


Introduction#
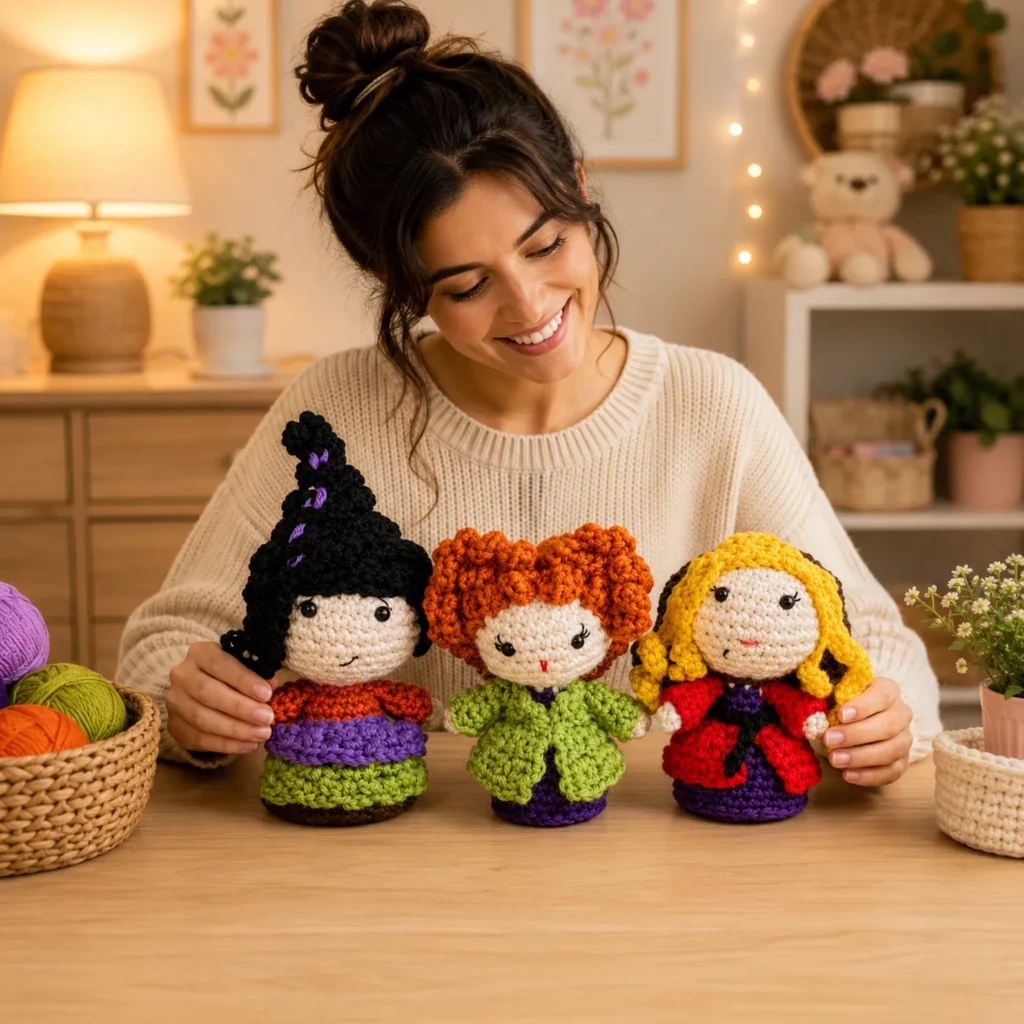
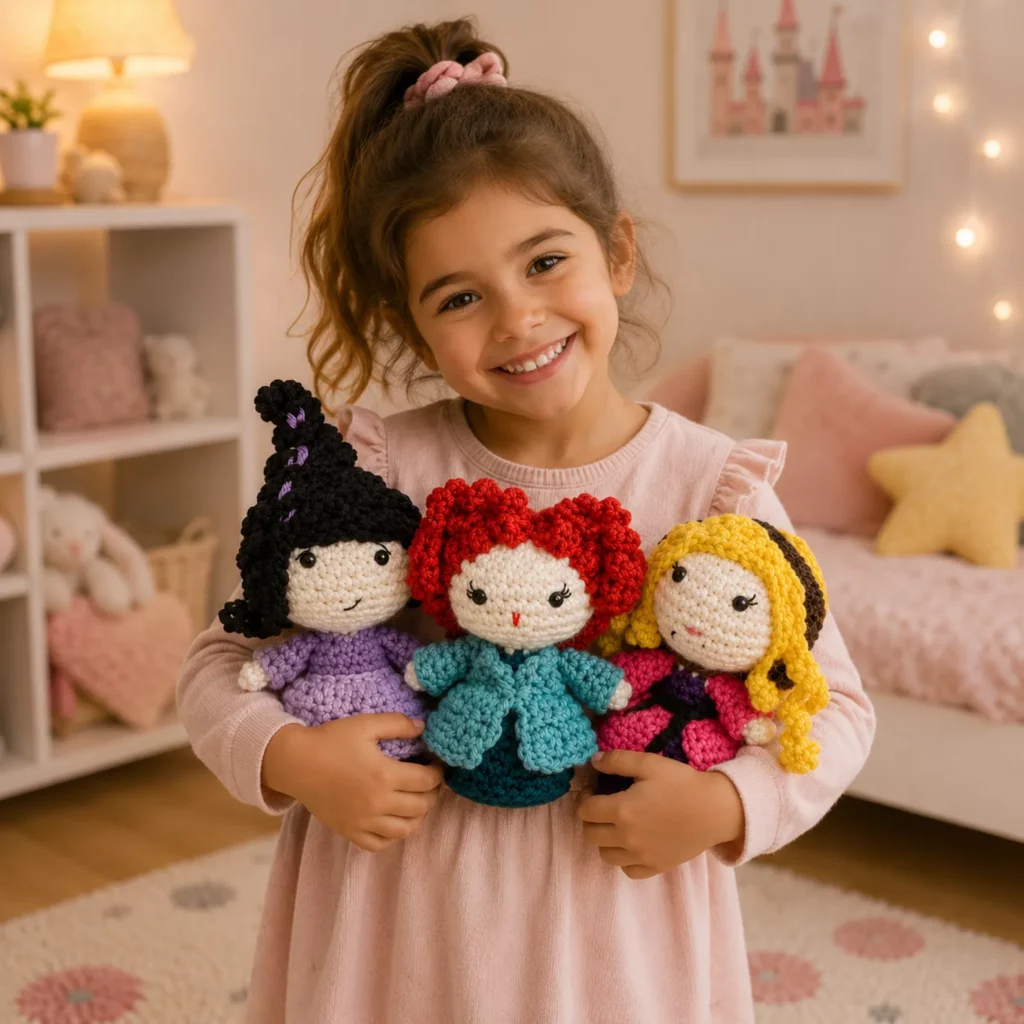
Some crochet projects are cute on their own, but a themed set is what makes people stop scrolling. A trio of mini witch dolls is one of those “instant collection” projects: you make one, and suddenly you want the whole group lined up on a shelf. They’re perfect for fall decorating, Halloween gift baskets, desk buddies, party favors, and even as small “mascot” dolls for craft fairs.
Explore more beginner amigurumi crochet patterns in our pattern library.
What makes this set so satisfying is that it’s built from the same simple base doll shape, then customized with hair, colors, and outfit details. That means you don’t have to learn three different crochet patterns. You make one basic doll body, then swap the hair style and outfit colors to create three distinct characters. It’s a smart way to get maximum impact from beginner-friendly stitches.
This crochet pattern set features small amigurumi-style dolls with round heads, tiny bodies, simple arms, and bold hair silhouettes. You’ll see fun textures like spiral curls, a tall pointed hairstyle, and a soft wavy look. The outfits are made from easy skirt rounds and simple coat/shawl layers, so even if you’re still learning, you can get that polished “finished doll” look without complicated shaping.
Detailed Description of the Crochet Pattern#
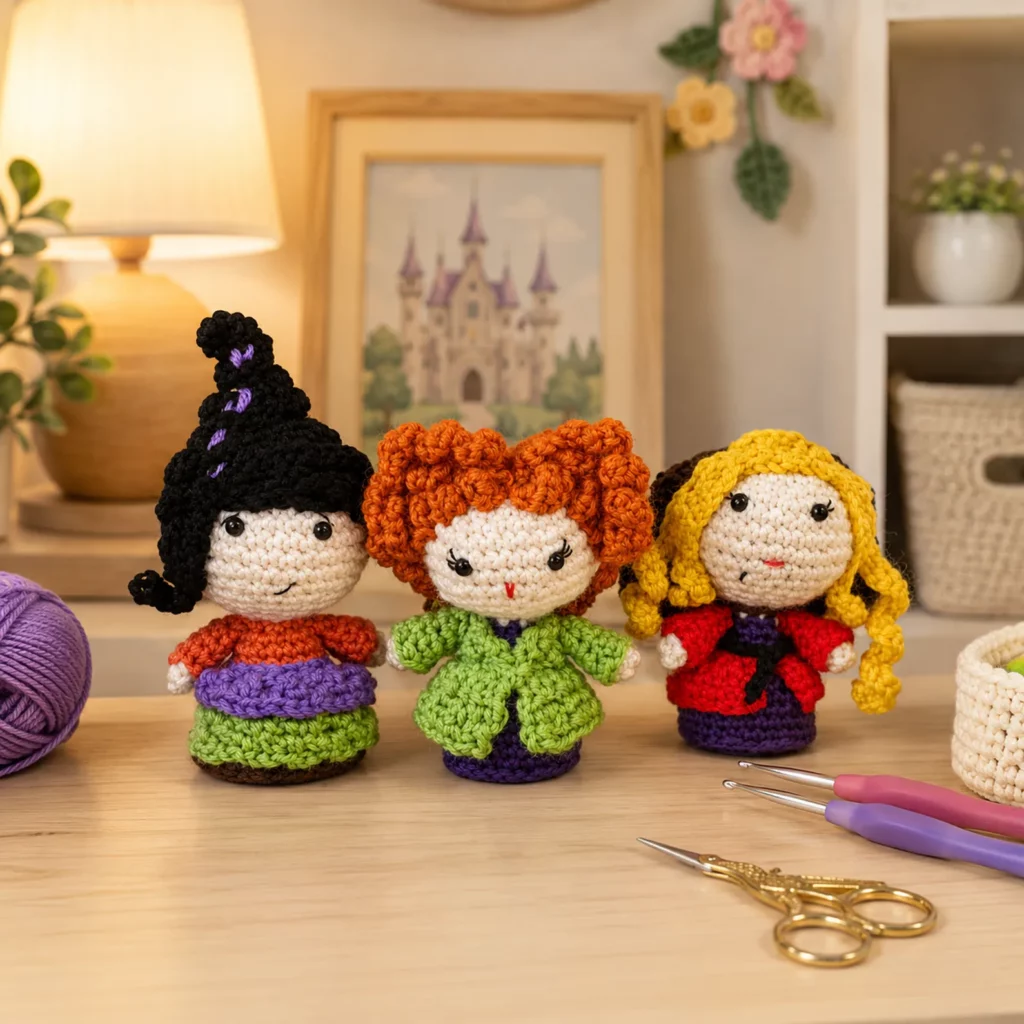
This is a mini amigurumi doll set made in parts and assembled. Each doll uses a basic construction: a round head, a small body with a slightly flared base, and tiny arms. The face is minimal—small eyes, simple stitched mouth, and optional lashes and blush—so the hair and clothes carry the theme.
The three dolls are designed to look coordinated but different. The differences come from:
Hair style and color, such as a tall cone-like style, short bouncy curls, or long spiral ringlets
Outfit color placement, such as a layered dress, a cape-like wrap, or a coat effect
Small facial details, like lashes or lip color
Because these dolls are small, they work beautifully with worsted yarn and a tight hook, or with DK yarn if you want them even smaller. They also make great stash-busters: you can use leftover yarn in purple, orange, green, red, and black and still end up with a complete set.
These dolls are also “collectible-friendly.” Once you learn the base, you can keep making new versions: witches, fairies, princesses, or holiday elves, all by changing hair and outfit details.
Skill Level Explanation#
This is an easy-to-intermediate crochet pattern.
Easy parts:
Single crochet in the round
Basic increases and invisible decreases
Simple sewing (head to body, arms, hair)
Small outfit pieces that are mostly straight rounds
Intermediate parts:
Consistent tension for tiny pieces
Hair construction, especially spiral curls
Assembly and symmetry (placing eyes, aligning hairline, attaching clothing neatly)
If you’ve made one basic amigurumi ball before, you can absolutely make these dolls. If you’re newer, go slowly and use stitch markers and pins during assembly. The smaller the doll, the more important neat placement becomes, but the actual crocheting stays simple.
Materials Needed#
Yarn
Worsted weight (#4) yarn works best for these mini dolls because it gives clear stitch definition and good structure. Cotton or cotton-blend is especially nice for crisp details, while acrylic is softer and budget-friendly.
Suggested colors for a “witch trio” vibe:
Skin tone: cream or beige
Hair: black, orange, yellow/blonde (or any fun color palette)
Outfits: purple, green, red, black accents
Small scrap yarn: black for lashes/eyes details, red for lips, purple for highlights
Hook
Use a smaller hook than you normally would for worsted to create tight stitches:
2.75 mm to 3.5 mm is a great range for mini amigurumi
If your stitches look loose or stuffing shows, go down a hook size.
Notions
Stitch marker
Yarn needle
Scissors
Fiberfill stuffing
Optional: 6–8 mm safety eyes (embroider eyes for baby-safe)
Optional: embroidery floss for lashes and mouth
Optional: a tiny dab of blush for display-only dolls
Stuffing tip
Because these dolls are small, use tiny pinches of stuffing and pack gently with the end of a crochet hook or pencil.
Stitches & Techniques Explained#
Abbreviations (US terms)
MR = magic ring
sc = single crochet
inc = increase (2 sc in one stitch)
dec = invisible decrease
sl st = slip stitch
ch = chain
hdc = half double crochet
dc = double crochet
BLO = back loop only
st(s) = stitches
Key techniques
Magic ring: helps the head start tightly with no hole
Invisible decrease: keeps shaping smooth and prevents “bumpy” decreases
Working in continuous rounds: most of the doll parts are spiraled rounds (use a stitch marker)
Basic embroidery: lashes, lips, and small smiles are usually stitched on at the end
Spiral curls: made by chaining and working multiple stitches into each chain to create a corkscrew
Hair is the main feature in this set, so take your time there. Even if your stitches aren’t perfect, consistent curl size and placement makes the dolls look professional.
Step-by-Step Instructions#
Pattern notes
This is written as a “base doll + customization” approach. You’ll make one body pattern three times, then use different hair and outfit pieces for each doll. Numbers in parentheses are stitch counts. Work in continuous rounds unless stated.
Part 1: Base Head (make 3, skin color)
Rnd 1: MR, 6 sc (6)
Rnd 2: inc around (12)
Rnd 3: (sc, inc) around (18)
Rnd 4: (2 sc, inc) around (24)
Rnd 5: (3 sc, inc) around (30)
Rnd 6: (4 sc, inc) around (36)
Rnd 7–10: sc around (36) for 4 rounds
Insert eyes between Rnd 8–9, about 6–8 stitches apart.
Start stuffing firmly.
Rnd 11: (4 sc, dec) around (30)
Rnd 12: (3 sc, dec) around (24)
Rnd 13: (2 sc, dec) around (18)
Rnd 14: (sc, dec) around (12)
Rnd 15: dec around (6)
Fasten off, close, weave in.
Face details
Mouth: stitch a small smile or tiny straight line using black or pink/red thread
Lashes (optional): stitch 2–3 short lines from the outer corner of each eye
Cheeks (optional): light pink embroidery or blush for display dolls
Part 2: Base Body (make 3, outfit base color or skin color depending on style)
You can make the body in the dress color so it looks like clothing is “built in,” then add layers on top.
Rnd 1: MR, 6 sc (6)
Rnd 2: inc around (12)
Rnd 3: (sc, inc) around (18)
Rnd 4: (2 sc, inc) around (24)
Rnd 5–8: sc around (24) for 4 rounds
Rnd 9: (2 sc, dec) around (18)
Rnd 10: sc around (18)
Stuff lightly.
Rnd 11: (sc, dec) around (12)
Rnd 12: sc around (12)
Fasten off leaving a tail for sewing head to body.
To create a flat standing base
Before fastening off, add one round of BLO sc around and then a final round of sc. This makes the bottom edge firmer.
Sew head to body
Pin head centered on the body. Stitch around securely, hiding the seam in the stitches.
Part 3: Arms (make 6, skin color)
Rnd 1: MR, 6 sc (6)
Rnd 2: sc around (6)
Rnd 3: sc around (6)
Lightly stuff or leave unstuffed for tiny arms.
Flatten top and stitch closed.
Fasten off leaving a tail.
Attach arms to the sides of the body just below the head seam.
Part 4: Outfit Ideas for the Trio
Because these dolls are small, the outfits can be simple overlays.
Simple skirt flare (works for any doll)
Join outfit color at the bottom of body.
Rnd 1: (inc, sc) around (36) if your body bottom is 18 or 24 stitches; adjust evenly
Rnd 2: sc around
Rnd 3: (sc, inc) spaced evenly for a slightly wider skirt
Rnd 4: sc around
Fasten off.
Cape or coat layer (open front look)
Ch a length that wraps around the doll body.
Work rows of sc or hdc for 6–10 rows.
Add a collar by working a row of hdc or dc across the top edge.
Sew only at the shoulders so it hangs open.
Belt detail
Crochet a chain and wrap around waist. Sl st to close or stitch at the back.
Part 5: Hair Styles (the fun part)
Hair is what makes the dolls look like a “set.” Here are three easy hair approaches that match the look of the trio.
Style A: Tall pointed hair (black)
This creates a cone-like updo.
Rnd 1: MR, 6 sc
Rnd 2: sc around (6)
Rnd 3: (sc, inc) around (9)
Rnd 4: sc around (9)
Rnd 5: (2 sc, inc) around (12)
Rnd 6: sc around (12)
Rnd 7: (3 sc, inc) around (15)
Rnd 8: sc around (15)
Rnd 9: (4 sc, inc) around (18)
Rnd 10: sc around (18)
Fasten off leaving a long tail.
Sew centered on top of head.
Optional: embroider a small purple “highlight” line with surface stitches.
Style B: Short bouncy curls (orange)
Make multiple curl strands and attach around the head like a wig.
Curl strand (make 12–18)
Ch 12
In 2nd ch from hook: 2 sc, then 2 sc in each chain across (creates a curly strip)
Fasten off leaving a tail.
Wig cap base
Make a flat circle that fits the top of the head.
MR 6 sc
Inc around (12)
(sc, inc) around (18)
(2 sc, inc) around (24)
Sc around (24)
Fasten off.
Sew curl strands around the edge of the wig cap, then sew the wig cap onto the head. This method keeps hair placement tidy and makes the doll look professional.
Style C: Long spiral ringlets (yellow/blonde)
Ringlet strand (make 6–10)
Ch 25
Work 2 dc in each chain across (or 3 hdc in each chain) to force a tight spiral
Fasten off.
Attach ringlets to a simple wig cap (same method as above) or sew directly to the head starting at the crown and working down the sides.
Part 6: Final Assembly Checklist
Attach hair first so you can hide seams and adjust the “hairline”
Attach outfits next and tack stitch at shoulders or back for stability
Add final embroidery details last (lashes, lips, small smile)
Check symmetry by looking straight-on before finishing off yarn tails
Common Mistakes and How to Avoid Them#
Heads look uneven or lumpy
Stuff slowly with tiny bits and shape the head with your hands before closing.
Hair looks messy
Use a wig cap base so curl placement is controlled. Sew hair in layers, not all at once.
Dolls won’t stand
Flatten the bottom and add a firm last round. You can also insert a small felt circle inside the base.
Faces look “off”
Mark the center of the face and count stitches outward for eye placement. Place eyes before sewing hair.
Outfit layers slide around
Tack stitch at the shoulders or back with matching yarn so clothing stays in place.
Curl strands unravel
Make sure you secure the starting tail and weave it in well. Plush or slippery yarn can loosen if not anchored.
Expert Tips for Better Results#
Use embroidery thread for lashes and lips if your yarn is bulky. It gives cleaner details.
Pin everything before sewing. A few pins can save you a lot of rework.
Make all heads first, then all bodies, then all hair. Batch-making keeps sizes consistent across the trio.
If you want the dolls to be keychain-sized, switch to DK yarn and a 2.25–2.75 mm hook.
For a gift-ready finish, add a tiny tag or ribbon bow on the outfit, stitched securely.
Variations and Customization Ideas#
Make the trio seasonal: pastel spring witches, winter witches with scarves, or holiday-themed colors.
Turn them into ornaments by adding a hanging loop at the top of the hair.
Make them into finger puppets by leaving the bottom open and skipping stuffing in the body.
Add tiny accessories like a mini broom, star wand, or small potion bottle (simple cylinders).
Swap hairstyles: bob cut, pigtails, braided hair (surface crochet chain braid).
Create a whole set: keep the same base and make 6–12 dolls in different colors for party favors.
Benefits of This Crochet Project#
You get three characters from one base crochet pattern
It’s a great stash-buster for small yarn leftovers
It teaches hair construction, which is a valuable amigurumi skill
The set looks high-value and giftable
Perfect for seasonal décor, craft fairs, and themed collections
Fast makes once you batch-produce the base parts
Internal Linking Suggestions#
Beginner Crochet Tutorial: How to Make Amigurumi Hair with Wig Caps
Free Crochet Pattern: Simple Mini Doll Base (Use for Any Outfit)
Crochet Tutorial: Embroidered Faces for Amigurumi
DIY Crochet: How to Make Spiral Curls and Ringlets
Free Crochet Pattern: Mini Pumpkin or Mini Ghost Accessories
How to Make Crochet Dolls Stand Up (Base Tips)
FAQ Section#
Is this an easy crochet pattern for beginners?
Yes, especially if you’ve made a basic amigurumi ball before. The doll base is simple. Hair and assembly take patience, but they’re not complicated.
What yarn works best for small crochet dolls?
Worsted cotton or cotton-blend gives crisp stitches and holds shape well. Acrylic is softer and affordable. For tiny dolls, DK yarn makes details more refined.
How do I make the hair look neat and consistent?
Use a wig cap base, then sew hair strands onto the cap before attaching it to the head. This controls placement and symmetry.
Can I make these dolls baby-safe?
Yes. Embroider eyes instead of using safety eyes, avoid loose buttons, and sew all parts extra securely. These dolls are best as decor or older-kid toys unless made with baby-safe features.
How do I keep the dolls from tipping over?
Flatten the base firmly, use a slightly wider base round, and consider placing a small felt circle inside the bottom to stiffen it.
Can I sell dolls made from this crochet pattern?
Many crocheters sell finished dolls they make themselves, but rules vary depending on where you list items and how you present patterns. If you’re selling, focus on your own photos and your own written descriptions, and avoid using trademarked names for themed sets.
Conclusion#
A trio of mini witch dolls is one of the most fun ways to turn a simple crochet pattern into a full display set. Once you master the base doll shape, you can play with hair, colors, and outfit layers to make each doll feel like her own little personality. It’s a perfect DIY crochet project for fall crafting, gifting, and building a collectible series of small dolls you can keep adding to.
If you want, tell me whether you’re using worsted or DK yarn and what size you want the dolls to be (tiny keychain size or small shelf dolls), and I can suggest exact stitch counts for the head and body so all three come out perfectly proportional.


