


Introduction#
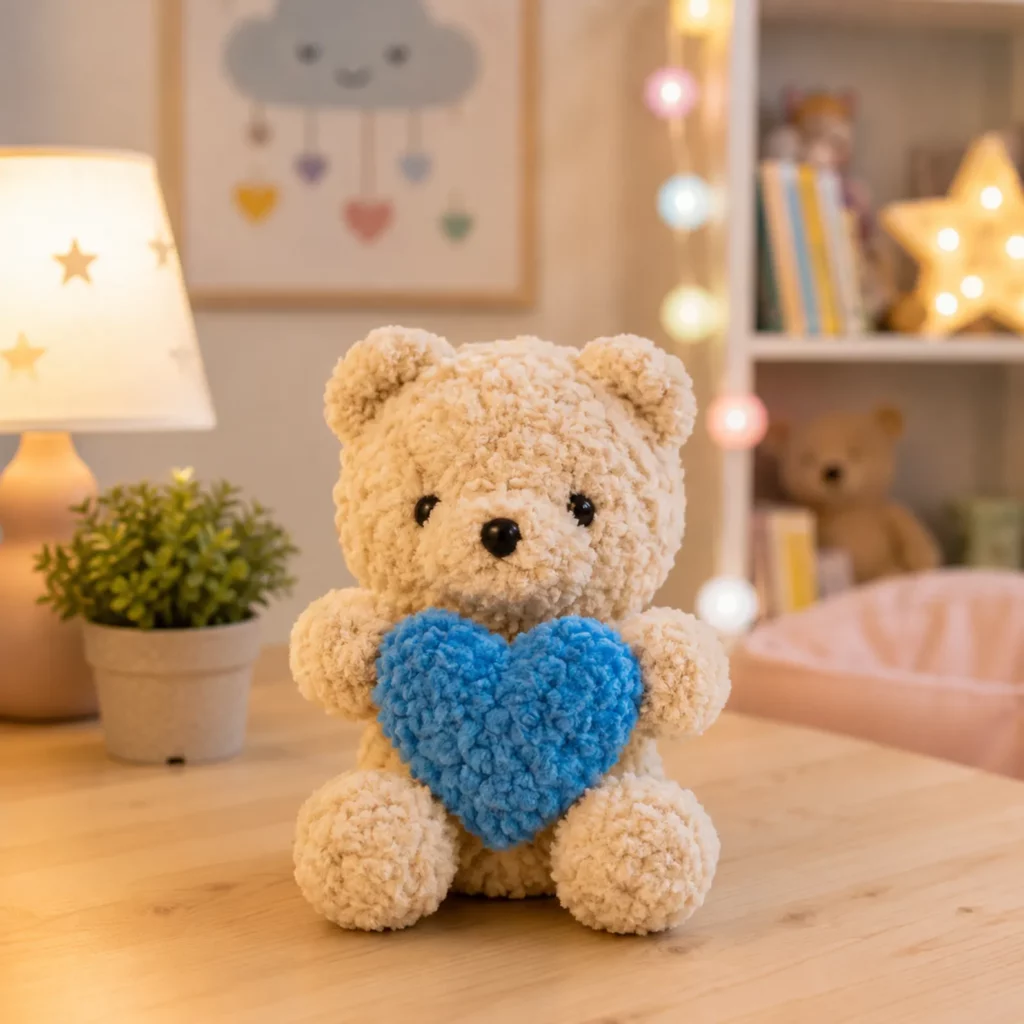
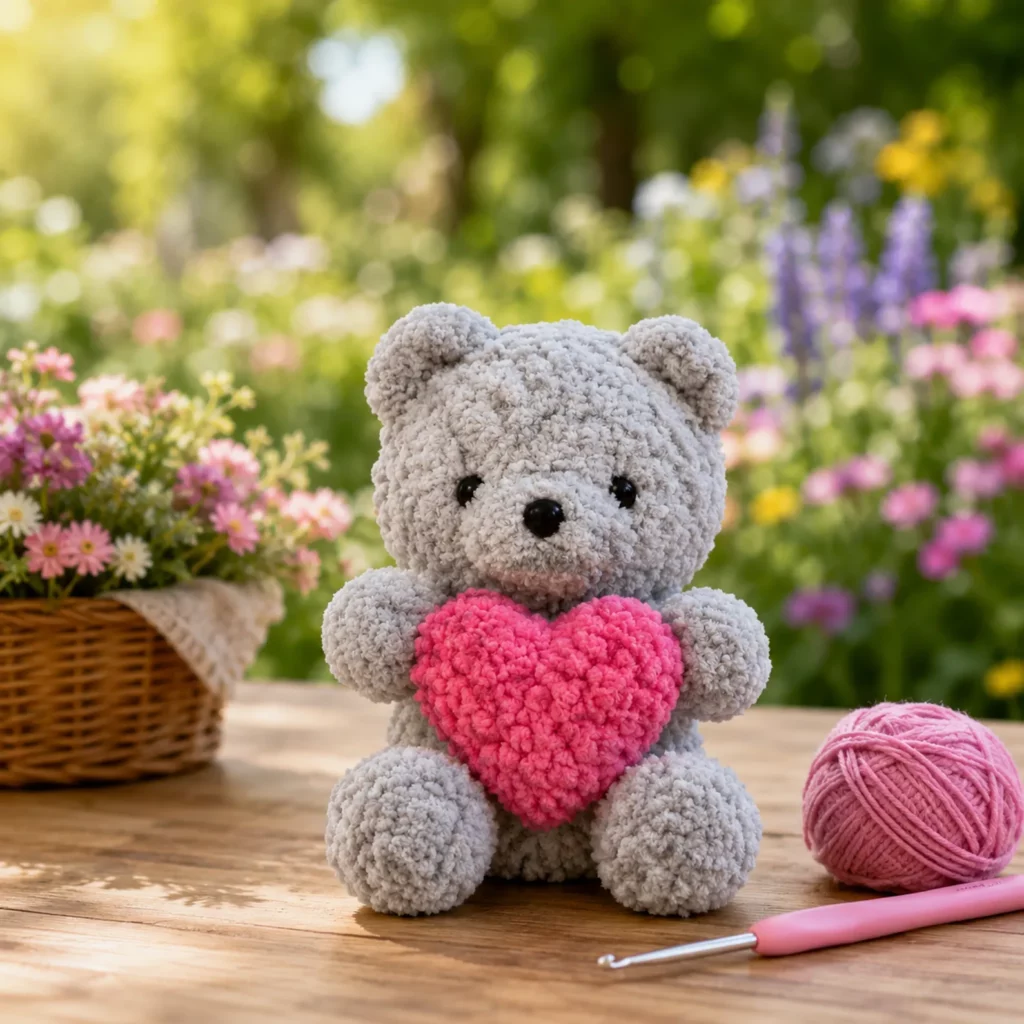
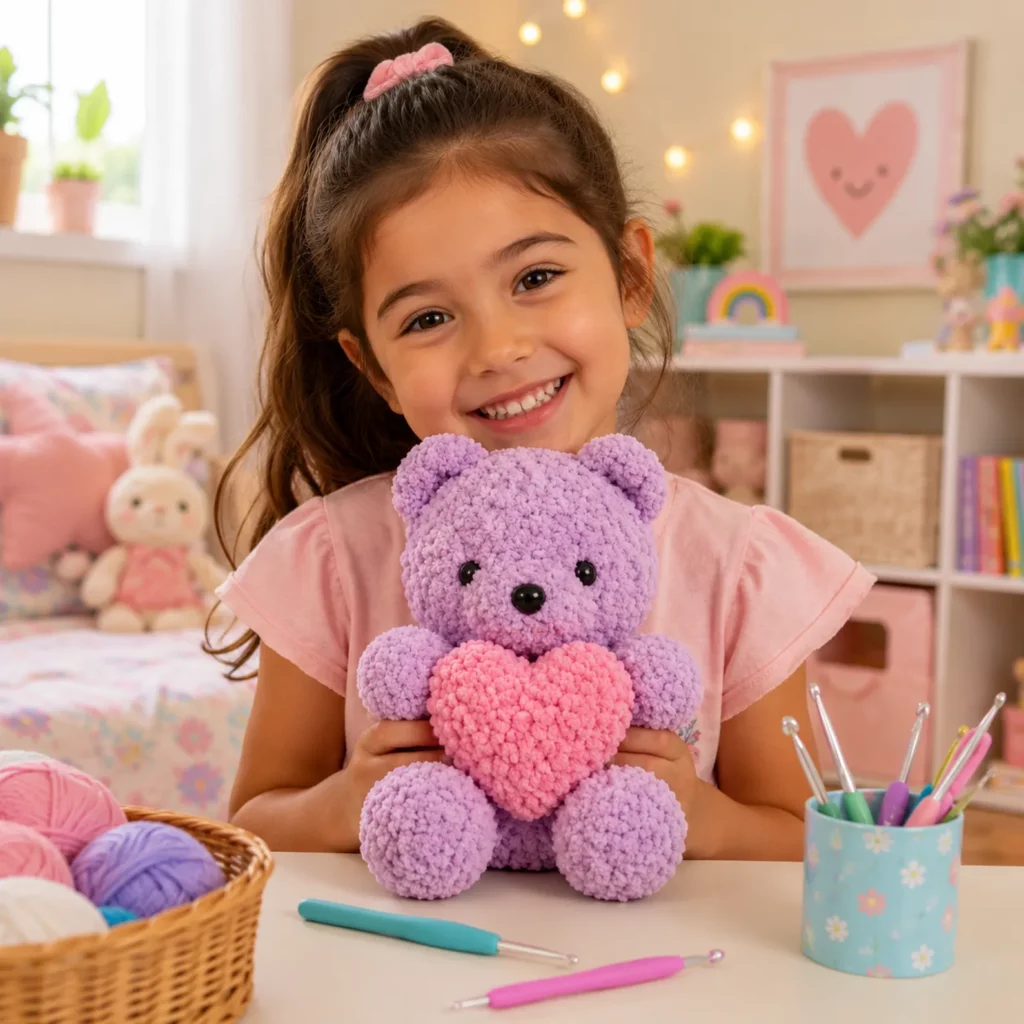
Some crochet projects are cute, and some feel like a message you can hold in your hands. A tiny teddy bear hugging a heart is the second kind—the “I made this for you” kind. It’s the perfect handmade gift for Valentine’s Day, anniversaries, baby showers, or just a sweet surprise for someone who needs a little extra love.
Explore more beginner amigurumi crochet patterns in our pattern library.
This crochet pattern is designed to create a small plush bear with a soft, rounded head, simple limbs, and a bold heart held front-and-center. The shape is beginner-friendly (classic amigurumi rounds with gentle increases and decreases), and the finishing is forgiving—especially if you use plush yarn. You can make it as a desk buddy, a keychain-sized charm, or a larger cuddle version by changing yarn weight and hook size.
If you’re looking for a free crochet pattern that’s fast, meaningful, and completely giftable, this easy crochet pattern will quickly become one of your favorites.
Detailed Description of the Crochet Pattern#
This project creates a teddy bear amigurumi with a heart accent. The design has three main visual features:
- Fluffy bear body with a rounded head and small ears
- Simple, chubby limbs (arms and feet are small spheres or rounded nubs)
- A plush heart held against the belly, stitched securely in place
Construction style
The bear is worked in separate pieces and assembled:
- Head (ball shape)
- Body (plump oval that sits nicely)
- Ears (small half-spheres)
- Arms and legs (simple rounded pieces)
- Heart (two lobes + point, or a flat heart appliqué)
- Face (eyes + nose, with optional embroidered details)
This modular build makes it easy to customize:
- Make the heart larger for a “statement” look
- Add a scarf, bow, or tiny hat
- Adjust the limbs for a sitting or standing pose
Finished size (approx.)
- With plush/chenille yarn: 4–7 inches tall
- With worsted yarn: 3–5 inches tall
Size depends on yarn, hook, and how firmly you stuff.
Skill Level Explanation#
This is an easy-to-intermediate amigurumi crochet project.
Perfect for beginners who can:
- crochet single crochet in the round
- increase and decrease
- count stitches using a stitch marker
- sew pieces together with a yarn needle
Intermediate (optional) improvements:
- neat eye placement and symmetry
- shaping with stuffing (making the head round and smooth)
- adding tiny details like blush cheeks or embroidered eyebrows
If you’ve made a basic amigurumi ball before, this is an ideal “next project” for crochet for beginners.
Materials Needed#
Yarn
For the soft plush look, you can use plush/chenille yarn. For crisp stitches, use worsted cotton/acrylic.
Best options:
- Plush/chenille yarn (super soft teddy look)
- Worsted weight yarn (#4) (easier stitch visibility)
Colors:
- Bear: white/cream (or any teddy color—tan, brown, gray, pink)
- Heart: red (or pink, burgundy, pastel)
- Face: black yarn/embroidery thread (or safety eyes + safety nose)
Yardage estimate (small plush):
- Bear color: 80–150 yards
- Heart color: 20–50 yards
Hook
Choose a hook that makes tight fabric:
- Plush yarn: 4.0–6.0 mm
- Worsted yarn: 2.75–3.5 mm
Tip: If you can see stuffing through gaps, go down one hook size.
Notions
- Stitch marker
- Yarn needle
- Scissors
- Polyester fiberfill stuffing
Eyes and nose
- Safety eyes: 6–10 mm for small bears, larger for bigger plush
- Safety nose (optional), or embroider nose with black yarn
Safety note: For children under 3, skip safety eyes and use embroidered features.
Stitches & Techniques Explained#
Abbreviations (US terms)
- MR = magic ring
- sc = single crochet
- inc = increase (2 sc in one stitch)
- dec = invisible decrease
- sl st = slip stitch
- ch = chain
- st(s) = stitch(es)
Invisible decrease (clean shaping)
Invisible decreases make plushies look smoother than standard sc2tog.
How:
- Insert hook into front loop only of next stitch
- Insert hook into front loop only of following stitch
- Yarn over, pull through both front loops
- Yarn over, pull through remaining loops
Working with plush yarn (quick tips)
- Use a stitch marker every round—stitches are harder to see.
- Feel for the “V” bumps rather than relying on sight.
- Keep tension steady (too tight makes it hard to insert your hook).
Heart shaping
A heart looks best when:
- the lobes are rounded and slightly raised
- the bottom point is neat and centered
- the heart is lightly stuffed (for a plush 3D look)
Step-by-Step Instructions#
Pattern notes
- Work in continuous rounds unless stated
- Use a stitch marker in the first stitch of each round
- Stuff firmly but evenly
- Counts in ( )
Part 1: Head (Bear Color)
Rnd 1: MR, 6 sc (6)
Rnd 2: inc around (12)
Rnd 3: (sc, inc) around (18)
Rnd 4: (2 sc, inc) around (24)
Rnd 5: (3 sc, inc) around (30)
Rnd 6: (4 sc, inc) around (36)
Rnd 7–11: sc around (36) for 5 rounds
Place eyes (if using safety eyes): between Rnd 8–9, about 6–8 stitches apart.
Rnd 12: (4 sc, dec) around (30)
Rnd 13: (3 sc, dec) around (24)
Rnd 14: (2 sc, dec) around (18)
Stuff firmly.
Rnd 15: (sc, dec) around (12)
Rnd 16: dec around (6)
Fasten off, close, weave in end.
Part 2: Ears (Make 2, Bear Color)
Rnd 1: MR, 6 sc (6)
Rnd 2: (sc, inc) around (9)
Rnd 3: sc around (9)
Flatten slightly, do not stuff. Fasten off leaving tail for sewing.
Part 3: Body (Bear Color)
Rnd 1: MR, 6 sc (6)
Rnd 2: inc around (12)
Rnd 3: (sc, inc) around (18)
Rnd 4: (2 sc, inc) around (24)
Rnd 5: (3 sc, inc) around (30)
Rnd 6–10: sc around (30) for 5 rounds
Start tapering slightly:
Rnd 11: (3 sc, dec) around (24)
Rnd 12: sc around (24)
Stuff firmly (optional: extra stuffing at bottom for sitting stability).
Rnd 13: (2 sc, dec) around (18)
Rnd 14: (sc, dec) around (12)
Rnd 15: dec around (6)
Fasten off, close, weave in end.
Part 4: Arms (Make 2, Bear Color)
Rnd 1: MR, 6 sc (6)
Rnd 2: sc around (6)
Rnd 3: (sc, inc) around (9)
Rnd 4–6: sc around (9) for 3 rounds
Lightly stuff. Flatten and close with 4–5 sc through both layers (or sew closed). Fasten off leaving tail.
Part 5: Legs/Feet (Make 2, Bear Color)
Rnd 1: MR, 6 sc (6)
Rnd 2: inc around (12)
Rnd 3: sc around (12)
Rnd 4: (2 sc, dec) around (9)
Rnd 5: sc around (9)
Stuff firmly. Flatten and close. Fasten off leaving tail.
Part 6: Heart (Heart Color, 3D Plush Style)
Make 2 heart lobes:
Lobe (make 2):
Rnd 1: MR, 6 sc (6)
Rnd 2: inc around (12)
Rnd 3: sc around (12)
Fasten off first lobe. Do NOT fasten off second lobe—continue.
Join lobes:
- After finishing second lobe Rnd 3, sc 12 around second lobe, then sc 12 around first lobe (24 total around both lobes).
Now shape the heart:
Rnd 4: sc around (24)
Rnd 5: (2 sc, dec) around (18)
Stuff lightly (enough to keep it puffy).
Rnd 6: (sc, dec) around (12)
Rnd 7: dec around (6)
Fasten off, close neatly, weave in end.
Optional heart point shaping: After closing, stitch a small pinch at the top center between lobes and a tiny pinch at the bottom for a sharper heart silhouette.
Part 7: Face Details
- Nose: embroider a small triangle or oval in black, centered below eyes
- Optional: add a short line down and a tiny smile curve
- Optional blush: pink yarn or a light dab of blush on cheeks (for decor pieces)
Part 8: Assembly
- Sew ears to the top sides of the head (symmetrical).
- Sew head to body (centered, strong seam—go around twice if needed).
- Attach legs to the bottom front of body for a seated pose.
- Attach arms on the sides, positioned so they “hug” the heart.
- Sew the heart to the front of the body, then sew arms over the heart edges for a secure “holding” look.
Weave in all ends securely.
Common Mistakes and How to Avoid Them#
- Bear looks lumpy: stuff in small pieces and shape as you go—don’t wait until the end.
- Eyes uneven: mark a center line on the face and count stitch spacing.
- Heart looks flat: add a little stuffing and pinch the top center between lobes.
- Arms don’t hug the heart: attach the heart first, then position arms over it.
- Plush yarn is hard to count: use a stitch marker every round and count carefully.
- Head wobbles: reinforce the neck seam with a second pass of stitching.
Expert Tips for Better Results#
- Use a smaller hook for a denser fabric and cleaner shape.
- Add extra stuffing to the bottom of the body so the bear sits upright.
- For a “premium” look: embroider closed eyes (curved lines) instead of safety eyes.
- If making as a keychain: add a loop at the top of the head before closing (ch 10, sl st back).
- Sew the heart with hidden stitches around the edge so the seam disappears into the plush texture.
Variations and Customization Ideas#
- Valentine’s bear: pink bear + red heart + blush cheeks
- Wedding favor: white bear + burgundy heart + tiny bow tie
- Baby shower: pastel bear + soft yellow heart
- Holiday version: white bear + green heart with a tiny embroidered “Merry”
- Mini gift tag: make a tiny flat heart and stitch it to the bear’s chest with initials
Benefits of This Crochet Project#
- Quick, meaningful gift with strong “handmade wow” factor
- Great stash-buster (small amounts of yarn)
- Beginner-friendly amigurumi practice: shaping + assembly
- Easy to scale up/down by changing yarn and hook
- Perfect for craft fairs (fast, adorable, high appeal)
- Works as decor, keychain, or nursery keepsake
Internal Linking Suggestions#
You may also like…
- Free Crochet Pattern: Mini Heart Keychain
- Crochet Tutorial: Invisible Decrease for Amigurumi
- Crochet for Beginners: How to Crochet with Plush/Chenille Yarn
- DIY Crochet: How to Attach Safety Eyes Securely
- Free Crochet Pattern: Tiny Bear Amigurumi
- Amigurumi Finishing Guide: Neat Sewing and Stuffing Tips
FAQ Section#
What yarn is best for a teddy bear crochet pattern?
Plush/chenille yarn makes a super soft teddy, while worsted cotton or acrylic is easier to see and count. Both work great—choose based on your comfort level.
Is this an easy crochet pattern for beginners?
Yes. It uses basic amigurumi techniques (single crochet, increases, decreases) and simple shapes. Assembly is straightforward and forgiving.
Can I embroider the eyes instead of using safety eyes?
Absolutely. Embroidered eyes are safer for young children and look adorable—especially for a sleepy teddy style.
How do I make the bear bigger or smaller?
Use thicker yarn and a bigger hook to size up, or thinner yarn and a smaller hook to size down. You can also add one more increase round to the head/body to enlarge the plush.
How do I keep the heart from falling off?
Sew the heart around its edges, then stitch the arms over the heart for extra security. Weave yarn tails deeply into the body.
Can I turn this into a keychain?
Yes. Add a loop to the top of the head and attach a keyring. For durability, embroider eyes instead of using safety eyes.
Conclusion#
A teddy bear holding a heart is the kind of crochet gift that never feels “random”—it always feels personal. This free crochet pattern keeps the construction simple but delivers a finished plush that looks polished, soft, and full of meaning.
If you tell me your yarn type (plush vs worsted) and the size you want (mini keychain or medium plush), I can adjust the stitch counts so your crochet pattern comes out perfectly proportioned every time.


