


Introduction#
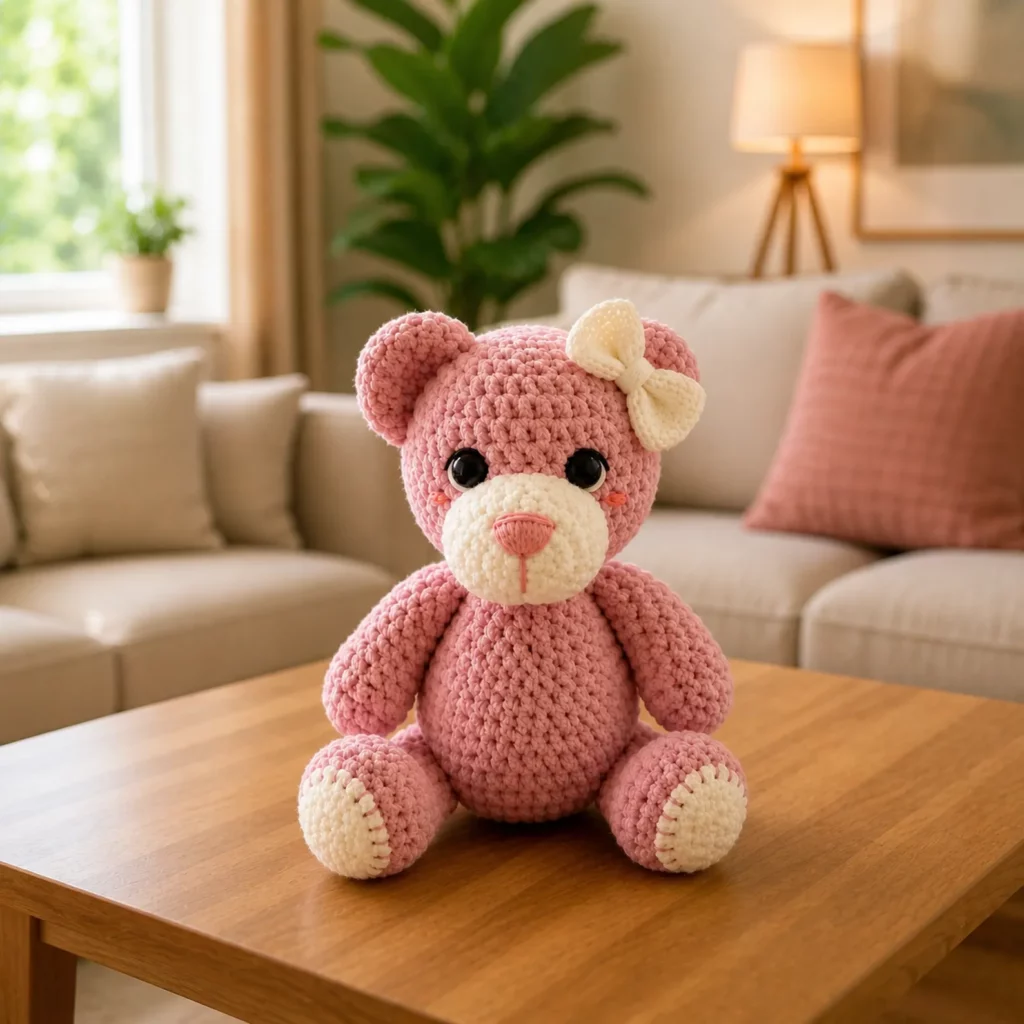
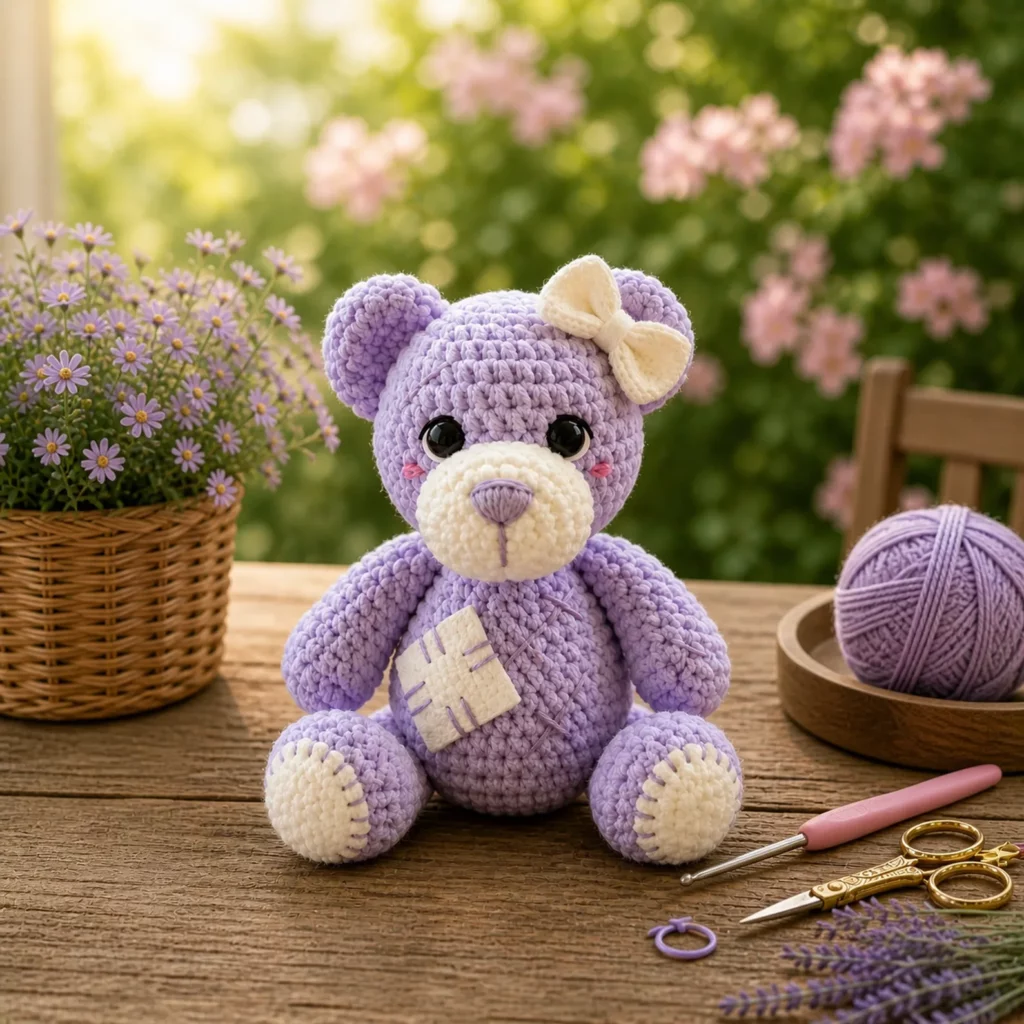
A classic teddy bear never goes out of style—but a soft plush teddy with a gentle color palette and handmade details feels especially gift-worthy. This project is designed to look like a boutique-style stuffed bear: rounded head and belly, contrasting snout and paw pads, and a cute little bow that instantly gives it personality. The textured “blanket yarn” look makes it extra snuggly, and the simple shapes keep it approachable even if you’re still learning amigurumi basics.
Explore more beginner amigurumi crochet patterns in our pattern library.
If you’ve been searching for a crochet pattern that feels “premium” but still reads like an easy crochet pattern, this one hits that sweet spot. You’ll use mostly single crochet in the round, then add charm with a few beginner-friendly finishing touches: a snout, embroidered nose, optional cheek blush, and visible “patch” stitches that imitate a sewn teddy. It’s the kind of DIY crochet project that works for birthdays, baby showers (with baby-safe changes), or a cozy desk companion.
Below you’ll find a detailed free crochet pattern written in a step-by-step, beginner-friendly style. You’ll also get expert tips for working with plush yarn, keeping your stitches neat, and assembling the bear so it sits nicely and looks symmetrical.
Detailed Description of the Crochet Pattern#
This teddy bear amigurumi is made in separate pieces that are easy to manage, then assembled for a clean, professional finish.
Key design features you’ll create:
- Plush body texture: achieved with chenille/blanket-style yarn or bulky yarn for a soft, chunky look
- Contrasting snout and paw pads: gives a classic teddy face and “cute toes” look
- Rounded limbs: simple tubes with light shaping so the bear looks cuddly, not stiff
- Bow detail: a small fabric-like crochet bow (or ribbon bow) placed near one ear
- Patchwork accents (optional): stitched “X” marks and a square patch for a handmade, repaired-teddy vibe
Overall construction approach:
- Head (worked in the round, stuffed, closed)
- Snout (separate oval or round piece sewn on)
- Ears (two small rounds sewn to the head)
- Body (egg shape that sits well)
- Arms and legs (simple tubes, lightly stuffed)
- Paw pads (optional contrast circles/ovals sewn on)
- Bow and patch details (added last)
Because plush yarn can hide stitch definition, this pattern relies on clear shaping (increases/decreases) and thoughtful placement, rather than complicated stitch patterns.
Skill Level Explanation#
This crochet pattern is beginner-friendly with a few “level-up” details that you can keep or skip.
Great for beginners who know:
- Magic ring (or alternative start)
- Single crochet in the round
- Increasing and invisible decreasing
- Basic sewing/assembly
Optional skills (not required):
- Working with plush/chenille yarn (slightly harder to see stitches)
- Embroidery details like a nose, mouth line, or patch stitches
- Simple bow shaping
If you’re brand new, you can absolutely still make this bear—just take your time with stitch counting and use a stitch marker. If you want the easiest version, use smooth worsted yarn instead of plush and keep the details minimal.
Materials Needed#
Yarn
Choose one of these options:
Plush teddy (recommended look)
- Super bulky chenille/blanket yarn for the main bear color (soft blue)
- Small amount of matching chenille or smooth yarn for the snout/paw pads (white or cream)
Classic amigurumi teddy
- Worsted weight acrylic/cotton blend in blue
- Worsted weight white/cream for snout and paw pads
Yarn tips
- Plush yarn hides mistakes and looks luxurious, but it can be harder to count stitches.
- Smooth yarn shows stitch definition and is easier for beginners.
Hook
Pick a hook that makes a tight fabric (stuffing shouldn’t show through):
- Plush/super bulky: typically 4.5 mm to 6.5 mm depending on yarn
- Worsted: typically 3.0 mm to 3.5 mm
Notions
- Fiberfill stuffing
- Stitch marker (very helpful with plush yarn)
- Yarn needle for sewing
- Scissors
- Safety eyes (optional) or embroidery thread for baby-safe eyes
- Embroidery floss or smooth yarn for nose and patch stitches
- Optional: ribbon for bow, or use yarn to crochet a bow
- Optional: small piece of felt for a patch (if you prefer felt over crochet)
Stitches & Techniques Explained#
Common abbreviations (US terms)
- MR: magic ring
- sc: single crochet
- inc: increase (two single crochet in the same stitch)
- dec: invisible decrease (single crochet two together through front loops)
- sl st: slip stitch
- ch: chain
- BLO: back loop only
Working in continuous rounds
Most amigurumi is crocheted in a spiral without joining. Mark the first stitch of each round so you never lose your place.
Invisible decrease
This decrease keeps the fabric smooth and is especially nice on plush toys where bumps can show as odd dents.
Embroidery basics for faces
A teddy face looks best when the snout is centered and the nose is slightly above the middle of the snout. Use small, neat stitches and pull gently—too tight can pucker the fabric.
Step-by-Step Instructions#
Notes before you start
- Work in continuous rounds unless stated otherwise.
- Use a stitch marker in the first stitch of every round.
- Stuff firmly but not so hard that the fabric stretches.
- Stitch counts are shown in brackets.
Head
In main color (blue).
R1: MR, sc around [6]
R2: inc around [12]
R3: (sc, inc) repeat around [18]
R4: (two sc, inc) repeat around [24]
R5: (three sc, inc) repeat around [30]
R6: (four sc, inc) repeat around [36]
R7: (five sc, inc) repeat around [42]
R8–R12: sc around [42]
Begin shaping the top:
R13: (five sc, dec) repeat around [36]
R14: sc around [36]
R15: (four sc, dec) repeat around [30]
R16: sc around [30]
If using safety eyes, place them now:
- Position eyes on the front, roughly between the rounds where the head looks widest.
- Keep them slightly closer together for a sweeter expression.
Continue closing:
R17: (three sc, dec) repeat around [24]
Start stuffing firmly, shaping into a round head.
R18: (two sc, dec) repeat around [18]
R19: (sc, dec) repeat around [12]
R20: dec around [6]
Fasten off, close the opening, weave in.
Snout
In contrast color (white/cream).
This is a simple rounded snout that sits centered on the face.
R1: MR, sc around [6]
R2: inc around [12]
R3: (sc, inc) repeat around [18]
R4: sc around [18]
Fasten off with a long tail. Lightly stuff before sewing (or leave unstuffed for a flatter snout).
Nose embroidery
- Stitch a small triangle or oval nose at the center top of the snout using matching blue or dark thread.
- Add a short vertical line down from the nose for a classic teddy look.
Sew snout to the face:
- Center it below the eyes.
- Pin first, then sew around the edge with small stitches.
Ears
Make two in main color.
R1: MR, sc around [6]
R2: (sc, inc) repeat around [9]
R3: sc around [9]
Fasten off, leave a tail.
Flatten slightly and sew to the top sides of the head. Try to keep both ears at the same height.
Body
In main color (blue). This shape creates a seated teddy look.
R1: MR, sc around [6]
R2: inc around [12]
R3: (sc, inc) repeat around [18]
R4: (two sc, inc) repeat around [24]
R5: (three sc, inc) repeat around [30]
R6: (four sc, inc) repeat around [36]
R7–R11: sc around [36]
Widen the belly slightly:
R12: (five sc, inc) repeat around [42]
R13–R15: sc around [42]
Begin narrowing toward the top:
R16: (five sc, dec) repeat around [36]
R17: sc around [36]
R18: (four sc, dec) repeat around [30]
R19: sc around [30]
Start stuffing firmly, shaping the belly round.
R20: (three sc, dec) repeat around [24]
R21: (two sc, dec) repeat around [18]
R22: (sc, dec) repeat around [12]
R23: dec around [6]
Fasten off, close, weave in.
Arms
Make two in main color.
R1: MR, sc around [6]
R2: (sc, inc) repeat around [9]
R3–R7: sc around [9]
Lightly stuff the lower part. Flatten the opening and stitch closed. Leave a long tail for sewing.
Attach arms:
- Sew to the sides of the body slightly below where the head will sit.
- Angle them forward a little for a cuddly pose.
Legs
Make two in main color.
R1: MR, sc around [6]
R2: inc around [12]
R3: (sc, inc) repeat around [18]
R4–R6: sc around [18]
R7: (sc, dec) repeat around [12]
R8–R9: sc around [12]
Stuff firmly, flatten top, stitch closed. Leave a tail.
Attach legs:
- Sew to the lower front of the body so the bear sits.
- The feet should point forward.
Paw Pads
In contrast color (white/cream). Make four if you want both hands and feet padded; or make two for feet only.
Simple pad:
R1: MR, sc around [6]
R2: inc around [12]
R3: sc around [12]
Fasten off, sew onto the front of each foot (and/or hand).
Optional “stitched paw” look:
- Using blue embroidery thread, stitch short lines around the pad edge like little “repair stitches.”
Head to Body Assembly
Pin the head centered on top of the body.
Sew with strong stitches all the way around. Plush yarn can stretch, so use extra passes and pull snug but not tight.
Bow
You can crochet a bow or tie a ribbon.
Quick crochet bow (smooth yarn works best):
- Chain a short length and crochet back and forth to make a small rectangle.
- Wrap yarn around the center tightly to cinch into a bow shape.
- Sew near one ear.
Ribbon bow option:
- Tie a small ribbon bow and stitch it securely to the ear area.
Patch Details (optional but adorable)
To create a “hand-stitched teddy” vibe:
- Stitch a small square patch on the belly using felt or a crocheted square.
- Add a few “X” stitches on the body with darker blue thread to imitate repair stitching.
Common Mistakes and How to Avoid Them#
- Stuffing shows through: Use a smaller hook, and don’t stretch stitches while crocheting.
- Head looks lopsided: Count rounds carefully and stuff evenly. Shape the head with your hands before closing.
- Eyes feel uneven: Insert safety eyes only after pinning the snout placement. Double-check symmetry.
- Limbs don’t match: Count rounds and stuffing amounts. Pin both arms/legs before sewing.
- Plush yarn is hard to see: Feel for stitches with your fingers and use stitch markers more often.
Expert Tips for Better Results#
- For plush yarn, place a stitch marker every few stitches while increasing—this prevents losing count.
- If you want a more “baby teddy” look, set the eyes slightly lower and closer together.
- Sew the snout first, then decide on nose placement—this keeps the face centered.
- To make the bear sit nicely, stuff the bottom of the body extra firm and slightly flatten the base with your hands.
- If you want a cleaner finish, sew with a smooth matching yarn instead of chenille (it glides better through stitches).
Variations and Customization Ideas#
- Color swaps: pastel pink, cream, latte brown, or classic teddy tan
- Outfit add-on: tiny scarf, sweater, or overalls for extra personality
- Baby-safe version: embroidered eyes and nose, no safety eyes or removable parts
- Memory bear style: use special yarn colors and add a heart patch on the belly
- Mini bear keychain: switch to thin yarn and add a loop at the top of the head
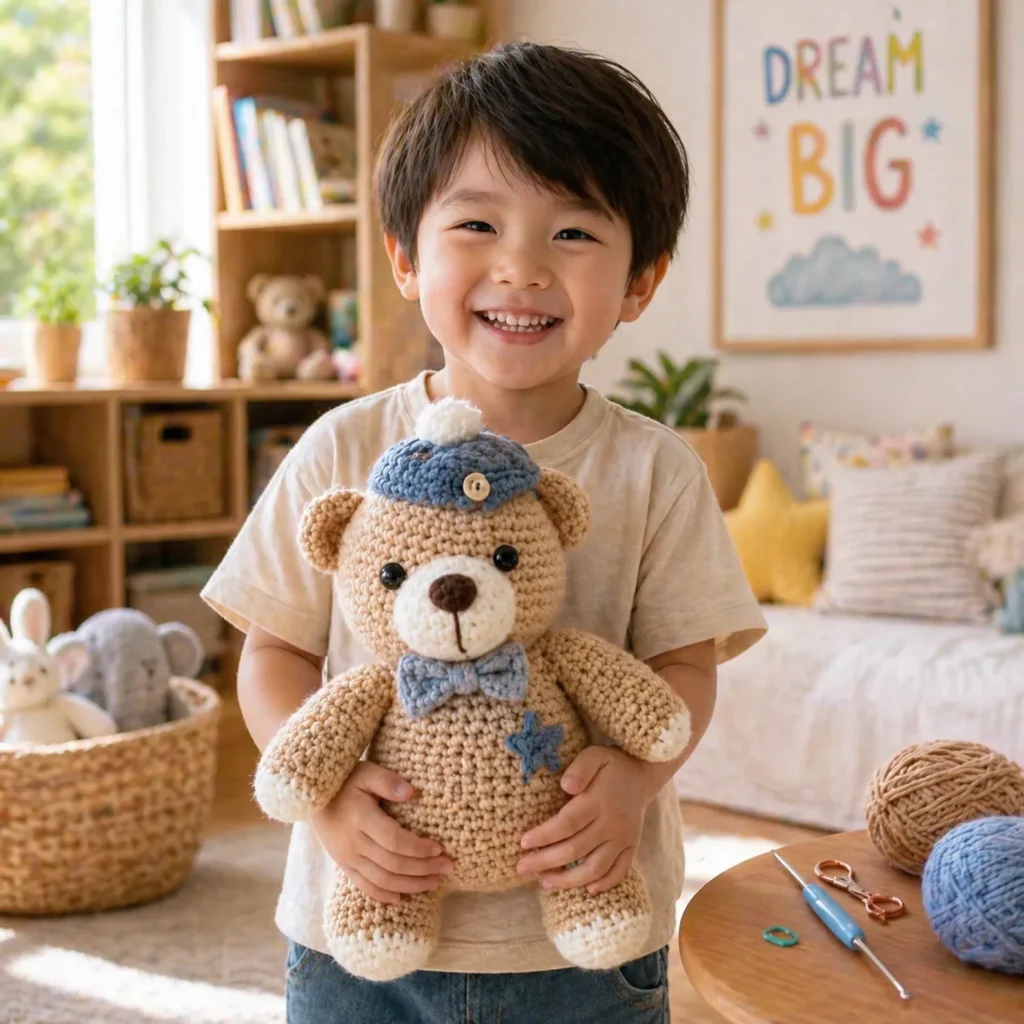
Benefits of This Crochet Project#
- A timeless plush that feels handmade and meaningful
- Simple amigurumi shapes with high “cute payoff”
- Works as a gift, nursery décor, or craft fair bestseller
- Great way to practice neat assembly and face placement
- A strong evergreen topic for search traffic: crochet pattern, free crochet pattern, crochet tutorial, DIY crochet, and crochet for beginners fit naturally
Internal Linking Suggestions#
You may also like…
- Magic Ring Crochet Tutorial for Beginners
- Invisible Decrease Crochet Tutorial
- How to Place Safety Eyes in Amigurumi
- Beginner Amigurumi Animal Patterns (bunny, cat, dog)
- How to Sew Amigurumi Parts Neatly (no gaps, smooth joins)
FAQ Section#
Is this an easy crochet pattern for beginners?
Yes. The shapes are classic amigurumi (rounds, increases, decreases). The bow and patch details are optional.
What yarn is best for a super soft teddy bear?
Chenille/blanket yarn creates the plushest feel. If you’re new, worsted yarn is easier to count and still looks great.
Can I make this teddy bear baby-safe?
Yes. Replace safety eyes with embroidered eyes and stitch all details securely. Skip any removable accessories.
How do I keep the teddy bear sitting upright?
Stuff the bottom of the body firmly and position the legs slightly forward. Flatten the base gently while shaping.
Why does my plush yarn look messy or uneven?
Plush yarn can hide stitch definition. Use steady tension, count carefully, and shape the piece with your hands as you stuff.
Can I resize the bear?
Absolutely. Use thicker yarn and a larger hook to make it bigger, or thinner yarn and a smaller hook to make it smaller—keep the stitch counts the same.
Conclusion#
This soft blue teddy bear is a feel-good crochet pattern that’s simple to build but looks polished thanks to the contrasting snout, paw pads, and charming bow. Whether you’re making a heartfelt gift or adding a new plush to your amigurumi collection, this free crochet pattern gives you a reliable roadmap from the first magic ring to the final stitched detail.
If you tell me what yarn you’re using (chenille, bulky, or worsted) and what size eyes you have, I can suggest the best hook size and exact eye placement so your teddy gets that sweetest expression.


