


Introduction#
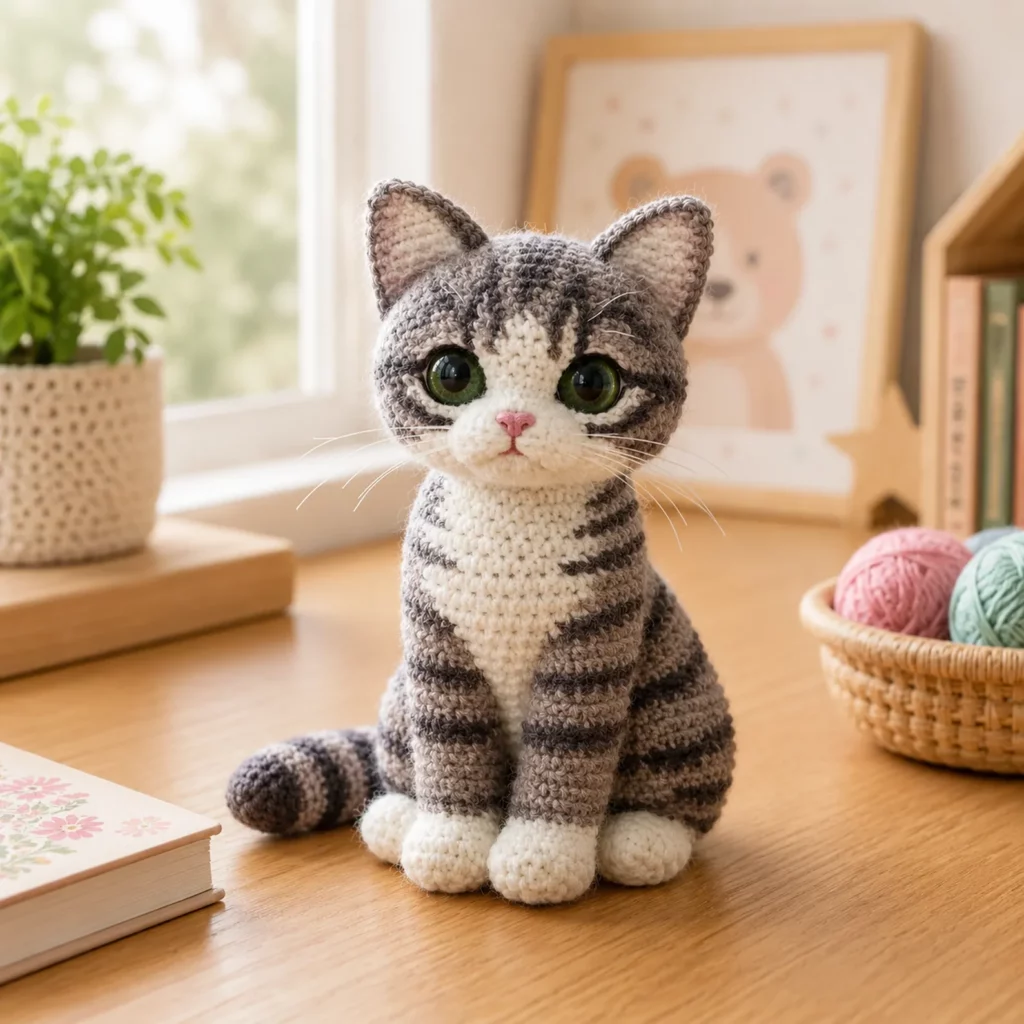
If you want a crochet project that instantly melts hearts, a tabby cat amigurumi is hard to beat. Cats have that perfect mix of “simple shape” and “big personality,” which makes them ideal for crochet: a round head, tiny paws, pointy ears, and a tail that adds character all by itself. And when you add classic tabby stripes plus a little white muzzle and paws, the result looks surprisingly realistic—like a mini plush version of a real cat.
Explore more beginner amigurumi crochet patterns in our pattern library.
This crochet pattern is written as a beginner-friendly crochet tutorial that still delivers a polished finish. You’ll learn how to shape a sitting cat body, make a smooth head with a defined muzzle area, add white accents and stripes without stressful colorwork, and finish everything with expressive eyes and whiskers. This is also a fantastic “custom pet” style project: change the colors, adjust the stripe placement, and you can recreate almost any cat coat pattern.
Detailed Description of the Crochet Pattern#
This crochet cat is a sitting tabby plush with a rounded head, wide-set glossy eyes, a white muzzle and chest, white paws, and a striped body and tail. The ears are slightly oversized for cuteness, and the tail curves around the body for that classic “kitty pose.”
What you’ll make
Head (tabby base color with white muzzle marking)
Body (sitting shape with white belly/chest patch)
Front legs/paws (white feet with tabby legs)
Back legs (thicker paws for balance)
Tail (striped, slightly curled)
Ears (tabby outer + optional pink inner)
Muzzle patch (white)
Nose (pink embroidery)
Whiskers (fishing line, embroidery thread, or stiff nylon thread)
How it’s constructed
The head and body are crocheted as separate pieces for easier shaping and assembly. The stripes are added in a beginner-friendly way: either by changing yarn colors in rounds, or by surface crocheting/embroidering stripes after the main body is complete (the cleanest option for most beginners).
Skill Level Explanation#
Skill Level: Confident Beginner
You’ll do great if you already know
Magic ring
Single crochet (sc)
Increases (inc) and decreases (dec)
Working in continuous rounds
Basic sewing and assembly
You’ll also practice
Adding color accents cleanly (white paws and muzzle)
Creating stripes with simple surface techniques
Placing eyes symmetrically for a cute face
Shaping the muzzle and cheeks with stuffing control
This is an easy crochet pattern in stitches, with extra detail coming from finishing touches rather than complicated techniques.
Materials Needed#
Yarn
Choose a smooth yarn so the stitches and stripes look crisp.
Suggested yarn weight
Worsted (Category 4) for a medium plush
DK (Category 3) for a smaller plush with finer details
Colors
A: Tabby base color (light brown/tan)
B: Stripe color (dark brown)
C: White or cream (muzzle, chest, paws)
D: Pink (nose and optional ear inner)
Optional: Black embroidery floss (mouth and optional eye detailing)
Yarn tips
Cotton gives the cleanest stitch definition
Acrylic makes a softer plush
If you want very sharp stripes, use cotton or a smooth acrylic (avoid fuzzy yarn)
Hook
Use a smaller hook than the yarn label suggests to keep stuffing from showing.
Worsted: 3.0–4.0 mm
DK: 2.75–3.25 mm
Notions
Stitch marker
Tapestry needle
Scissors
Fiberfill stuffing
Safety eyes (12–16 mm for the big-eyed look) or embroidered eyes
Optional: green safety eyes if you want that realistic tabby stare
Whiskers: fishing line, nylon thread, or embroidery thread
Optional: blush or pastel chalk for cheeks
Safety note
For children under 3, embroider the eyes and skip fishing-line whiskers.
Stitches & Techniques Explained#
Abbreviations
MR = magic ring
sc = single crochet
inc = increase (2 sc in one stitch)
dec = decrease (invisible decrease recommended)
sl st = slip stitch
ch = chain
BLO = back loop only
FLO = front loop only
( ) repeat
[ ] stitch count
Invisible decrease
Insert hook into the front loop of the next stitch, then the front loop of the following stitch, yarn over and pull through, yarn over and pull through two. This keeps the face smooth.
Easy stripe options
Option A: Surface slip stitch stripes (cleanest)
After the cat is assembled, use stripe yarn to surface slip stitch short lines along the body, tail, head, and legs. This gives control and looks neat.
Option B: Embroidered stripes
Use stripe yarn or embroidery floss to stitch simple V-shaped tabby marks and side stripes.
Option C: Color change rounds
Change yarn colors in a few rounds to create full stripes. This is fastest, but you must carry yarn or weave more ends.
This pattern uses surface stripes as the main method because it is beginner-friendly and gives the most control.
Step-by-Step Instructions#
Finished Size
With worsted yarn and a 3.5 mm hook, expect about 8–11 inches (20–28 cm) tall depending on stuffing and eye size.
Notes Before You Start
Work in continuous rounds unless stated
Use a stitch marker
Stuff firmly but avoid stretching stitches
Pin parts before sewing for symmetry
Color Key
A = Tabby base
B = Stripe color
C = White/cream
D = Pink
Head (A)#
Round 1: 6 sc in MR [6]
Round 2: inc around [12]
Round 3: (sc, inc) around [18]
Round 4: (2 sc, inc) around [24]
Round 5: (3 sc, inc) around [30]
Round 6: (4 sc, inc) around [36]
Round 7: (5 sc, inc) around [42]
Rounds 8–12: sc around [42]
Eye placement
Place eyes between Rounds 10–11, about 10–12 stitches apart for the big-eyed cute look.
Round 13: (5 sc, dec) around [36]
Round 14: sc around [36]
Round 15: (4 sc, dec) around [30]
Round 16: sc around [30]
Start stuffing firmly, shaping the cheeks.
Round 17: (3 sc, dec) around [24]
Round 18: (2 sc, dec) around [18]
Round 19: (sc, dec) around [12]
Round 20: dec around [6]
Fasten off and close.
Muzzle Patch (C)#
This is a separate white oval that sits on the face.
Round 1: 6 sc in MR [6]
Round 2: inc around [12]
Round 3: (sc, inc) around [18]
Round 4: sc around [18]
Fasten off leaving a long tail.
Lightly stuff or leave flat (flat looks cleaner for a tabby). Sew centered below the eyes.
Nose and mouth
Embroider a small pink triangle nose (D) at the top center of the muzzle patch.
Add a short vertical line down and a tiny curved mouth in black thread.
Ears (Make 2)#
Outer ear (A)
Round 1: 4 sc in MR [4]
Round 2: (sc, inc) around [6]
Round 3: (2 sc, inc) around [8]
Round 4: sc around [8]
Round 5: (3 sc, inc) around [10]
Round 6: sc around [10]
Fasten off leaving a long tail. Flatten.
Inner ear (optional, D or light pink)
Ch 6
Row 1: sc in 2nd ch and across (5), ch 1, turn
Row 2: sc2tog, sc 1, sc2tog (3)
Fasten off. Sew inside ear.
Sew ears to top of head slightly to the sides, angled outward.
Body (A with C belly)#
The body is a sitting shape. For the white belly look, you’ll sew a white belly patch on later (cleanest), or you can color-change a front panel if preferred.
Round 1: 6 sc in MR [6]
Round 2: inc around [12]
Round 3: (sc, inc) around [18]
Round 4: (2 sc, inc) around [24]
Round 5: (3 sc, inc) around [30]
Round 6: (4 sc, inc) around [36]
Round 7: (5 sc, inc) around [42]
Rounds 8–12: sc around [42]
Create the sitting “rump”
Round 13: (6 sc, inc) around [48]
Rounds 14–16: sc around [48]
Shape inward for the upper body
Round 17: (6 sc, dec) around [42]
Round 18: sc around [42]
Round 19: (5 sc, dec) around [36]
Round 20: sc around [36]
Round 21: (4 sc, dec) around [30]
Round 22: sc around [30]
Stuff firmly, flattening the base slightly so it sits.
Close top for head attachment
Round 23: (3 sc, dec) around [24]
Round 24: (2 sc, dec) around [18]
Fasten off leaving a long tail. Do not close fully if you want an easier head join.
Belly Patch (C)#
Ch 10
Row 1: sc in 2nd ch and across (9), ch 1, turn
Row 2: sc across (9), ch 1, turn
Row 3: sc2tog, sc 5, sc2tog (7), ch 1, turn
Row 4: sc across (7)
Fasten off and sew to the front of the body.
Front Legs (Make 2, A with C paws)#
Start with white paws (C)
Round 1: 6 sc in MR [6]
Round 2: inc around [12]
Round 3: sc around [12]
Switch to A
Rounds 4–10: sc around [12]
Stuff lightly, flatten top, fasten off with a tail.
Back Legs (Make 2, A with C feet)#
Start with white feet (C)
Round 1: 6 sc in MR [6]
Round 2: inc around [12]
Round 3: (sc, inc) around [18]
Round 4: sc around [18]
Switch to A
Round 5: sc in BLO around [18] (turns up)
Rounds 6–10: sc around [18]
Round 11: (4 sc, dec) around [15]
Rounds 12–13: sc around [15]
Stuff firmly, flatten top, fasten off with a tail.
Tail (A with B stripes)#
Round 1: 6 sc in MR [6]
Rounds 2–6: sc around [6]
Round 7: (sc, dec) around [4]
Rounds 8–20: sc around [4] (adjust length)
Fasten off with tail for sewing.
Tail tip option
Add a tiny white tip by switching to C for the last 2–3 rounds before fastening off.
Assembly#
Attach head to body
Pin head centered on body top. Sew securely all around.
Attach legs
Front legs: sew to the front lower body, close together.
Back legs: sew to the sides/back lower body so the cat sits stably.
Attach tail
Sew tail to back of body. Curve it around the side and tack with a small stitch so it stays in a cute curled pose.
Tabby Stripes (B)#
This is where the tabby look comes alive.
Head markings
Add a short “M” shape on the forehead with surface slip stitches or embroidery.
Add 1–2 small eyebrow stripes above each eye.
Body stripes
Add short horizontal stripes on the sides of the body.
Keep stripes slightly curved and spaced evenly.
Leg stripes
Add 2–3 short stripes on each leg (upper area), leaving paws white.
Tail stripes
Add full rings or partial rings every 2–3 rounds along the tail.
Stripe tip
Less is more. A few well-placed stripes look more realistic than covering everything.
Whiskers#
Whisker options
Fishing line: looks most realistic and holds shape
Embroidery thread: soft and safe for kids
Nylon thread: a good in-between option
Insert whiskers through the muzzle patch area (3 on each side), knot securely inside.
Common Mistakes and How to Avoid Them#
Cat won’t sit flat
Stuff the base firmly and flatten it slightly
Reposition back legs a bit wider
Add a tiny weight pouch inside the bottom if needed
Eyes look uneven
Mark eye positions with pins before inserting
Measure stitches between eyes
Check from the front before locking safety eyes
Muzzle looks crooked
Pin muzzle patch first
Sew the top edge, then sides, then bottom
Keep stitches small and even
Stripes look messy
Use surface slip stitches with consistent tension
Keep stripe lengths similar
Plan stripe placement lightly with pins before stitching
Stuffing shows through
Use a smaller hook
Keep tension consistent
Avoid overstuffing the head
Expert Tips for Better Results#
Use a smooth yarn for the face and a slightly darker shade for stripes for a realistic tabby effect
Add a tiny white highlight stitch on each eye for extra life
Lightly blush the cheeks for a sweet expression
For a very realistic coat pattern, add darker ear edges and a slightly darker tail tip
Sew the tail in a curve and tack it down so the pose looks intentional
Variations and Customization Ideas#
Turn it into a kitten
Shorten body by 2–3 rounds and make head slightly larger.
Make a calico or tuxedo cat
Replace stripes with patches of color and keep a white chest.
Make a long-haired cat
Add loop stitch texture along cheeks and chest, or brush yarn gently for fluff.
Add accessories
Tiny collar with a bell
Mini scarf
Little bow on one ear
Make it baby-safe
Embroider eyes and whiskers
Skip any plastic parts
Benefits of This Crochet Project#
A classic crochet pattern that’s instantly recognizable
Great stash-buster for small amounts of stripe yarn
Beginner-friendly stitches with a high-end finished look
Perfect gift for cat lovers
Customizable to resemble real pets
Teaches amigurumi shaping, assembly, and surface detailing skills
Internal Linking Suggestions#
How to Crochet Invisible Decreases for Smooth Amigurumi
Easy Guide to Adding Surface Crochet Details
Best Yarn for Amigurumi: Cotton vs Acrylic
How to Embroider Faces on Crochet Animals
Beginner Crochet Animal Patterns Collection
FAQ Section#
Is this crochet pattern suitable for beginners?
Yes. The stitches are basic single crochet shaping. The stripes are added afterward with simple surface stitches, which is beginner-friendly.
What yarn works best for a tabby cat amigurumi?
Smooth cotton or acrylic works best for clean stitches and crisp stripes. Cotton gives the sharpest definition.
How do I make the stripes look neat?
Use surface slip stitches or embroidery with consistent tension. Place fewer stripes but make them intentional and evenly spaced.
Can I make it baby-safe?
Yes. Use embroidered eyes and whiskers, and stitch all parts securely. Avoid fishing line whiskers for small children.
How do I make the cat bigger or smaller?
Change yarn weight and hook size. You can also add extra rounds to the body and head for a larger plush.
How do I keep the cat sitting upright?
Stuff the base firmly, place the back legs wider, and add a small weight pouch in the bottom if needed.
Conclusion#
A tabby cat amigurumi is one of the sweetest crochet pattern projects because it combines simple shapes with expressive details that make it feel real. With big eyes, a neat white muzzle, classic stripes, and a curled tail, your finished kitty will look polished, giftable, and completely adorable.
If you tell me your yarn weight and hook size, I can suggest the best safety-eye size and where to stop the tail rounds for the exact “curled” pose you want.


