


Introduction#
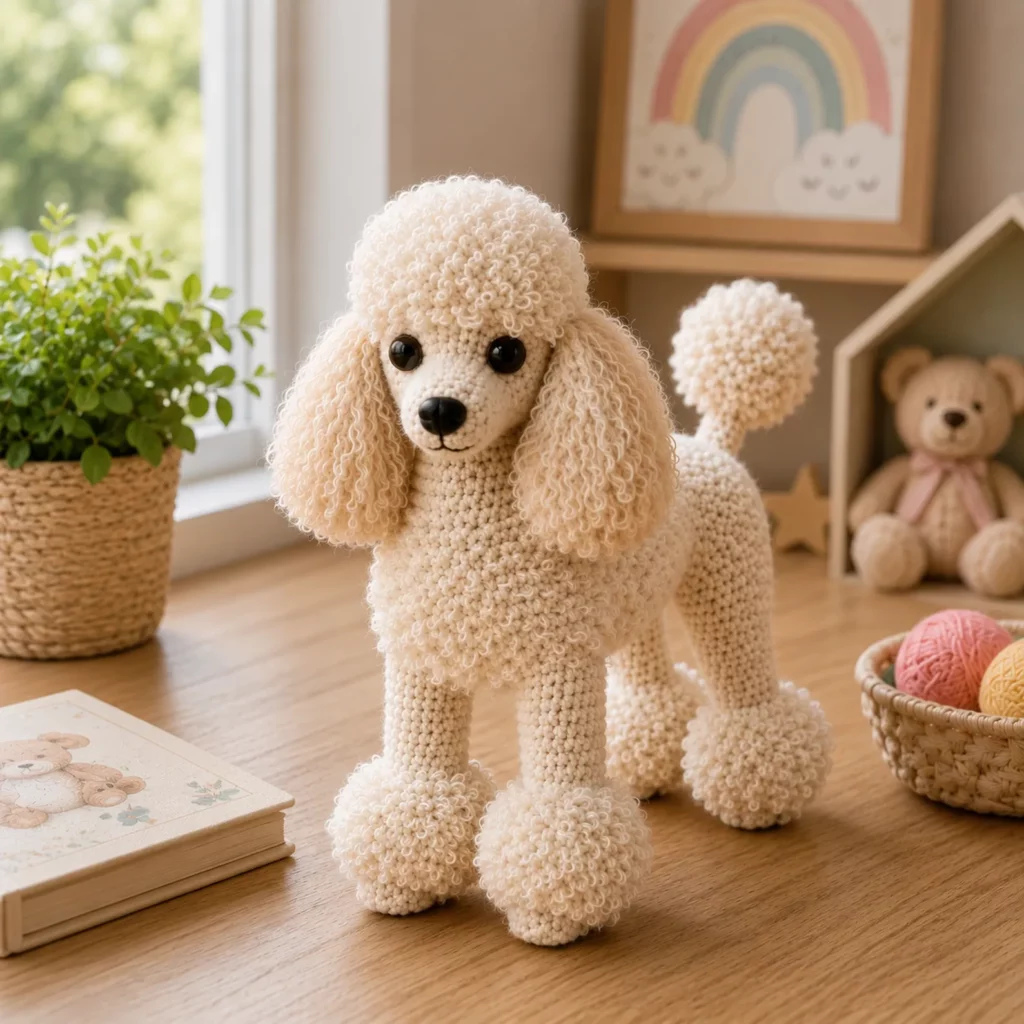
If you’ve ever wanted to crochet a dog that looks instantly recognizable, a poodle amigurumi is such a satisfying project. Poodles have that signature silhouette: a sweet little face, long curly ears, a fluffy topknot, and those “pom” cuffs on the legs that make them look extra fancy (even when they’re being silly). The best part is that you can create that iconic poodle look with simple amigurumi shapes and one easy texture trick.
Explore more beginner amigurumi crochet patterns in our pattern library.
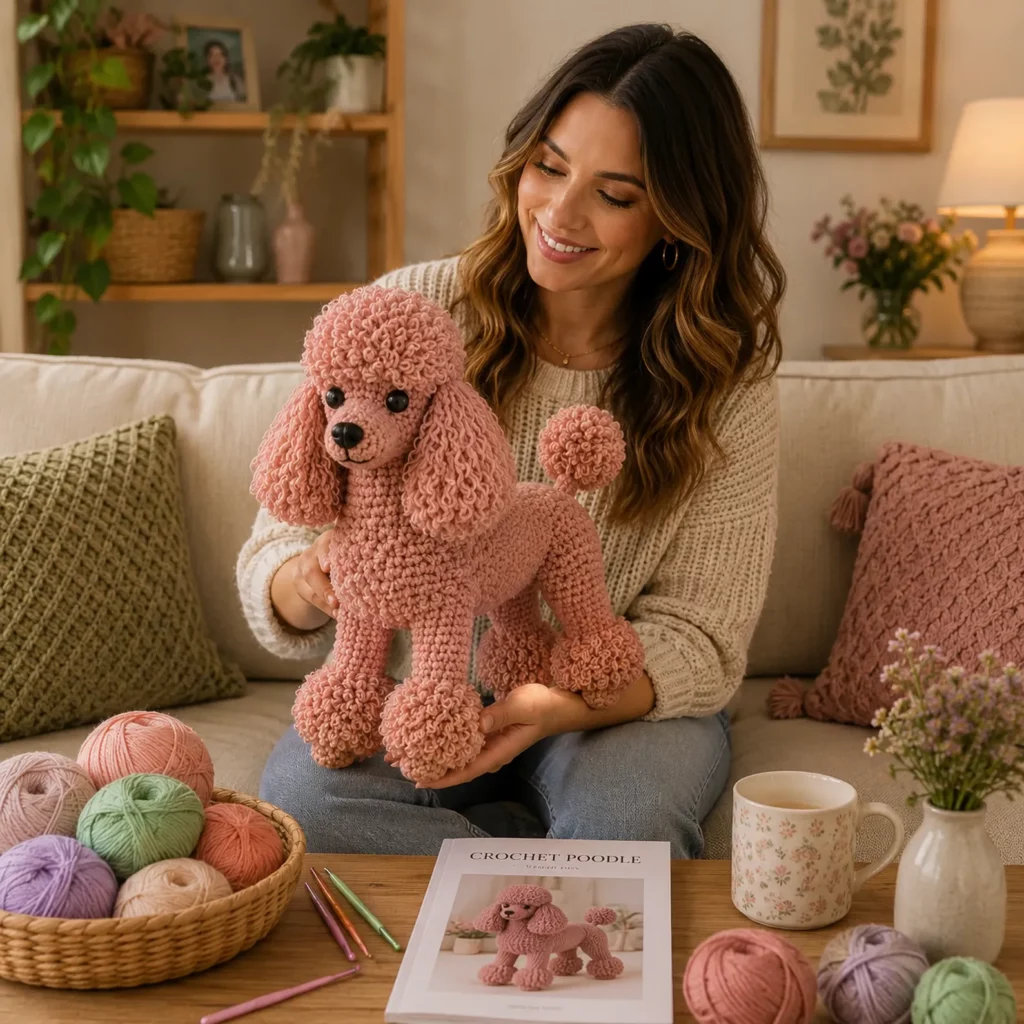
This crochet pattern tutorial is written to feel approachable and beginner-friendly while still producing a polished, gift-worthy plush. You’ll crochet the body and head in smooth single crochet for a clean foundation, then add fluffy texture to the ears, ankles, tail, and topknot using either loop stitch, brushed yarn, or a curly/bouclé yarn. That means you can control how fluffy you want the finished toy to be, from “slightly fuzzy” to “full poodle poof.”
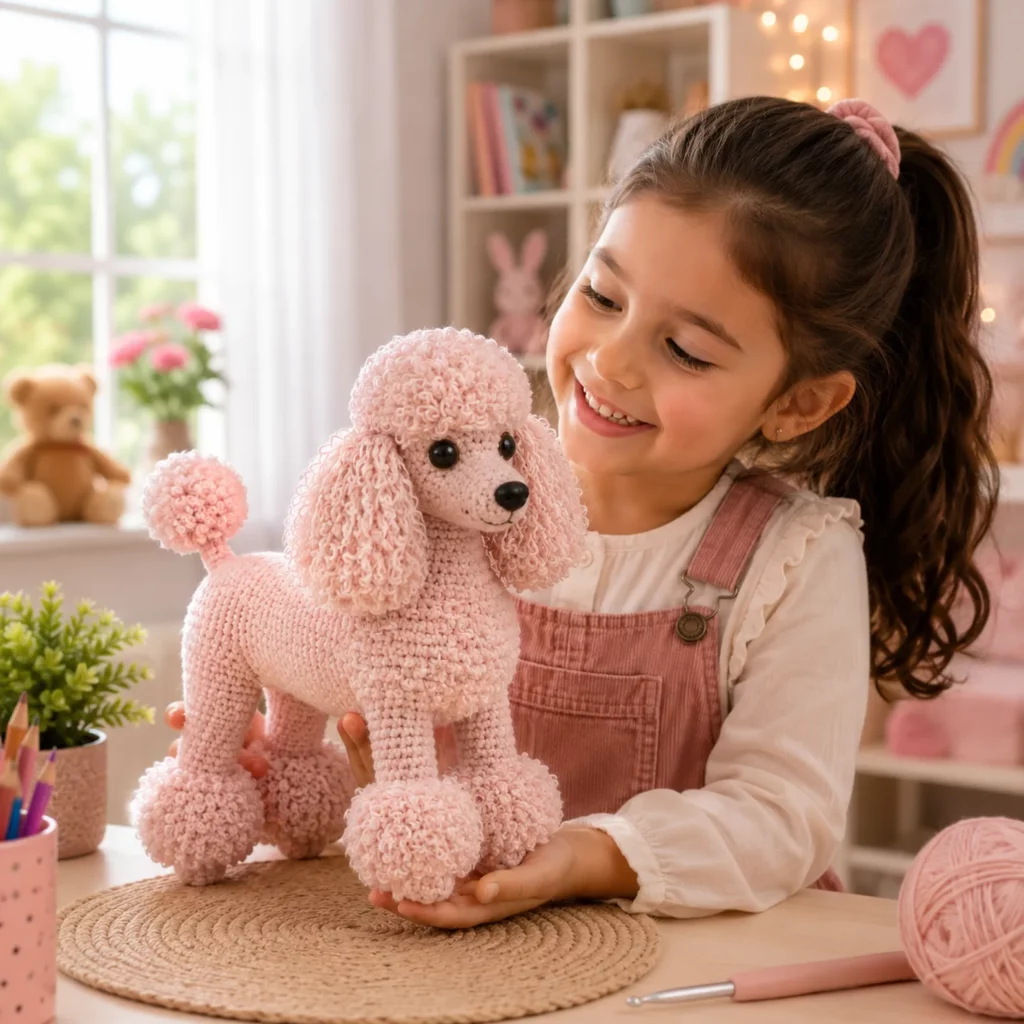
This is a great DIY crochet project for pet lovers, nursery décor, birthday gifts, and craft fairs. And once you make one poodle, it’s easy to customize: change the color, adjust the ear length, make it mini, or turn it into a keychain puppy.
Detailed Description of the Crochet Pattern#
This crochet pattern makes a standing toy poodle-style amigurumi with a slim body, a rounded head, long floppy ears, and fluffy “pom” details.
Design features
Smooth base body so the shape looks clean
Curly texture accents on head topknot, ears, ankles, and tail tip
Big shiny eyes and a tiny embroidered smile for a friendly expression
Lightly posed stance so the poodle stands or sits nicely
Optional collar for extra charm
How it’s constructed
Head (smooth) with a slightly longer muzzle area
Body (smooth) shaped like a soft cylinder
Legs (4 pieces) with optional fluffy ankle cuffs
Ears (2 pieces) that can be smooth or curly
Tail (1 piece) with a pom tip
Topknot cap (1 piece) plus curly overlay (or fluffy yarn) for that poodle “hairdo”
This is an easy crochet pattern in stitches, but it looks more detailed because of the texture choices and careful assembly.
Skill Level Explanation#
Skill Level: Confident Beginner
You’ll do great if you already know
Magic ring
Single crochet (sc)
Increase (inc) and decrease (dec)
Working in continuous rounds
Basic sewing and assembly
You’ll also learn or practice
Placing eyes evenly for a cute face
Adding texture with loop stitch or fluffy yarn
Making a standing plush more stable by shaping feet and stuffing evenly
Attaching ears symmetrically
If you’ve made one basic amigurumi animal, this crochet tutorial is a perfect next step.
Materials Needed#
Yarn
For the cleanest look, use smooth yarn for the main body and a fluffier yarn for the “poodle poofs.”
Recommended yarn weights
Worsted weight (Category 4) for a medium plush
DK weight (Category 3) for a smaller plush
Color suggestions
Cream, ivory, white, apricot, black, gray, or classic poodle beige
Optional accent color for collar (pink, red, black, or pastel)
Texture options for the curly areas
Option A: Same yarn + loop stitch (no special yarn needed)
Option B: Curly/bouclé yarn for ears and cuffs
Option C: Brushable yarn (acrylic) brushed gently for fluff
Yardage estimate
Main smooth yarn: 150–250 yards (140–230 m)
Curly/fluffy yarn or extra for loop stitch: 50–120 yards (46–110 m)
Hook
Use a smaller hook than the yarn label suggests to make tight stitches that hide stuffing
Worsted: 3.0–4.0 mm
DK: 2.75–3.25 mm
Notions
Stitch marker
Tapestry needle
Scissors
Fiberfill stuffing
Safety eyes (10–14 mm for medium size) or embroidery thread
Embroidery thread for nose/mouth (black or dark brown)
Optional blush for cheeks
Optional pipe cleaner or floral wire for pose support (not recommended for children)
Safety note
If making for a baby or toddler, embroider eyes and avoid any internal wire.
Stitches & Techniques Explained#
Common Abbreviations
MR = magic ring
sc = single crochet
inc = increase (2 sc in one stitch)
dec = decrease (invisible decrease recommended)
sl st = slip stitch
ch = chain
hdc = half double crochet
dc = double crochet
BLO = back loop only
FLO = front loop only
( ) repeat
[ ] stitch count
Invisible Decrease
Insert hook into the front loop of the next stitch, then the front loop of the following stitch, yarn over and pull through, yarn over and pull through two. This keeps the poodle’s face smooth.
Loop Stitch (Easy Curly Texture)
Loop stitch makes little loops that look like curly fur.
You form a loop of yarn over your finger while making a single crochet, trapping the loop in the stitch.
You can trim loops slightly to shape the fur.
If loop stitch is new to you
Practice on a small swatch first. Once you get the rhythm, it’s easy and gives a perfect poodle texture.
Fluffy Yarn Shortcut
If you don’t want loop stitch, use bouclé/curly yarn for
Topknot
Ears
Ankle cuffs
Tail pom
This gives instant “poodle fluff,” but stitch definition can be harder to see. A stitch marker becomes very helpful.
Step-by-Step Instructions#
This free crochet pattern is written for worsted yarn. If using DK, the same stitch counts will make a smaller poodle.
Finished size
Approximately 8–11 inches (20–28 cm) tall depending on yarn and stuffing.
Notes before you begin
Work in continuous rounds unless stated
Use a stitch marker in the first stitch of each round
Stuff firmly but do not stretch the stitches
Pin parts before sewing to check symmetry
Color Key
A = Main body color (smooth yarn)
F = Fluffy yarn (optional) or use A with loop stitch for textured areas
Head (A)#
Round 1: 6 sc in MR [6]
Round 2: inc around [12]
Round 3: (sc, inc) around [18]
Round 4: (2 sc, inc) around [24]
Round 5: (3 sc, inc) around [30]
Round 6: (4 sc, inc) around [36]
Rounds 7–10: sc around [36]
Eye placement
Place eyes between Rounds 8–9 about 7–9 stitches apart.
Shape the muzzle slightly
Round 11: (4 sc, dec) around [30]
Round 12: sc around [30]
Round 13: (3 sc, dec) around [24]
Round 14: sc around [24]
Stuff firmly, shaping the face gently.
Round 15: (2 sc, dec) around [18]
Round 16: (sc, dec) around [12]
Round 17: dec around [6]
Fasten off and close.
Embroider nose and mouth
Add a small oval nose and a short smile line. Optional tiny blush cheeks under the eyes.
Body (A)#
Round 1: 6 sc in MR [6]
Round 2: inc around [12]
Round 3: (sc, inc) around [18]
Round 4: (2 sc, inc) around [24]
Round 5: (3 sc, inc) around [30]
Round 6: (4 sc, inc) around [36]
Rounds 7–12: sc around [36]
Shape slightly narrower at the waist
Round 13: (4 sc, dec) around [30]
Round 14: sc around [30]
Round 15: (3 sc, dec) around [24]
Rounds 16–18: sc around [24]
Stuff firmly, especially the base so the poodle stands better.
Close body top opening for neck attachment
Round 19: (2 sc, dec) around [18]
Round 20: sc around [18]
Fasten off leaving a long tail for sewing the head on.
Legs (Make 4, A)#
Feet base
Round 1: 6 sc in MR [6]
Round 2: inc around [12]
Round 3: (sc, inc) around [18]
Round 4: sc around [18]
Round 5: sc in BLO around [18] (turns up the foot edge)
Rounds 6–10: sc around [18]
Round 11: (4 sc, dec) around [15]
Rounds 12–14: sc around [15]
Stuff lightly, flatten opening, fasten off with a long tail.
Optional ankle poof (choose one method)
Method 1: Loop stitch band using A
Attach yarn around leg at Round 10 area and work one round of loop stitch sc (or loop stitch in every stitch)
Method 2: Fluffy yarn band (F)
Attach F and work 1–2 rounds sc around
Fasten off and weave in ends.
Tail (A)#
Round 1: 6 sc in MR [6]
Rounds 2–8: sc around [6]
Fasten off with tail for sewing.
Tail pom
Option A (loop stitch): attach A at tip and work loop stitches around tip area
Option B (fluffy yarn): attach F and work 2 rounds sc around, then fasten off
Option C (pom-pom): make a small yarn pom and sew to tail tip
Ears (Make 2)#
Ear base (A)
Round 1: 6 sc in MR [6]
Round 2: (sc, inc) around [9]
Round 3: (2 sc, inc) around [12]
Rounds 4–12: sc around [12]
Flatten ear (do not stuff) and fasten off with long tail.
Curly ear overlay (choose one)
Option A: loop stitch edging along the outer edge of the ear
Option B: switch to fluffy yarn and sc around ear for a fuzzy look
Option C: attach strand curls (cut strands, latch through, then twist gently)
Topknot (Poodle Head Poof)#
Topknot base cap (A)
Round 1: 6 sc in MR [6]
Round 2: inc around [12]
Round 3: (sc, inc) around [18]
Round 4: (2 sc, inc) around [24]
Round 5: sc around [24]
Fasten off with tail.
Topknot fluff
Option A: work loop stitches all over the cap
Option B: crochet the cap in fluffy yarn instead
Option C: add strand curls to the cap and trim into a rounded poof
Sew topknot centered on top of head.
Assembly#
Attach head to body
Pin head centered on body top. Sew securely all around. Add extra stitches at the front and back of neck for strength.
Attach legs
Pin two front legs slightly forward and two back legs slightly back. Make sure the poodle stands evenly before sewing. Sew firmly.
Attach tail
Sew tail to back of body, slightly upward.
Attach ears
Sew ears to sides of head slightly below eye line. Pin first and check symmetry from the front.
Final grooming
If you used loop stitches, you can lightly trim for an even shape. If you used brushed yarn, gently brush curls outward.
Optional collar
Ch long enough to wrap neck, work sc rows to desired width, then sew or add a small button.
Common Mistakes and How to Avoid Them#
Fluff looks uneven
Keep loop lengths consistent
Trim slowly in tiny snips
If using fluffy yarn, count carefully and use stitch markers
Poodle won’t stand
Stuff the body base more firmly
Flatten the feet while stuffing
Position legs wider apart
Add a small weight pouch inside the body (optional)
Eyes look crooked
Insert eyes before closing head and check alignment
Use pins to mark eye spacing first
Ears look mismatched
Count the rounds exactly
Pin and compare before sewing
Stuffing shows through
Use a smaller hook
Keep stitches tight
Avoid overstuffing the head
Expert Tips for Better Results#
Use smooth yarn for the face and fluffy yarn only for accents for a clean, professional finish
For a show-poodle look, make the topknot bigger by adding one more increase round to the cap
Add subtle shaping by placing a tiny stitch indentation under the eyes for “cheeks”
If you want extra curls, attach thin strands and gently twirl them around a skewer before sewing
Weave ends as you go, fluffy areas hide ends but smooth areas do not
Variations and Customization Ideas#
Toy poodle mini
Use DK yarn and a smaller hook, shorten legs by a few rounds.
Color variations
Classic white poodle
Apricot poodle
Black poodle with a white collar
Two-tone poodle (darker ears, lighter body)
Accessories
Add a bow on one ear
Add a little sweater
Add a leash and tiny bag charm
Turn it into a keychain by making a smaller version and adding a loop
Benefits of This Crochet Project#
A recognizable dog amigurumi that looks detailed without complicated stitches
Great stash buster if you use leftover yarn for fluff accents
Perfect gift for dog lovers and poodle owners
Customizable size and color palette
Teaches texture techniques you can reuse on bears, sheep, and other furry amigurumi
A crochet pattern that looks boutique and photo-ready
Internal Linking Suggestions#
How to Crochet Loop Stitch for Fluffy Amigurumi
Invisible Decrease Tutorial for Smooth Faces
How to Add Hair to Crochet Dolls and Animals
Best Yarn for Amigurumi and Plush Toys
Beginner Crochet Dog Patterns Collection
FAQ Section#
Is this poodle crochet pattern beginner-friendly?
Yes. The base is simple single crochet shaping. The only “extra” skill is adding fluff, and you can choose an easy option like fluffy yarn.
What yarn is best for a fluffy poodle look?
Cotton or smooth acrylic for the body, plus loop stitch or bouclé yarn for the curls. Using smooth yarn for the face helps it look clean.
Can I make it without loop stitch?
Absolutely. Use fluffy yarn for the ears and topknot, or attach yarn strands for curls instead.
How do I make it baby-safe?
Embroider the eyes, avoid wire, and sew all parts very securely. Skip any detachable accessories like bows or buttons.
How do I make the poodle bigger or smaller?
Change yarn weight and hook size. You can also add rounds to the body and legs for a taller dog.
How do I keep it standing?
Stuff the body base firmly, flatten the feet, and position legs evenly. Adding a small weight pouch inside the belly helps a lot.
Conclusion#
A fluffy poodle amigurumi is the perfect crochet pattern when you want something cute, elegant, and instantly recognizable. With a smooth body foundation and curly texture details on the ears, topknot, ankles, and tail, you’ll end up with a plush that looks like a real little poodle—even though it’s built from simple stitches.
If you tell me your yarn weight (DK or worsted) and the hook size you’re using, I can adjust the stitch counts so your poodle comes out the exact height and “fluffiness level” you want.


