


Introduction#
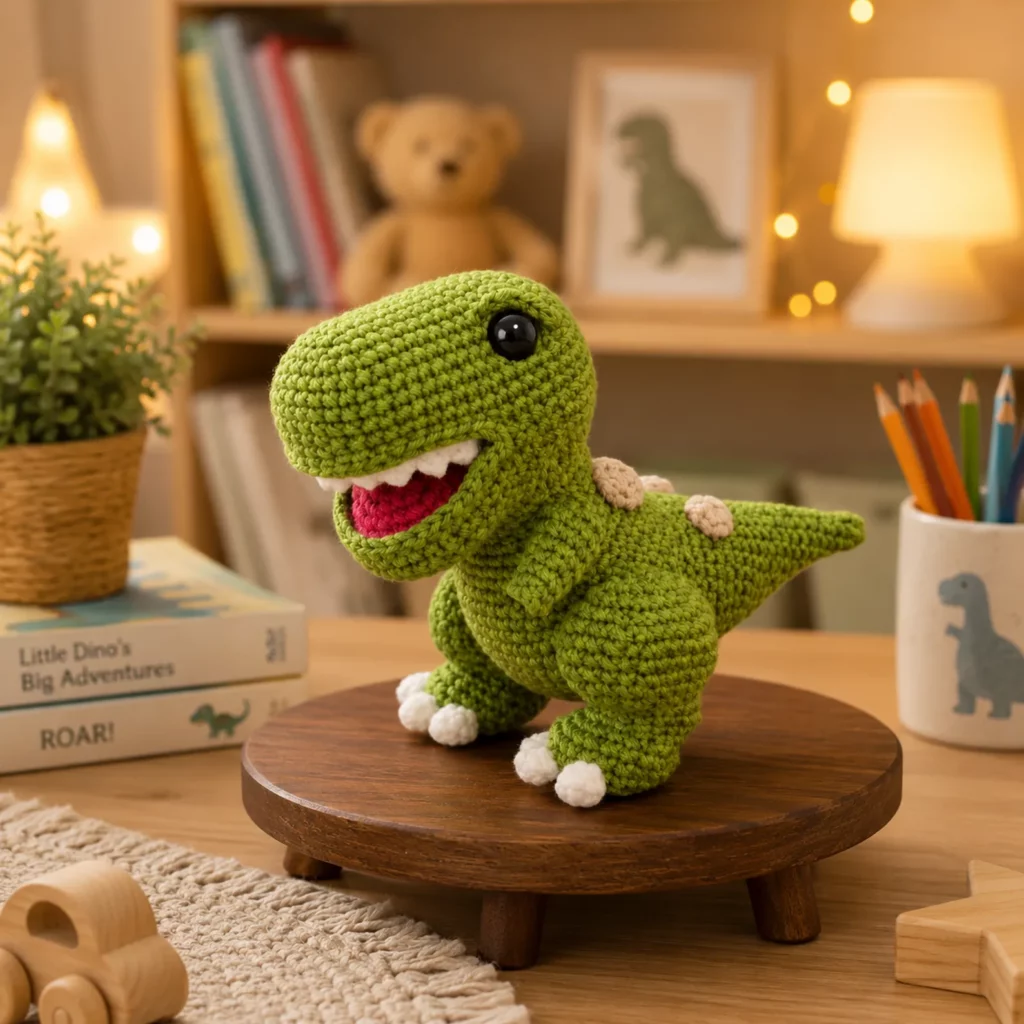
If you want a crochet project that gets an instant reaction (the “OMG it’s so cute!” kind), a chubby little T-Rex is hard to beat. It has everything that makes amigurumi fun: a big expressive head, tiny arms, a chunky body, and those iconic dinosaur details—teeth, tail, and little back bumps—without complicated pieces or advanced shaping.
Explore more beginner amigurumi crochet patterns in our pattern library.
This crochet pattern is written to be approachable for confident beginners but still packed with the finishing tips that make handmade plushies look clean and professional. The construction is logical: you crochet the head and body shapes in smooth rounds, then add the mouth insert, teeth, arms, legs, tail, and back plates. The end result is a sturdy dinosaur that can sit on a shelf, star in nursery décor, or become a gift that everyone remembers.
Below you’ll find a complete, educational crochet tutorial style guide: materials, stitch explanations, step-by-step instructions, assembly, and customization ideas so you can make your own friendly T-Rex in any color you love.
Detailed Description of the Crochet Pattern#
This is a classic “big head + chubby body” amigurumi dinosaur. The shaping is smooth and rounded, with minimal parts and maximum personality. The standout features include:
A large rounded head with a protruding snout and a wide open mouth look
A contrasting mouth interior (tongue/mouth lining) that pops visually
Small triangular teeth along the top jaw for that unmistakable T-Rex grin
Tiny arms and sturdy legs that help the plush sit
A tapered tail that balances the shape
Simple back bumps (plates) that add texture without making assembly hard
Optional white “claws” on the feet for extra character
The best part is that you can simplify or level-up the details depending on who the plush is for. Want baby-safe? Embroider eyes and skip hard pieces. Want extra fancy? Add a shaded mouth, nostrils, and embroidered facial lines.
Skill Level Explanation#
Skill Level: Confident Beginner
You’ll do great if you already know:
Single crochet (sc)
Increase (inc) and decrease (dec)
Working in continuous rounds (spiral)
Basic sewing/assembly with a yarn needle
Newer skills you’ll learn (or practice):
Invisible decrease for smooth shaping
Attaching a mouth insert neatly
Adding small teeth without gaps
Strategic stuffing so the dinosaur sits nicely
Clean placement of eyes and facial details
If you’ve made one simple amigurumi animal before, this is a perfect next project because it feels playful but teaches “finishing skills” that carry over to every plush you make.
Materials Needed#
Yarn#
For a plush like this, choose yarn that shows stitches clearly and holds shape.
Recommended yarn weights:
Worsted (Category 4) for a medium plush (most common, beginner-friendly)
DK (Category 3) for a slightly smaller, more detailed plush
Fiber suggestions:
Cotton for crisp stitches and clean shaping
Acrylic for softer cuddles and easy care
Avoid fuzzy novelty yarn for your first attempt (it hides stitch counts and makes details harder)
Color palette (classic T-Rex vibe):
A: Main body color (brown, tan, green, or any fun shade)
B: Back bumps/plates (light green or contrast color)
C: Mouth interior/tongue (red, burgundy, or pink)
D: Teeth/claws (white or cream)
Yardage estimate (approximate):
Worsted: 250–450 yards total depending on size and how many details you add
DK: 300–500 yards total (more yards because thinner yarn)
Hook#
Use a hook smaller than the yarn label suggests so stitches are tight:
Worsted: 3.25–4.0 mm
DK: 2.75–3.25 mm
If you can see stuffing through stitches, go down a hook size.
Notions#
Stitch marker
Yarn needle
Scissors
Fiberfill stuffing
Safety eyes (10–14 mm for worsted, 8–12 mm for DK)
Black embroidery floss (optional for nostrils/smile lines)
Optional: blush for cheeks
Safety note: If this is for babies/toddlers, embroider eyes instead of using safety eyes and sew all details extremely securely.
Stitches & Techniques Explained#
Common Abbreviations#
MR = magic ring
sc = single crochet
inc = increase (2 sc in one stitch)
dec = decrease (sc 2 together)
inv dec = invisible decrease
sl st = slip stitch
ch = chain
BLO = back loop only
FLO = front loop only
( ) = repeat
[ ] = stitch count
Invisible Decrease (recommended)#
Insert hook into front loop of next stitch, then into front loop of following stitch, yarn over and pull through, yarn over and finish sc. This keeps decreases smoother and helps the head look clean.
Clean Color Change#
On the last stitch of a round, stop when 2 loops remain, yarn over with the new color, and pull through. This keeps color changes tidy (especially for the mouth interior).
Open Mouth Look (easy method)#
Instead of crocheting a full hinged jaw, we’ll create the illusion of an open mouth by sewing a curved mouth opening and attaching a mouth insert (red) plus small teeth (white). This gives that wide “roaring” expression without complex engineering.
Step-by-Step Instructions#
Finished Size#
Worsted yarn + 3.5–4.0 mm hook: roughly 8–11 inches (20–28 cm) tall
DK yarn + 3.0 mm hook: roughly 6–9 inches (15–23 cm) tall
Size depends on stuffing firmness and exact yarn.
Notes Before You Start#
Work in continuous rounds unless stated.
Use a stitch marker to track rounds.
Stuff in small amounts as you go, shaping with your hands.
For the neatest face, plan eye placement before closing the head.
Color Key#
A = Main body
B = Back bumps
C = Mouth interior/tongue
D = Teeth/claws
Head (Color A)
Round 1: 6 sc in MR [6]
Round 2: inc around [12]
Round 3: (sc, inc) around [18]
Round 4: (2 sc, inc) around [24]
Round 5: (3 sc, inc) around [30]
Round 6: (4 sc, inc) around [36]
Round 7: (5 sc, inc) around [42]
Rounds 8–12: sc around [42]
Eye placement: place eyes between Rounds 10–11, about 9–11 stitches apart. Adjust spacing for a cuter look (wider eyes = more baby-like).
Round 13: (5 sc, inv dec) around [36]
Round 14: (4 sc, inv dec) around [30]
Round 15: (3 sc, inv dec) around [24]
Round 16: (2 sc, inv dec) around [18]
Start stuffing firmly, shaping the snout slightly forward.
Round 17: (sc, inv dec) around [12]
Round 18: inv dec around [6]
Fasten off and close.
Mouth Opening Placement (before adding insert)
Using a yarn needle and matching body yarn, lightly “sketch” the mouth curve on the front lower half of the head with a removable strand or pins. Aim for a wide smile shape that sits below the eyes.
This is your guide for where the mouth insert and teeth will go.
Mouth Insert (Color C)
Make an oval insert that will sit inside the mouth opening.
Ch 10
Round 1: sc in 2nd ch from hook, sc in next 7 ch, 3 sc in last ch; turn and work underside, sc in next 7 ch, 2 sc in last ch [20]
Round 2: inc, sc 7, inc x3 (around curve), sc 7, inc x2 (around curve) [26]
Round 3: sc around [26]
Fasten off leaving a long tail.
Optional tongue bump:
With same color, make a small half-oval (ch 6, sc back, then one increase row) and stitch it inside the insert for extra dimension.
Sew the mouth insert to the inside of the mouth curve you marked, slightly tucked in, so it looks like a deep mouth.
Teeth (Color D)
Make 6–10 tiny teeth depending on how toothy you want your dino.
Tooth (make multiple):
Ch 3
In 2nd ch from hook: sl st
In next ch: sc
Fasten off leaving a small tail.
Sew teeth along the upper edge of the mouth opening, spaced evenly. Keep them small and slightly irregular for a cute look.
Body (Color A)
Round 1: 6 sc in MR [6]
Round 2: inc around [12]
Round 3: (sc, inc) around [18]
Round 4: (2 sc, inc) around [24]
Round 5: (3 sc, inc) around [30]
Round 6: (4 sc, inc) around [36]
Rounds 7–11: sc around [36]
Round 12: (4 sc, inv dec) around [30]
Rounds 13–15: sc around [30]
Round 16: (3 sc, inv dec) around [24]
Start stuffing firmly, flattening the base slightly so it sits.
Round 17: sc around [24]
Round 18: (2 sc, inv dec) around [18]
Round 19: (sc, inv dec) around [12]
Round 20: inv dec around [6]
Fasten off leaving a long tail for sewing head to body.
Arms (make 2, Color A)
Round 1: 6 sc in MR [6]
Rounds 2–3: sc around [6]
Round 4: (sc, inv dec) around [4]
Rounds 5–7: sc around [4]
Lightly stuff the hand end only (optional). Flatten top and stitch closed. Fasten off with tail.
Legs (make 2, Color A)
Round 1: 6 sc in MR [6]
Round 2: inc around [12]
Rounds 3–5: sc around [12]
Round 6: (2 sc, inv dec) around [9]
Rounds 7–11: sc around [9]
Stuff firmly. Fasten off with a long tail.
Optional white claws (Color D):
Make 3 tiny nubs per foot (MR 4 sc, sl st, fasten off) and sew at the front of each leg, or embroider small white stitches instead.
Tail (Color A)
Round 1: 4 sc in MR [4]
Round 2: (sc, inc) around [6]
Rounds 3–5: sc around [6]
Round 6: (2 sc, inc) around [8]
Rounds 7–10: sc around [8]
Lightly stuff. Fasten off with tail and sew to back of body.
Back Bumps/Plates (Color B)
Make 3–5 small bumps.
Bump:
Round 1: 6 sc in MR [6]
Round 2: sc around [6]
Fasten off with tail.
Sew bumps along the top of the back, starting near the neck and moving toward the tail. Keep spacing even for a tidy look.
Assembly#
Sew head to body centered and secure. Add extra stitches around the neck for strength.
Sew legs to the lower sides/front so the dinosaur sits upright. Adjust placement before fully tightening stitches.
Sew arms to the upper sides of the body, slightly forward for a cute pose.
Sew tail to the back for balance.
Add back bumps and any extra details (claws, blush, nostrils).
Face finishing options:
Embroider small nostrils above the mouth opening with black or dark brown floss.
Add a couple of short “smile lines” at the mouth corners for extra expression.
Common Mistakes and How to Avoid Them#
The head looks lumpy
Cause: stuffing added in one big clump
Fix: stuff in small pinches and massage the head into shape before closing
Teeth look messy
Cause: uneven spacing or teeth too large
Fix: make all teeth first, line them up, then sew evenly; keep teeth small
The dino won’t sit
Cause: legs placed too far back or base not flattened
Fix: stuff the bottom firmly and sew legs slightly forward; flatten base while stuffing
Stuffing shows through stitches
Cause: hook too big or tension too loose
Fix: use a smaller hook and tighter tension, especially on the head
Mouth insert won’t sit neatly
Cause: insert too big or not anchored evenly
Fix: pin the insert first, sew with small stitches, and slightly gather the mouth edge around it
Expert Tips for Better Results#
Use invisible decreases for the smoothest finish, especially on the head and snout.
Pin everything before sewing. Tiny placement changes make a big difference in “cuteness.”
For a deeper open-mouth effect, tuck the mouth insert inward slightly and stitch the mouth edge down tightly around it.
If you want a more dramatic roar, add a few teeth on the lower edge too (fewer than the top).
For extra stability, add a small weighted pouch (rice in a sealed bag) inside the base (display plush only, not baby-safe).
Weave ends into the densest areas (neck join, base) so nothing peeks through the fabric.
Variations and Customization Ideas#
Make it baby-safe
Embroider eyes, skip separate teeth (embroider white triangles), and simplify back bumps to embroidered dots.
Make a pastel “kawaii” dino
Use mint, lavender, or peach for the body, white teeth, and pink mouth. Add blush cheeks.
Turn it into a keychain mini
Use fingering yarn and a 2.0–2.5 mm hook, reduce rounds (stop increases earlier), and add a loop at the top of the head.
Change the dinosaur type
Swap back bumps for sharper spikes to create a stegosaurus vibe.
Add a frill collar and horns to make a triceratops-inspired plush.
Lengthen the neck and tail for a brontosaurus-style dino.
Benefits of This Crochet Project#
Fast, giftable crochet pattern with big personality
Teaches essential amigurumi skills (shaping, stuffing, assembly)
Great stash-buster for small accent colors (mouth, teeth, bumps)
Customizable for any theme or nursery palette
Perfect for craft fairs, birthdays, and “just because” makes
Internal Linking Suggestions#
How to Crochet a Magic Ring (Beginner Tutorial)
Invisible Decrease Tutorial for Amigurumi
How to Place Safety Eyes for the Cutest Expression
Beginner Guide to Stuffing Amigurumi Evenly
Easy Crochet Dinosaur Patterns for Beginners (Collection Post)
How to Sew Amigurumi Parts Neatly (No Wobble Necks)
FAQ#
Is this crochet pattern suitable for beginners?
Yes, especially for confident beginners who know sc, inc, and dec. The open mouth detail looks advanced but is just an insert sewn into place.
What yarn is best for amigurumi dinosaurs?
Smooth cotton or acrylic in DK or worsted weight works best for clean stitches. Plush yarn is cuddly but harder to see stitches and sew details.
What size safety eyes should I use?
For worsted, 10–14 mm is common. For DK, 8–12 mm often looks balanced. Always test placement before locking them in.
How do I make the dinosaur sit upright?
Stuff the base firmly, flatten it slightly, and sew legs a bit forward. The tail also helps with balance.
Can I skip the teeth?
Absolutely. You can embroider a smile line instead, or add felt teeth (display only). For baby-safe versions, embroidery is best.
Why does my mouth insert pucker?
It’s usually too large or sewn too tightly in one area. Pin it evenly and sew with small, consistent stitches all the way around.
Can I make it bigger?
Yes. Use thicker yarn (or hold two strands together) and scale up your hook slightly while keeping stitches tight. Eye size should scale with the head.
Conclusion#
This T-Rex amigurumi crochet pattern is the perfect mix of cute and classic: a chunky little dinosaur with a big smile, tiny arms, and fun details that make it instantly recognizable. Once you make one, it’s easy to imagine a whole dino shelf—different colors, different spikes, different expressions.
If you tell me your yarn weight (DK or worsted) and the approximate size you want (mini shelf plush vs larger cuddly version), I can suggest the best hook size and safety-eye size so your dinosaur proportions come out just right.


