


Introduction#
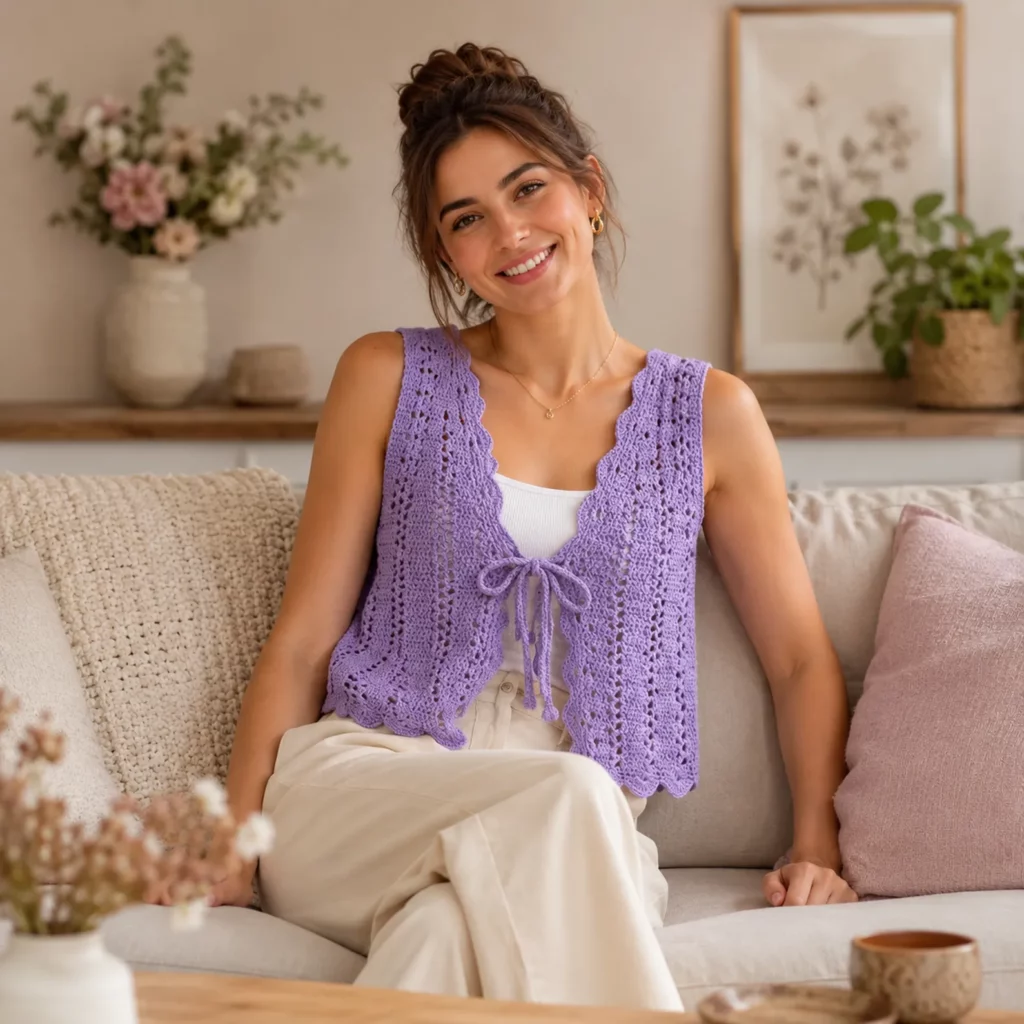
A sleeveless crochet vest is one of the easiest ways to make your wardrobe feel more “finished” without committing to a full sweater. You can throw it over a tee, a tank, or a dress, and suddenly the outfit looks styled—while still feeling comfortable and lightweight. This tie-front version has an especially charming look: delicate lace texture throughout, a softly scalloped hem, and a simple front tie that keeps the shape flattering without buttons or complex shaping.
Explore more beginner cardigans crochet patterns in our pattern library.
This crochet pattern is ideal if you love pieces that look vintage-inspired but still wearable every day. The stitchwork feels decorative, yet it’s built from beginner-friendly repeats. The construction is also straightforward: you’ll crochet a back panel, two front panels, seam the shoulders and sides, then add the edging, ties, and the scalloped hem finish.
Below you’ll find a detailed, crochet tutorial style guide that explains the stitches, sizing, materials, and step-by-step instructions—plus practical tips for making the vest sit neatly at the neckline and lay flat at the hem.
Detailed Description of the Crochet Pattern#
This project is a sleeveless, open-front vest (often called a sleeveless cardigan) with a few defining design features:
A lace-textured body made from repeating eyelet columns. The fabric has small openings that create a breezy, lightweight feel—perfect for layering in spring, summer evenings, or transitional weather.
A shaped armhole and shoulder line. The vest is mostly straight panels, but you’ll add simple armhole shaping and a clean shoulder join so it sits comfortably without pulling.
A front edge with a soft decorative texture. The front opening has a slightly more structured edging than the body, giving the piece a polished “finished” look.
A tie-front closure at the waist. Instead of buttons, you’ll crochet two ties and attach them to the inside edges so you can close it loosely or wear it open.
A scalloped hem. The bottom edge has gentle scallops that give the vest a sweet, feminine finish and help the garment look intentional even when worn casually.
Because the main body is panel-based, this is a forgiving DIY crochet garment. You can easily adjust length, change the tie placement, or make it more fitted with subtle decreases if you want.
Skill Level Explanation#
Skill Level: Confident Beginner
You’ll do great if you already know:
- Chain (ch)
- Single crochet (sc)
- Double crochet (dc)
- Working in rows
- Skipping stitches and working into chain spaces
- Basic seaming (whip stitch or mattress stitch)
Newer skills you’ll learn (or practice):
- A simple lace repeat that stays aligned row to row
- Clean edging along garment fronts and armholes
- Shaping armholes without stress
- Creating scallops that lie flat
- Making and attaching crochet ties neatly
If you’ve ever made a scarf, shawl, or basic cardigan panel, this crochet for beginners garment is a comfortable next step.
Materials Needed#
Yarn#
For a vest like this, drape matters. You want something soft that won’t feel stiff across the shoulders.
Recommended yarn weights:
- DK (Category 3) for a light, lacy vest with beautiful drape
- Worsted (Category 4) for a slightly warmer vest with clearer stitch definition
Best fibers:
- Cotton or cotton blends for a crisp, breathable look (great for warm weather)
- Bamboo blends for extra drape and a softer, dressy feel
- Acrylic for budget-friendly softness (choose a smooth, non-fuzzy yarn so lace shows)
Yardage estimate (approximate):
- XS–S: 700–1000 yards (DK)
- M–L: 1000–1400 yards (DK)
- XL–2XL: 1400–1900 yards (DK)
If using worsted, you’ll generally need fewer yards but a similar number of skeins by weight.
Hook#
- DK yarn: 4.0 mm to 4.5 mm
- Worsted yarn: 5.0 mm to 5.5 mm
Choose the hook that gives you a fabric that’s lacy but not floppy. If your lace holes look too large, go down a hook size.
Notions#
- Stitch markers
- Yarn needle
- Scissors
- Measuring tape
- Optional: blocking mats and pins (recommended for lace)
Stitches & Techniques Explained#
Common Abbreviations#
- ch = chain
- sc = single crochet
- dc = double crochet
- sl st = slip stitch
- sk = skip
- sp = space
- st(s) = stitch(es)
- ( ) = repeat
- RS/WS = right side/wrong side
Lace Repeat Used in This Pattern#
To match the airy vertical eyelet look, we’ll use a clean, beginner-friendly lace repeat that stacks nicely:
Eyelet Column Lace (worked in rows):
Row A: (dc, ch 1, sk 1) repeat across, dc in last st
Row B: dc across (working into dc stitches; keep chains aligned)
This creates tidy openings without huge gaps and keeps the fabric stable for a wearable garment.
Scallop Edge#
A classic scallop is a small shell worked into the same stitch/space. The most common is 5 dc in one stitch with skips between scallops. The key to pretty scallops is spacing: too close and they ruffle, too far and they flatten.

Step-by-Step Instructions#
Finished Size#
This pattern is written to be easily adjustable. Choose your size based on bust measurement and desired ease.
Suggested ease: 2–6 inches of positive ease (a relaxed fit works best for an open vest).
Size guide (finished garment bust, approximate):
- XS: 32–34″
- S: 35–37″
- M: 38–40″
- L: 41–44″
- XL: 45–48″
- 2XL: 49–52″
Length: adjustable (hip-length is classic for this style).
Gauge#
Gauge matters for wearables. Make a small swatch in the lace pattern.
Suggested gauge target (DK yarn, mid-size hook):
- 4″ x 4″ = about 14–16 dc and 8–10 rows in a dc-based fabric
Your lace section may measure slightly differently; the important thing is that your panel width matches your target size.
Notes Before You Start#
- Block your swatch before measuring. Lace changes size slightly after washing/blocking.
- This vest is made from 3 panels: back + 2 fronts.
- Keep stitch counts consistent. Lace patterns can accidentally add stitches if you work into chain spaces incorrectly.
- Use stitch markers to mark armhole shaping points.
Panel Construction Overview#
You’ll crochet:
- Back panel (rectangle + armhole shaping)
- Left front panel (rectangle + neckline shaping)
- Right front panel (mirror of left)
Then seam shoulders and sides, and finish with borders and ties.
Step 1: Back Panel#
Foundation chain:
Chain enough to reach your desired back width. A simple starting guideline is:
- XS–S: 16–18″ wide
- M–L: 18–21″ wide
- XL–2XL: 21–24″ wide
Make sure your starting chain count is an even number so the lace repeat works smoothly.
Row 1 (setup):
Dc in 4th ch from hook and dc across. Turn.
Row 2 (lace row):
Ch 3 (counts as dc), sk 1, (dc in next st, ch 1, sk 1) repeat across, dc in last st. Turn.
Row 3 (solid stabilizing row):
Ch 3, dc across (place dc into each dc stitch; ignore the ch-1 spaces by working into the actual stitches). Turn.
Repeat Rows 2–3 until the back reaches your desired length to the underarm (typically 10–13″ from the shoulder down for an adult vest, depending on your torso length).
Armhole shaping (simple and beginner-friendly):
To create armholes, you’ll “step in” a few stitches at each side over a few rows.
Example shaping (adjust based on size):
- Row 1 of shaping: skip first 2–3 stitches, work pattern across, turn, skip last 2–3 stitches
- Row 2 of shaping: skip first 1–2 stitches, work across, skip last 1–2 stitches
Then work even (no more skipping) until back panel reaches shoulder height.
Shoulder section:
Work even until the piece reaches your full desired length (commonly 18–22″ total length, adjustable). Fasten off.
Step 2: Front Panels (Make 2)#
Each front panel is narrower than the back. You’ll also create a gentle neckline slope on the inner edge.
Front panel width guideline:
Each front is roughly half the back width minus 1–2 inches for the opening overlap.
Foundation chain:
Chain to desired front width (even number).
Work Rows 1–3 as for the back panel. Continue repeating Rows 2–3 until you reach the underarm height.
Armhole shaping:
Shape the outer edge the same way you shaped the back panel sides.
Neckline shaping (inner edge):
Once you’re about 3–5 inches below the shoulder, begin decreasing at the inner front edge to create a soft curve.
Easy neckline decrease method:
At the beginning of every other row on the inner edge, skip 1 stitch (or work 2 stitches together) to gently slope the neckline. Continue until you reach the shoulder height.
Finish the shoulder:
Work even for the last 1–2 inches so the shoulder seam is stable and easy to sew. Fasten off.
Make the second front panel as a mirror (same shaping, opposite side).
Step 3: Seaming#
Shoulders:
Lay front panels on the back panel with RS facing. Sew shoulder seams using whip stitch or mattress stitch. Keep seams about 2–3 inches wide (or longer for wider shoulders).
Sides:
With RS facing, seam side edges from hem up to armhole depth, leaving the armhole opening unsewn. This vest style usually looks best with a slightly relaxed armhole.
Try-on tip:
Before fully securing seams, pin and try the vest on. Adjust side seam length to change looseness at the waist/hip.
Step 4: Edging and Tie Channel#
Now you’ll add finishing that makes the vest look polished.
Front and neckline edging (stabilizing):
Join yarn at the bottom front edge. Work sc evenly up the front, around neckline, and back down the other front edge.
Do 2–3 rounds of sc for a firm, clean edge.
Tie placement:
Mark the waist area (usually around the narrowest point of your torso or just above the natural waist). Attach ties to the inside edges here.
Step 5: Crochet Ties#
Make 2 ties.
Simple tie:
Ch 80–120 depending on how long you want the bow tails.
Row 1: sl st or sc in 2nd ch from hook and across (optional—gives thickness)
Fasten off with long tails and attach securely.
Alternative: i-cord style tie (crochet-only look):
Ch desired length, then sl st into back bumps of the chain for a rounder cord effect.
Sew ties to inside front edges at your marked waist points. Reinforce by stitching through multiple rows.
Step 6: Scalloped Hem#
To match the soft scalloped look, finish the bottom edge with a simple shell scallop.
Hem setup round:
Work 1 round of sc evenly around the entire bottom hem.
Scallop round:
(sk 2, 5 dc in next st, sk 2, sl st in next st) repeat around the hem.
If your scallops ruffle, increase the skip to sk 3 in a few places.
If scallops pull tight, reduce to sk 1.
Fasten off and weave in ends.
Common Mistakes and How to Avoid Them#
Lace columns drift or don’t line up
Cause: accidentally working into chain spaces instead of stitches
Fix: on stabilizing rows, work into the dc stitches consistently; use stitch markers at row ends
Vest edges curl at the opening
Cause: edge not reinforced enough
Fix: add 1–2 more sc edging rounds; consider crab stitch for extra firmness
Armholes feel tight
Cause: too much shaping or side seams too high
Fix: seam sides less, leaving a larger armhole opening; reduce the number of skipped stitches in shaping
Scalloped hem ruffles
Cause: shells too close together
Fix: increase skip count between shells or use smaller shells (3 dc instead of 5)
Neckline looks uneven
Cause: inconsistent decreases or tension changes
Fix: decrease at the same interval every time (every other row is easiest) and block at the end
Ties pull the vest awkwardly
Cause: tie placement too high/low
Fix: move ties to a more comfortable spot (natural waist is usually flattering); attach slightly closer to center for a snugger fit
Expert Tips for Better Results#
Block the panels before seaming. Lace relaxes and becomes more even, making seams cleaner.
Use cotton or bamboo blend for the prettiest drape and stitch definition.
If you want a smoother neckline curve, do smaller decreases more often (every other row) instead of big decreases occasionally.
Reinforce tie attachments with a small hidden patch of fabric or extra crochet stitches on the inside if you plan to wear it often.
For a more fitted vest, add subtle shaping at the waist by skipping 1 stitch at each side edge every few rows, then adding it back near the hips.
For a boutique finish, add a final crab stitch edging around armholes and neckline after the sc border rounds.
Variations and Customization Ideas#
Make it longer (tunic vest)
Add more rows before starting armhole shaping, and extend hem length by 2–5 inches.
Make it cropped
Stop the body 3–5 inches shorter and keep the scalloped hem for a cute summer layer.
Add buttons instead of ties
Create buttonholes on one front edge by chaining and skipping stitches, then sew buttons on the other side.
Add pockets
Crochet two simple sc rectangles and sew to the lower front panels before edging.
Change the lace pattern
Swap the eyelet column lace for:
- Moss stitch (sc, ch 1) for a modern texture
- Granny stripe for a classic crochet look
- Shell lace for a more dramatic openwork feel
Add a contrast trim
Use a contrasting yarn color for the scalloped hem and neckline edge for a statement finish.
Benefits of This Crochet Project#
A wearable crochet pattern that’s practical and stylish
Lightweight lace makes it perfect for layering
Panel construction keeps it beginner-friendly
Easy to resize for different body types and lengths
Scalloped hem and tie closure make it gift-worthy
A versatile piece you can remake in different yarns for different seasons
Internal Linking Suggestions#
How to Crochet a Lace Stitch for Beginners (Easy Eyelet Rows)
How to Block Crochet Garments (Lace and Wearables)
Beginner Guide to Sizing Crochet Clothing
How to Crochet a Scalloped Edge (Shell Border Tutorial)
Best Yarn for Crochet Garments (Cotton vs Acrylic vs Bamboo)
How to Seam Crochet Panels Neatly (Mattress Stitch Guide)
FAQ#
Is this crochet pattern suitable for beginners?
Yes, for confident beginners. The stitches are basic, and the shaping is simple. The lace repeat is repetitive and easy once you’ve done a few rows.
What yarn works best for a lacy vest?
Cotton blends and bamboo blends drape beautifully and show lace clearly. Acrylic works too, but may be warmer and slightly less crisp in the lace.
How do I resize the vest?
Adjust the width by changing the starting chain count for each panel, and adjust the length by adding or removing rows before armhole shaping. The pattern is very flexible.
Do I have to block it?
Blocking is strongly recommended. It evens out lace, helps panels match size, and makes the scalloped hem look much more polished.
How do I keep the front edges from curling?
Add multiple rounds of single crochet edging, keep tension even, and consider a crab stitch finish for extra stability.
Can I add sleeves?
Yes. You can pick up stitches around the armhole and work short sleeves in rounds using a simple lace or dc pattern. This turns the vest into a light cardigan.
Where should I place the tie?
Most people like it at the natural waist or slightly above. Pin the ties and try it on before sewing for the best fit.
Conclusion#
This tie-front lace vest is the kind of crochet pattern that feels satisfying to make and easy to wear. The airy stitch pattern keeps it lightweight, the scalloped hem adds a sweet vintage finish, and the tie closure makes it adjustable and flattering on many body shapes. Once you make one, it’s hard not to plan another in a different color.
If you tell me your bust measurement and whether you’re using DK or worsted yarn, I can suggest a starting chain count for each panel and a simple armhole shaping plan so your vest fits exactly the way you want.


