


Introduction#
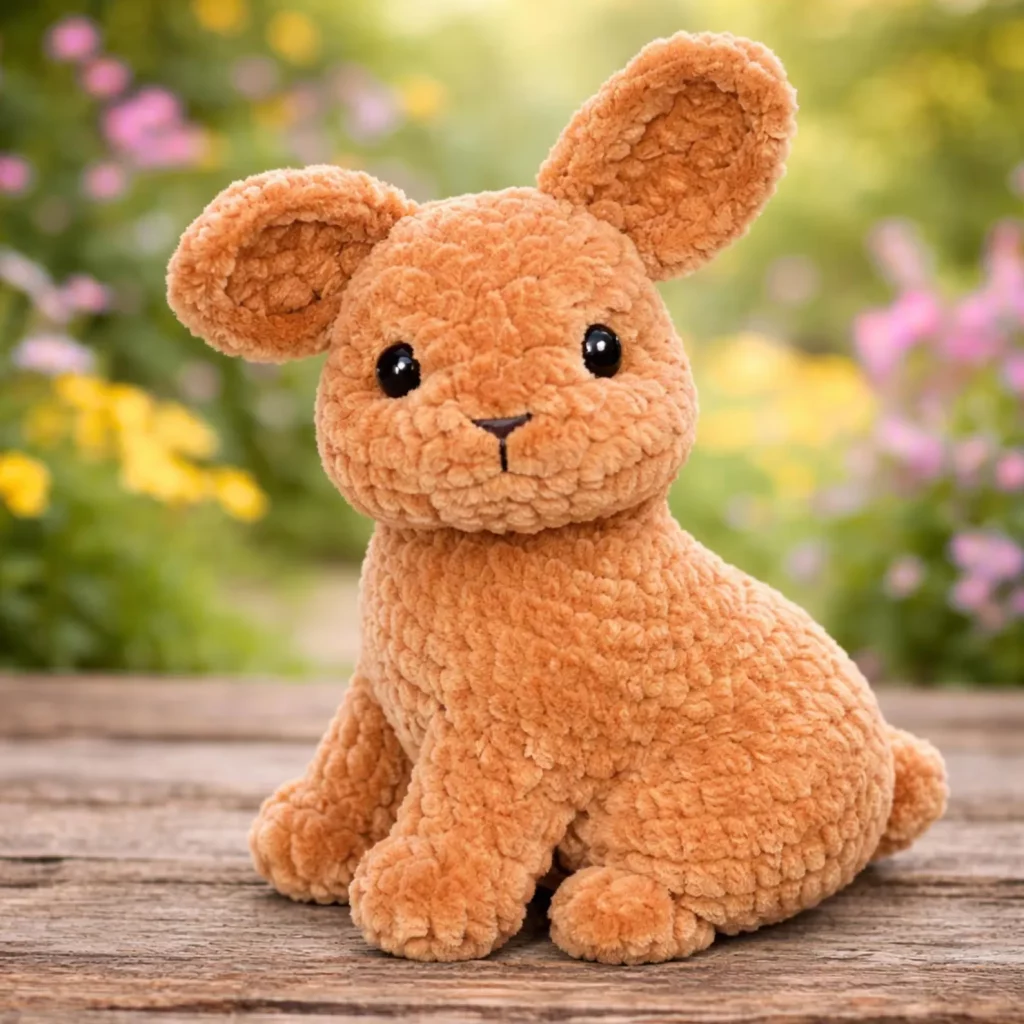
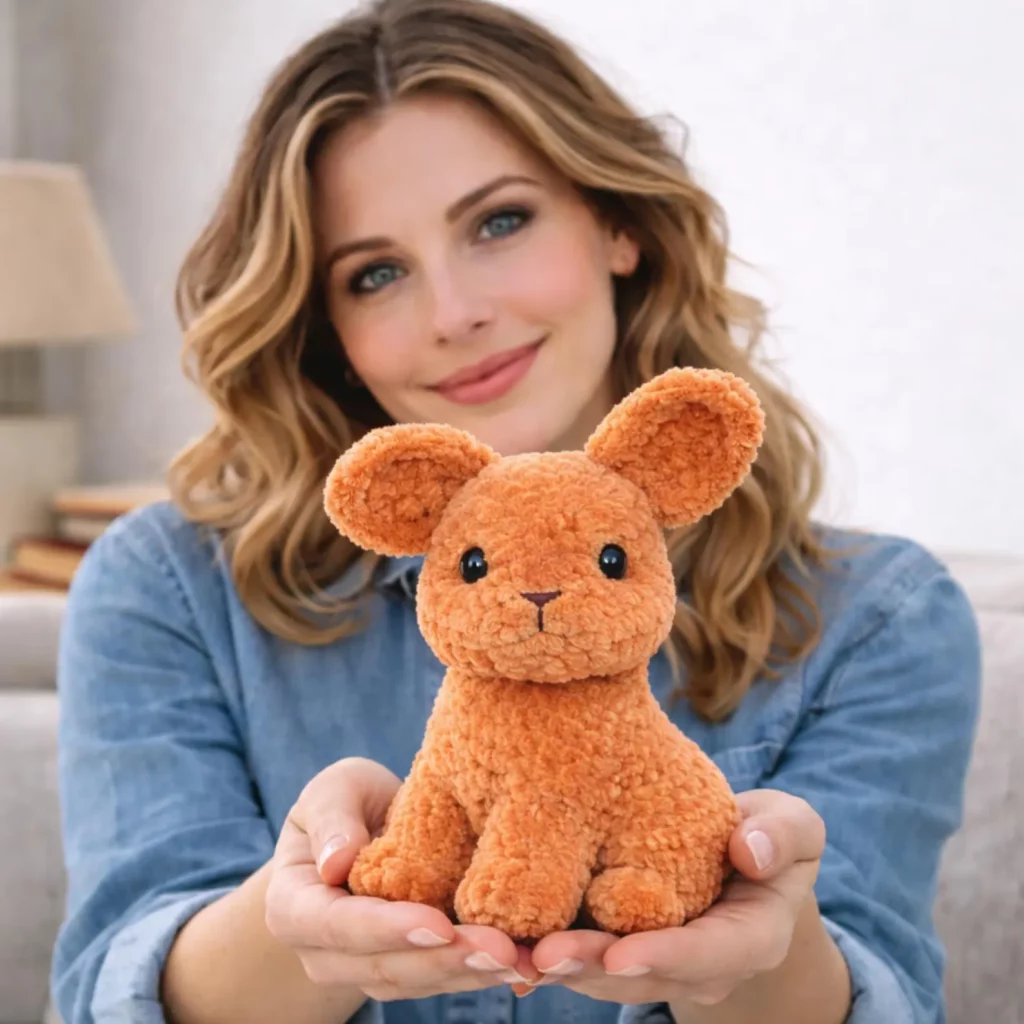
If you’ve been hunting for a crochet pattern that gives you that “instant cuddle” result—soft texture, sweet face, and a finished toy that looks store-quality—this plush bunny is it. Plush yarn amigurumi has a special kind of magic: the stitches work up fast, the toy feels luxurious, and even simple shaping looks extra cute because everything turns squishy and rounded.
Explore more beginner amigurumi crochet patterns in our pattern library.
This crochet pattern walks you through a sitting bunny with a chubby head, soft muzzle shape, and oversized ears that give it a gentle, baby-bunny look. The body is simple and stable, the limbs are easy tubes, and the face uses minimal details so you get maximum cuteness without complicated embroidery. You’ll also learn the best beginner tricks for chenille/blanket yarn (where stitches can be hard to see) so you don’t lose your place or end up with lopsided shaping.
Whether you’re making a nursery gift, a comfort plush, a springtime basket buddy, or a cozy companion for your couch, this free crochet pattern is designed to be practical, teach you something, and help you finish with a result you’ll be proud to show off.
Detailed Description of the Crochet Pattern#
This plush bunny is built in classic amigurumi style, but optimized for thick, fluffy yarn:
- Round head with a gentle snout/muzzle shape created by placement and embroidery
- Big upright ears that read “bunny” instantly (they can be made floppier or stiffer)
- Simple seated body that’s slightly pear-shaped for stability
- Short arms that rest nicely at the sides
- Chunky legs/feet that help the bunny sit without tipping
- Minimal face: safety eyes or embroidered eyes, plus a tiny nose and mouth line
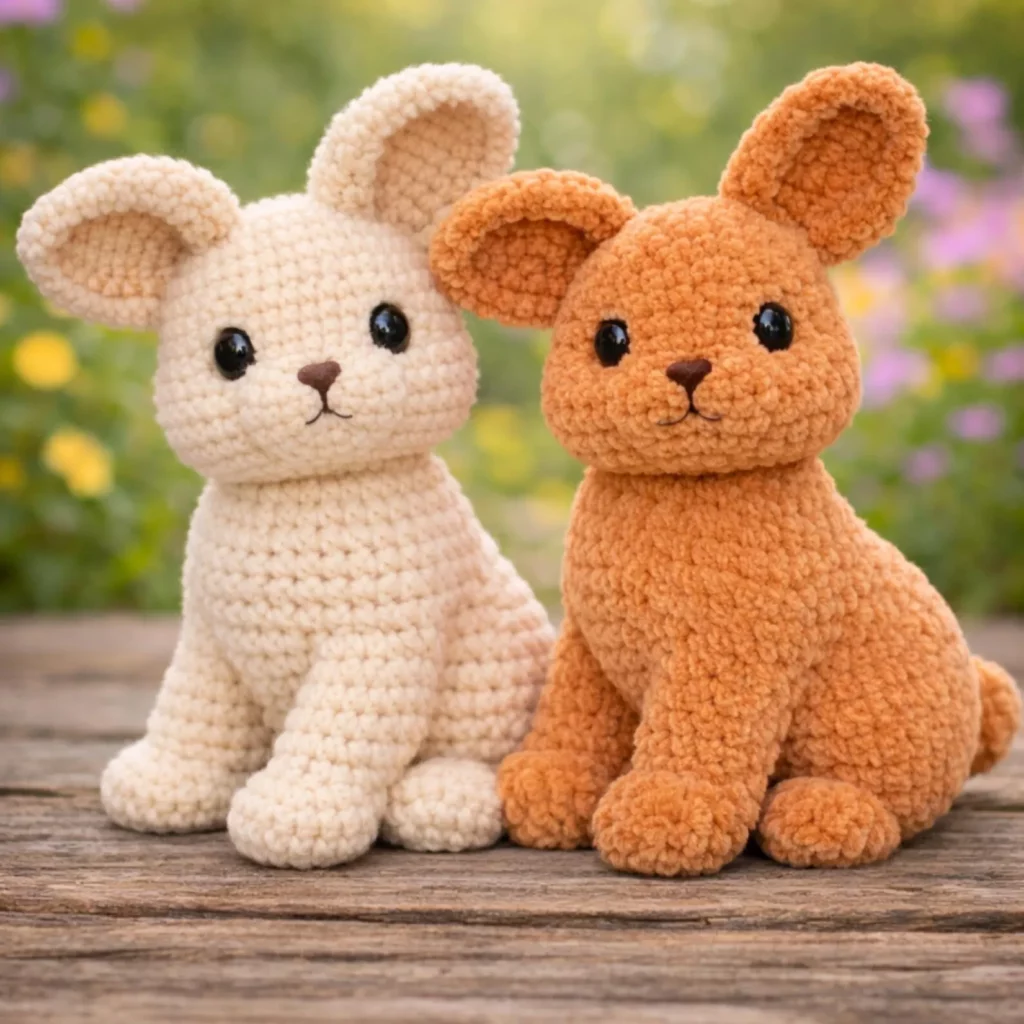
The overall style is “kawaii plush” (cute and clean), and it’s very customizable. Make it in classic tan, cream, gray, or pastel—this shape looks good in everything.
Skill Level Explanation#
This is an easy crochet pattern for confident beginners, and a relaxing project for experienced crocheters.
You’ll need:
- Single crochet in the round
- Increases and invisible decreases
- Basic sewing/assembly
- Simple embroidery (nose/mouth)
Plush yarn adds one learning curve: counting stitches. But the shaping itself is straightforward and forgiving, and I’ll give you practical ways to stay on track.
Materials Needed#
Yarn
For the soft, fuzzy look, use super bulky (#6) chenille/blanket yarn. It’s fast, plush, and gives that “pillow pet” feel.
Recommended yarn types:
- Chenille/blanket yarn (#6) for the main bunny
- Optional small amount of worsted or embroidery floss for face details (stronger, cleaner lines)
Color ideas:
- Warm tan, caramel, beige, cream
- Pastels for baby gifts (peach, mint, lavender)
- Two-tone: contrasting inner ears or muzzle
Yardage (approximate, depends on yarn thickness and size):
- 1–2 skeins (#6) for a medium plush bunny
- A small scrap of black/brown for embroidery
Hook
Use a hook that creates a dense fabric (no visible stuffing gaps):
- Plush yarn (#6): 6.0–7.0 mm (start at 6.5 mm and adjust)
Notions
- Fiberfill stuffing (plush yarn projects need a good amount)
- Stitch markers (use more than one if you like)
- Yarn needle (large eye)
- Scissors
- Safety eyes: 12–18 mm (size depends on finished scale)
- Optional: embroidery floss/yarn for nose and mouth
- Optional: poly pellets in a fabric pouch for extra base weight
- Optional: felt for eye highlights (if you want extra “sparkle”)
Stitches & Techniques Explained#
Abbreviations (US terms)
- MR = magic ring
- sc = single crochet
- inc = increase (2 sc in same stitch)
- dec = invisible decrease (sc2tog through front loops)
- sl st = slip stitch
- ch = chain
- ( ) = repeat
- = stitch count
Plush yarn tips that actually help
- Count by touch: feel for the “V” of each stitch rather than trying to see it.
- Use a running marker: place a stitch marker in the first stitch of every round.
- Add “milestone markers”: if a round has 48 stitches, place a marker every 12 stitches so you can count in chunks.
- Invisible decreases are your friend: they disappear beautifully in plush yarn and keep the shape smooth.
Safety note (especially for gifts)
If the plush is for a child under 3, embroidered eyes are typically safer than plastic safety eyes. (Always follow your local toy safety guidance.)
Step-by-Step Instructions#
Notes:
- Work in continuous rounds unless stated.
- Use a stitch marker.
- Stuff gradually and shape as you go.
- Stitch counts assume a medium plush bunny in #6 yarn. If your yarn is thicker/thinner, the finished size will change but the pattern still works.
Head (main color)
R1: MR, 6 sc [6]
R2: inc x6 [12]
R3: (sc, inc) x6 [18]
R4: (2 sc, inc) x6 [24]
R5: (3 sc, inc) x6 [30]
R6: (4 sc, inc) x6 [36]
R7: (5 sc, inc) x6 [42]
R8: (6 sc, inc) x6 [48]
R9–R12: sc around [48]
Eye placement:
Place safety eyes between R10–R11, about 10–14 stitches apart.
Tip: Wider spacing = calmer, cuter expression. Closer spacing = “baby” look.
Begin closing:
R13: (6 sc, dec) x6 [42]
R14: (5 sc, dec) x6 [36]
R15: (4 sc, dec) x6 [30]
Start stuffing firmly.
R16: (3 sc, dec) x6 [24]
R17: (2 sc, dec) x6 [18]
R18: (sc, dec) x6 [12]
R19: dec x6 [6]
Fasten off, weave in.
Nose and Mouth (embroidery)
Use black/brown embroidery floss or smooth yarn (easier to stitch cleanly than chenille).
- Nose: small triangle or tiny horizontal oval centered under the eyes
- Mouth: short vertical line down from the nose, then a tiny “smile” curve
Keep it minimal—plush yarn already adds softness, so tiny details read best.
Body (main color)
This body is a stable seated shape with a slightly wider bottom.
R1: MR, 6 sc [6]
R2: inc x6 [12]
R3: (sc, inc) x6 [18]
R4: (2 sc, inc) x6 [24]
R5: (3 sc, inc) x6 [30]
R6: (4 sc, inc) x6 [36]
R7: (5 sc, inc) x6 [42]
R8–R12: sc around [42]
Slight taper upward:
R13: (5 sc, dec) x6 [36]
R14–R15: sc around [36]
Stuff firmly, especially the bottom. If adding a weight pouch, put it in now and cover it with stuffing.
Close:
R16: (4 sc, dec) x6 [30]
R17: (3 sc, dec) x6 [24]
R18: (2 sc, dec) x6 [18]
Fasten off leaving a long tail for attaching head.
Arms (make 2)
Short, soft arms look sweet and keep the bunny cuddly.
R1: MR, 6 sc [6]
R2: (sc, inc) x3 [9]
R3–R6: sc around [9]
Lightly stuff (optional—many plush arms look best barely stuffed).
Flatten and close with 4–5 sc across. Leave tail for sewing.
Legs/Feet (make 2)
These help the bunny sit upright and look “plush.”
R1: MR, 6 sc [6]
R2: inc x6 [12]
R3: (sc, inc) x6 [18]
R4–R7: sc around [18]
Stuff firmly, especially the foot end.
Flatten the top and close with 9 sc across. Leave tail.
Ears (make 2)
Big ears are the signature. You can make them upright (light stuffing) or floppier (no stuffing).
R1: MR, 6 sc [6]
R2: (sc, inc) x3 [9]
R3: sc around [9]
R4: (2 sc, inc) x3 [12]
R5–R10: sc around [12]
Optional taper at the base:
R11: (2 sc, dec) x3 [9]
R12: sc around [9]
Flatten and close with 4–5 sc across. Leave long tail.
Ear shaping options:
- Upright ears: lightly stuff the bottom third only
- Floppy ears: do not stuff; sew slightly outward
Optional Tail
A tiny puff tail adds charm.
R1: MR, 6 sc [6]
R2: inc x6 [12]
R3: sc around [12]
Fasten off, lightly stuff, sew onto the back.
Assembly#
This is where your plush looks “professional.” Take your time and pin first.
Attach head to body
- Center head on the top opening of the body.
- Pin in 4 points (front, back, left, right).
- Sew around with whip stitch.
- Reinforce with a second pass if the plush will be hugged a lot.
Attach legs
- Pin legs low on the front of the body so the bunny sits.
- The feet should angle slightly forward.
- Sew firmly.
Attach arms
- Sew arms to the sides, slightly below the head join.
- Angle them forward a bit for a cuddly pose.
Attach ears
- Pin ears on top of the head.
- Check symmetry from the front before sewing.
- Sew securely with multiple stitches (ears get pulled a lot).
Add tail (optional)
Sew tail to the back, centered and slightly above the base.
Common Mistakes and How to Avoid Them#
- Stitches are hard to count (plush yarn issue): use more stitch markers—every 10–12 stitches is a game changer.
- Head looks lumpy: stuffing needs to be in small tufts; shape the head with your hands before closing.
- Eyes look uneven: test placement with pins first. For safety eyes, don’t snap the backs until you’re sure.
- Bunny tips forward: legs are too low/too close together or base isn’t stuffed firmly. Add more stuffing or a small weight pouch.
- Ears don’t match: count rounds carefully and pin both ears before sewing either one fully.
Expert Tips for Better Results#
- Use embroidery floss for facial details: chenille yarn can look chunky for noses and mouths.
- Reinforce joins: big plushies get hugged; stitch arms/ears with extra passes.
- Shape as you go: after each stuffing step, gently “roll” the piece between your palms to smooth lumps.
- Add subtle cheek blush: a tiny dab adds instant personality.
- Want a cleaner seam? sew through consistent loops (outer loops on the body, edge loops on the part).
Variations and Customization Ideas#
- Two-tone bunny: use a lighter inner ear (sew a felt oval or crochet a small oval panel).
- Sleepy bunny: embroider curved closed eyes instead of using safety eyes.
- Baby-safe version: embroidered eyes + stitched nose only, no plastic pieces.
- Jumbo bunny: use thicker chenille and add 2–4 extra “even rounds” in head and body.
- Tiny bunny: switch to worsted yarn and a 3.0 mm hook; keep stitch counts the same.
- Accessories: add a bow tie, scarf, tiny backpack, or a mini carrot plush.
Benefits of This Crochet Project#
- Works up quickly with plush yarn
- Beginner-friendly shaping with a high “wow” result
- Super giftable for babies, birthdays, holidays, and spring baskets
- Easy to customize colors and expression
- Great stash-buster for chenille yarn
- Excellent crochet tutorial project for learning plush yarn techniques
Internal Linking Suggestions#
If you’re building a crochet blog, link this pattern to:
- How to Crochet with Chenille/Blanket Yarn
- Magic Ring Tutorial for Beginners
- Invisible Decrease for Amigurumi
- How to Attach Safety Eyes Securely
- How to Stuff Amigurumi Without Lumps
- Easy Beginner Amigurumi Projects
FAQ Section#
Is this a good crochet pattern for beginners?
Yes. It uses simple stitches (mostly single crochet) and the shaping is classic amigurumi. Plush yarn just requires careful counting.
What yarn is best for a plush bunny?
Super bulky chenille/blanket yarn creates the softest result. If you prefer sharper stitch definition, use worsted cotton or acrylic.
Can I make this without safety eyes?
Absolutely. Embroidered eyes are adorable and often preferred for baby gifts.
How do I make the bunny bigger or smaller?
Change yarn weight and hook size to scale up/down. For extra size, add more even rounds in the head and body.
How do I keep the bunny sitting upright?
Stuff the base firmly, place legs slightly forward and spaced apart, and add a small weighted pouch inside the bottom if needed.
Why do my plush stitches look uneven?
Plush yarn hides the stitch “V.” Slow down, count by touch, and use stitch markers frequently—especially on increase/decrease rounds.
Conclusion#
A super soft plush bunny is one of those crochet patterns that feels like pure comfort: simple to stitch, fast to finish, and impossible not to cuddle once it’s done. With clean shaping, careful stuffing, and a few thoughtful details (eyes, ears, tiny nose), you’ll end up with a plush that looks polished and gift-ready.
If you tell me your yarn brand/weight and the size you want (small, medium, jumbo), I can tweak the round counts (especially the body “even rounds”) and recommend the best eye size so your bunny comes out perfectly proportioned.


