


Introduction#
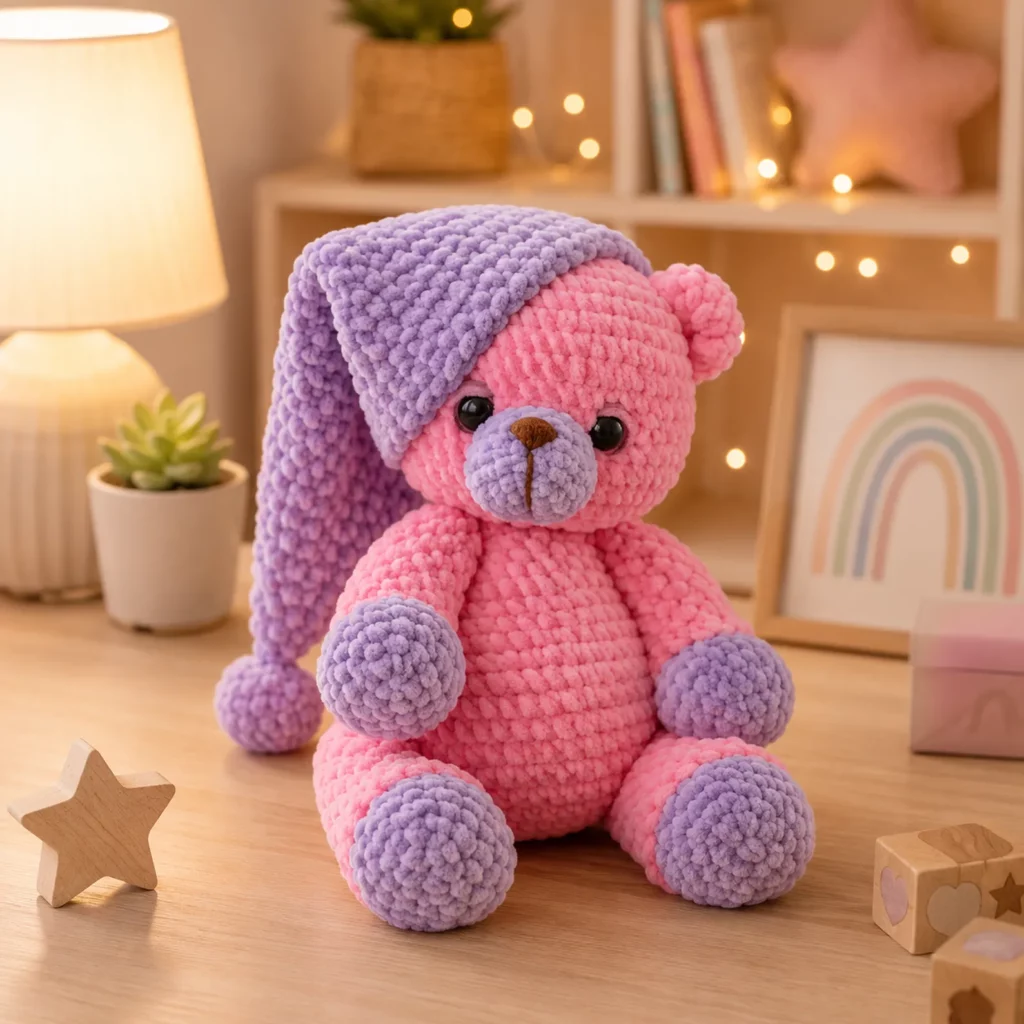
Some crochet toys are “cute,” and some are the kind you can already picture sitting on a pillow, waiting to be hugged. This sleepy teddy bear is definitely the second kind. With a soft plush texture, a snuggly pajama-style body, and an oversized floppy nightcap, it looks like the perfect bedtime buddy—sweet, cozy, and gift-ready.
Explore more beginner amigurumi crochet patterns in our pattern library.
If you’ve been searching for a crochet pattern that feels extra special but still doable, this one hits a wonderful balance. The shaping is classic amigurumi (round head, rounded body, simple limbs), and the personality comes from the details: contrast cuffs, a bold snout, and a hat that drapes like a real sleep cap. You can keep it simple for a beginner-friendly plush, or add optional touches like embroidered sleepy lashes, a little bow, or even a tiny blanket.
Below is a full free crochet pattern written in a crochet tutorial style, with clear steps, stitch explanations, sizing tips, and finishing tricks so your teddy looks polished and sits nicely.
Detailed Description of the Crochet Pattern#
This project is a seated amigurumi teddy bear wearing “pajamas.” The design is made with thick, plush-style yarn for maximum cuddle factor, but the construction stays straightforward: crochet the parts in the round, stuff, then assemble.
Key features you’ll create
A large round head with a contrasting muzzle (snout) and centered nose line
A rounded body shaped like a soft capsule so the bear naturally sits
Color-block pajama effect: body and limbs in one color with contrasting paws/cuffs
A floppy nightcap with a rounded tip (and an optional pom-pom)
Optional sleepy expression details like embroidered lashes or eyebrows
The overall silhouette is compact and adorable, with short limbs and a gentle, plushy shape that’s perfect for bedtime décor or gifting.
Skill Level Explanation#
Skill Level: Confident Beginner
You’ll do great if you already know
Magic ring (or starting chain ring)
Single crochet (sc) in continuous rounds
Increase (inc) and decrease (dec)
Simple sewing/assembly for amigurumi
Newer (but learnable) skills you’ll practice
Working with plush/chenille yarn (harder to see stitches, easier to “feel” them)
Clean color changes for pajama color blocking
Positioning safety eyes evenly
Attaching a snout and hat neatly so the face looks centered
If you’re brand new to amigurumi, you can still make this, but I recommend practicing a small sphere first so you’re comfortable counting rounds.
Materials Needed#
Yarn#
This bear is ideal in plush/chenille “blanket” yarn because it makes the toy soft and squishy. You can also use worsted yarn for a smaller bear with sharper stitch definition.
Recommended yarn weights
Plush/chenille blanket yarn (Category 6) for the cuddly look
Worsted (Category 4) for a smaller, more detailed bear
Suggested fibers
Polyester plush yarn for softness
Acrylic for an easy-care alternative
Cotton (not as plush, but very clean stitches)
Color planning (classic pajama teddy)
A: Pajamas main color (blue)
B: Head/contrast color (pink) or make head match body
C: Snout color (yellow/cream)
D: Nose detail color (brown)
Optional: hat color to match pajamas (blue) and cuffs in a contrast (pink)
Yarn amount (approximate)
Plush yarn: 200–350 yards total depending on size and hat length
Worsted yarn: 250–450 yards total
Hook#
Plush yarn: 5.0–6.5 mm depending on yarn thickness and your tension
Worsted: 3.25–4.0 mm
Tip: For amigurumi, choose a hook size that makes your stitches tight enough that stuffing doesn’t peek through.
Notions#
Stitch marker
Yarn needle
Scissors
Fiberfill stuffing
Safety eyes (12–18 mm for plush yarn; 8–12 mm for worsted)
Embroidery floss or thin yarn for nose/mouth details
Optional: blush for cheeks
Safety note: If this toy is for babies/toddlers, embroider the eyes instead of using safety eyes and sew all pieces extremely securely.
Stitches & Techniques Explained#
Abbreviations#
MR = magic ring
sc = single crochet
inc = increase (2 sc in same stitch)
dec = decrease (sc 2 together)
inv dec = invisible decrease (recommended)
sl st = slip stitch
ch = chain
st(s) = stitch(es)
( ) = repeat
Invisible Decrease (helps plush look smoother)#
Insert hook into the front loop of the next stitch, then into the front loop of the following stitch, yarn over and pull through both loops, yarn over and finish sc. This reduces “bumpiness” on the head.
Plush yarn tip: “count by feel”#
With chenille yarn, stitches can be hard to see. Use these tricks
Use a stitch marker every round start
Feel for the V-shapes with your fingers
Count stitches as you make them (quietly counting out loud helps)
Clean color changes (for cuffs and pajama blocks)#
On the last stitch of the old color, stop with 2 loops on hook, yarn over with the new color, pull through to finish the stitch. This makes the color boundary cleaner.

Step-by-Step Instructions#
Finished Size
Plush yarn version: approximately 10–14 inches tall sitting (varies by yarn and hook)
Worsted version: approximately 7–10 inches tall sitting
Notes Before You Start
Work in continuous rounds unless stated
Use a stitch marker and move it every round
Stuff firmly but smoothly, especially the head
Plush yarn stretches if overstuffed, so add stuffing gradually
Color Key (example)
A = Blue (pajamas + hat)
B = Pink (head accents/cuffs)
C = Yellow/cream (snout)
D = Brown (nose embroidery)
Head (Color B or your main bear color)
Round 1: 6 sc in MR [6]
Round 2: inc around [12]
Round 3: (sc, inc) around [18]
Round 4: (2 sc, inc) around [24]
Round 5: (3 sc, inc) around [30]
Round 6: (4 sc, inc) around [36]
Round 7: (5 sc, inc) around [42]
Rounds 8–12: sc around [42]
Place safety eyes between Rounds 10–11, about 8–10 stitches apart (adjust for your preferred expression).
Round 13: (5 sc, inv dec) around [36]
Round 14: (4 sc, inv dec) around [30]
Round 15: (3 sc, inv dec) around [24]
Stuff firmly, shaping into a smooth ball.
Round 16: (2 sc, inv dec) around [18]
Round 17: (sc, inv dec) around [12]
Round 18: inv dec around [6]
Fasten off and close. Weave in end.
Snout/Muzzle (Color C)
Round 1: 6 sc in MR [6]
Round 2: inc around [12]
Round 3: (sc, inc) around [18]
Round 4: sc around [18]
Fasten off leaving a long tail.
Optional: add a tiny pinch of stuffing behind the snout as you sew to make it puffy.
Embroider the nose and mouth (Color D)
Stitch a small triangular/oval nose at the top center of the snout. Add a short vertical line down and a small smile line if desired.
Sew snout to the lower front of the head, centered beneath the eyes.
Ears (Make 2, Color B)
Round 1: 6 sc in MR [6]
Round 2: (sc, inc) around [9]
Round 3: sc around [9]
Flatten and sc across the top to close (about 4 sc).
Fasten off with a long tail for sewing.
Sew ears to the top sides of the head, slightly behind the eyes for a cute rounded look.
Body (Color A, pajama color)
Round 1: 6 sc in MR [6]
Round 2: inc around [12]
Round 3: (sc, inc) around [18]
Round 4: (2 sc, inc) around [24]
Round 5: (3 sc, inc) around [30]
Rounds 6–10: sc around [30]
Round 11: (3 sc, inv dec) around [24]
Rounds 12–14: sc around [24]
Start stuffing firmly, flattening the base slightly so the bear sits.
Round 15: (2 sc, inv dec) around [18]
Round 16: sc around [18]
Round 17: (sc, inv dec) around [12]
Round 18: inv dec around [6]
Fasten off leaving a long tail for sewing head to body.
Arms (Make 2)
Start with cuff color (B), then switch to pajama color (A).
Round 1 (B): 6 sc in MR [6]
Rounds 2–3: sc around [6]
Change to A
Round 4: sc around [6]
Round 5: (sc, inv dec) around [4]
Rounds 6–11: sc around [4]
Lightly stuff the hand end only (optional). Flatten top and stitch closed. Fasten off with tail.
Sew arms to the sides of the body just below the head join.
Legs (Make 2)
Start with foot color (B), then switch to pajama color (A).
Round 1 (B): 6 sc in MR [6]
Round 2: inc around [12]
Rounds 3–4: sc around [12]
Change to A
Round 5: (2 sc, inv dec) around [9]
Rounds 6–12: sc around [9]
Stuff firmly. Fasten off with a long tail.
Sew legs to the lower front sides of the body so the bear sits.
Nightcap (Color A)
This is a long, floppy cone hat with a rounded top. Adjust length by adding rounds.
Round 1: 6 sc in MR [6]
Round 2: (sc, inc) around [9]
Round 3: (2 sc, inc) around [12]
Round 4: (3 sc, inc) around [15]
Round 5: (4 sc, inc) around [18]
Rounds 6–16: sc around [18] (add more rounds for a longer, floppier hat)
Brim Round (optional for a neat edge): sc around, then sl st to finish.
Fasten off leaving a long tail. Do not stuff.
Sew hat to the top of the head so it drapes to one side.
Optional pom-pom
Make a small ball in matching color: 6 sc in MR, inc around [12], sc 1 round, dec around [6], close. Attach to hat tip.
Assembly
Sew head to body centered and secure. Add extra stitches around the neck for strength.
Attach legs so the bear sits and balances.
Attach arms.
Sew snout and ears if not already attached.
Sew the hat last so you can position it perfectly with the face.
Common Mistakes and How to Avoid Them#
The plush looks lumpy
Cause: stuffing added in big clumps
Fix: add small pinches and shape with your hands as you go
Safety eyes look uneven
Cause: inserted without measuring
Fix: count the stitches between eyes and align them on the same round
Snout looks crooked
Cause: sewn without pinning
Fix: pin snout in place, check from multiple angles, then sew
Hat won’t drape nicely
Cause: hat too stiff or too short
Fix: add more rounds for length, use a slightly larger hook, and do not stuff the hat
Arms/legs twist outward
Cause: attachment points not symmetrical
Fix: mark placement with pins first and sew through multiple stitches for stability
Expert Tips for Better Results#
Use a stitch marker and count by feel when working with plush yarn
Embroider the nose before sewing the snout on so you can center it more easily
For an extra “sleepy” look, embroider curved closed eyes with lashes instead of safety eyes
To make the bear sit better, slightly flatten the bottom while stuffing and place legs a touch forward
If you want a more structured hat brim, add one increase round at the hat opening before sewing it on
For a truly gift-worthy finish, lightly steam the hat (not the plush yarn directly) to relax the drape
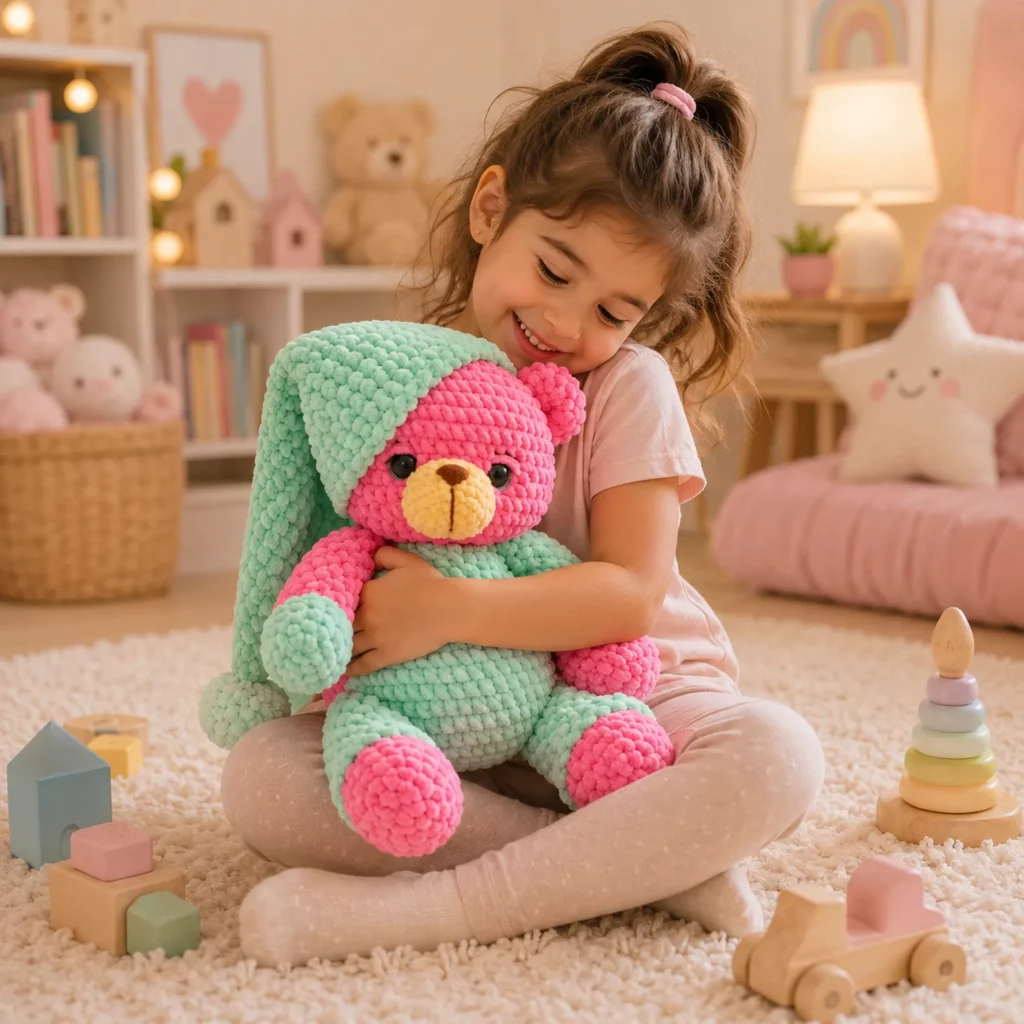
Variations and Customization Ideas#
Make it baby-safe
Embroider eyes and skip any hard parts. Use simple stitched teeth-free, bead-free details.
Change the pajama style
Add a tiny scarf instead of a hat
Add a small nightshirt hem by crocheting a ruffle round at the bottom of the body
Add stripes by changing colors every 2–3 rounds on the body
Turn it into a “bedtime set”
Crochet a mini blanket in a simple stitch
Add a tiny pillow (small rectangle sewn shut)
Add a small star or moon applique to the hat
Adjust the size
Use thicker yarn for a bigger bear
Use DK yarn for a smaller bear
Keep the stitch counts the same and let yarn choice scale the plush naturally
Benefits of This Crochet Project#
A high-cuteness crochet pattern that’s still beginner-friendly
Perfect handmade gift for baby showers, birthdays, or bedtime routines
Works well with plush yarn for maximum softness
Customizable colors make it easy to match nursery themes
A great stash-buster for small accent colors (snout, cuffs, hat)
Internal Linking Suggestions#
Beginner Guide to Amigurumi: How to Crochet in the Round
Invisible Decrease Tutorial for Smoother Plushies
How to Work With Plush Yarn Without Losing Your Place
How to Place Safety Eyes for the Cutest Expression
Easy Crochet Hat Patterns for Amigurumi Toys
How to Stuff Amigurumi Evenly Without Lumps
FAQ#
Is this crochet pattern good for beginners?
Yes for confident beginners. The shaping is simple, and the details are optional. The only challenge is plush yarn visibility, which you can manage with stitch markers and counting.
What yarn works best for a sleepy teddy bear?
Plush/chenille yarn makes it extra cuddly and gives the soft toy look. Worsted cotton or acrylic works too for a smaller, more detailed bear.
What size safety eyes should I use?
For plush yarn bears, 12–18 mm often looks balanced. For worsted, 8–12 mm is common. Always test placement before locking the backs.
How do I make it baby-safe?
Embroider eyes, avoid hard parts, and stitch all pieces securely. Keep details simple and tightly attached.
Why does my hat look stiff instead of floppy?
It’s usually tension or hat length. Use a slightly larger hook, add more rounds, and keep the hat unstuffed.
Can I make the bear bigger?
Yes. Use thicker yarn or hold two strands together. You can also add extra rounds to the body and head “straight” sections for more height.
How do I keep the snout centered?
Pin it first, measure the distance to each eye, and sew with small, even stitches. Embroider the nose before attaching for easier centering.
Conclusion#
This sleepy teddy bear crochet pattern is the kind of project that feels comforting to make and even better to gift. The pajama color blocking keeps it playful, the nightcap adds instant bedtime charm, and the simple amigurumi shapes make it approachable even if you’re still building confidence.
If you tell me your yarn type (plush/chenille or worsted) and the approximate size you want, I can adjust the stitch counts and recommend the best hook and eye size so your bear turns out perfectly proportional.


