


Introduction#
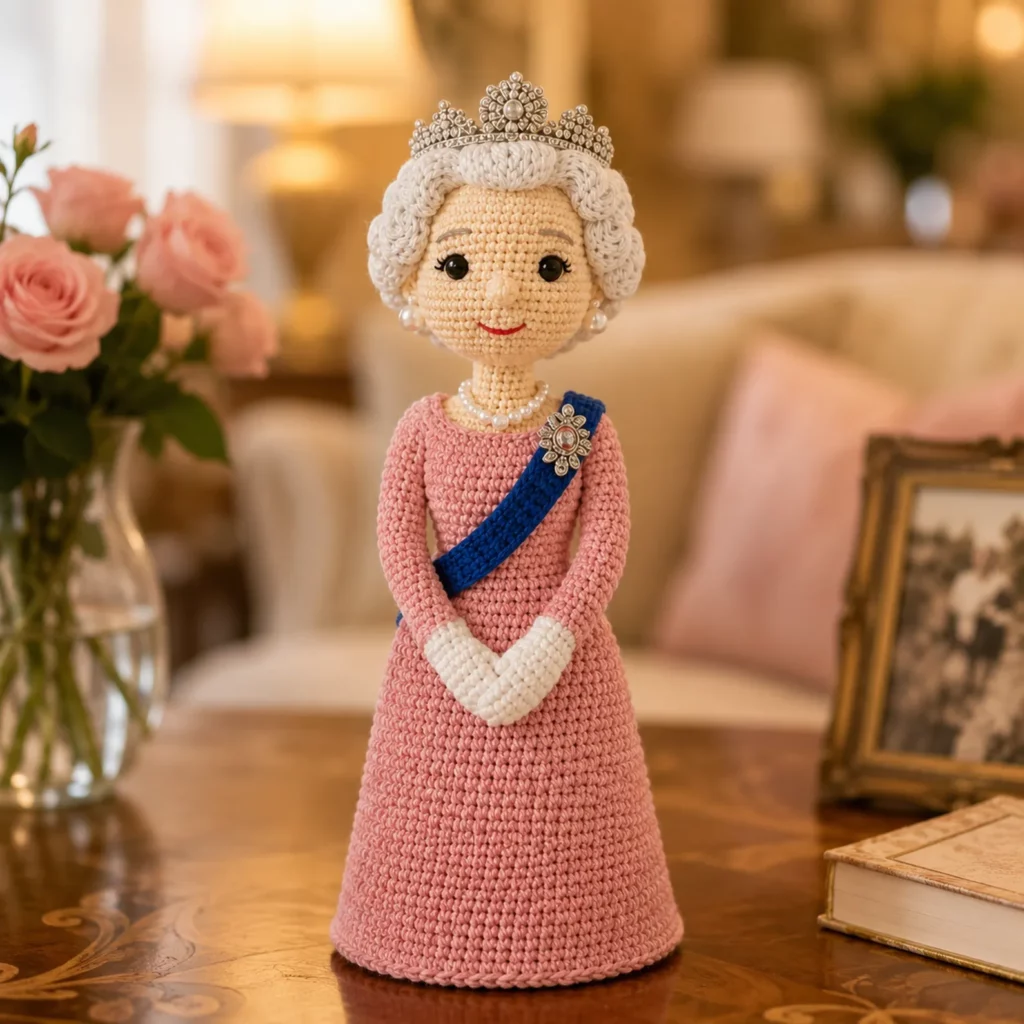
Some crochet projects are cute. Others are unforgettable. A royal-inspired amigurumi doll falls firmly into the second category—because it combines classic amigurumi shaping with those extra “character” details that make people stop and stare. Think elegant gown, polished hair, a sparkling crown, and a tiny sash that instantly gives the doll a ceremonial look.
Explore more beginner amigurumi crochet patterns in our pattern library.
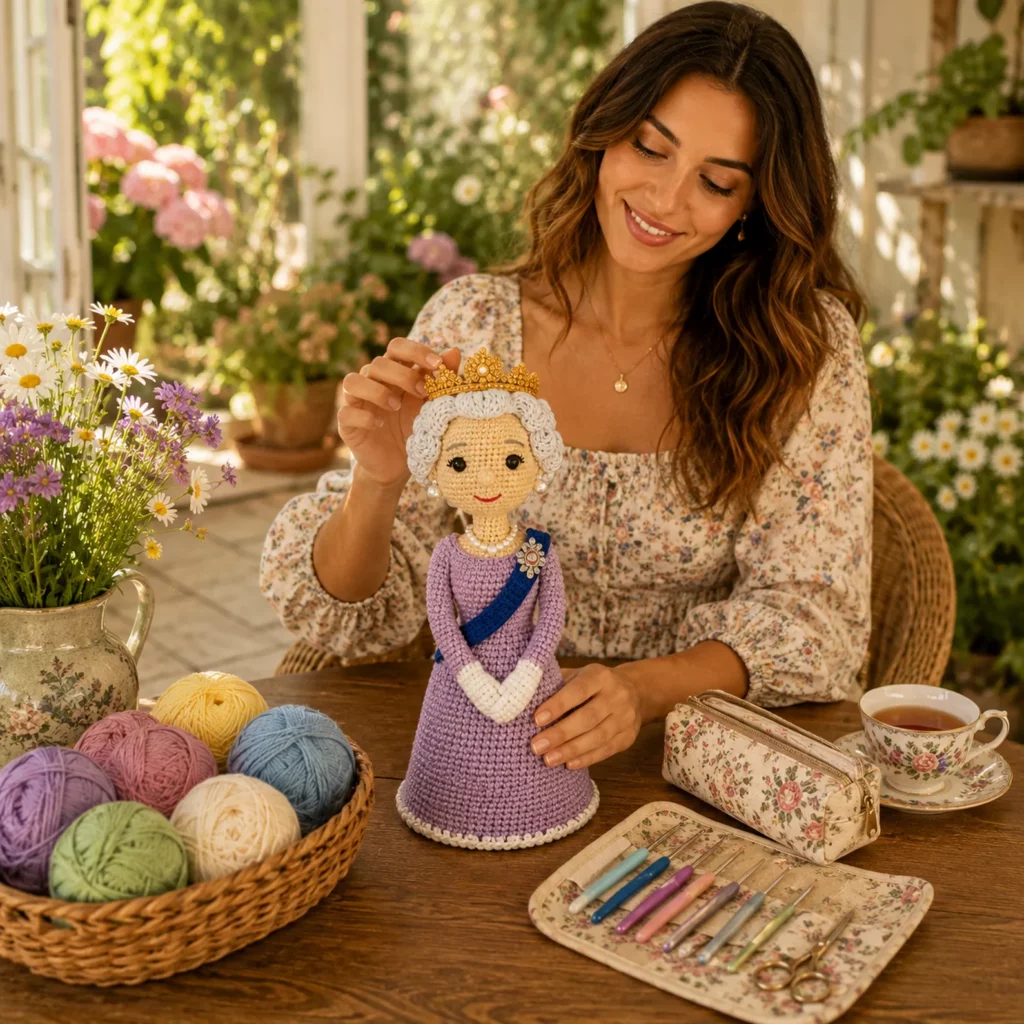
This crochet pattern is designed to help you recreate that refined, collectible-style doll in a clear, beginner-friendly way. You’ll learn how to shape a smooth head and face, build a long gown body that stands nicely, and add details like rolled hair, pearl-style jewelry, and a simple sash. Even if you’ve never designed a doll before, the steps below walk you through it like a crochet tutorial you can follow confidently.
The best part is that you can customize everything—skin tone, dress color, hair style, crown type, and accessories—so the finished doll feels uniquely yours.
Detailed Description of the Crochet Pattern#
This project is a standing amigurumi doll with a long, slightly flared gown. The silhouette is tall and elegant, with slim arms crossed in front for a formal pose. The head is proportionally large (classic amigurumi style), with embroidered facial features and optional safety eyes. The hair is worked in structured sections to mimic a “rolled” updo, which is then topped with a decorative crown or tiara.
The outfit includes
- A floor-length gown made mostly with single crochet for a smooth, fabric-like texture
- A fitted bodice that transitions into a flared skirt so the doll can stand
- Long sleeves or glove-like arms depending on your preference
- A diagonal sash in a contrasting color
- Optional brooch detail where the sash meets the shoulder
- Pearl-style accents such as earrings and a necklace
Construction is modular, meaning you crochet separate pieces (head, neck, body, arms, hair, accessories) and assemble them in a clean order. This makes the pattern easier to adjust and also easier to fix if you want to change the look.
Skill Level Explanation#
This is a confident beginner to intermediate crochet pattern.
You’ll be comfortable if you know
- Single crochet in continuous rounds
- Increasing and decreasing neatly
- Color changes
- Basic assembly and sewing pieces together
You’ll also practice
- Shaping a standing body with a stable base
- Creating hair texture and structure
- Adding small details like embroidery, jewelry, and accessories
- Using firm stuffing and optional internal support to keep the doll upright
If you’ve made amigurumi animals before, you can absolutely make this doll. The stitches are simple—the magic is in the finishing.
Materials Needed#
Yarn
Use smooth yarn so the face and gown look clean and refined.
Recommended yarn weight
- DK weight yarn for a collectible-style finish
- Worsted weight yarn if you want a larger doll and faster progress
Suggested colors
- Skin tone yarn
- White or ivory for the gown
- Hair color yarn (white, silver, gray, blonde, or any shade you like)
- Royal blue (or your chosen sash color)
- Small amounts of metallic thread or silver yarn for crown accents (optional)
Yarn selection tips
- Cotton yarn gives crisp stitches and excellent stitch definition
- Acrylic is softer and can still look polished if your tension is consistent
- Avoid fuzzy yarn for the face and jewelry details, because it hides stitches
Hook
Choose a hook that creates tight stitches so stuffing doesn’t show through.
- DK yarn often pairs well with a 2.75 mm to 3.25 mm hook
- Worsted yarn often pairs well with a 3.25 mm to 4.0 mm hook
Notions
- Stitch marker
- Tapestry needle
- Scissors
- Fiberfill stuffing
- Safety eyes if desired (or black yarn for embroidered eyes)
- Embroidery floss in black and pink/red for facial features
- Optional internal support such as a wooden dowel, chopstick, or craft wire
- Optional beads for pearls, brooch, or earrings
Safety note
If this doll is intended for a child under three, skip safety eyes and beads. Embroider the eyes and stitch jewelry details instead.
Stitches & Techniques Explained#
Abbreviations in US terms
- MR magic ring
- ch chain
- sl st slip stitch
- sc single crochet
- inc increase (2 sc in same stitch)
- dec decrease (single crochet two stitches together)
- BLO back loop only
- FLO front loop only
- st stitch
Invisible decrease
For a smooth face and gown, use an invisible decrease whenever possible. Pick up the front loops of the next two stitches, then sc them together.
Clean color change
To change colors smoothly, complete the last yarn-over of the final stitch with the new color.
Firm stuffing technique
For a doll that stands nicely, stuff in small amounts and press stuffing into place with the back of your hook or a stuffing tool. The body should feel firm, not squishy.
Step-by-Step Instructions#
This is a free crochet pattern written as a guided crochet tutorial. Stitch counts are included so you can follow along, but feel free to adjust for your preferred size.
Notes before you start
- Work in continuous rounds unless noted
- Use a stitch marker to track rounds
- Keep tension tight and consistent
- Stuff as you go, especially the head and neck
Finished size
- DK yarn typically creates a doll around 10 to 14 inches tall
- Worsted yarn typically creates a doll around 14 to 18 inches tall
Head
Use skin tone.
Round 1
- 6 sc in MR (6)
Round 2
- inc around (12)
Round 3
- (sc, inc) around (18)
Round 4
- (2 sc, inc) around (24)
Round 5
- (3 sc, inc) around (30)
Round 6
- (4 sc, inc) around (36)
Round 7
- (5 sc, inc) around (42)
Rounds 8 to 14
- sc around (42)
Eye placement
- Place eyes between rounds 11 and 12, about 7 to 9 stitches apart
- If embroidering eyes, mark positions with pins and do it later
Round 15
- (5 sc, dec) around (36)
Round 16
- (4 sc, dec) around (30)
Round 17
- (3 sc, dec) around (24)
Round 18
- (2 sc, dec) around (18)
Stuff the head firmly now.
Round 19
- (sc, dec) around (12)
Round 20
- dec around (6)
Fasten off, close the opening, and weave in the end.
Face details
Embroider features for a classic doll expression
- Eyebrows as small curved stitches
- Nose as a tiny horizontal stitch or small “bump” stitch
- Mouth as a gentle curved line in red or pink
Optional blush
A tiny touch of pink yarn or fabric blush can add a warm, lifelike look.
Neck
Use skin tone.
Round 1
- 6 sc in MR (6)
Round 2
- inc around (12)
Rounds 3 to 6
- sc around (12)
Stuff lightly.
Fasten off with a long tail for sewing.
Body and gown base
Use white or ivory.
The body is shaped like a long cone so it stands.
Round 1
- 6 sc in MR (6)
Round 2
- inc around (12)
Round 3
- (sc, inc) around (18)
Round 4
- (2 sc, inc) around (24)
Round 5
- (3 sc, inc) around (30)
Round 6
- (4 sc, inc) around (36)
Round 7
- (5 sc, inc) around (42)
Now begin the slow flare for the skirt. Increase evenly every few rounds.
Round 8
- sc around (42)
Round 9
- (6 sc, inc) around (48)
Round 10
- sc around (48)
Round 11
- (7 sc, inc) around (54)
Rounds 12 to 20
- sc around (54)
If you want a taller doll, add more straight rounds here.
To create a slightly wider hem for stability
Round 21
- (8 sc, inc) around (60)
Rounds 22 to 24
- sc around (60)
Stuff the lower body firmly, especially the base.
Optional support method
- Insert a dowel or stick through the center before closing the top of the body. This helps the doll stay upright.
Now shape the upper body (bodice area). You can gently taper.
Round 25
- (8 sc, dec) around (54)
Round 26
- sc around (54)
Round 27
- (7 sc, dec) around (48)
Round 28
- sc around (48)
Round 29
- (6 sc, dec) around (42)
Rounds 30 to 32
- sc around (42)
Stuff the upper body firmly.
Neck opening
Round 33
- (5 sc, dec) around (36)
Round 34
- sc around (36)
Fasten off with a long tail for sewing the neck and head.
Arms
Use white for “glove” arms, or skin tone for hands with white sleeves.
Make two.
Round 1
- 6 sc in MR (6)
Round 2
- (sc, inc) around (9)
Rounds 3 to 14
- sc around (9)
Lightly stuff the arms so they stay slim.
Flatten the top and sc across to close. Leave a long tail to sew.
Crossed-arm pose tip
To create the formal crossed look, sew one arm slightly overlapping the other at the wrists. You can tack the wrists together with a few stitches.
Simple sleeve cuff detail
If you want a gentle cuff look on the wrists
- Crochet one extra round in BLO near the wrist
- Or embroider a thin line with matching yarn
Hair base cap
Use hair color.
Round 1
- 6 sc in MR (6)
Round 2
- inc around (12)
Round 3
- (sc, inc) around (18)
Round 4
- (2 sc, inc) around (24)
Round 5
- (3 sc, inc) around (30)
Round 6
- (4 sc, inc) around (36)
Rounds 7 to 9
- sc around (36)
Fasten off leaving a long tail. Sew the cap to the top/back of the head, leaving the front hairline open if you want a defined forehead.
Rolled updo hair sections
This hairstyle looks elegant because it uses “rolled” pieces.
Make a hair roll strip
- Ch 26 to 36 depending on head size
- Work 3 sc in each chain across (this causes the strip to curl into a roll)
- Fasten off
Make two side rolls and one top roll
- Sew side rolls along each side of the head like soft curls
- Sew the top roll across the crown area
Optional center bun
- Make a small circle: 6 sc in MR, then inc around (12)
- One round sc around (12)
- Stuff lightly and sew at the back/top for a bun shape
Crown or tiara crochet option
If you want a crocheted crown instead of a purchased one, use metallic or silver yarn.
Crown band
- Ch to fit head circumference (about 30 to 40 chains for DK, adjust as needed)
- Join to form a ring, sc around for two rounds
Points
- Ch 4, sl st in second ch, sc in next, hdc in next, sl st into band repeat around
Sew crown to the hair cap securely.
Sash
Use royal blue or your chosen color.
Make a strip
- Ch long enough to go from shoulder to opposite hip
- Work sc rows until the sash is about 1 to 1.5 inches wide (or narrower for a delicate look)
- Fasten off and weave ends
Attach sash
- Sew at the shoulder first
- Lay diagonally across the body
- Sew at the hip and add a few hidden tacking stitches along the way
Optional brooch
- Sew a small bead, button, or crocheted flower where the sash meets the shoulder.
Necklace and earrings
Pearl look without beads
- Necklace: embroider small French knots or tiny white stitches around the neckline
- Earrings: small white yarn knots stitched at each side of the head
With beads
- Sew beads securely with strong thread, knotting multiple times
Assembly
Recommended order
- Sew neck to body
- Sew head to neck
- Sew hair cap and hair details
- Attach arms and tack wrists together
- Add sash and accessories
- Final shaping and touch-ups
Sewing tips
- Use pins or stitch markers to position pieces before sewing
- Step back and check symmetry before you commit
- Use small, tight stitches for a cleaner finish
Common Mistakes and How to Avoid Them#
Loose stitches showing stuffing
Use a smaller hook and tighten tension. Dolls look best with dense stitching.
Head wobble
This usually happens when the neck is under-stuffed or the join is too small. Stuff the neck firmly and sew with strong, repeated stitches. An internal dowel helps a lot.
Body won’t stand
Make the base wider, stuff the lower body very firmly, and consider adding a small weight inside the base (like a fabric pouch of pellets) if the doll is for display only.
Hair rolls look messy
Keep hair strips consistent in length and stitch count, and sew them in a planned order. Pin first, then sew slowly.
Sash twists or bulges
Use several tiny tacking stitches along the sash so it lies flat. Blocking the sash strip lightly before sewing can also help.
Accessories fall off
If the doll is for play, skip beads and metal pieces. Crochet or embroider details instead.
Expert Tips for Better Results#
- Use invisible decreases for a smooth face and gown
- Stuff the head very firmly so it keeps its shape long-term
- Add a support dowel for a display doll that stays upright
- Sew the hair in layers, pinning each section before stitching
- Weave in ends as you go so finishing doesn’t feel overwhelming
- Use a soft matte yarn for the gown if you want a fabric-like luxury look
- Take photos during assembly to check balance and symmetry
Variations and Customization Ideas#
- Change the gown color to pastel, champagne, or deep jewel tones
- Add a lace hem by crocheting a scallop round at the bottom of the skirt
- Make a capelet or shawl for a more ceremonial look
- Add a tiny handbag, bouquet, or miniature accessory for a themed display
- Swap the hairstyle for a bun, braids, or short curls
- Create a “winter” version with a faux fur collar (use fluffy yarn sparingly)
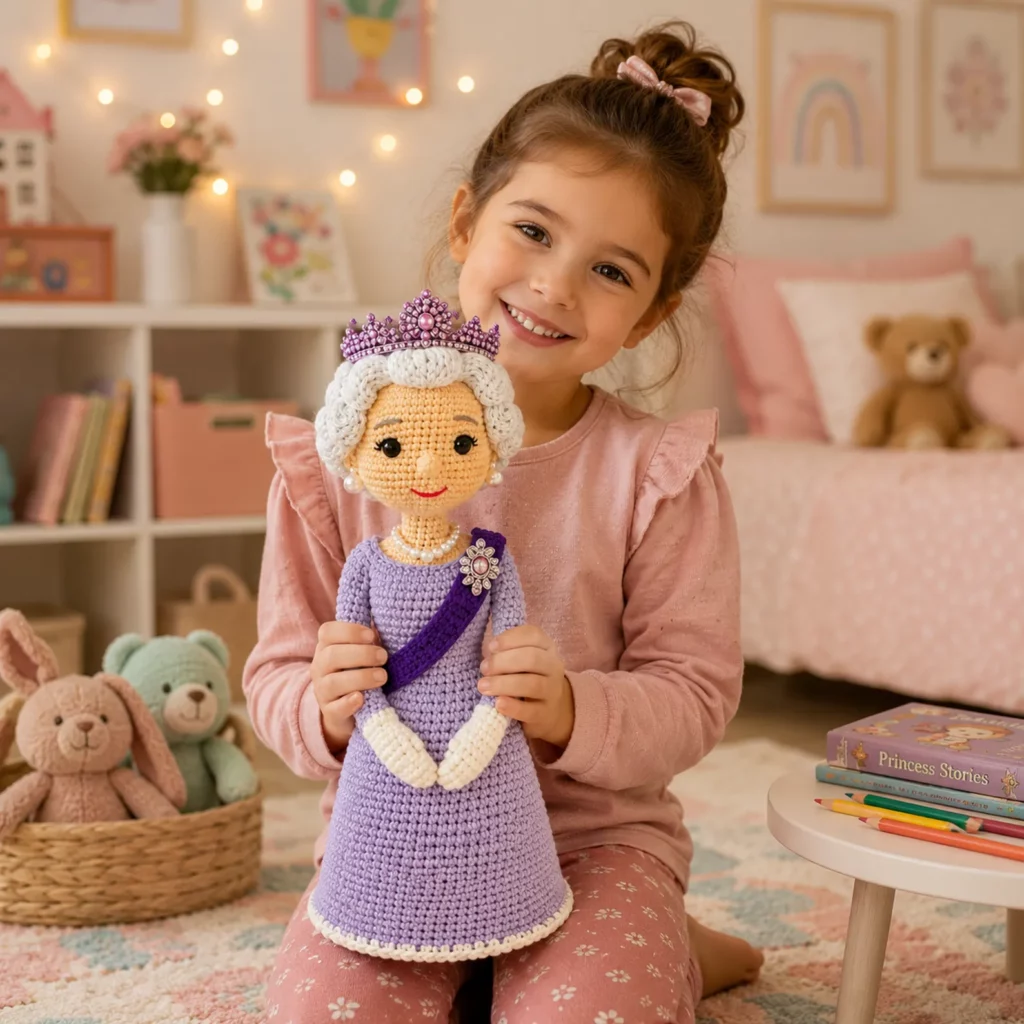
- Make it baby-safe by embroidering eyes and skipping all beads/metal pieces
Benefits of This Crochet Project#
- A unique crochet pattern that stands out from typical amigurumi
- Great practice for shaping, sewing, and detail work
- Highly customizable for colors, accessories, and style
- Makes a memorable handmade gift or display piece
- Uses mostly simple stitches, so the process is relaxing once you’re in rhythm
- Perfect “slow craft” project that feels truly rewarding at the end
Internal Linking Suggestions#
- How to Crochet a Perfect Amigurumi Sphere
- Invisible Decrease Tutorial for Smooth Dolls
- How to Embroider Amigurumi Faces
- Best Yarn for Amigurumi and Doll Making
- How to Make Amigurumi Hair Styles
- Beginner-Friendly Doll Dress Crochet Pattern
- How to Make Amigurumi Stand Upright With Support
FAQ#
Can beginners make this crochet pattern
Yes if you’re comfortable with single crochet, increases, and decreases. The steps are beginner-friendly, and the detail work is done slowly with simple techniques.
What yarn is best for a clean doll face
Smooth cotton or smooth acrylic works best. Avoid fuzzy yarn for the face because it hides stitches and makes embroidery harder.
How do I make the doll stand without falling
Stuff the base very firmly and flare the skirt slightly wider. For display dolls, add a support dowel or a small internal weight.
Can I make the doll without safety eyes
Absolutely. Embroidered eyes are beautiful and also safer for children.
How do I make the hair look like neat rolls
Use curled strips made by working multiple stitches into each chain, then sew them in place in sections. Pin first so you can adjust the shape before stitching.
How can I adjust the size of the doll
Use thicker yarn and a larger hook for a bigger doll, or thinner yarn and a smaller hook for a smaller one. Keep stitches tight so stuffing doesn’t show.
Conclusion#
This royal-inspired amigurumi doll crochet pattern is one of those projects that feels special from start to finish. The smooth gown shape, the polished hair, and the crown-and-sash details create a truly elegant result, yet the stitches themselves remain simple and approachable. With careful stuffing and thoughtful finishing, you’ll have a display-worthy doll that looks refined, collectible, and completely handmade in the best way.
If you tell me what yarn weight you plan to use and the height you want for the finished doll, I can suggest the best hook size and easy adjustments to the body length so your proportions look perfect.


