


Introduction#
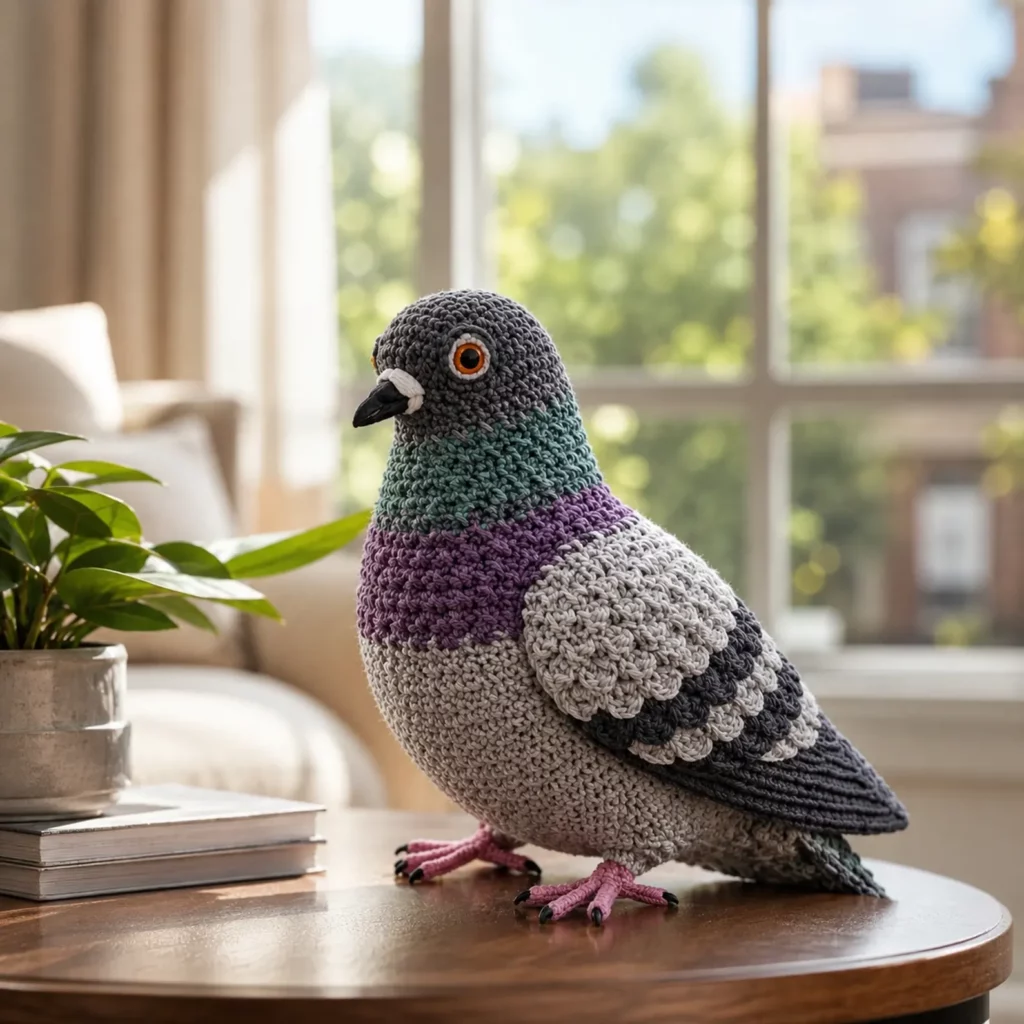
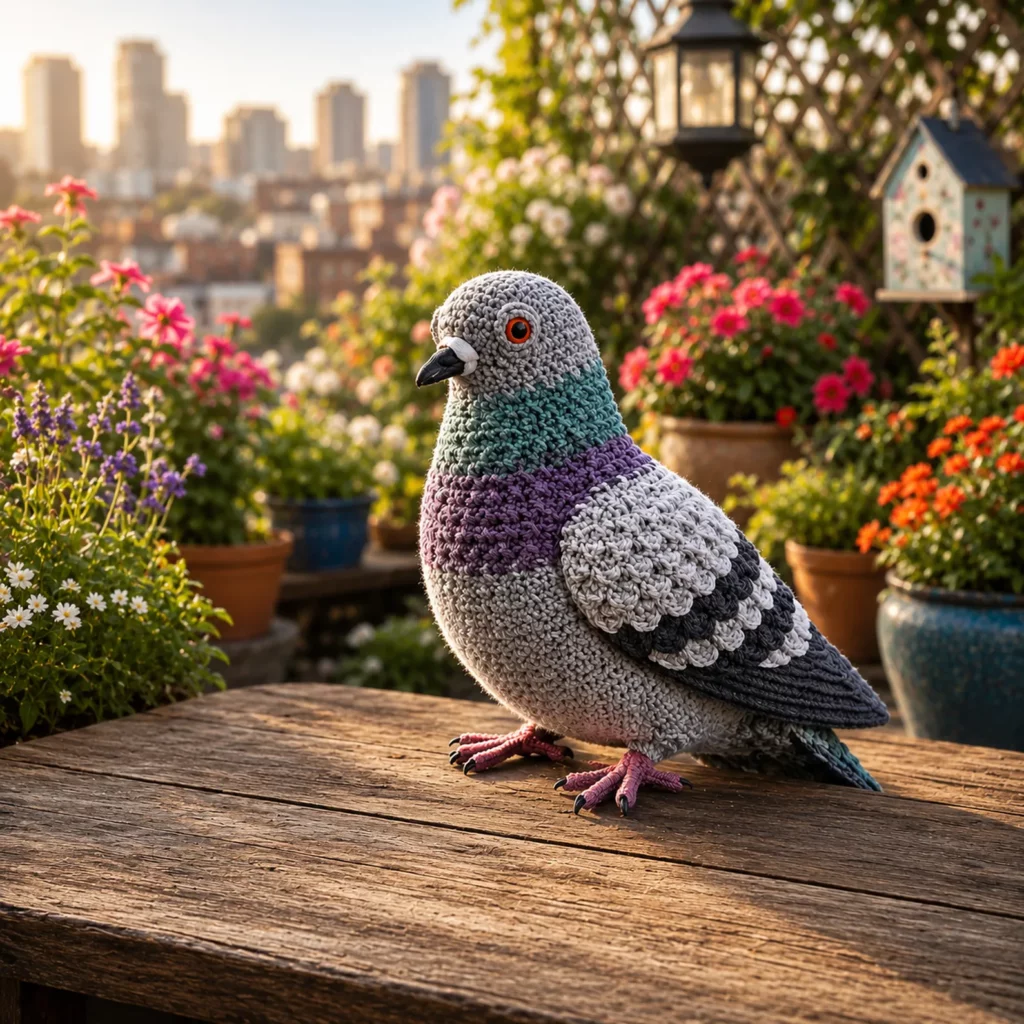
If you love crochet projects that look surprisingly lifelike (without being overly complicated), a pigeon plush is such a fun win. It has that instantly recognizable shape—round head, plump body, neat wings—and the color placement does most of the “realism” work for you.
Explore more beginner amigurumi crochet patterns in our pattern library.
This crochet pattern is written in a crochet tutorial style so you can follow along even if you’re newer to amigurumi. You’ll practice smooth shaping in single crochet, learn how to get clean color changes for the neck bands, and add simple layered wing details that read like feathers. The end result is a giftable plush that looks great on a shelf, desk, or windowsill—and it’s a fantastic way to build confidence with 3D crochet.
Detailed Description of the Crochet Pattern#
This amigurumi pigeon is built from approachable parts, then assembled for a realistic posture:
- Head (light gray): worked in continuous rounds with single crochet increases and decreases for a smooth dome shape.
- Body (light gray + accent bands): a rounded “egg” shape with two color-change bands at the neck/chest area to mimic an iridescent pigeon look.
- Beak (black) + optional cere (white/cream): a small, slightly pointed piece sewn to the face; the cere is the little pale area above the beak for extra realism.
- Wings (2 pieces): crocheted separately and attached to the sides; finished with a scalloped/cluster edge to suggest layered feathers.
- Tail (dark gray/charcoal): a flat wedge shape that extends the silhouette and balances the bird visually.
- Feet (pink/mauve): small flat feet with simple toes; you can add weight in the body so the pigeon stands confidently.
Overall construction is simple: crochet each part, stuff firmly, sew together, then refine the details (beak placement, wing angle, and slight head tilt).
Skill Level Explanation#
Skill Level: Confident Beginner to Intermediate Beginner
You’ll do great if you already know:
- Single crochet (sc)
- Increase (inc) and decrease (dec)
- Working in continuous rounds (spiral)
- Basic sewing/assembly for amigurumi
Newer skills you’ll learn (or practice):
- Clean color changes for stripes/bands
- Invisible decrease (recommended for a neat finish)
- Simple scallops/clusters for “feather” texture on wings
Materials Needed#
Yarn
Use a smooth yarn so the stitch definition stays crisp (that’s what makes amigurumi look polished).
Suggested yarn weights:
- DK (Category 3) for a smaller bird
- Worsted (Category 4) for a sturdier, larger plush
Colors (adjust to taste):
- A: Light Gray (main head + body)
- B: Teal/Green (upper neck band)
- C: Purple (lower neck/chest band)
- D: White/Pale Gray (wing highlight)
- E: Dark Gray/Charcoal (wing + tail accents)
- F: Black (beak)
- G: Pink/Mauve (feet)
- Optional: Cream/White for the beak cere
Tips for yarn choice:
- Cotton = crisp stitches and a “clean” look
- Acrylic = soft and widely available
- Keep yarn weights consistent across colors if possible
Hook
Use a hook smaller than the yarn label suggests for tight fabric:
- DK yarn: 2.75–3.25 mm
- Worsted: 3.0–4.0 mm
Notions
- Stitch marker
- Yarn needle
- Scissors
- Fiberfill stuffing
- Safety eyes (10–14 mm depending on size)
- Optional: poly pellets or small stones in a sealed pouch for weight (helps standing)
Safety Note
If this is for a baby/toddler, embroider the eyes instead of using safety eyes, and stitch all parts extra securely.
Stitches & Techniques Explained#
Common Abbreviations
- MR = magic ring
- sc = single crochet
- inc = increase
- dec = decrease (use invisible decrease if possible)
- sl st = slip stitch
- ch = chain
- FLO/BLO = front/back loop only
- ( ) = repeat
- = stitch count
Invisible Decrease (Recommended)
Pick up the front loops of the next two stitches, then single crochet them together. This keeps the decreases smooth and less “bumpy.”
Clean Color Changes (For Neck Bands)
On the last yarn-over of the final stitch in the old color, pull through with the new color. This prevents jagged stripes.
Simple Feather Edge (Wing Detail)
A feather-like look can be made with small scallops:
- Shell/scallop: 3 dc in one stitch (creates a rounded “feather”)
Space shells with skipped stitches so the edge looks layered rather than bulky.
Step-by-Step Instructions#
Finished Size
With worsted yarn and a 3.25 mm hook: roughly 6–8 inches (15–20 cm) tall, depending on tension and stuffing.
Notes Before You Start
- Work in continuous rounds unless stated.
- Use a stitch marker and move it every round.
- Stuff firmly as you go—especially the body.
- For the most realistic shape, keep the head slightly less stuffed than the body.
Color Key
- A = Light Gray
- B = Teal/Green
- C = Purple
- D = White/Pale Gray
- E = Dark Gray/Charcoal
- F = Black
- G = Pink/Mauve
Head (Color A)
Round 1: 6 sc in MR [6]
Round 2: inc around [12]
Round 3: (sc, inc) around [18]
Round 4: (2 sc, inc) around [24]
Round 5: (3 sc, inc) around [30]
Round 6: (4 sc, inc) around [36]
Rounds 7–10: sc around [36]
Place eyes between Rounds 8–9, about 6–8 stitches apart (adjust based on your preferred face).
Round 11: (4 sc, dec) around [30]
Round 12: (3 sc, dec) around [24]
Round 13: (2 sc, dec) around [18]
Stuff firmly.
Round 14: (sc, dec) around [12]
Round 15: dec around [6]
Fasten off and close.
Body (Start Color A)
Round 1: 6 sc in MR [6]
Round 2: inc around [12]
Round 3: (sc, inc) around [18]
Round 4: (2 sc, inc) around [24]
Round 5: (3 sc, inc) around [30]
Round 6: (4 sc, inc) around [36]
Round 7: (5 sc, inc) around [42]
Rounds 8–12: sc around [42]
Neck/Chest Color Bands
Change to Color B:
Rounds 13–14: sc around [42]
Change to Color C:
Rounds 15–16: sc around [42]
Change back to Color A:
Rounds 17–20: sc around [42]
Shape Down
Round 21: (5 sc, dec) around [36]
Round 22: sc around [36]
Round 23: (4 sc, dec) around [30]
Round 24: sc around [30]
Begin stuffing firmly. Add optional weight in a sealed pouch at the base for stability.
Round 25: (3 sc, dec) around [24]
Round 26: (2 sc, dec) around [18]
Round 27: (sc, dec) around [12]
Round 28: dec around [6]
Fasten off and close.
Beak (Color F)
Ch 2
Round 1: 6 sc in 2nd ch from hook [6]
Round 2: (sc, inc) around [9]
Rounds 3–4: sc around [9]
Fasten off with a sewing tail.
Optional Cere (Cream/White)
Ch 3
Work a tiny oval: sc in 2nd ch, sc in next, 3 sc in last ch, sc along the other side [8]
Fasten off and sew just above the beak base.
Wings (Make 2)
You can make wings in two easy layers: a simple base + a scalloped feather edge.
Wing Base (Color D or A)
Ch 10
Row 1: sc in 2nd ch and across [9]
Row 2: ch 1, turn, sc across [9]
Row 3: ch 1, turn, sc2tog, sc 5, sc2tog [7]
Row 4: ch 1, turn, sc across [7]
Row 5: ch 1, turn, sc2tog, sc 3, sc2tog [5]
Row 6: ch 1, turn, sc across [5]
Row 7: ch 1, turn, sc2tog, sc 1, sc2tog [3]
Row 8: ch 1, turn, sc across [3]
Fasten off.
Feather Edge (Colors D + E)
Attach Color D along the longer curved edge and add scallops:
- sl st in next st, skip 1 st, 3 dc in next st, skip 1 st repeat along the edge
Add a second partial scallop band in Color E near the lower/tip area (fewer repeats) so the wing looks shaded.
Tip: The feather effect doesn’t need perfect symmetry—slight variation looks more natural.
Tail (Color E)
Ch 9
Row 1: sc in 2nd ch and across [8]
Row 2: ch 1, turn, sc across [8]
Row 3: ch 1, turn, sc2tog, sc 4, sc2tog [6]
Row 4: ch 1, turn, sc across [6]
Row 5: ch 1, turn, sc2tog, sc 2, sc2tog [4]
Row 6: ch 1, turn, sc across [4]
Fasten off with a sewing tail.
Feet (Make 2, Color G)
Foot Pad (Oval)
Ch 4
sc in 2nd ch, sc in next, 3 sc in last ch, sc back along underside, sc in last [8]
Simple Toes
From the pad edge:
- ch 3, sl st back down the chain to form a toe
Repeat 2–3 times across the front.
Fasten off with a long tail.
Assembly#
- Sew head to body, slightly forward for a natural pigeon posture.
- Sew beak centered between the eyes; add the optional cere above it.
- Sew wings to the sides, angled slightly back. Keep scalloped edges free.
- Sew tail to the back, slightly downward to extend the silhouette.
- Sew feet to the underside. If the pigeon tips, move feet slightly forward or add more weight to the base.
- Adjust stuffing and shaping by gently pressing and rounding the body with your hands.
Common Mistakes and How to Avoid Them#
- Not counting stitches: count every round, especially after increases/decreases.
- Gaps showing stuffing: use a smaller hook and keep tension tighter.
- Color changes look jagged: switch colors on the last yarn-over of the previous stitch.
- Wings feel floppy: crochet the wing base tighter or add a single crochet edging for structure.
- Bird won’t stand: add a small weight pouch inside the base and reposition feet slightly forward.
Expert Tips for Better Results#
- Use invisible decreases for a smooth, professional surface.
- Stuff the body firmly, but don’t overstuff the head—slightly softer head looks more natural.
- Pin pieces in place before sewing (wings especially).
- Add one tiny white stitch on the eye as a “highlight” for instant personality.
- If you want cleaner stripes, cut yarn between band colors and weave ends rather than carrying.
Variations and Customization Ideas#
- Make a mini keychain pigeon using DK yarn and a smaller hook; skip feet and add a hanging loop.
- Create a dove by using all white/cream and soft gray wings.
- Make a more dramatic iridescent neck by adding an extra band (teal → purple → teal).
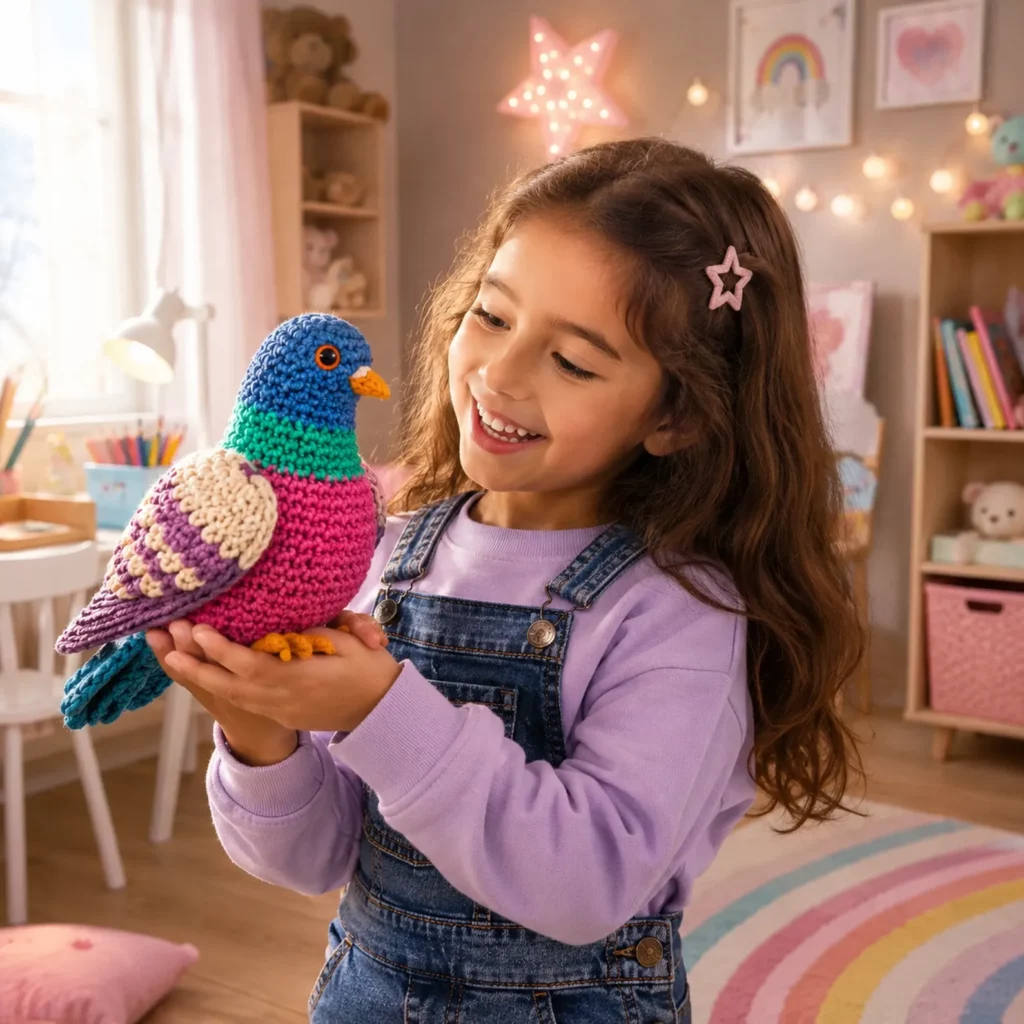
- Add a tiny scarf or bow for a cute, giftable character.
- Swap colors to imitate your local pigeons—this pattern adapts beautifully to “real life” colorways.
Benefits of This Crochet Project#
- Teaches core amigurumi shaping (perfect skill builder)
- Uses small amounts of multiple yarn colors (stash friendly)
- Looks impressive without complicated construction
- Makes a unique handmade gift or desk décor
- Great practice for color changes + assembly placement
Internal Linking Suggestions#
- How to Crochet a Magic Ring (Beginner Guide)
- Invisible Decrease Tutorial for Amigurumi
- Best Yarn for Amigurumi: Cotton vs Acrylic
- Beginner-Friendly Crochet Bird Patterns
- How to Sew Amigurumi Parts Neatly (No Wobbly Heads)
FAQ#
Is this crochet pattern suitable for beginners?
Yes, especially if you’re comfortable with single crochet and counting rounds. The shaping is straightforward; the wings are the “fanciest” part, but still beginner-friendly.
What yarn works best for a realistic amigurumi pigeon?
Smooth cotton or acrylic in DK/worsted weight. Smooth yarn shows stitch definition clearly, which is what makes the plush look realistic.
How do I stop holes and gaps in amigurumi?
Use a smaller hook than the label suggests, keep tension consistent, and don’t stretch the fabric while stuffing.
Can I make it baby-safe?
Yes—embroider eyes instead of using safety eyes, and stitch all parts securely. Avoid weighted pellets for baby toys.
Why does my pigeon tip over?
It usually needs more base weight, firmer stuffing in the lower body, or feet placed slightly farther forward.
Conclusion#
This pigeon amigurumi is the perfect example of a “simple shapes, big impact” crochet pattern. With clean single crochet rounds, a couple of color bands, and wing details that read like feathers, you’ll end up with a plush that feels surprisingly lifelike—and totally gift-worthy.
If you tell me your yarn weight and hook size, I can suggest the best safety-eye size and quick adjustments to make your pigeon taller, rounder, or more compact.


