


Introduction#
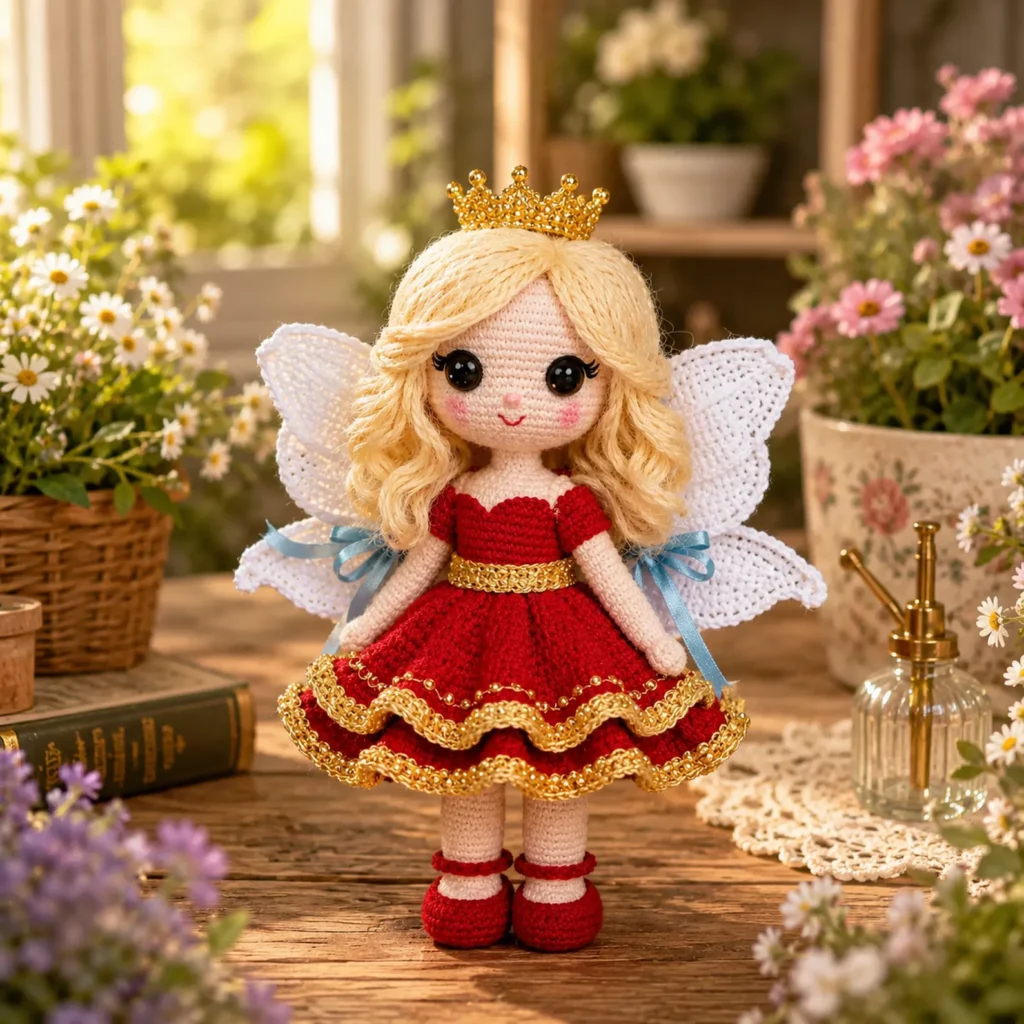
Some amigurumi projects are cute. Others are pure “main character energy.” This princess fairy doll falls into the second category—with big sparkly eyes, soft wavy hair, delicate wings, and a twirly dress that looks like it belongs at a tiny royal ball.
Explore more beginner amigurumi crochet patterns in our pattern library.
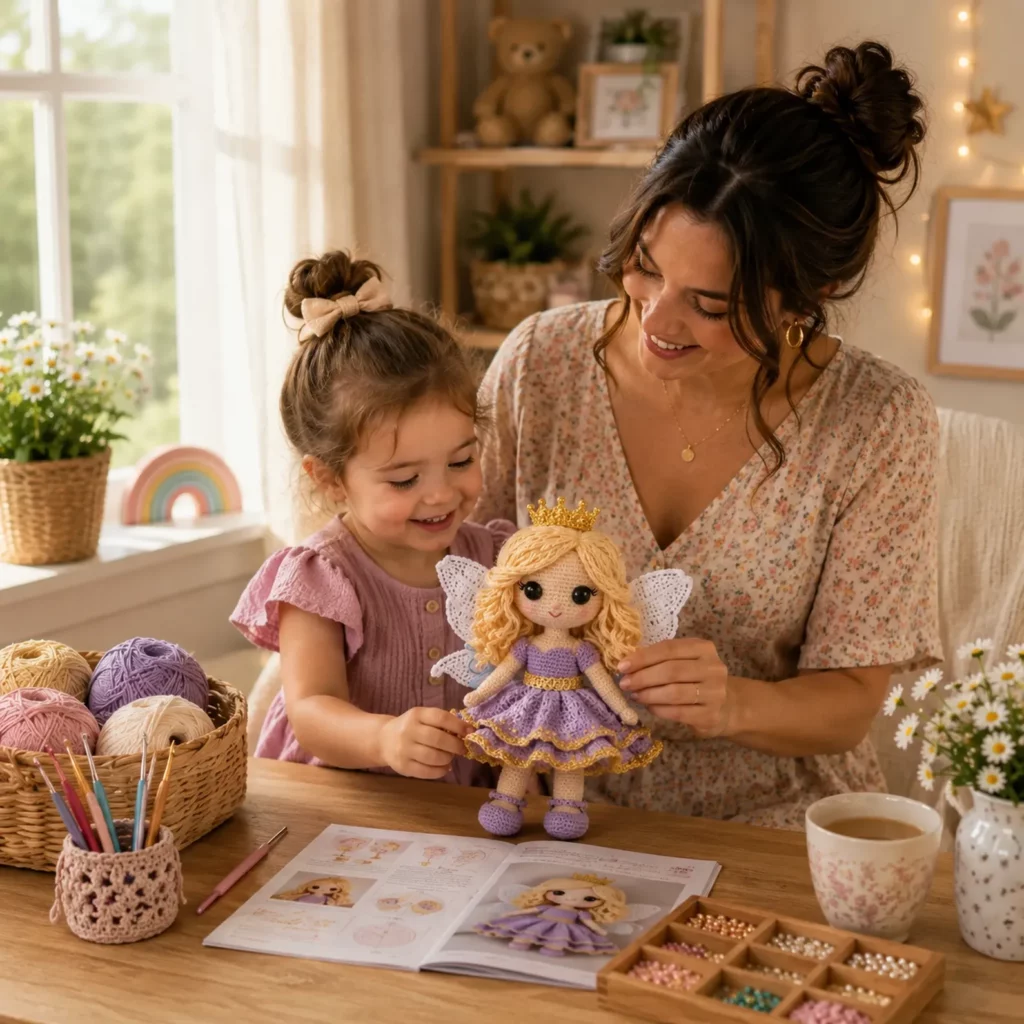
What’s especially nice about this crochet pattern is that it’s built on a straightforward doll base. The magic comes from the styling: a shaped bodice, a full skirt with decorative trim, and accessories (crown + wings) that you can customize endlessly. Once you learn the core construction, you’ll be able to create an entire collection—birthday princess, winter queen, flower fairy, or holiday angel—simply by changing colors and embellishments.
This free crochet pattern is written in a crochet tutorial style with extra guidance for clean shaping, neat color changes, and finishing details that make your doll look polished and gift-worthy.
Detailed Description of the Crochet Pattern#
This is a classic amigurumi doll with a couture-style outfit and accessories. The base is made with tight single crochet so the stuffing doesn’t show and the doll holds a smooth, professional shape.
The doll includes:
Head and face (skin tone): round head with large safety eyes, embroidered smile, and blush cheeks.
Body (dress bodice): fitted upper body that transitions into a skirt base.
Arms (skin tone): slim tubes with optional short sleeves in the dress color.
Legs (skin tone): slim legs with separate shoes/strap details.
Hair (light/blonde): soft waves created with yarn curls or crocheted strands attached to a hair cap.
Wings (white): textured lace-like wings attached to the back.
Crown (gold): a tiny crown (you can crochet it, use metallic thread, or use a small craft crown).
Dress details (red + gold trim): the skirt is shaped for fullness and finished with decorative edging to mimic ruffles and metallic trim.
Construction is approachable: crochet parts, stuff firmly, assemble, then add accessories and dress finishing touches.
Skill Level Explanation#
Skill Level: Confident Beginner to Intermediate Beginner
You’ll do great if you already know:
Single crochet (sc)
Increase (inc) and decrease (dec)
Working in continuous rounds
Basic sewing/assembly
Newer skills you’ll learn (or practice):
Invisible decrease (for smooth shaping)
Clean color changes (especially for the dress and shoes)
Working into front loops only (FLO) to create skirt ruffles
Simple lace shaping for wings
Attaching doll hair evenly for a full, wavy look
If you’ve made one or two amigurumi pieces before, this is an excellent “level up” project that still feels doable.
Materials Needed#
Yarn
Use smooth yarn so stitches look neat and the face is clean.
Suggested yarn weights:
DK (Category 3) for a delicate, detailed doll
Worsted (Category 4) for a slightly larger, faster doll
Color palette (example):
A: Skin tone (light peach/cream)
B: Hair (blonde)
C: Dress (red)
D: Wings (white)
E: Shoes (red)
F: Trim (gold metallic yarn or embroidery floss)
Tips for yarn choice:
Cotton gives crisp stitches and a very polished face.
Acrylic is soft and cuddly, great for gifting.
If using metallic yarn for trim, pair it with a smooth base yarn and keep tension relaxed (metallic yarn can be stiff).
Hook
Use a hook one size smaller than the yarn label suggests to keep stitches tight.
DK: 2.75–3.25 mm
Worsted: 3.25–4.0 mm
Notions
Stitch marker
Yarn needle
Scissors
Fiberfill stuffing
Safety eyes (10–14 mm depending on head size)
Black embroidery floss (lashes/mouth)
Pink embroidery floss or blush (cheeks)
Optional: craft crown, gold beads (display only), ribbon for wing bows
Safety note: If making for babies/toddlers, embroider eyes instead of using safety eyes and avoid beads or loose accessories. Stitch wings and crown very securely.
Stitches & Techniques Explained#
Common Abbreviations
MR = magic ring
sc = single crochet
inc = increase (2 sc in one stitch)
dec = decrease (sc 2 together)
inv dec = invisible decrease
sl st = slip stitch
ch = chain
hdc = half double crochet
dc = double crochet
BLO = back loop only
FLO = front loop only
( ) = repeat
[ ] = stitch count
Invisible Decrease
Insert hook into the front loop of the next stitch, then into the front loop of the following stitch, yarn over and pull through both front loops, yarn over and finish sc. This makes shaping smoother, especially on the head.
Clean Color Change
On the last stitch before changing colors, complete the stitch until 2 loops remain on hook, yarn over with new color, pull through the last 2 loops. This keeps stripes and outfit edges crisp.
Hair Options (Two Beginner-Friendly Methods)
Yarn curls (easiest): attach strands to a hair cap, then twist strands into loose curls.
Crocheted waves (neat + consistent): crochet long strips and sew them to the cap in rows.
Skirt Ruffles Using FLO
Working into FLO creates a spare set of loops you can use to attach ruffles later, giving a layered dress look without bulky seams.
Step-by-Step Instructions#
Finished Size
With DK yarn and a 3.0 mm hook: about 9–11 inches (23–28 cm) tall
With worsted yarn and a 3.5–4.0 mm hook: about 11–13 inches (28–33 cm) tall
Size varies with tension and stuffing.
Notes Before You Start
Work in continuous rounds unless stated.
Use a stitch marker to track rounds.
Stuff firmly but smoothly; “massage” the head and body to remove lumps.
For neat facial details, embroider the mouth before final assembly when possible.
Color Key
A = Skin tone
B = Hair
C = Dress (red)
D = Wings (white)
E = Shoes (red)
F = Gold trim
Head (Color A)
Round 1: 6 sc in MR [6]
Round 2: inc around [12]
Round 3: (sc, inc) around [18]
Round 4: (2 sc, inc) around [24]
Round 5: (3 sc, inc) around [30]
Round 6: (4 sc, inc) around [36]
Round 7: (5 sc, inc) around [42]
Rounds 8–12: sc around [42]
Place eyes between Rounds 10–11, 8–10 stitches apart (adjust for the expression you want).
Round 13: (5 sc, inv dec) around [36]
Round 14: (4 sc, inv dec) around [30]
Round 15: (3 sc, inv dec) around [24]
Stuff firmly.
Round 16: (2 sc, inv dec) around [18]
Round 17: (sc, inv dec) around [12]
Round 18: inv dec around [6]
Fasten off and close.
Face Details
Embroider a small smile centered below the eyes. Add blush to cheeks. For lashes, stitch 2–3 small lines at the outer corners of each eye.
Body and Dress Bodice (Start Color A, then change to C)
Start in skin tone to create a small “neck,” then switch to dress color for the bodice.
Round 1: 6 sc in MR [6]
Round 2: inc around [12]
Round 3: (sc, inc) around [18]
Round 4: sc around [18]
Round 5: (4 sc, dec) around [15]
Round 6: sc around [15]
Change to Color C (red).
Round 7: sc around [15]
Round 8: (3 sc, dec) around [12]
Rounds 9–12: sc around [12]
Round 13: (2 sc, inc) around [16]
Round 14: sc around [16]
Round 15 (FLO): sc around [16] (save back loops for a skirt detail later)
Stuff torso firmly.
Round 16: (3 sc, inc) around [20]
Round 17: sc around [20]
Fasten off, leaving a long tail for sewing head later.
Bodice shaping tip: If you want a more “sweetheart neckline,” you can embroider a curved neckline edge in matching red after assembly, or add a tiny scallop trim across the chest using surface slip stitches.
Arms (Make 2, Color A)
Round 1: 6 sc in MR [6]
Round 2: sc around [6]
Round 3: (sc, dec) around [4]
Rounds 4–12: sc around [4]
Lightly stuff the hand/forearm only. Leave the top unstuffed so it sits flat when sewn.
Optional sleeve (Color C): join red at the top, ch 1, (inc) around or (sc, inc) around for a tiny cap sleeve. Fasten off with a sewing tail.
Legs (Make 2, Color A)
Round 1: 6 sc in MR [6]
Round 2: inc around [12]
Round 3: sc around [12]
Round 4: (2 sc, dec) around [9]
Rounds 5–14: sc around [9]
Stuff firmly.
Fasten off with a long tail for sewing.
Shoes (Make 2, Color E)
These are simple “shoe caps” that sit at the bottom of the legs.
Round 1: 6 sc in MR [6]
Round 2: inc around [12]
Round 3: sc around [12]
Round 4: (2 sc, dec) around [9]
Rounds 5–6: sc around [9]
Fasten off, slide onto the bottom of the leg, and stitch in place.
Optional shoe strap: ch 8–10, sl st back along the chain, sew around the ankle like a strap.
Full Skirt (Attached at Waist, Color C)
You can crochet the skirt as a separate piece and sew it on, or attach it directly to the body. Direct attachment usually looks cleaner.
Attach red yarn at the waist (Round 17 area). Work the skirt in rounds, increasing to create fullness.
Skirt Round 1: (inc, sc) around [30]
Skirt Round 2: (4 sc, inc) around [36]
Skirt Round 3: (5 sc, inc) around [42]
Skirt Round 4: (6 sc, inc) around [48]
Skirt Round 5: sc around [48]
Skirt Round 6: (7 sc, inc) around [54]
Skirt Rounds 7–10: sc around [54]
Fasten off.
If you want a more dramatic “party dress” silhouette, add 1–2 more increase rounds (up to [60] or [66]) and then 2–4 straight rounds to lengthen.
Ruffled Hem and Gold Trim (FLO + Edging)
This is where the dress becomes “princess.”
Hem Ruffle (Color C or F):
Join yarn in the FLO of the last skirt round.
Work 2 dc in each FLO stitch around (this creates a ruffle).
Join with sl st, fasten off.
Gold trim options (choose one):
Easy embroidered trim (most beginner-friendly): use gold embroidery floss and stitch a simple running stitch around the hem ruffle.
Crochet trim: join gold yarn, work (sl st, ch 1) repeatedly around for a corded look.
Scallop trim: (sl st, sk 1, 5 dc in next st, sk 1, sl st) repeat (adjust spacing if needed).
Waist band (gold):
Ch enough to wrap around the waist, sl st back along the chain, then sew on like a belt.
Wings (Make 2, Color D)
These wings have a soft lace look and a structured outline.
Ch 16
Row 1: sc in 2nd ch from hook, sc across [15], turn
Row 2: ch 1, inc, sc across to last st, inc [17], turn
Row 3: ch 1, sc across [17], turn
Row 4: ch 1, inc, sc across to last st, inc [19], turn
Row 5: ch 1, sc across [19], turn
Row 6: ch 1, dec, sc across to last st, dec [17], turn
Row 7: ch 1, dec, sc across to last st, dec [15], turn
Fasten off.
Wing lace edging (makes it airy):
Join yarn at the bottom, work (sl st, ch 3, sl st in next st) around to create small loops, or (sc, ch 2, sc) in every other stitch. Keep it light and consistent.
Attach wings to the upper back with multiple anchor points (top, center, bottom) so they sit evenly.
Optional wing bows: tie a small ribbon at the wing base and stitch in place (display dolls only or very securely stitched).
Hair Cap (Color B)
Round 1: 6 sc in MR [6]
Round 2: inc around [12]
Round 3: (sc, inc) around [18]
Round 4: (2 sc, inc) around [24]
Round 5: (3 sc, inc) around [30]
Round 6: (4 sc, inc) around [36]
Rounds 7–9: sc around [36]
Fasten off with a long tail.
Hair Method A: Yarn Waves (Fast + Full)
Cut many strands 12–16 inches long. Attach to the cap with lark’s head knots in rows. For waves, braid 3–5 strands together in sections, then gently undo to create loose crimped waves (works best with acrylic). Stitch cap to head.
Hair Method B: Crocheted Curls (Neat + Predictable)
Make 12–18 curl strips:
Ch 30–45, 2 sc in each chain back (this spirals into a curl).
Sew curls to the cap in layers from bottom to top.
Crown (Gold)
Option 1: Craft crown (quickest)
Sew a tiny craft crown to the hair with strong stitches.
Option 2: Crochet crown (simple)
Ch 24–30 to fit the head, join to form a ring.
Round 1: sc around.
Round 2: (ch 3, sl st in next st) repeat to form points.
Add tiny beads to tips for display dolls only.
Assembly#
Sew head to body centered and firmly (add extra stitches around the neck for strength).
Sew legs to the underside of the body evenly so the doll stands (or sits nicely).
Sew arms to the sides of the bodice slightly below the neckline.
Attach shoes and ankle straps if using.
Sew hair cap onto head, shaping a side part with your fingers as you stitch.
Attach crown to hair securely.
Sew wings to the upper back, symmetrical.
Add waist band and hem trim as the final “luxury” details.
Common Mistakes and How to Avoid Them#
Stuffing shows through stitches
Cause: hook too big or loose tension
Fix: size down your hook and keep sc tight, especially on the head
Head looks lumpy
Cause: uneven stuffing
Fix: stuff in small layers and massage the head into shape before closing
Skirt ruffle curls too much
Cause: too many increases in the ruffle round
Fix: instead of 2 dc in every stitch, try (2 dc in next st, 1 dc in next st) around
Wings flop or twist
Cause: too soft fabric or weak attachment
Fix: add a sc border to stabilize, and stitch wings on at multiple points
Hair looks sparse
Cause: too few strands or not enough layers
Fix: add extra strands around the hairline and part; layer from back to front
Gold trim feels stiff
Cause: metallic yarn tension too tight
Fix: loosen your tension and consider using gold embroidery floss instead of metallic yarn
Expert Tips for Better Results#
Use invisible decreases on the head for a smooth “doll face” finish.
Pin everything before sewing: head angle, wing placement, arm height—small shifts change the whole look.
Embroider the mouth before attaching hair; it’s easier to position the smile when the face is fully visible.
If you want extra “sparkle,” use a tiny dab of fabric glue to secure metallic trim ends (display dolls), then stitch over it.
For the cleanest dress silhouette, keep the bodice tight (smaller hook, snug tension) and let the skirt provide the drape and volume.
Weave ends in two directions so they don’t pull out when the doll is hugged or handled.
Variations and Customization Ideas#
Holiday princess: swap red for emerald or icy blue; add white faux-fur style trim (bobble edging) at hem.
Birthday fairy: pastel dress, rainbow wings, tiny number charm on the belt (securely stitched).
Winter queen: white/silver dress, glittery thread accents, snowflake crown.
Ballet fairy: make a shorter skirt and add a tulle overlay (sewn on) for a tutu effect.
Angel version: keep wings white, swap crown for a halo, make the dress ivory with gold trim.
Benefits of This Crochet Project#
Teaches foundational doll shaping you can reuse for countless characters
Uses small amounts of yarn (great for stash busting)
Accessories (wings/crown/dress trim) make it feel high-end and gift-worthy
Customizable colorways for seasons and themes
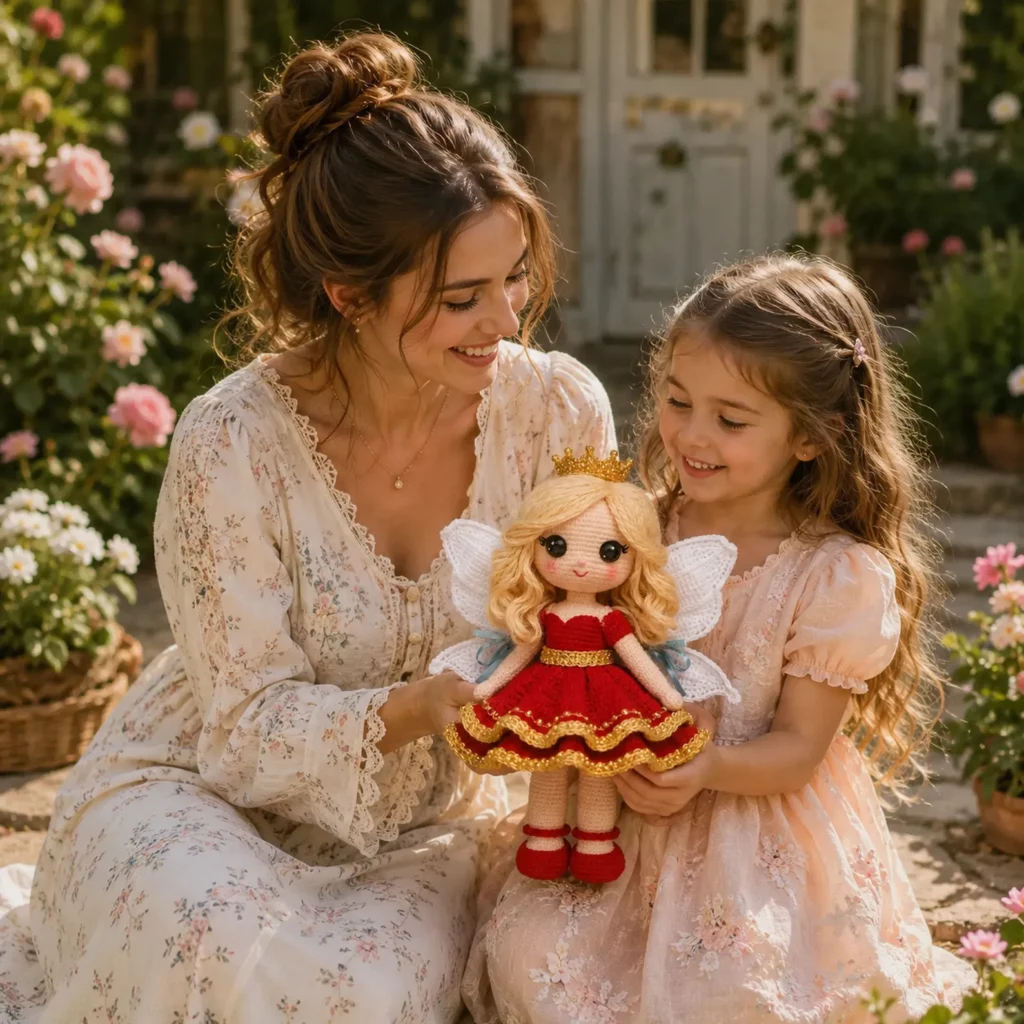
A memorable handmade keepsake for birthdays, holidays, and collectors
Internal Linking Suggestions#
How to Crochet Doll Hair (Yarn Strands vs Crocheted Curls)
Invisible Decrease Tutorial for Amigurumi
How to Make Crochet Wings (Easy Lace Shapes)
Best Yarn for Amigurumi Dolls (Cotton vs Acrylic)
How to Add Ruffles and FLO Details to Crochet Dresses
FAQ#
Is this crochet pattern beginner-friendly?
Yes, if you know sc, inc, and dec. The doll base is straightforward. Wings and gold trim are “extras” that you can simplify if you want.
What yarn is best for a doll like this?
Cotton gives the cleanest stitches and crisp details. Acrylic is softer and often easier for hair. Many makers use cotton for the body and acrylic for the hair.
How do I make it baby-safe?
Skip safety eyes (embroider them instead), avoid beads and loose crowns, and stitch wings and trim extremely securely. For very young children, consider leaving off the crown entirely.
How do I choose the right safety eye size?
For DK dolls around 9–11 inches tall, 10–12 mm is common. For worsted dolls around 11–13 inches, 12–14 mm often looks balanced. Always test placement before locking the backs.
Why does my skirt look more flat than full?
You need more increases (more stitches) before working straight rounds. Add one more increase round before the straight rounds, or add an extra ruffle round at the hem.
Can I change the dress style?
Absolutely. Keep the same bodice and swap the skirt for a shorter tutu, a long gown, or a layered petal skirt. The doll base works with many outfit designs.
Conclusion#
This princess fairy doll crochet pattern is the perfect blend of classic amigurumi and dress-up magic: a smooth, cute doll base paired with wings, a crown, and a ruffled party dress that feels truly special. Once you’ve made one, you’ll realize it’s basically a “doll template” you can remix forever—new hair, new colors, new accessories, endless characters.
If you tell me your yarn weight (DK or worsted) and the height you want, I can recommend an exact eye size and a skirt increase plan so your dress comes out perfectly full and proportional.


