


Introduction#
If you love amigurumi that looks genuinely impressive, a praying mantis is one of the coolest crochet projects you can make. It’s unusual, instantly recognizable, and full of interesting shapes—big eyes, long antennae, folded “praying” arms, and sleek wings along the back. The best part is that you can crochet all of those details using mostly basic stitches, then bring the personality to life through careful shaping and assembly.
Explore more intermediate amigurumi crochet patterns in our pattern library.
This crochet pattern is designed to help you create a realistic praying mantis amigurumi with a posed stance and detailed limbs. It’s a fantastic DIY crochet project for insect lovers, collectors, nature-themed décor, and anyone who wants to go beyond typical crochet animals.
In this crochet tutorial, you’ll learn how to build the mantis step-by-step, how to keep the body balanced, how to create the signature folded arms, and how to add wings that look sleek and structured without complicated stitch work.
Detailed Description of the Crochet Pattern#
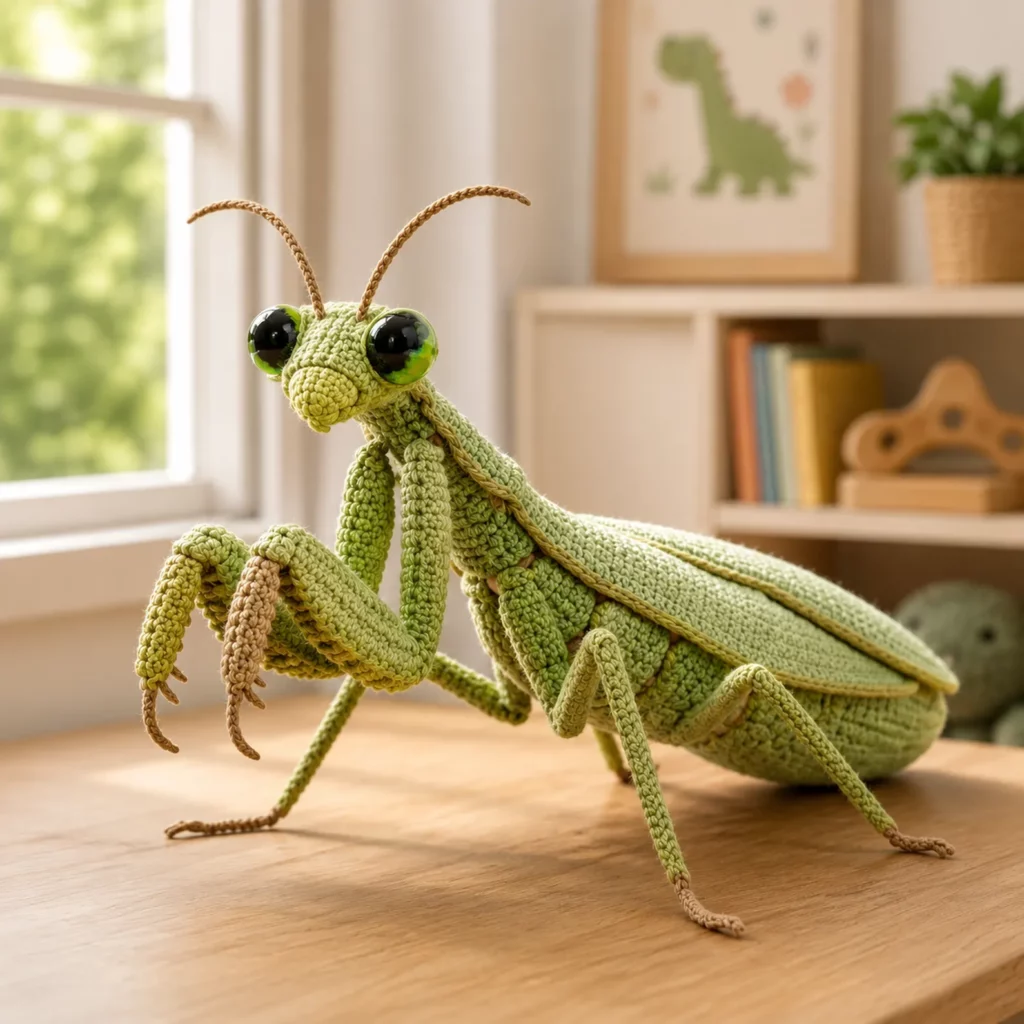
This praying mantis is built in a lifelike pose. The body is elongated with a thicker thorax and a tapered abdomen. The head is slightly triangular with large protruding eyes and long antennae. The front arms are the star feature—they bend forward and include a “grippy” forearm section that mimics the mantis’s hunting posture. The middle and back legs are long and angled to support the body. A pair of flat wings rests along the back, adding realism and completing the silhouette.
Key features you will crochet
- Shaped head with big raised eyes
- Long antennae that curve upward
- Thorax and abdomen with smooth single crochet texture
- Folded raptorial arms with a defined bend
- Four walking legs positioned for a stable stance
- Flat wings layered along the back
- Optional tiny spines on forearms for extra realism (easy add-on)
This crochet pattern looks advanced because of the posing, but it’s still built from manageable pieces: simple tubes, ovals, and flat wing panels sewn together carefully.
Skill Level Explanation#
This is an intermediate crochet pattern.
You’ll be comfortable if you can
- Crochet tight single crochet in the round
- Increase and decrease evenly
- Read and repeat shaping rounds
- Sew multiple pieces neatly
- Work with small details like thin antennae and long legs
You’ll practice
- Building a pose through placement rather than complicated shaping
- Making matching limbs (symmetry matters here)
- Adding structure with firm stuffing and optional internal support
- Creating crisp flat pieces for wings
If you’ve made amigurumi animals and want a more “collector style” project, this is a perfect next challenge.
Materials Needed#
Yarn
Smooth yarn is ideal for insects because it shows stitch definition and makes the body look sleek.
Recommended yarn weight
- DK weight yarn for detailed limbs and clean shaping
- Worsted weight yarn if you want a larger mantis, but DK gives the most refined look
Suggested colors
- Main green (olive, leaf green, or lime green depending on style)
- Light green or yellow-green for accents (optional)
- Brown or tan for tiny claw tips and antennae tips (optional)
Yarn tips
- Cotton yarn gives crisp stitches and holds shape well
- Acrylic is fine too, but choose a smooth one so details don’t get fuzzy
- If you want a “natural” look, use two close greens and swap colors occasionally for subtle camouflage
Hook
Use a smaller hook than the yarn label suggests to keep stitches tight.
- DK yarn: 2.5 mm to 3.25 mm
- Worsted yarn: 3.25 mm to 4.0 mm
Notions
- Stitch marker
- Tapestry needle
- Scissors
- Fiberfill stuffing
- Safety eyes or craft eyes for a big insect look (or crochet eye domes)
- Optional craft wire or pipe cleaners for posing legs and arms (display only)
- Optional small weights for stability (display only)
Safety note
If making for children, skip wire and use embroidered eyes or crocheted eyes instead of hard eyes.
Stitches & Techniques Explained#
Abbreviations in US terms
- MR magic ring
- ch chain
- sl st slip stitch
- sc single crochet
- inc increase (2 sc in same stitch)
- dec decrease (sc two stitches together)
- BLO back loop only
- st stitch
Invisible decrease
For smooth shaping, use invisible decrease by picking up the front loops of the next two stitches and sc them together.
Making long thin parts
Antennae and legs look best with very tight stitches and minimal stuffing. If you overstuff, they get lumpy. If you under-stuff, they flop. Aim for “firm but thin.”
Posing without complicated shaping
You can create bends in arms and legs by
- Sewing pieces at an angle
- Adding a small tack stitch at the “elbow” or “knee”
- Using light internal wire for display only
Flat wings
Wings are crocheted flat in rows, then sewn on the back. A simple edging round makes them look clean and finished.

Step-by-Step Instructions#
Work in continuous rounds unless stated. Use a stitch marker. This free crochet pattern is written in a tutorial format so you can adjust size easily.
Finished size
- DK yarn typically makes a mantis around 18 to 28 cm long depending on abdomen and leg length
- Worsted yarn makes a larger display mantis
Notes
- Stuff thorax and abdomen firmly
- Stuff head firmly
- Legs and arms should be lightly stuffed or supported
- Pin everything before sewing to check pose
Head
Use main green.
Round 1
- 6 sc in MR (6)
Round 2
- inc around (12)
Round 3
- (sc, inc) around (18)
Round 4
- (2 sc, inc) around (24)
Rounds 5 to 7
- sc around (24)
Shape slightly into a mantis head silhouette
Round 8
- (2 sc, dec) around (18)
Round 9
- sc around (18)
Round 10
- (sc, dec) around (12)
Stuff firmly.
Round 11
- dec around (6)
Fasten off, close, weave in end.
Head shaping tip
To get that mantis “face,” you can add a few shaping stitches later, pulling slightly from the side of the head toward the front to create a subtle angled jawline.
Eyes (make two)
These are raised domes that give the mantis its big-eyed look.
With main green (or slightly darker green)
Round 1
- 6 sc in MR (6)
Round 2
- inc around (12)
Round 3
- sc around (12)
Round 4
- (2 sc, dec) around (9)
Stuff lightly. If adding a safety eye, insert it now.
Round 5
- sc around (9)
Fasten off with a tail. Sew eyes to the sides of the head, slightly forward.
Alternative eye option
Use large craft eyes and sew them on securely for a dramatic realistic look (display only).
Antennae (make two)
Use brown or green.
Method one simple cord antenna
- Ch 26 to 40 depending on desired length
- Sl st back down the chain for a firm cord
Fasten off.
Method two thin tube antenna (more realistic)
Round 1
- 4 sc in MR (4)
Rounds 2 to 18 - sc around (4)
Fasten off.
Sew antennae to the top of the head, angled outward.
Thorax (middle body)
Use main green. The thorax is thicker because it supports arms and legs.
Round 1
- 6 sc in MR (6)
Round 2
- inc around (12)
Round 3
- (sc, inc) around (18)
Round 4
- (2 sc, inc) around (24)
Rounds 5 to 10
- sc around (24)
Taper slightly toward the abdomen
Round 11
- (2 sc, dec) around (18)
Rounds 12 to 13
- sc around (18)
Stuff firmly. Fasten off leaving long tail for sewing.
Abdomen (back body)
Use main green. This is longer and tapered.
Round 1
- 6 sc in MR (6)
Round 2
- inc around (12)
Round 3
- (sc, inc) around (18)
Round 4
- (2 sc, inc) around (24)
Rounds 5 to 12
- sc around (24)
Start tapering
Round 13
- (2 sc, dec) around (18)
Rounds 14 to 18
- sc around (18)
Round 19
- (sc, dec) around (12)
Rounds 20 to 22
- sc around (12)
Round 23
- dec around (6)
Stuff firmly as you go, but keep the final tip slightly softer so it tapers nicely.
Fasten off and close.
Wings (make two)
Use main green (or a lighter green). Wings are flat panels.
Row 1
- Ch 18, sc in second ch from hook and across (17)
Rows 2 to 10
- Ch 1, turn, sc across (17)
To taper the wing tip
Row 11
- Ch 1, sc2tog, sc 13, sc2tog (15)
Row 12
- Ch 1, sc across (15)
Row 13
- Ch 1, sc2tog, sc 11, sc2tog (13)
Row 14
- Ch 1, sc across (13)
Fasten off with long tail.
Optional wing edging
- Sc evenly around wing edge for a cleaner outline
Sew wings on top of the abdomen, overlapping slightly near the center seam.
Front arms (raptorial arms, make two)
These are the signature “praying” arms with a bend.
Upper arm (shoulder to elbow)
Round 1
- 6 sc in MR (6)
Round 2
- (sc, inc) around (9)
Rounds 3 to 8
- sc around (9)
Forearm (elbow to hand)
Round 9
- (sc, dec) around (6)
Rounds 10 to 18
- sc around (6)
Make it look bent
- Lightly stuff the upper arm
- Keep forearm lightly stuffed or unstuffed
- Fold at the “elbow” and add a tack stitch to hold the bend
Optional spines
- Surface stitch tiny bumps along the inside edge using a contrasting green or tan yarn
Fasten off leaving a long tail for sewing.
Walking legs (middle and back legs, make four)
Use main green with optional brown tips.
Leg tube
Round 1
- 6 sc in MR (6)
Round 2
- (sc, inc) around (9)
Rounds 3 to 20
- sc around (9)
Taper slightly
Round 21
- (sc, dec) around (6)
Rounds 22 to 28
- sc around (6)
Fasten off leaving tail for sewing.
Leg posing tip
Pin legs to the thorax and abdomen first, then position the mantis on a flat surface to check balance before sewing.
Assembly
Assembly is what makes this crochet pattern look realistic, so take your time here.
Sew head to thorax
- Center head on the front of the thorax
- Sew firmly with multiple passes
Sew abdomen to thorax
- Attach abdomen to the back of thorax
- Angle slightly downward so the mantis looks natural
Attach wings
- Sew wings on the top of the abdomen
- Overlap them slightly at the center
Attach front arms
- Sew arms high on the thorax near the head
- Angle them forward
- Add a small tack stitch to keep the “praying” position
Attach walking legs
- Middle legs attach on the sides of thorax
- Back legs attach closer to the abdomen
- Angle them outward and backward for stability
Add antennae
- Sew at top front of head
- Angle outward for lifelike posture
Final pose check
Place the mantis on a flat surface. Adjust limbs with a few hidden stitches if needed to improve balance.
Common Mistakes and How to Avoid Them#
Mantis won’t balance
- Spread legs slightly wider
- Angle back legs farther backward
- Add a tiny weight inside the abdomen (display only)
Arms look too straight
- Add an elbow tack stitch
- Lightly bend and sew the forearm to the upper arm at an angle
Eyes look uneven
- Pin both eyes first and check from front view
- Measure placement from the center line
Wings curl
- Add a border round of sc around edges
- Lightly steam-block wings and let them dry flat
Legs flop
- Use tighter stitches and minimal stuffing
- For display pieces, add thin wire inside legs
Expert Tips for Better Results#
- Use a smaller hook for legs and antennae to keep them thin and sturdy
- Stuff the thorax and abdomen firmly so the body doesn’t sag
- Pin everything before sewing and take photos to check symmetry
- Use invisible decreases for the smoothest finish
- Add subtle shading by surface stitching a darker green line along the wing edge
- Weave in ends as you go because this pattern has many parts
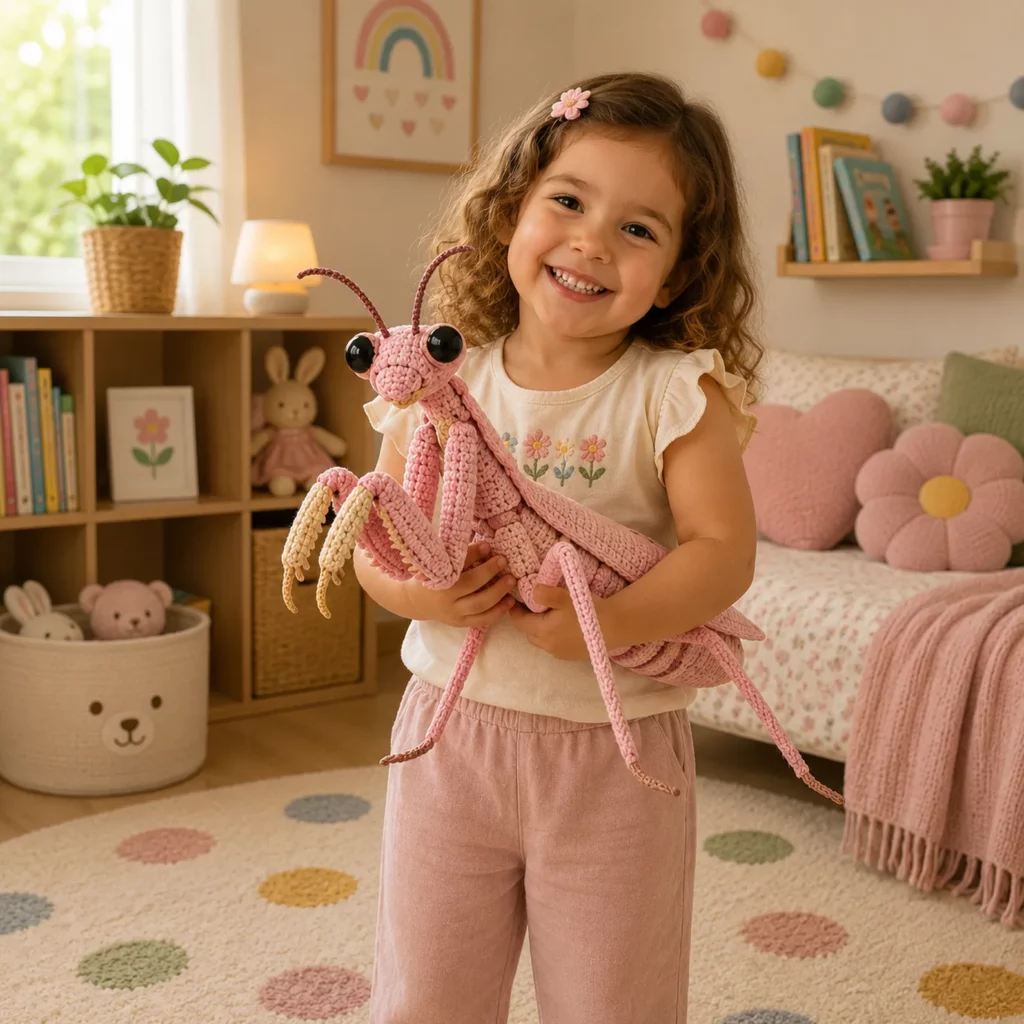
Variations and Customization Ideas#
- Make a cute “cartoon” mantis by using larger eyes and shorter abdomen
- Make a baby mantis keychain version with sport yarn and embroidered eyes
- Use variegated green yarn for a natural camouflage effect
- Add tiny crocheted wings only (skip large wings) for a simpler look
- Create a leaf perch base so it displays beautifully on a shelf
- Add a “flower mantis” version with pink accents and petal-like wings
Benefits of This Crochet Project#
- A unique crochet pattern that stands out from typical amigurumi animals
- Great practice for shaping, posing, and advanced assembly
- Teaches useful skills like thin limbs, flat wings, and symmetry
- Perfect for collectors and nature-themed décor
- Highly customizable in size and color
- Makes a memorable handmade gift for insect lovers
Internal Linking Suggestions#
- How to Crochet Invisible Decrease for Amigurumi
- Best Yarn for Amigurumi With Tight Stitches
- How to Sew Amigurumi Parts Neatly
- Clean Color Change Tutorial for Crochet
- How to Make Amigurumi Stand Upright
- Free Crochet Bug and Insect Patterns Collection
- Crochet Wire Support Tips for Display Amigurumi
FAQ#
Is this crochet pattern beginner-friendly
It’s best for confident beginners or intermediate crocheters. The stitches are simple, but there are many parts and careful assembly is important.
Can I make this without safety eyes
Yes. You can crochet eye domes and embroider pupils, or stitch on felt circles (display only). Embroidered eyes are safest for children.
How do I keep the arms in the praying pose
Use a tack stitch at the elbow bend and sew the arms at a forward angle. For display pieces, a hidden wire inside the arm also helps.
Do I need to add wire to the legs
Not required, but it helps if you want a poseable display mantis. If you skip wire, keep stitches tight and stuff lightly for stiffness.
How do I make the wings look more realistic
Add a sc border, lightly steam-block them flat, and consider surface stitching a thin line down the center to mimic wing structure.
How do I resize the mantis
Use thicker yarn and a larger hook for a bigger mantis, or thinner yarn and a smaller hook for a smaller one. Keep tension tight for clean shaping.
Conclusion#
This praying mantis amigurumi crochet pattern is the perfect project when you want something detailed, unusual, and truly display-worthy. The big eyes, long antennae, sleek wings, and folded arms capture the mantis’s iconic look, while the simple stitches keep the process approachable. With careful stuffing and thoughtful assembly, you’ll end up with a crochet insect that looks like a handmade collectible.
If you tell me your yarn weight and the size you want your mantis to be, I can suggest the best eye size and an easy leg-length adjustment so your final pose looks perfectly balanced.


