


Introduction#
There’s a reason teddy bears are one of the most loved crochet projects of all time: they’re timeless, comforting, and instantly giftable. But when you combine that classic teddy shape with plush chenille yarn, the result feels extra special—like a handmade toy that could sit on a nursery shelf, be hugged like a pillow, or become a forever “favorite” for someone you love.
Explore more beginner amigurumi crochet patterns in our pattern library.
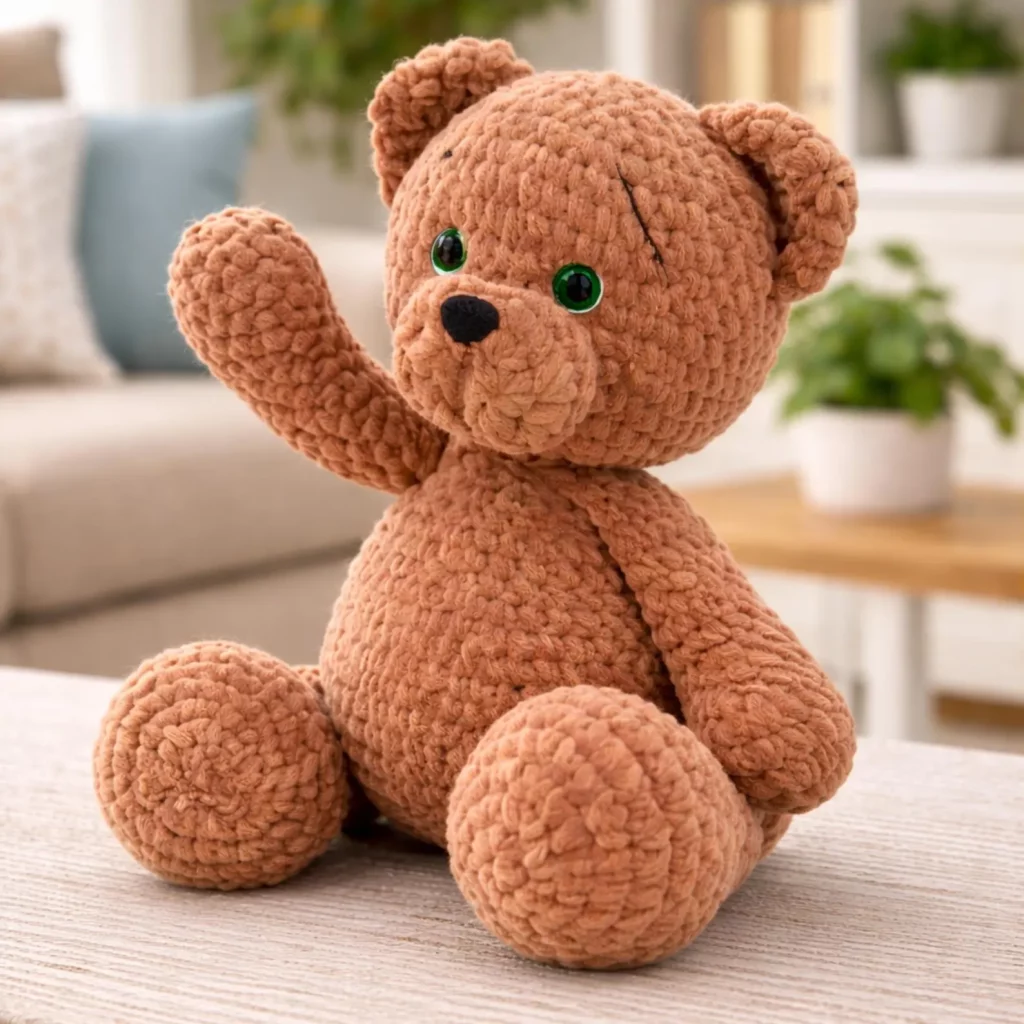
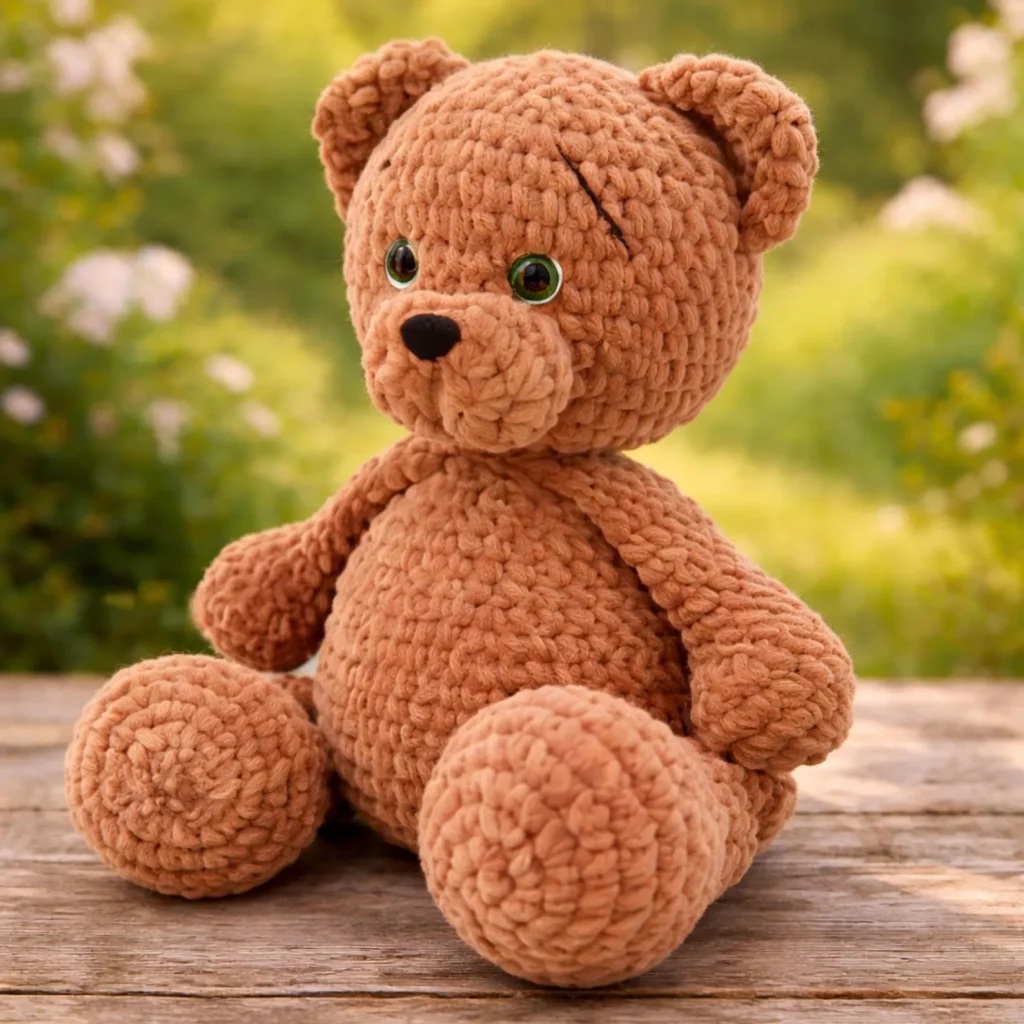
This crochet pattern is designed for a soft, modern plush teddy bear with a round head, a slightly protruding muzzle, simple ears, and chunky limbs that help it sit nicely. The look is clean and minimalist (no complicated colorwork), but still has plenty of personality thanks to the face shaping and the sweet teddy proportions.
In this guide, you’ll get a full free crochet pattern written in a crochet tutorial style—meaning I’ll explain why we do certain steps, how to check your shaping as you go, and how to get a neat finish even if you’re new to plush yarn. You’ll also get customization ideas, common mistake fixes, and practical tips that help your teddy look polished and professional.
Detailed Description of the Crochet Pattern#
This plush teddy bear is a seated amigurumi style toy with a soft, rounded silhouette. The design focuses on a few key features:
- Big round head with smooth shaping (perfect for cuddling)
- Raised muzzle/snout that gives a classic teddy profile
- Small rounded ears positioned slightly to the sides for a sweet expression
- Chunky arms and legs that feel “plush” and help the bear sit upright
- Simple face details that can be made with safety eyes, embroidery, or felt
- Single main color for a clean look (but easy to customize if you want accents)
Instead of complicated sculpting, this crochet pattern relies on smart placement: where you put the eyes, muzzle, and ears makes the teddy look cute and balanced. It’s a great project for learning “face mapping” (the amigurumi skill that makes toys look symmetrical and expressive).
Skill Level Explanation#
This is an easy-to-intermediate crochet pattern.
It’s great for crochet for beginners who already know:
- how to single crochet
- how to work in the round
- basic increases and decreases
- simple sewing with a yarn needle
It becomes “intermediate” mostly because plush yarn can be tricky to count. The teddy construction itself is simple. If you take your time and use stitch markers, you’ll be totally fine.
Materials Needed#
Yarn
To match the soft plush look, use super bulky (#6) chenille/blanket yarn. This yarn creates a velvety texture and makes the teddy extra cuddly.
Recommended yarn options:
- Chenille/blanket yarn (#6) for the body
- A small amount of smooth yarn or embroidery floss for face details (optional but helpful)
Color ideas:
- Classic teddy: warm tan, caramel, cocoa, honey brown
- Modern nursery: cream, beige, soft gray
- Fun versions: pastel pink, sage, lavender, baby blue
Yarn amount (approximate):
- Medium plush bear: 1–2 skeins of #6 chenille yarn
- Small bear: 1 skein is often enough
(Exact yardage depends on yarn thickness and your chosen size.)
Hook
Use a hook that creates a dense fabric so stuffing won’t show:
- Chenille/blanket yarn: 6.0–7.0 mm (start at 6.5 mm)
If your stitches look loose or you can see stuffing, go down a hook size.
Notions
- Fiberfill stuffing
- Stitch markers (more than one is helpful)
- Yarn needle (large eye)
- Scissors
- Safety eyes (optional): 12–18 mm depending on bear size
- Optional: safety nose, felt nose, or embroidery floss for nose/mouth
- Optional: poly pellets in a fabric pouch for weight (makes sitting easier)
Stitches & Techniques Explained#
Abbreviations (US terms)
- MR = magic ring
- sc = single crochet
- inc = increase (2 sc in same stitch)
- dec = invisible decrease (sc2tog through front loops)
- sl st = slip stitch
- ch = chain
- ( ) = repeat
- = stitch count
Plush yarn tips (very important)
Plush yarn is forgiving for looks, but tricky for counting. Here are the best methods:
- Count by touch: feel the “V” stitches with your fingers
- Use a running marker: mark the first stitch of every round
- Add milestone markers: every 10–12 stitches on large rounds
- Slow down on decrease rounds: decreases are easy to miss in fluffy yarn
Invisible decrease
For smooth shaping (especially on head and limbs), use invisible decreases:
- Insert hook into front loop of next stitch, then front loop of following stitch, yarn over, pull through, yarn over, pull through two.
This blends beautifully into plush fabric.

Step-by-Step Instructions#
Notes:
- Work in continuous rounds unless stated.
- Use a stitch marker.
- Stuff firmly but don’t stretch stitches.
- Stitch counts are written for a medium plush teddy. You can scale size by changing yarn weight and hook size.
Head
R1: MR, 6 sc [6]
R2: inc x6 [12]
R3: (sc, inc) x6 [18]
R4: (2 sc, inc) x6 [24]
R5: (3 sc, inc) x6 [30]
R6: (4 sc, inc) x6 [36]
R7: (5 sc, inc) x6 [42]
R8: (6 sc, inc) x6 [48]
R9–R12: sc around [48]
Eye placement (if using safety eyes):
Place eyes between R10–R11, about 10–14 stitches apart.
Tip: Wider spacing looks calm and cuddly; slightly closer looks “baby bear.”
Begin closing:
R13: (6 sc, dec) x6 [42]
R14: (5 sc, dec) x6 [36]
R15: (4 sc, dec) x6 [30]
Stuff firmly and shape round.
R16: (3 sc, dec) x6 [24]
R17: (2 sc, dec) x6 [18]
R18: (sc, dec) x6 [12]
R19: dec x6 [6]
Fasten off, weave in.
Muzzle/Snout
This piece gives the bear that classic teddy face.
R1: MR, 6 sc [6]
R2: inc x6 [12]
R3: (sc, inc) x6 [18]
R4: (2 sc, inc) x6 [24]
R5: sc around [24]
R6: (2 sc, dec) x6 [18]
Lightly stuff. Fasten off leaving a long sewing tail.
Attach muzzle:
Pin it centered below the eyes. Sew around the edge with small stitches. Avoid pulling too tight (tight sewing can pucker plush fabric).
Nose and Mouth
Use embroidery floss or smooth yarn (it looks cleaner than chenille).
- Nose: small triangle or oval on the muzzle center
- Mouth: a short vertical stitch down from the nose, then a tiny curve or two lines
Keep facial details minimal—simple looks sweetest with plush yarn.
Ears (make 2)
R1: MR, 6 sc [6]
R2: (sc, inc) x3 [9]
R3: sc around [9]
R4: (2 sc, inc) x3 [12]
R5: sc around [12]
Flatten (do not stuff). Fasten off with a long tail.
Body
This body is rounded and stable for a seated pose.
R1: MR, 6 sc [6]
R2: inc x6 [12]
R3: (sc, inc) x6 [18]
R4: (2 sc, inc) x6 [24]
R5: (3 sc, inc) x6 [30]
R6: (4 sc, inc) x6 [36]
R7: (5 sc, inc) x6 [42]
R8–R12: sc around [42]
Taper slightly toward the neck:
R13: (5 sc, dec) x6 [36]
R14–R15: sc around [36]
Stuff firmly, especially the bottom. (Add a small weight pouch now if using.)
R16: (4 sc, dec) x6 [30]
R17: (3 sc, dec) x6 [24]
Fasten off leaving a long tail for attaching head.
Arms (make 2)
R1: MR, 6 sc [6]
R2: (sc, inc) x3 [9]
R3–R6: sc around [9]
R7: (sc, dec) x3 [6]
R8–R10: sc around [6]
Lightly stuff (mostly at the end). Flatten and close. Leave tail for sewing.
Legs/Feet (make 2)
Chunky feet help the teddy sit.
R1: MR, 6 sc [6]
R2: inc x6 [12]
R3: (sc, inc) x6 [18]
R4: (2 sc, inc) x6 [24]
R5–R7: sc around [24]
Stuff firmly.
R8: (2 sc, dec) x6 [18]
R9: sc around [18]
Flatten top and close. Leave tail.
Optional Tail
R1: MR, 5 sc [5]
R2: inc x5 [10]
R3: sc around [10]
Fasten off, lightly stuff, sew to back.
Assembly#
Assembly is where your teddy becomes “wow.” Pin everything first.
Attach head to body
- Pin head centered on body opening.
- Sew around securely with whip stitch.
- Reinforce by stitching a second pass around the join (plush toys get hugged).
Attach legs
- Place legs low on the body front, angled slightly forward.
- Check that the teddy can sit without tipping before sewing permanently.
- Sew firmly.
Attach arms
- Sew arms on the sides, slightly below head join.
- Angle forward for a cuddly pose.
Attach ears
- Pin ears symmetrically on top sides of the head.
- Step back and check from the front before sewing.
- Sew securely with multiple stitches.
Final face check
If you embroidered after placing the muzzle, make sure the nose is centered. A tiny shift in embroidery can change the whole expression—so take your time.
Common Mistakes and How to Avoid Them#
- Stuffing shows through: use a smaller hook and keep tension tight. Plush yarn needs dense fabric.
- Head looks lumpy: stuff in small tufts and shape with your hands while closing.
- Muzzle puckers: you’re pulling sewing yarn too tight—use gentler tension and more evenly spaced stitches.
- Eyes look uneven: place eyes with pins first, or don’t snap safety eye backs until you’re happy.
- Bear won’t sit: legs may be too low or too close together. Move them slightly outward and stuff base firmly (or add weight).
Expert Tips for Better Results#
- Use embroidery floss for the nose/mouth for cleaner lines.
- Add a small weight pouch (poly pellets in fabric) inside the base for stability.
- Mark the front center of head and body with stitch markers so everything aligns.
- Weave ends deep and long—chenille yarn can loosen if ends are too short.
- Want extra cuteness? Add tiny blush cheeks with cosmetic blush or pink embroidery.
Variations and Customization Ideas#
- Sleepy teddy: embroider closed eyes instead of using safety eyes.
- Two-tone teddy: lighter muzzle and paw pads for contrast.
- Mini teddy: use worsted yarn and a 3.0 mm hook with the same stitch counts.
- Jumbo teddy: use thicker chenille and add extra even rounds in head and body.
- Accessory teddy: add a scarf, bow tie, or tiny sweater for gifting.
- Personalized teddy: stitch initials on the belly or add a small heart patch.
Benefits of This Crochet Project#
- Works up quickly with plush yarn
- Beginner-friendly shaping with a high-end finished look
- Extremely giftable for babies, birthdays, and holidays
- Easy to customize size, color, and expression
- Great “content project” for crochet blogs and social posts
- Comforting, huggable result that people actually use and keep
Internal Linking Suggestions#
If you’re building a crochet blog, link this pattern to:
- How to Crochet with Chenille/Blanket Yarn
- Magic Ring Tutorial for Beginners
- Invisible Decrease for Amigurumi
- How to Attach Safety Eyes Securely
- How to Stuff Amigurumi Without Lumps
- Easy Beginner Amigurumi Patterns for Gifts
FAQ Section#
Is this crochet pattern good for beginners?
Yes. The stitches are simple (mostly single crochet). The main learning curve is counting stitches in plush yarn, which is manageable with markers.
What yarn is best for a plush teddy bear?
Chenille/blanket yarn (#6) gives the softest teddy. Worsted yarn works too for a smaller, more defined bear.
Can I make it without safety eyes?
Absolutely. Embroidered eyes are adorable and often preferred for baby-safe gifts.
How do I make the teddy bigger or smaller?
Change yarn weight and hook size. You can also add extra even rounds in the head and body for a bigger plush.
How do I keep the muzzle centered?
Pin the muzzle first and measure from both eyes. Sew slowly and check placement after every few stitches.
Can I wash the teddy?
Usually yes, depending on yarn. Plush yarn often does best with gentle washing and air drying. Always follow the yarn label care instructions.
Conclusion#
A plush teddy bear is one of the most satisfying crochet pattern projects you can make—fast to stitch, soothing to hold, and endlessly giftable. With simple shaping, careful stuffing, and neat assembly, you’ll end up with a teddy that looks professional and feels like a true comfort plush.
If you tell me what yarn weight you’re using (plush #6, bulky #5, or worsted #4) and how tall you want your bear, I can adjust the round counts and eye size recommendations so your teddy comes out perfectly proportioned.


