


Introduction#
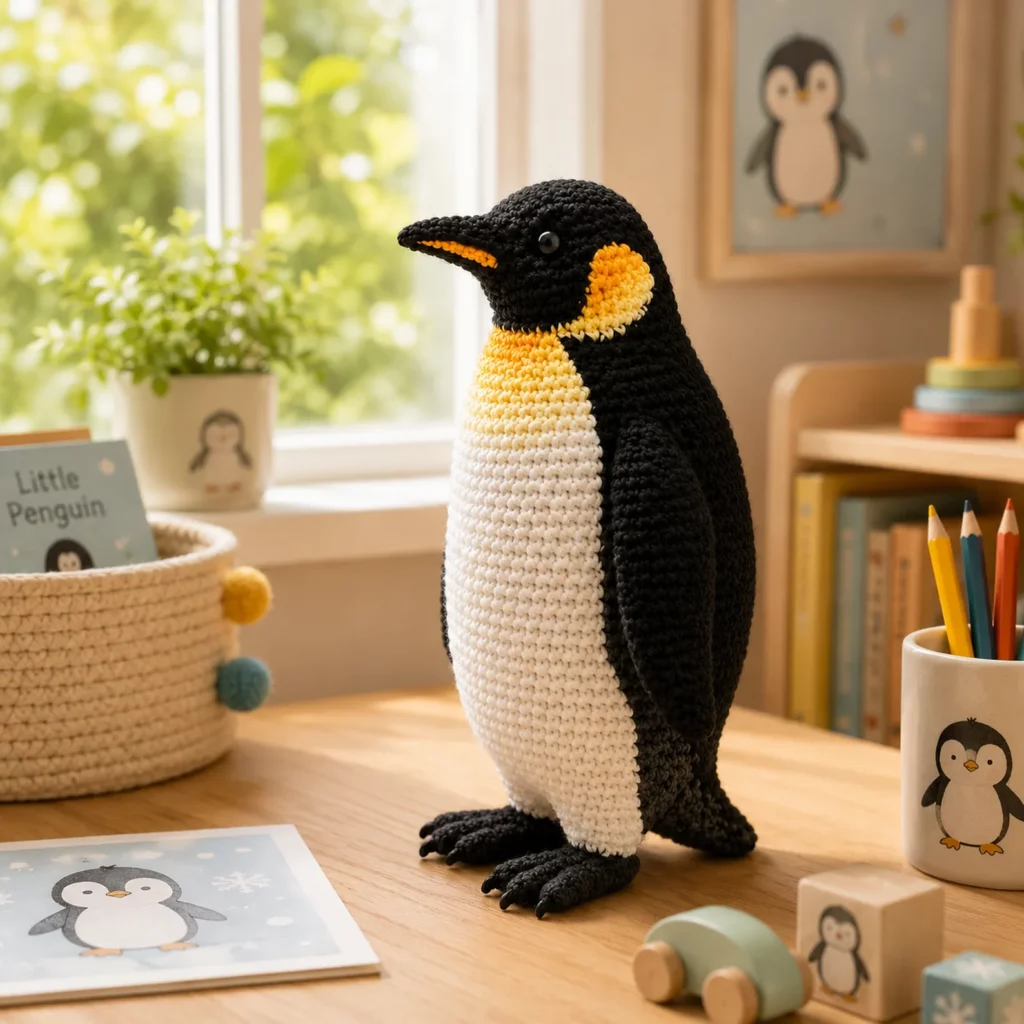
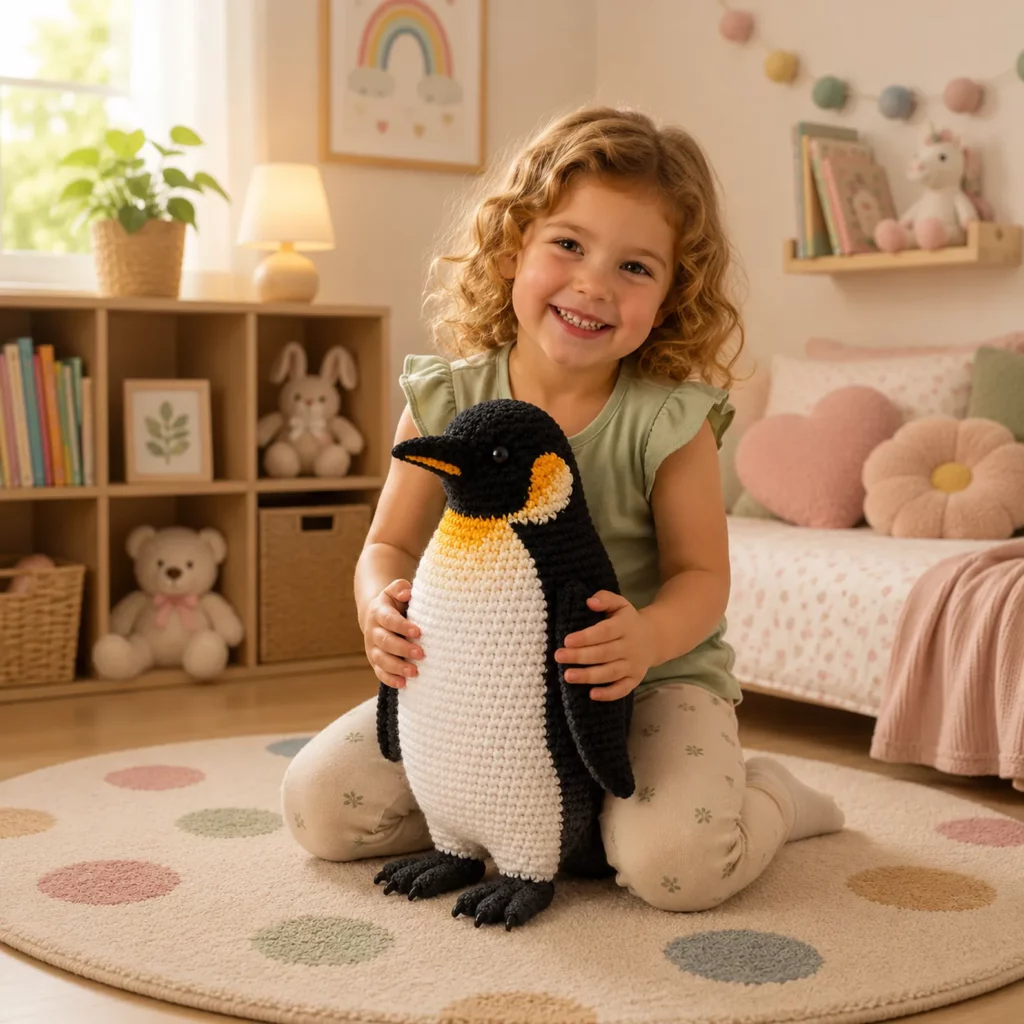
A penguin amigurumi is one of those crochet projects that looks instantly charming the moment the shape starts to form. The simple black-and-white color blocking gives it a classic look, and the upright body makes it perfect for nursery décor, winter displays, desk buddies, and handmade gifts.
Explore more beginner amigurumi crochet patterns in our pattern library.
This crochet pattern shows you how to create a standing penguin with a smooth rounded body, neat white belly, small flippers, and sturdy feet that help it balance. The yellow and orange accent area around the neck adds that “real penguin” vibe without making the pattern complicated. Most of the work is basic single crochet in the round—what makes it look professional is your shaping, stuffing, and clean color changes.
Below you’ll find a detailed crochet tutorial with step-by-step instructions, finishing tips, and easy options to customize your penguin’s size and expression.
Detailed Description of the Crochet Pattern#
This penguin is designed with a realistic upright posture while keeping that soft, friendly amigurumi style. The body is a tall oval shape with a flatter base to help it stand. The belly is a clean contrasting panel that runs from the chest down to the lower tummy. The head is rounded and blends naturally into the body (or can be made separately for easier assembly). The beak is short and pointed, and the flippers are simple teardrop shapes that sit close to the sides.
Main features you’ll crochet
- Upright body with a stable base
- Smooth black back and white belly front
- Yellow-to-orange throat accent for a realistic look
- Small pointed beak
- Rounded flippers sewn close to the body
- Two feet with toes for balance
- Optional embroidered details for a cute expression
This crochet pattern looks clean and modern because the stitch texture stays even and tight, giving the penguin a polished “plush toy” finish.
Skill Level Explanation#
This is a confident beginner crochet pattern.
You’ll be comfortable if you can
- Crochet single crochet in continuous rounds
- Increase and decrease evenly
- Count stitches and rounds
- Attach safety eyes or embroider features
- Sew pieces neatly with a yarn needle
You’ll practice
- Clean color changes for the belly and neck accents
- Stuffing and shaping for a standing plush
- Symmetrical placement for flippers, feet, and beak
If you’ve made any simple amigurumi before, this penguin is a great next project.
Materials Needed#
Yarn
Smooth yarn works best for crisp color blocking and a clean finish.
Recommended yarn weight
- DK weight for a smaller, detailed penguin
- Worsted weight for a larger, cuddlier penguin
Suggested colors
- Black for head, back, and sides
- White for belly
- Yellow for throat area
- Orange for cheek/chin accent (optional but cute)
- Dark gray or black for feet and beak if you prefer a darker look
Yarn tips
- Cotton gives crisp stitches and sharp color separation
- Acrylic is softer and great for plush toys
- Avoid fuzzy yarn because it blurs colorwork and hides shaping
Hook
Use a smaller hook than the label suggests so stuffing doesn’t show.
- DK yarn: 2.75 mm to 3.25 mm
- Worsted yarn: 3.25 mm to 4.0 mm
Notions
- Stitch marker
- Tapestry needle
- Scissors
- Fiberfill stuffing
- Safety eyes (8 to 12 mm depending on size) or black embroidery floss
- Optional felt for tiny beak detail (display only)
- Optional small weight pouch for the base (display only)
Safety note
For small children, embroider the eyes and skip any hard accessories or weights.
Stitches & Techniques Explained#
Abbreviations in US terms
- MR magic ring
- ch chain
- sl st slip stitch
- sc single crochet
- inc increase (2 sc in same stitch)
- dec decrease (sc 2 stitches together)
- st stitch
- BLO back loop only
Invisible decrease
Use invisible decreases for a smoother finish: pick up the front loops of the next two stitches, then sc them together.
Clean color changes
Change color on the last yarn-over of the stitch before the new color. Pull the new yarn snugly to prevent gaps.
Making a plush stand upright
The secret is a firm base. Stuff the lower body firmly and flatten the bottom slightly with your hands. For display-only penguins, a small weight pouch inside the base helps a lot.

Step-by-Step Instructions#
This is a free crochet pattern written as a crochet tutorial. Work in continuous rounds unless stated. Use a stitch marker.
Finished size
- DK yarn: about 14 to 20 cm tall
- Worsted yarn: about 18 to 28 cm tall
Notes
- You can crochet head and body as one piece for a seamless look
- For the neatest belly, you can either do color changes during rounds or sew on a belly panel
- Below I’m giving the simplest method: sew-on belly panel, plus optional color accent around the neck
Body and head (one piece)
Start at the top of the head with black.
Round 1
- 6 sc in MR (6)
Round 2
- inc around (12)
Round 3
- (sc, inc) around (18)
Round 4
- (2 sc, inc) around (24)
Round 5
- (3 sc, inc) around (30)
Round 6
- (4 sc, inc) around (36)
Rounds 7 to 11
- sc around (36)
Eye placement
- Place eyes between rounds 9 and 10
- Space them about 7 to 9 stitches apart
Optional yellow neck accent
To create the warm yellow throat area without complicated shaping, switch to yellow for two rounds right under the head.
Round 12 (yellow)
- sc around (36)
Round 13 (yellow)
- sc around (36)
Switch back to black.
Rounds 14 to 20 (black)
- sc around (36)
Begin widening slightly for the belly
Round 21
- (5 sc, inc) around (42)
Rounds 22 to 28
- sc around (42)
Begin tapering toward the base
Round 29
- (5 sc, dec) around (36)
Round 30
- sc around (36)
Round 31
- (4 sc, dec) around (30)
Round 32
- sc around (30)
Start stuffing
Stuff head and upper body firmly, then continue stuffing the lower body very firmly for stability.
Round 33
- (3 sc, dec) around (24)
Round 34
- sc around (24)
Round 35
- (2 sc, dec) around (18)
Round 36
- sc around (18)
Round 37
- (sc, dec) around (12)
Round 38
- dec around (6)
Fasten off and close. Flatten the base gently.
White belly panel (sewn on)
This method creates a very neat belly shape.
With white
Row 1
- Ch 10, sc in second ch from hook and across (9)
Rows 2 to 16
- Ch 1, turn, sc across (9)
To curve the top slightly
Row 17
- Ch 1, sc2tog, sc 5, sc2tog (7)
Row 18
- Ch 1, sc across (7)
Fasten off leaving a long tail.
Sew belly panel
- Center the belly on the front
- The top should sit just under the yellow throat area
- Stitch neatly around the edges with small stitches
Beak
Use black with a small yellow/orange detail, or make it entirely dark for simplicity.
Simple beak (triangle in rows)
Row 1
- Ch 4, sc in second ch from hook and across (3)
Row 2
- Ch 1, turn, sc2tog, sc (2)
Row 3
- Ch 1, turn, sc2tog (1)
Fasten off leaving a tail. Sew centered between the eyes, slightly below eye line.
Optional colored beak stripe
- Embroider a small yellow line on the beak edge
- Or sew a tiny strip of yellow yarn on one side for a realistic touch
Flippers (make two)
Use black.
Round 1
- 6 sc in MR (6)
Round 2
- (sc, inc) around (9)
Round 3
- (2 sc, inc) around (12)
Rounds 4 to 8
- sc around (12)
Round 9
- (2 sc, dec) around (9)
Round 10
- sc around (9)
Flatten and close
- Do not stuff
- Fold flat and sc across the top to close
Fasten off leaving a sewing tail.
Sew flippers
- Attach to the sides of the body
- Position slightly back so the penguin looks sleek
- Make sure both flippers sit at the same height
Feet (make two)
Use dark gray or black.
Round 1
- 6 sc in MR (6)
Round 2
- inc around (12)
Round 3
- (sc, inc) around (18)
Rounds 4 to 5
- sc around (18)
Flatten slightly and shape toes
You can create toes by sewing a few stitches to pinch the front edge into three sections.
Fasten off leaving a tail.
Attach feet
- Place feet slightly forward under the belly area
- Pin both first, then test standing
- Sew firmly, adding extra stitches at the back of each foot join
Assembly#
If you followed the one-piece body method, you’ll only be assembling details.
Assembly order
- Sew belly panel
- Sew beak
- Sew flippers
- Sew feet
- Add any embroidery details (cheek highlight, beak line, eyelids)
Balance tip
Before sewing feet permanently, place the penguin on a flat surface and adjust foot angle until it stands without tipping.
Common Mistakes and How to Avoid Them#
Belly panel looks crooked
- Pin the panel first and check from multiple angles
- Sew the top edge first, then work down both sides evenly
Penguin falls forward
- Stuff the base more firmly
- Move feet slightly forward
- Add a small weight pouch inside the base for display-only pieces
Color changes look jagged
- Change color on the last yarn-over
- Keep tension consistent when switching colors
- Weave ends neatly so they don’t create bumps
Flippers look uneven
- Count rounds carefully on both flippers
- Pin them before sewing and measure their height from the base
Beak looks too long or too short
- Adjust starting chain length
- For a shorter beak, start with ch 3
- For a longer beak, start with ch 5
Expert Tips for Better Results#
- Use invisible decreases for the smoothest finish
- Insert eyes before you fully stuff the head
- Stuff in small amounts and shape as you go
- Lightly steam the belly panel before sewing so it lays flat
- Add a tiny white highlight stitch on the eye for extra life
- If you want a super neat look, surface crochet a thin line around the belly edge in black to frame it
Variations and Customization Ideas#
- Make a baby penguin by shortening the body and using bigger eyes
- Add a scarf or earmuffs for a winter-themed gift
- Make a pastel penguin for nursery décor
- Add a little bow tie for a formal look
- Turn it into an ornament by making it smaller and adding a hanging loop
- Add flipper wire inside for posed arms (display only)
- Create a whole penguin family by changing yarn weight for different sizes
Benefits of This Crochet Project#
- A timeless crochet pattern that’s cute year-round and perfect for winter décor
- Mostly basic stitches, so it’s relaxing and beginner-friendly
- Teaches clean color blocking and neat finishing skills
- Makes a giftable plush that looks polished and professional
- Easy to customize with accessories and colors
- Great stash buster for small amounts of accent yarn
Internal Linking Suggestions#
- How to Crochet Invisible Decrease for Amigurumi
- Clean Color Change Tutorial for Crochet
- How to Sew Amigurumi Parts Neatly
- Best Yarn for Amigurumi With Tight Stitches
- How to Place Safety Eyes Symmetrically
- How to Make Amigurumi Stand Upright
- Free Crochet Winter Amigurumi Patterns Collection
FAQ#
Is this crochet pattern beginner-friendly
Yes. It uses single crochet, increases, decreases, and simple sewing. The key is careful stuffing and foot placement so it stands well.
Can I make this without safety eyes
Absolutely. Embroider eyes with black thread for a baby-safe penguin.
How do I make the belly look neat
A sewn-on belly panel is the simplest way to get crisp lines without complicated colorwork. Pin it first and sew slowly.
How do I stop the penguin from tipping
Stuff the base firmly and place the feet slightly forward. For display pieces, add a small weight pouch inside the base.
What yarn is best for amigurumi penguins
Smooth cotton or acrylic is ideal. Cotton gives crisp definition; acrylic can feel softer and plushier.
How do I resize the penguin
Use thicker yarn and a larger hook for a bigger penguin, or thinner yarn and a smaller hook for a mini version. Keep stitches tight so stuffing doesn’t show.
Conclusion#
This penguin amigurumi crochet pattern is a perfect project when you want something clean, classic, and irresistibly cute. The upright body shape, crisp belly, and small details like the beak and flippers create a polished look that feels professional, yet the stitches stay simple and relaxing. With firm stuffing and careful foot placement, you’ll end up with a sturdy penguin that stands proudly on its own—ready to gift, display, or add to your amigurumi animal collection.
If you tell me your yarn weight and the height you want for your penguin, I can suggest the best eye size and a quick adjustment to body rounds so your proportions look exactly right.


