


Introduction#
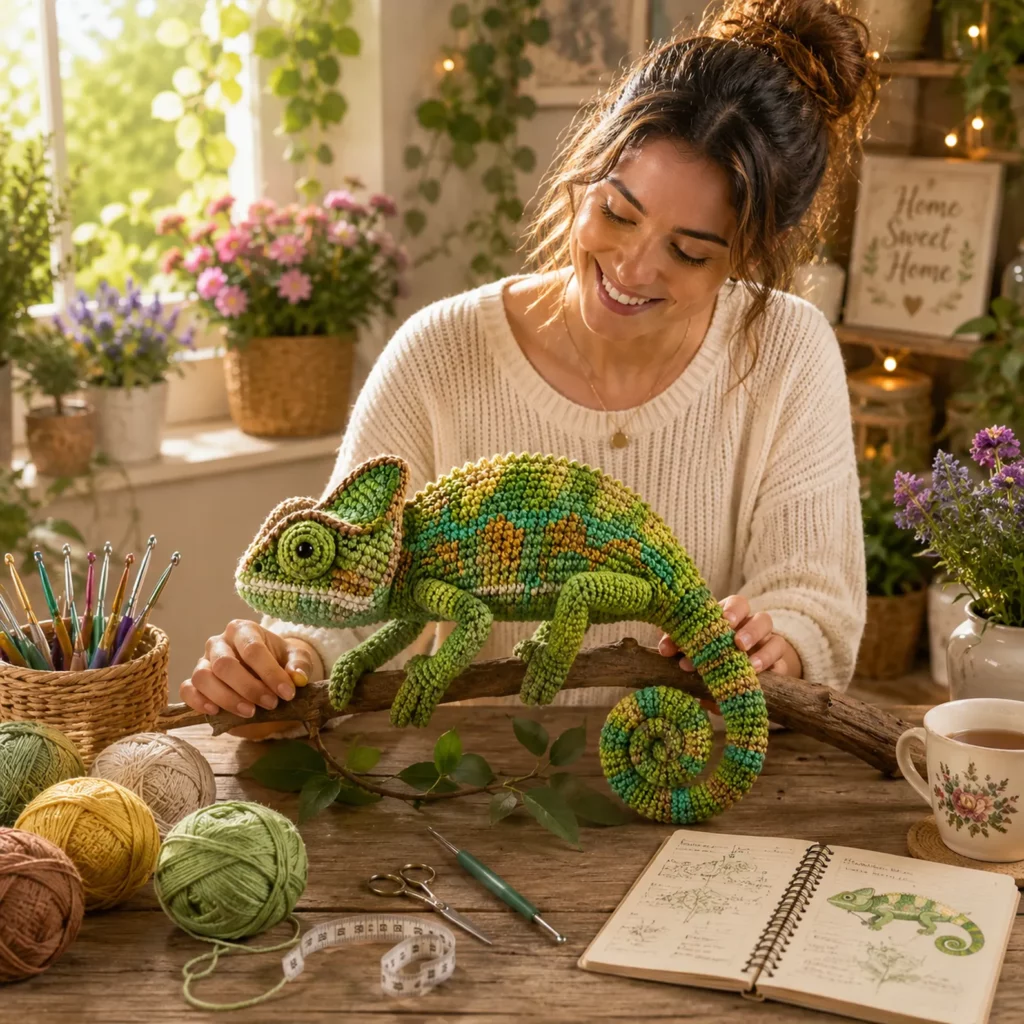
If you’re looking for a crochet pattern that feels playful, unique, and seriously fun to display, a chameleon amigurumi is the perfect choice. Chameleons have such a recognizable silhouette—big head, grippy feet, curved back, and that iconic curled tail—and they translate beautifully into crochet. Even better, you can have so much fun with colors: soft mossy greens, bright tropical shades, or even a rainbow fantasy version.
Explore more beginner amigurumi crochet patterns in our pattern library.
This crochet tutorial shows you how to make a branch-perching chameleon with a smooth amigurumi body, subtle texture along the back, and a spiral tail that curls naturally. The look is detailed, but the stitches stay approachable: mostly single crochet, increases, decreases, and clean color changes. The “wow” comes from clever shaping and thoughtful assembly.
Whether you’re making this as décor, a gift for an animal lover, or a standout addition to your amigurumi collection, this DIY crochet project will teach you techniques you’ll use again and again.
Detailed Description of the Crochet Pattern#
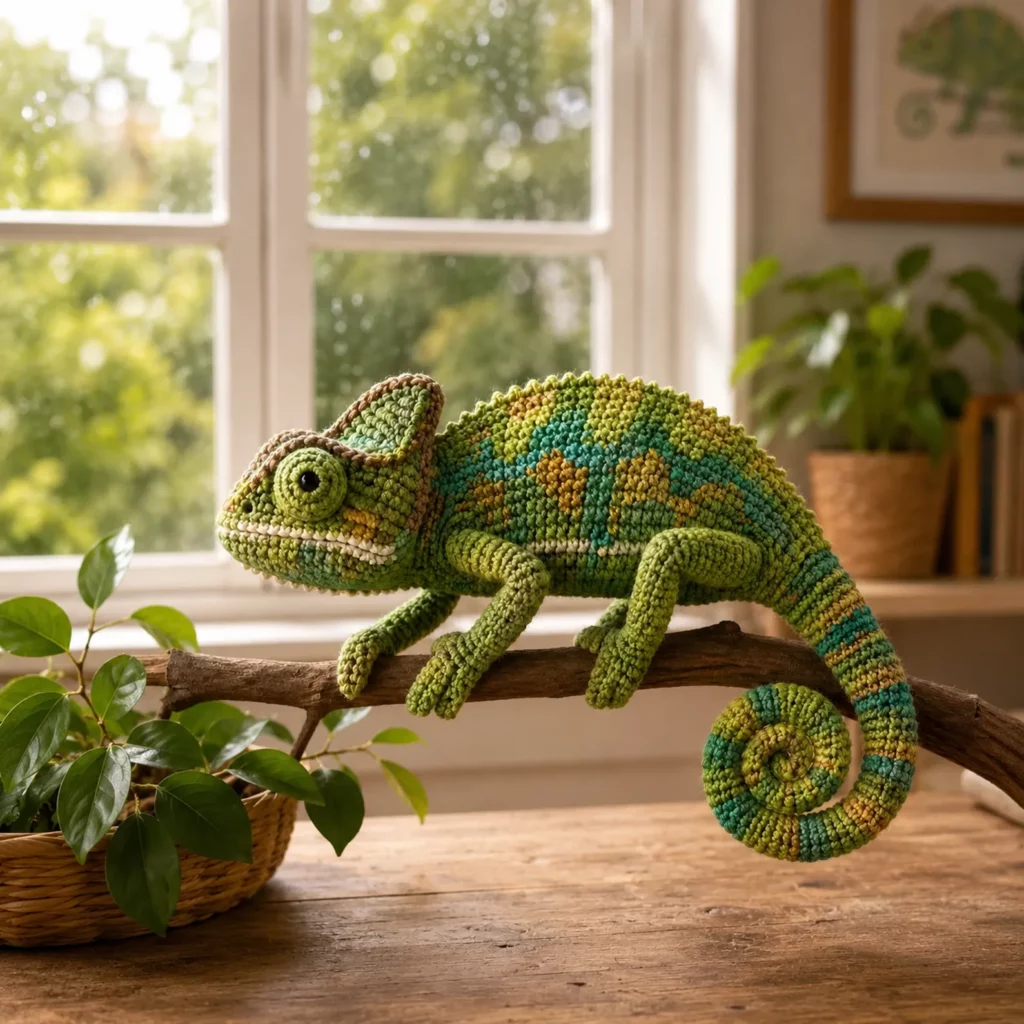
This chameleon is designed to look like it’s resting on a branch. The body is long and slightly arched. The head is angular and slightly boxy (chameleons have that distinctive helmet-like shape), and the eyes sit as raised round domes. The legs are positioned forward and backward like a real chameleon’s climbing stance, and the tail curls into a tight spiral.
Key features you’ll crochet
- A long, slightly curved body with smooth single crochet fabric
- A shaped head with a firm jawline and defined snout
- Raised “turret” eyes for a true chameleon look
- A subtle ridge or spine effect along the back
- Four bent legs with grippy feet for a branch pose
- A curled tail worked as a spiral piece so it naturally coils
- Optional colorwork spots or stripes for that classic chameleon camouflage effect
This crochet pattern is modular, meaning you crochet pieces separately and assemble them. That makes it easier to get the proportions right and makes colorwork much less stressful.
Skill Level Explanation#
This is a confident beginner to intermediate crochet pattern.
You’ll be comfortable if you can
- Crochet single crochet in continuous rounds
- Increase and decrease evenly
- Count stitches and rounds consistently
- Do basic assembly and sewing
- Change colors cleanly (for spots and stripes)
You’ll practice
- Shaping a more “realistic” animal silhouette
- Creating raised features (eyes and ridge)
- Positioning limbs for a posed look
- Making a spiral tail that curls neatly
If you’ve made amigurumi animals like cats, foxes, or dinosaurs, you can definitely handle this chameleon.
Materials Needed#
Yarn
Smooth yarn gives the best stitch definition, especially for colorwork spots.
Recommended yarn weight
- DK weight for a detailed, collectible finish
- Worsted weight for a larger plush chameleon
Suggested colors
- Main green (olive, moss, or medium green)
- Accent green (lighter or darker) for striping
- Small amounts of yellow, tan, or teal for spots
- White or pale green for the belly/jaw line
- Black for embroidered details if needed
Yarn tips
- Cotton yarn gives crisp detail and makes color changes look clean
- Acrylic yarn works well too, especially if you keep tension tight
- Multi-tone yarn can create a camouflage effect automatically, but keep it smooth, not fuzzy
Hook
Use a smaller hook than the label suggests so stuffing doesn’t show.
- DK yarn: 2.75 mm to 3.25 mm
- Worsted yarn: 3.25 mm to 4.0 mm
Notions
- Stitch marker
- Tapestry needle
- Scissors
- Fiberfill stuffing
- Safety eyes (6 to 10 mm) for the eye turrets or embroidery thread for eyes
- Optional: pipe cleaner or craft wire for posed legs and tail (display only)
- Optional: a real branch or crocheted perch base
Safety note
If this is for a child, skip wire and use embroidered eyes.
Stitches & Techniques Explained#
Abbreviations in US terms
- MR magic ring
- ch chain
- sl st slip stitch
- sc single crochet
- inc increase (2 sc in same stitch)
- dec decrease (sc two stitches together)
- BLO back loop only
- FLO front loop only
- st stitch
Invisible decrease
For smooth shaping, use invisible decreases by picking up the front loops of the next two stitches and sc them together.
Clean color changes for spots
Change colors on the last yarn-over of the previous stitch. Carry the unused color loosely inside the body if the spot is only a few stitches away; otherwise, cut and rejoin to avoid bulky floats.
Back ridge technique
A simple ridge can be made by surface crocheting a line down the back, or by sewing a lightly stuffed thin strip along the spine. Another easy method is to work one round in BLO and then surface crochet along that “ditch.”
Spiral tail technique
A spiral tail is easiest when you crochet a long chain and work multiple stitches into each chain, forcing it to curl naturally.
Step-by-Step Instructions#
This free crochet pattern is written as a crochet tutorial. Work in continuous rounds unless stated. Use a stitch marker.
Finished size
- DK yarn: about 20 to 30 cm long depending on tail and pose
- Worsted yarn: about 30 to 40 cm long
Notes
- Stuff the head and body firmly, but keep the belly slightly softer so it sits naturally on a branch
- Pin pieces before sewing
- The pose comes from how you place the legs and tail, so take your time with assembly
Head
Use main green.
Round 1
- 6 sc in MR (6)
Round 2
- inc around (12)
Round 3
- (sc, inc) around (18)
Round 4
- (2 sc, inc) around (24)
Round 5
- (3 sc, inc) around (30)
Rounds 6 to 9
- sc around (30)
Shape the jaw and snout slightly
Round 10
- (3 sc, dec) around (24)
Round 11
- sc around (24)
Round 12
- (2 sc, dec) around (18)
Round 13
- sc around (18)
Stuff head firmly now.
Fasten off leaving a long tail for sewing to the body.
Head shaping tip
Chameleon heads often look more “angular” if you gently pinch the sides while you stuff. You can also add a few shaping stitches later to create a slight cheek line.
Eye turrets (make two)
Use main green.
Round 1
- 6 sc in MR (6)
Round 2
- inc around (12)
Round 3
- sc around (12)
Round 4
- (2 sc, dec) around (9)
Stuff lightly.
If using safety eyes, place them now.
Round 5
- sc around (9)
Fasten off leaving a tail. Sew to the sides/top of the head, slightly forward.
Body
Use main green.
Round 1
- 6 sc in MR (6)
Round 2
- inc around (12)
Round 3
- (sc, inc) around (18)
Round 4
- (2 sc, inc) around (24)
Round 5
- (3 sc, inc) around (30)
Round 6
- (4 sc, inc) around (36)
Rounds 7 to 14
- sc around (36)
Add optional colorwork spots
Pick a few rounds and replace small sections with accent colors
- Example: 3 to 5 stitches in accent color, then return to main color
Keep spots staggered so they look natural.
Begin tapering toward the tail end
Round 15
- (4 sc, dec) around (30)
Rounds 16 to 18
- sc around (30)
Round 19
- (3 sc, dec) around (24)
Rounds 20 to 22
- sc around (24)
Stuff firmly now. Shape the body slightly flatter underneath so it sits well.
Round 23
- (2 sc, dec) around (18)
Rounds 24 to 26
- sc around (18)
Round 27
- (sc, dec) around (12)
Round 28
- sc around (12)
Fasten off leaving a tail for attaching the tail piece.
Belly/jaw stripe (optional)
If you want a lighter belly like the photo style, it’s easiest to add it as a sewn-on strip rather than complicated colorwork.
With pale green or cream
- Ch 22 to 30 depending on body length
- Work sc rows until you have a strip about 1 to 1.5 inches wide
Sew to the underside from throat to belly.
Legs (make four)
Use main green.
Upper leg
Round 1
- 6 sc in MR (6)
Round 2
- (sc, inc) around (9)
Rounds 3 to 10
- sc around (9)
Stuff lightly and flatten top for sewing.
Fasten off leaving a long tail.
Feet and toes
Chameleons have grippy toes. You can mimic this with a split-toe look.
Simple split-toe method
- After finishing the leg tube, pinch the bottom flat
- Sew a small line up the center of the foot for about 3 to 5 stitches, creating two toe sections
Or - Crochet two tiny toe bumps and sew them to the front
Make four legs total.
Leg pose tip
Front legs should angle forward, back legs angle backward. Pin them in place on the body and test the “branch stance” before sewing.
Tail (curled spiral)
Use main green and optional accent striping.
Spiral tail method
- Ch 45 to 70 depending on how tight and long you want the curl
- Work 2 sc in each chain across for a tight spiral
If you want a chunkier tail, work 3 sc in each chain.
To add stripes
- Change color every 8 to 12 stitches along the chain
This creates a natural banded look.
Fasten off leaving a long tail. Sew the base of the spiral tail to the back end of the body.
Tail shaping tip
If you want a perfect coil, lightly steam the spiral and shape it with your fingers while it cools. For display pieces, you can stitch a few hidden tacks in the coil to hold the shape.
Back ridge (optional but very effective)
Option one surface crochet ridge
- With accent color, surface crochet a line of slip stitches down the spine
Option two stuffed ridge
- Crochet a thin strip (ch 20, sc back, repeat rows)
- Lightly stuff and sew along the back from head to tail base
Assembly
Attach head to body
- Sew head to the front of the body, slightly angled downward
- Add a few tight stitches underneath to create a clean neck join
Attach eyes
- Sew eye turrets symmetrically on each side/top of head
- Check from front view before final stitches
Attach legs
- Pin legs first
- Front legs: place near the chest and angle forward
- Back legs: place near the rear and angle backward
- Sew securely with multiple passes
Attach tail
- Sew spiral tail base to body
- Position so the curl hangs naturally or coils to the side
Final details
- Add a tiny mouth line with embroidery (optional)
- Add subtle darker stitch lines around the eye turret for definition (optional)
Common Mistakes and How to Avoid Them#
Body looks lumpy
- Stuff in small amounts and smooth as you go
- Use a smaller hook if stitches stretch
Tail isn’t curling enough
- Add more stitches per chain (try 3 sc in each chain)
- Use a thinner chain and tighter tension
Legs look stiff or awkward
- Pin and pose before sewing
- Angle front legs forward and back legs backward
- Sew with the body resting on a branch while you position legs
Colorwork spots look messy
- Keep spot stitches small and consistent
- Cut yarn rather than carrying too far
- Weave ends neatly to avoid bumps
Eyes look uneven
- Measure placement from the top center line of the head
- Pin both eyes before sewing
Expert Tips for Better Results#
- Use invisible decreases for the cleanest body shaping
- Stuff head very firmly so it holds the angular shape
- Add a small shaping stitch from the side of the head to the snout area for a subtle “cheek” line
- Make the belly slightly flatter by pressing while stuffing, so it sits nicely on a branch
- Make all legs identical in stitch count, then adjust pose by placement rather than changing leg lengths
- Weave in ends frequently, especially if you add lots of spots
Variations and Customization Ideas#
- Bright tropical chameleon with neon greens, blues, and yellows
- Pastel nursery chameleon in mint and peach
- Mini keychain version using sport yarn and embroidered eyes
- Add a tiny crocheted leaf accessory
- Make a sleeping chameleon by embroidering closed eyes
- Create a “color changing” look using variegated yarn with one solid accent
- Add a branch stand base by crocheting a cylinder perch and sewing feet onto it
Benefits of This Crochet Project#
- A unique crochet pattern that stands out from typical plush animals
- Great practice for shaping and posed assembly
- Perfect for scrap yarn because spots and stripes use small amounts
- Makes adorable décor for plant shelves, desks, and nurseries
- Teaches useful techniques like spiral tails and raised details
- Highly customizable in color and personality
Internal Linking Suggestions#
- How to Crochet Invisible Decrease for Amigurumi
- Clean Color Change Tutorial for Crochet
- Best Yarn for Amigurumi With Tight Stitches
- How to Sew Amigurumi Parts Neatly
- How to Make Amigurumi Stand Upright
- Easy Crochet Reptile Patterns Collection
- Crochet Spiral Tail and Curl Techniques
FAQ#
Is this crochet pattern beginner-friendly
Yes if you already know single crochet, increases, and decreases. The main learning curve is assembly and posing, not complicated stitches.
How do I make the tail curl tightly
Work more stitches into each chain. Two sc in each chain creates a curl; three sc in each chain makes a tighter spiral.
Can I make this without safety eyes
Yes. Embroidered eyes work well and are safer for children. You can also embroider a tiny eyelid line for extra expression.
How do I keep the legs posed like they’re gripping a branch
Sew the legs while the body is resting on a branch so you can position them naturally. For display pieces, you can also add a hidden pipe cleaner inside the legs.
What yarn works best for a chameleon
Smooth cotton or acrylic works best for stitch definition and clean colorwork. Variegated yarn can create a camouflage effect with less effort.
How do I resize the chameleon
Use thicker yarn and a larger hook for a bigger chameleon, or thinner yarn and a smaller hook for a mini version. Keep stitches tight so stuffing doesn’t show.
Conclusion#
This chameleon amigurumi crochet pattern is a fun, creative project that turns basic crochet techniques into a truly unique finished piece. The curled spiral tail, raised eyes, and branch-pose legs capture the chameleon’s character beautifully, while the optional spots and stripes let you play with color in a way that feels artistic and relaxing.
If you tell me your yarn weight and how long you want the finished chameleon to be, I can suggest the best chain length for the tail spiral and a simple spot-placement plan so the camouflage pattern looks perfectly balanced.


