


Introduction#
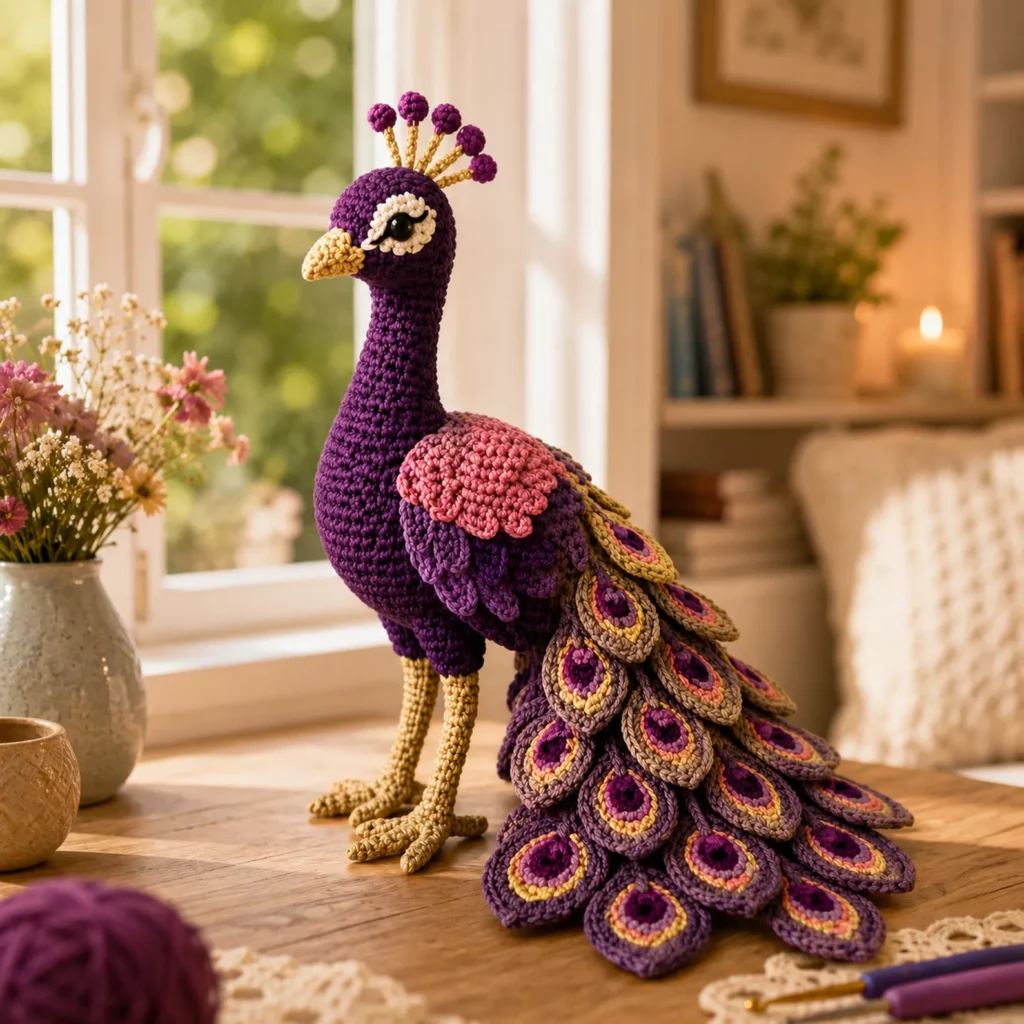
Some amigurumi projects are quick and cute. This one is the showstopper you put on a shelf and everyone asks, “Did you really make that?” A peacock amigurumi has that magical combination of simple crochet shapes and dramatic details—especially the layered feather tail with bright “eye” motifs.
Explore more beginner amigurumi crochet patterns in our pattern library.
This crochet pattern is written to help you create a standing peacock with a tall neck, smooth body, and an elegant tail that fans out behind it. The stitches are mostly basic single crochet, increases, and decreases, but the finished look feels advanced because of the thoughtful assembly: layered feathers, a neat beak, a bold eye patch, and a cute little crown crest on top of the head.
In this crochet tutorial, you’ll learn how to build the peacock step-by-step, how to keep the body stable so it stands, and how to crochet the feather eye motifs in a way that looks crisp and dimensional. If you love making animals and want a project that gives maximum “wow” for your effort, this is a perfect DIY crochet make.
Detailed Description of the Crochet Pattern#
This peacock is built in a realistic, graceful silhouette while still keeping classic amigurumi charm. The body is a rounded oval that supports a long neck. The head is smoothly shaped with a slightly pointed beak. The legs are slim but firm, with toes that splay forward for balance. The tail is the star: it’s made from multiple feather motifs that overlap like shingles, creating that lush layered look without needing complicated shaping.
Main parts you will crochet
- Head and neck as one continuous piece for a clean look
- Body as a separate oval shape that supports the neck
- Wings as simple rounded pieces that sit on the sides
- Legs and feet as structured tubes with small toes
- Beak and eye patch details for expression
- Crest “crown” strands on the head
- Feather tail made from repeated feather motifs with color-ring “eye” centers
Design highlights that make it look professional
- Tight, even stitches for a smooth fabric-like finish
- Clean color changes in the feather eyes
- Layered tail assembly that hides joins and adds volume
- Strategic stuffing and optional support so the bird stands well
This is a crochet pattern you can customize endlessly by changing tail colors, feather count, and body size.
Skill Level Explanation#
This is a confident beginner to intermediate crochet pattern.
You’ll feel comfortable if you can
- Crochet single crochet in continuous rounds
- Increase and decrease neatly
- Count stitches and keep consistent tension
- Sew amigurumi pieces securely
- Change colors cleanly
You’ll practice new or helpful skills
- Building a long neck that stays straight
- Making repeated motifs (tail feathers) that match in size
- Layering motifs for a 3D effect
- Shaping feet for standing stability
- Adding small details like crest strands and eye patches
If you’ve made an amigurumi plush before, you can absolutely make this. The key is patience during the tail section—once you find a rhythm, it becomes very satisfying.
Materials Needed#
Yarn
Smooth yarn is best for crisp stitch definition, especially for the feather eye details.
Recommended yarn weight
- DK weight yarn for a detailed, refined finish
- Worsted weight yarn for a larger peacock and faster progress
Suggested colors
- Deep blue for head, neck, and body
- Green tones for wings and tail base (light and dark green)
- Teal or turquoise for feather accents
- Gold or mustard for the feather eye ring
- Black or very dark navy for inner eye accents
- Light beige or tan for beak and legs
- White for eye patch detail
- Small amount of black for eyelash embroidery (optional)
Yarn selection tips
- Cotton yarn gives the cleanest stitches and holds shape well
- Smooth acrylic works too, especially for a softer plush feel
- Avoid fuzzy yarns because they blur colorwork and hide stitch definition
- If using multiple greens, choose shades with enough contrast so the feather layering shows
Hook
Use a smaller hook than the yarn label recommends to create tight amigurumi fabric.
- DK yarn: 2.75 mm to 3.25 mm
- Worsted yarn: 3.25 mm to 4.0 mm
Notions
- Stitch marker
- Tapestry needle
- Scissors
- Fiberfill stuffing
- Safety eyes (10–14 mm depending on size) or embroidery floss for eyes
- Optional craft wire, pipe cleaner, or a wooden dowel for neck support (display-only)
- Optional floral wire for crest strands (display-only)
- Optional small weights or pellets in a fabric pouch to stabilize the body base (display-only)
Safety note
If this is for a child under three, embroider eyes and skip wire and pellets.
Stitches & Techniques Explained#
Abbreviations in US terms
- MR magic ring
- ch chain
- sl st slip stitch
- sc single crochet
- hdc half double crochet
- dc double crochet
- inc increase (2 sc in same stitch)
- dec decrease (sc two stitches together)
- BLO back loop only
- FLO front loop only
- st stitch
Invisible decrease
For a smoother finish, especially on the neck and head, use invisible decreases by picking up the front loops of the next two stitches and single crocheting them together.
Clean color changes for motifs
To keep feather eye rings crisp, change color on the last yarn-over of the previous stitch. Pull the new color snugly so you don’t get gaps.
Shaping long parts
Long necks and legs can look wobbly if under-stuffed. Stuff gradually and firmly, and consider a hidden support inside for a standing display piece.
Layering motifs
Tail feathers look best when layered like roof shingles. You’ll sew the bottom row first and build upward, overlapping slightly to hide attachment points.
Step-by-Step Instructions#
This is a free crochet pattern written as a detailed crochet tutorial. Work in continuous rounds unless stated otherwise. Use a stitch marker to track the first stitch of each round.
Finished size
- DK yarn typically makes a peacock about 25 to 35 cm tall depending on neck length and tail
- Worsted yarn typically makes a peacock about 35 to 45 cm tall
Pattern notes
- Stuff as you go
- Pin pieces before sewing
- Keep stitch counts consistent across repeated feather motifs
Head and neck
Use deep blue.
Start at the top of the head.
Round 1
- 6 sc in MR (6)
Round 2
- inc around (12)
Round 3
- (sc, inc) around (18)
Round 4
- (2 sc, inc) around (24)
Round 5
- (3 sc, inc) around (30)
Rounds 6 to 10
- sc around (30)
Eye placement
- Place safety eyes between rounds 8 and 9
- Space them about 7 to 9 stitches apart depending on your preferred expression
Begin shaping down toward the neck
Round 11
- (3 sc, dec) around (24)
Round 12
- sc around (24)
Round 13
- (2 sc, dec) around (18)
Round 14
- sc around (18)
Round 15
- (sc, dec) around (12)
Round 16
- sc around (12)
Now extend the neck
Rounds 17 to 40
- sc around (12)
Neck length tip
Add or remove rounds here to adjust height. A taller neck makes the peacock look more elegant.
Stuffing tip
Stuff the head firmly. Stuff the neck gradually and firmly. For a display piece, insert a pipe cleaner or dowel inside the neck before stuffing the final third.
Fasten off leaving a long tail for sewing to the body.
Beak
Use beige or tan.
Row 1
- Ch 7, sc in second ch from hook and across (6)
Row 2
- Ch 1, turn, sc across (6)
Row 3
- Ch 1, turn, sc2tog, sc 2, sc2tog (4)
Row 4
- Ch 1, turn, sc across (4)
Row 5
- Ch 1, turn, sc2tog, sc, sc2tog (2)
Row 6
- Ch 1, turn, sc across (2)
Fasten off, fold lengthwise, and whip stitch to create a small pointed beak. Sew centered under the eye area.
Eye patch detail
Use white.
Round 1
- 6 sc in MR (6)
Round 2
- inc around (12)
Round 3
- (sc, inc) around (18)
Fasten off leaving a sewing tail. Flatten slightly and sew around the safety eye, creating a clean white eye patch. Add optional eyelash embroidery with black thread for extra charm.
Body
Use deep blue or slightly lighter blue if you want contrast.
Round 1
- 6 sc in MR (6)
Round 2
- inc around (12)
Round 3
- (sc, inc) around (18)
Round 4
- (2 sc, inc) around (24)
Round 5
- (3 sc, inc) around (30)
Round 6
- (4 sc, inc) around (36)
Round 7
- (5 sc, inc) around (42)
Rounds 8 to 14
- sc around (42)
Shape the body slightly longer
Round 15
- (6 sc, inc) around (48)
Rounds 16 to 20
- sc around (48)
Begin taper toward the back
Round 21
- (6 sc, dec) around (42)
Round 22
- sc around (42)
Round 23
- (5 sc, dec) around (36)
Rounds 24 to 25
- sc around (36)
Stuff firmly now
Focus stuffing toward the belly and base so it stands.
Round 26
- (4 sc, dec) around (30)
Round 27
- sc around (30)
Round 28
- (3 sc, dec) around (24)
Round 29
- (2 sc, dec) around (18)
Round 30
- (sc, dec) around (12)
Round 31
- dec around (6)
Fasten off and close. Weave in end.
Body stability option
For display pieces, add a small weight pouch inside the body base before closing.
Wings (make two)
Use green or teal-green.
Round 1
- 6 sc in MR (6)
Round 2
- (sc, inc) around (9)
Round 3
- (2 sc, inc) around (12)
Round 4
- (3 sc, inc) around (15)
Rounds 5 to 8
- sc around (15)
Round 9
- (3 sc, dec) around (12)
Round 10
- sc around (12)
Flatten and close
Do not stuff. Fold flat and sc across the opening. Fasten off leaving a long tail. Sew wings to the sides of the body, slightly angled back.
Legs and feet (make two)
Use beige or tan. Add darker yarn if you want toe tips.
Leg tube
Round 1
- 6 sc in MR (6)
Round 2
- inc around (12)
Rounds 3 to 6
- sc around (12)
Taper to a slimmer leg
Round 7
- (4 sc, dec) around (10)
Rounds 8 to 18
- sc around (10)
Stuff firmly as you go. Leave the top open for sewing.
Toes (make three per foot)
For each toe
- Ch 6, sc in second ch from hook and across (5)
Fasten off with a tail.
Assembly for foot
Sew three toes to the bottom front of each leg, fanning slightly outward. For extra stability, you can add a small back toe with a shorter chain.
Sew legs to body
Attach under the body slightly forward of center so the peacock balances with the tail behind.
Crest strands (head crown)
Use beige or tan for stems, blue for tips.
Make multiple strands
- Ch 10 to 14, sl st back down chain for a firm cord
Fasten off.
Tip puff (small bobble)
- Make a tiny puff ball: 6 sc in MR, inc around (12), one round sc around, then dec around (6) and close
Or simply crochet a small bobble stitch at the end of each strand.
Sew strands to the top of the head in a fan shape.
Display-only option
Insert thin floral wire inside the strands before stitching if you want them to stand upright.
Feather tail motifs
This is the signature part of the crochet pattern. You will make multiple feather motifs and layer them.
Feather eye center (worked in rounds)
Start with dark blue.
Round 1
- 6 sc in MR (6)
Round 2
- inc around (12)
Change to gold/mustard
Round 3
- (sc, inc) around (18)
Change to teal or medium blue
Round 4
- (2 sc, inc) around (24)
Change to green
Round 5
- (3 sc, inc) around (30)
Now shape into an oval feather
Instead of continuing a perfect circle, you’ll crochet around a chain to elongate.
Feather outline method
- Ch 10
- Work sc across one side of chain, 3 sc in end ch, sc back along other side, 3 sc in last ch, join
Then work 1 to 2 rounds around, increasing at ends to keep an oval shape.
Simpler feather method (very consistent)
Make an oval in rows
- Ch 14
- Row 1 sc in second ch and across (13)
- Row 2 ch 1, inc, sc 11, inc (15)
- Row 3 ch 1, sc across (15)
- Row 4 ch 1, inc, sc 13, inc (17)
- Row 5 ch 1, sc across (17)
Fasten off leaving a tail.
Then sew the round “eye” circle onto the center of the oval feather.
Make enough feathers
A lush tail usually uses 12 to 20 feathers depending on size. If you want the same dense look, plan for more feathers and layer them with overlap.
Tail base and layering
Tail base (green)
Create a curved base to attach feathers
- Ch 18 to 26 depending on body size
- Work sc rows for a few rows to create a sturdy panel
- Shape into a slight curve by adding a few increases at the outer edge if needed
Attach feathers in rows
- Sew the bottom row first, feathers slightly overlapping
- Add the next row above, overlapping the previous row by about one third
- Continue until the tail looks full
Attach tail to body
Sew the top of the tail base to the back of the body. Angle it so it rests on the surface behind the peacock, helping balance.
Common Mistakes and How to Avoid Them#
The peacock won’t stand upright
- Stuff legs and body more firmly
- Position legs slightly forward
- Add a small weight pouch inside the body base (display-only)
- Let the tail rest on the surface as a support point
Neck looks floppy
- Stuff the neck firmly in small amounts
- Use a hidden support inside the neck for display pieces
- Avoid over-stretching stitches by using a smaller hook
Feathers look uneven in size
- Use the same hook and tension for every feather
- Count rows and stitches carefully
- Block feather ovals lightly so they match
Tail looks sparse
- Add more feathers
- Increase overlap
- Add a smaller top row of feathers to fill gaps
Color changes in feather eyes look jagged
- Change colors on the last yarn-over
- Pull the new color snugly
- Weave ends neatly on the back of the motif
Eye patch looks bulky
- Use a thinner yarn for the patch
- Sew with small stitches and flatten the patch as you attach it
Expert Tips for Better Results#
- Make all feather eyes first, then all feather ovals, then assemble in batches
- Use stitch markers to place wings and legs symmetrically
- Pin the tail to the body before sewing to choose the best angle for balance
- Add a tiny white highlight stitch to the eye for extra sparkle
- Steam-block feather ovals lightly so they lie flat and stack neatly
- If you want a more realistic tail fan, vary feather sizes slightly with longer ovals in the bottom row
- Weave ends as you go, especially on feather motifs, to avoid finishing overload
Variations and Customization Ideas#
- Make a mini version using sport weight yarn and a smaller hook
- Make a jumbo plush by using chunky yarn and fewer, larger feathers
- Change the tail palette to modern shades like emerald and navy, or pastel peacock tones
- Add a small embroidered smile for a more playful look
- Turn it into a nursery mobile piece by skipping legs and hanging the body with tail feathers
- Add a base stand by crocheting a small platform and sewing the feet onto it
- Create a “winter peacock” with silver and icy blue feathers
- Add extra wing texture with surface crochet lines to mimic feather layers
Benefits of This Crochet Project#
- A high-impact crochet pattern that looks collectible and handmade in the best way
- Builds confidence with shaping, assembly, and motif repetition
- Great stash buster because feathers can use small leftover amounts
- A beautiful décor piece for shelves, desks, and nurseries
- Customizable in size, color, and tail fullness
- Teaches useful techniques like layering motifs and building stable standing amigurumi
Internal Linking Suggestions#
- How to Crochet Invisible Decrease for Amigurumi
- How to Change Colors Cleanly in Crochet
- Best Yarn for Amigurumi With Tight Stitches
- How to Sew Amigurumi Parts Neatly
- Crochet Motif Blocking Tips for Flat Pieces
- How to Make Amigurumi Stand Upright
- Easy Crochet Bird Pattern for Beginners
FAQ#
Is this crochet pattern suitable for beginners
If you already know single crochet, increases, and decreases, you can make it. The shaping is beginner-friendly, and the tail is repetitive once you learn the feather motif.
What yarn works best for a detailed peacock amigurumi
Smooth cotton or smooth acrylic is ideal. Cotton gives crisp stitch definition and helps the tail motifs look clean and professional.
How many feathers do I need for the tail
It depends on your size and how full you want it. A compact tail can use about 12 feathers, while a lush layered tail often looks best with 16 to 20.
How do I keep the neck from bending
Stuff firmly and consider adding a hidden support inside for display pieces. Keeping stitches tight also helps the neck stay straight.
Can I make this baby-safe
Yes. Embroider the eyes and skip wire, beads, and weights. Sew all pieces extra securely and avoid small detachable parts like crest tips.
How do I resize the peacock
Use thinner yarn and a smaller hook for a mini version, or thicker yarn and a larger hook for a bigger one. Keep tension tight so stuffing doesn’t show.
Conclusion#
This peacock amigurumi crochet pattern is the perfect project when you want something elegant, colorful, and truly impressive. The long neck and clean body shape create a graceful silhouette, while the layered feather tail brings the drama and detail that makes a peacock so iconic. Best of all, the stitches stay approachable—single crochet and smart shaping do most of the work, and the beauty comes from repetition and careful assembly.
If you tell me your yarn weight and the height you want for the finished peacock, I can suggest the best hook size and an easy feather count plan so your tail looks perfectly full and balanced.


