


Introduction#
Small amigurumi projects are the best kind of crochet “instant gratification.” They’re quick, adorable, and use tiny amounts of yarn—yet they teach big skills: clean shaping, tidy assembly, and how to add personality with just a few details.
Explore more beginner amigurumi crochet patterns in our pattern library.
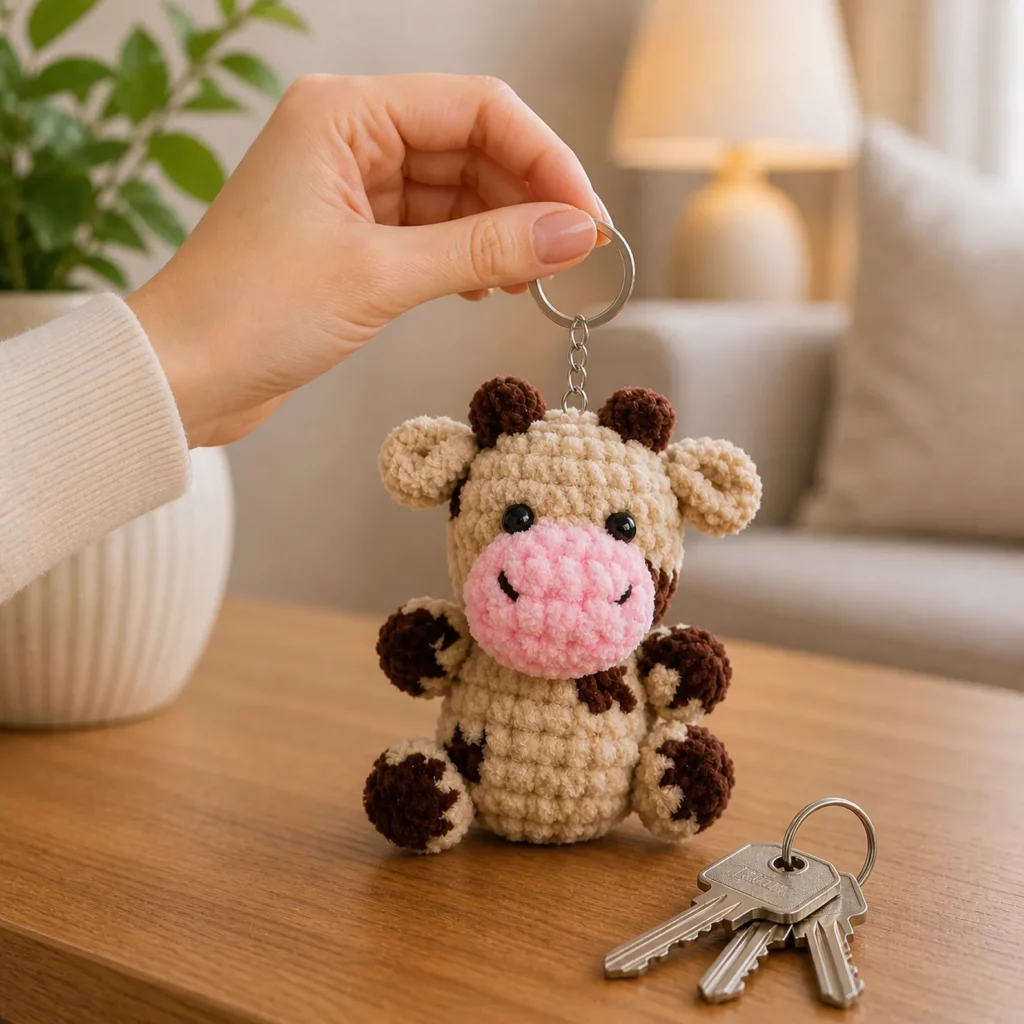
This crochet pattern is a mini cow keychain designed to be extra cute and extra squishy. It has a rounded body, a sweet oversized snout, tiny horns, and little ears. The bold black-and-white contrast (plus a soft pink muzzle) gives it that classic cow look, and the keychain hardware turns it into something you’ll actually use—on keys, backpacks, pencil cases, diaper bags, or even as a zipper pull.
If you’re looking for a free crochet pattern that’s beginner-friendly, giftable, and perfect for plush yarn, you’re in the right place. This tutorial-style guide walks you through each piece, explains what to watch for when using fluffy yarn, and includes customization ideas so you can make your cow look totally unique.
Detailed Description of the Crochet Pattern#
This mini cow keychain is built from simple amigurumi shapes that are easy to crochet and even easier to personalize:
- Head + body: worked as one rounded piece (or as two pieces sewn together—both options are included). The shape is slightly egg-like so it sits nicely in the hand.
- Snout/muzzle: a puffy oval piece in pink that’s stitched onto the front of the head. This is the “cute factor” detail that makes the face pop.
- Eyes: safety eyes (recommended) or embroidered eyes for a child-safe option.
- Horns: two small, rounded nubs in brown that sit on top of the head.
- Ears: small half-oval ears in the main color placed on each side.
- Spots + hooves: tiny accent pieces in black for that signature cow pattern.
- Keychain attachment: a small loop on top (crocheted strap) that connects to a jump ring and chain.
The overall texture is plush and bouncy, especially if you use velvet/chenille yarn. Because plush yarn hides stitch definition, this pattern emphasizes simple increases/decreases and firm stuffing for the cleanest silhouette.
Skill Level Explanation#
This is an easy to intermediate amigurumi project.
You’ll be comfortable if you can:
- Crochet in the round
- Make increases (inc) and decreases (dec)
- Count stitches and rounds
- Sew small parts neatly
- Attach safety eyes or embroider facial features
If you’re newer to amigurumi, you can still succeed—just go slowly and use stitch markers. Plush yarn can make stitches harder to see, so patience (and counting!) is your best friend.
Materials Needed#
To match the look and feel of a soft, squishy cow keychain, gather:
- Yarn (plush/velvet recommended):
- Main color: cream/white plush yarn
- Accent: black plush yarn (spots + hooves)
- Snout: pink plush yarn
- Horns: brown plush yarn (or beige/tan)
- Optional: a tiny bit of lighter pink for blush cheeks
- Crochet hook:
- 3.0–4.5 mm depending on your plush yarn thickness
- Choose smaller than the label suggests so stuffing won’t show.
- Stuffing: polyester fiberfill (small amount)
- Safety eyes: 8–10 mm (optional—embroider if making for small children)
- Tapestry needle for sewing
- Stitch marker
- Scissors
- Keychain hardware:
- 1 key ring
- 1 small chain (optional)
- 1 jump ring or lobster clasp
Yarn + hook tip
Plush yarn “blooms” and hides gaps, but it can still show stuffing if your hook is too large. If you can easily pull the fabric open with your fingers, go down a hook size.
Stitches & Techniques Explained#
This crochet tutorial uses standard amigurumi stitches in US terms:
- MR: magic ring
- ch: chain
- sc: single crochet
- inc: increase (2 sc in same stitch)
- dec: invisible decrease (recommended)
- sl st: slip stitch
- BLO/FLO: back loop only / front loop only (optional, for shaping edges)
Helpful techniques
- Invisible decrease (clean shaping):
Insert hook into the front loop of next stitch, then front loop of following stitch, yarn over, pull through, yarn over, pull through both loops. - Stuffing with plush yarn:
Plush stitches are thick. Use small tufts of stuffing and pack evenly so the shape is smooth—especially around the muzzle area. - Sewing plush parts:
Use small stitches and pull gently. Plush yarn can snap if pulled too hard, so tighten seams slowly.
Step-by-Step Instructions#
Pattern notes
- Work in continuous rounds unless stated.
- Use a stitch marker to mark the first stitch of each round.
- Stuff firmly but gently as you go.
- This crochet pattern is designed for plush yarn; if you use worsted yarn, the finished cow will be smaller and more defined.
Finished size (approx.)
With plush yarn: about 3.5–5 inches tall (varies by yarn and hook)
With worsted yarn: about 2–3 inches tall
PART 1: Head + Body (one-piece option)#
Use white/cream.
Round 1: MR, 6 sc (6)
Round 2: inc around (12)
Round 3: (sc, inc) around (18)
Round 4: (2 sc, inc) around (24)
Round 5: (3 sc, inc) around (30)
Round 6: (4 sc, inc) around (36)
Now build height:
Rounds 7–10: sc around (36)
Shape into the body (slight taper):
Round 11: (4 sc, dec) around (30)
Round 12: sc around (30)
Round 13: (3 sc, dec) around (24)
Round 14: sc around (24)
Optional “belly” puff (keeps it rounded):
Round 15: (2 sc, inc) around (32) (If your stitch count doesn’t divide perfectly, place increases evenly.)
Round 16: sc around (32)
Begin closing:
Round 17: (2 sc, dec) around (24)
Round 18: (sc, dec) around (16)
Start stuffing firmly—shape into a rounded “bean.”
Round 19: dec around (8)
Fasten off, close opening, weave in end.
Tip: If you want a more defined head/neck, you can add 1–2 rounds at the top with fewer stitches (like 24) before increasing. For plush yarn, the one-piece “bean” shape looks especially cute and squishy.
PART 2: Snout / Muzzle (puffy oval)#
Use pink.
Round 1: Ch 5. Sc in 2nd ch from hook, sc in next 2 ch, 3 sc in last ch.
Working on the other side of the chain: sc in next 2 ch, 2 sc in last ch. (12)
Round 2: inc, sc 2, inc x3 (around the curved end), sc 2, inc x2 (16)
Round 3: sc around (16)
Fasten off leaving a long tail.
Attach the muzzle:
Center the muzzle on the face area. Sew around the edge with small stitches. Lightly stuff the muzzle before fully closing the seam if you want it extra puffy.
Optional nostrils:
With black yarn, embroider two small curved lines or tiny stitches near the top of the muzzle.
PART 3: Eyes (safety or embroidered)#
Safety eyes option
- Insert eyes above the muzzle, spaced about 5–7 stitches apart (depends on your size).
- Add a small piece of felt behind each eye (optional) so they sit firmly in plush fabric.
- Lock washers on the inside before stuffing is fully packed.
Embroidered eyes option (child-safe)
With black yarn, embroider two small oval eyes. Add a tiny white highlight stitch for sparkle.
PART 4: Ears (make 2)#
Use white/cream.
Round 1: MR, 6 sc (6)
Round 2: (sc, inc) around (9)
Round 3: sc around (9)
Flatten ear and sc through both layers across the top to close (about 4–5 sc).
Fasten off leaving a tail.
Sew ears to each side of the head, slightly above the muzzle line.
PART 5: Horns (make 2)#
Use brown.
Round 1: MR, 4 sc (4)
Round 2: (sc, inc) around (6)
Round 3: sc around (6)
Fasten off leaving a tail.
Sew horns on top of the head, slightly angled outward for a cute look.
PART 6: Arms (make 2)#
Use black for hooves and white/cream for upper arm.
Hoof (black):
Round 1: MR, 6 sc (6)
Round 2: sc around (6)
Change to white/cream:
Upper arm:
Rounds 3–6: sc around (6)
Stuff lightly (or leave unstuffed for a floppy look).
Fasten off leaving a tail.
Attach arms to the sides of the body, slightly forward like the cow is holding its muzzle (extra cute pose).
PART 7: Legs/Feet (make 2)#
Use black for hooves and white/cream for leg.
Hoof (black):
Round 1: MR, 6 sc (6)
Round 2: inc around (12)
Round 3: sc around (12)
Change to white/cream:
Leg:
Round 4: sc around (12)
Round 5: (2 sc, dec) around (9)
Round 6: sc around (9)
Stuff lightly. Fasten off leaving a tail.
Sew legs to the bottom front of the body so the cow sits in a cute seated position.
PART 8: Spots (optional, adds character)#
Use black.
Make 2–4 tiny spot pieces:
Spot circle:
MR, 6 sc. Sl st to join. Fasten off.
Sew spots onto the body wherever you like—one on the side, one on the back, maybe a tiny one near the cheek.
PART 9: Keychain Loop (top attachment)#
Use white/cream or a strong matching yarn.
Find the top center of the head.
- Insert hook, pull up loop, ch 10–14 (adjust based on your hardware size).
- Sl st back into the same point (or a nearby stitch) to form a loop.
- Reinforce: sc around the loop (10–14 sc) for thickness, then sl st to secure.
Fasten off and weave in ends firmly.
Attach jump ring + chain + key ring.
Strength tip: If you want maximum durability, use a thin strong yarn (like cotton) for the loop, or crochet the loop twice and sew it down.
Final Assembly Checklist#
- Sew muzzle onto face (stuff slightly if desired)
- Add eyes (safety or embroidered)
- Sew ears and horns
- Attach arms and legs
- Add black spots
- Make keychain loop and attach hardware
- Final stuffing adjustments + weave in ends
Common Mistakes and How to Avoid Them#
- Stitches are hard to see in plush yarn:
Count carefully and feel the stitches with your fingers. Use a stitch marker every round. - Muzzle looks crooked:
Pin the muzzle in place before sewing. Step back and check symmetry. - Safety eyes feel loose:
Plush fabric is thick—make sure the washer is clicked on firmly. Adding a small felt circle behind the eye helps it grip. - Cow shape looks lumpy:
Stuff in small amounts and distribute evenly. Massage the stuffing from the outside to smooth it out. - Keychain loop feels weak:
Reinforce it. Crochet around the chain loop, sew the base down with extra passes, or use stronger yarn for that part. - Parts fall off over time:
Small amigurumi parts need strong sewing. Use multiple passes and knot securely (hide knots inside the body).
Expert Tips for Better Results#
- Use “guided stuffing”: Push stuffing into the cheeks and upper body so the face looks round and cute.
- Pin everything first: Ears, horns, arms—pinning saves so much frustration.
- Add blush cheeks: A tiny bit of pink embroidery or fabric blush makes it extra kawaii.
- Make the muzzle extra plush: Lightly stuff the muzzle before closing the seam for a 3D look.
- Sew with matching yarn: Plush yarn hides stitches well; use the same plush yarn to make seams invisible.
- Reinforce the loop twice: Keychains get tugged—double security is worth it.
Variations and Customization Ideas#
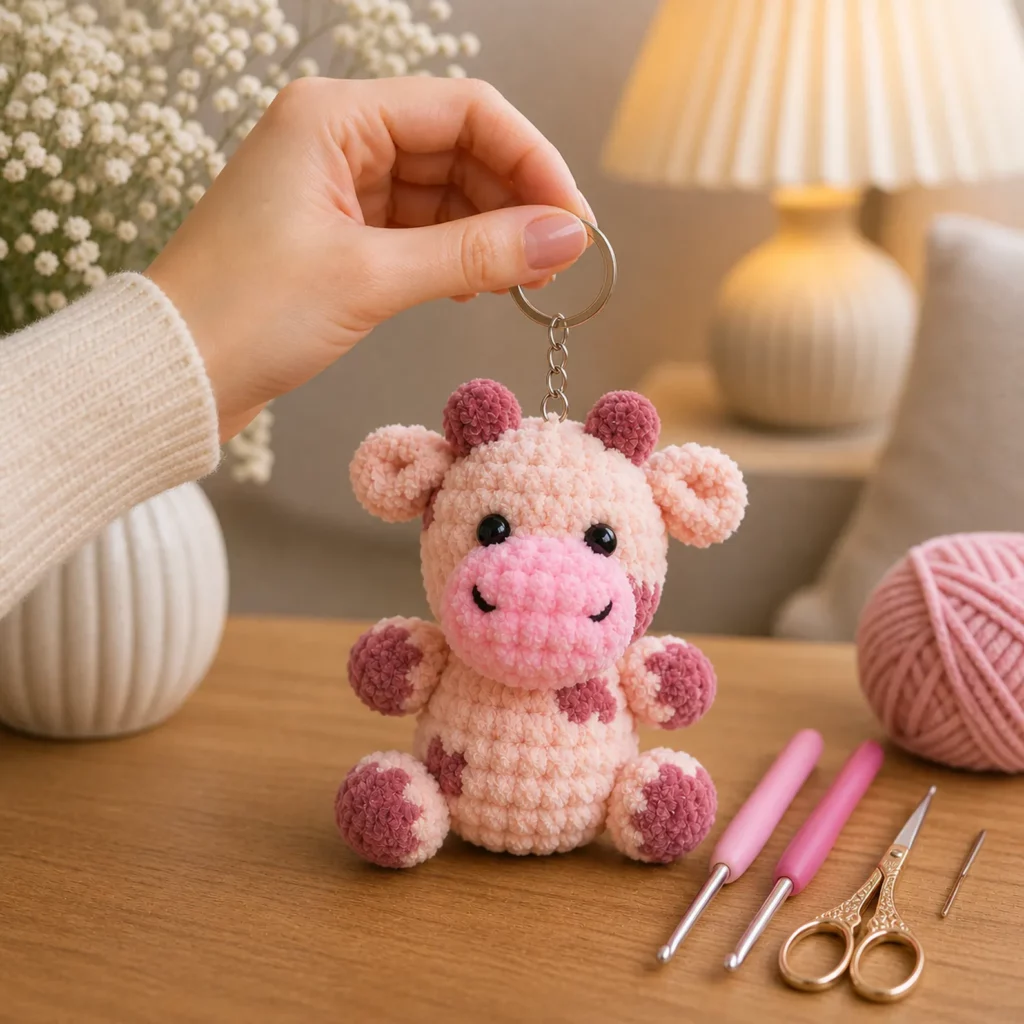
- Strawberry cow: Make the body pink, add tiny green leaf “tuft,” and white spots.
- Highland cow: Use caramel yarn, make longer fringe “hair” on top, and add bigger horns.
- Mini cow couple: Make one with a heart spot and one with a star spot for a matching set.
- Different face styles:
- sleepy eyes (embroidered curves)
- sparkly anime eyes (felt + embroidery)
- tiny smile under the muzzle for extra sweetness
- Bell collar: Crochet a tiny collar strip and sew a mini jingle bell (for older kids/adults).
- Keychain → ornament: Swap the key ring for ribbon and hang it on a tree or gift wrap.
Benefits of This Crochet Project#
- A super cute DIY crochet project that’s fast and satisfying
- Great for using up small scraps of plush yarn
- Teaches amigurumi essentials: shaping, assembly, placement, and finishing
- Makes an adorable handmade gift, party favor, or stocking stuffer
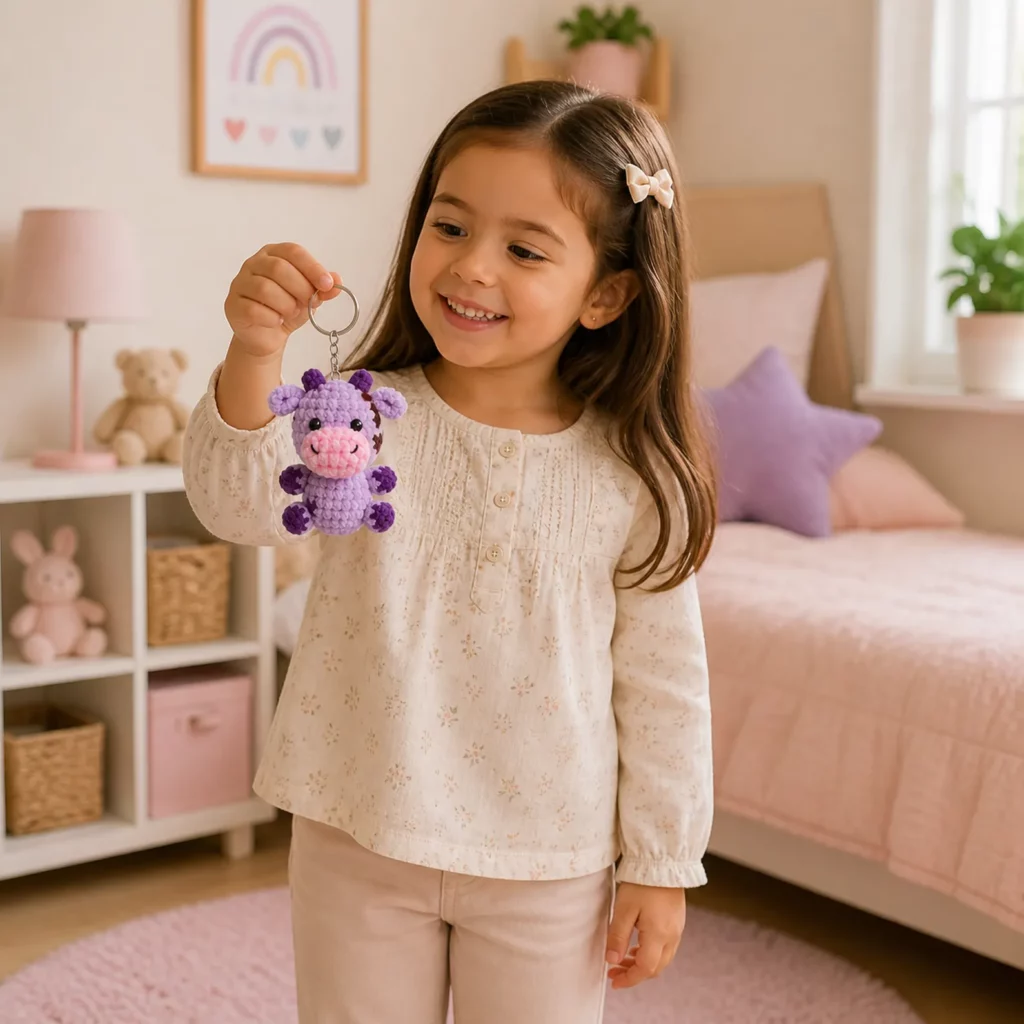
- Easily customizable—each cow can have a totally different “personality”
- Turns into something functional (keychain, bag charm, zipper pull)
Internal Linking Suggestions#
If you’re building a crochet blog, link this tutorial to:
- “How to Crochet an Invisible Decrease (Amigurumi Must-Know)”
- “Best Plush Yarn for Amigurumi (Beginner Guide)”
- “How to Attach Safety Eyes Securely”
- “How to Sew Amigurumi Parts Neatly”
- “Free Crochet Pattern Roundup: Mini Keychains & Bag Charms”
FAQ Section#
What yarn is best for a cow keychain crochet pattern?
Plush/velvet yarn makes the cow extra soft and squishy, which is perfect for a bag charm. If you want sharper stitch definition, use smooth cotton or worsted acrylic instead.
Is this a free crochet pattern for beginners?
Yes—this easy crochet pattern is beginner-friendly if you already know how to crochet in the round and do increases/decreases. Plush yarn can be trickier to see, so counting is key.
How do I make the keychain loop stronger?
Crochet around the chain loop with single crochet, sew the loop base down with multiple passes, and consider using a strong cotton yarn for the loop even if the cow is plush.
Can I make it without safety eyes?
Absolutely. Embroidered eyes are a great option, especially if the keychain will be given to a small child. You can also use felt circles stitched on securely.
How big will the finished cow be?
With plush yarn and a medium hook, it’s typically palm-sized (around 3.5–5 inches). With worsted yarn and a smaller hook, it may be closer to 2–3 inches.
How do I change the size?
Change yarn weight and hook size. For a bigger cow, use thicker plush yarn and a larger hook (while still keeping stitches tight). For a mini version, use sport weight yarn and a small hook.
Conclusion#
A mini cow keychain is one of those crochet projects that’s impossible not to love: tiny, cuddly, and packed with personality. The shaping is simple, the pieces are small, and the finished charm feels instantly gift-ready—especially with a sturdy loop and a neat muzzle.
If you want, tell me what yarn you’re using (plush #5, chenille #6, worsted, etc.) and whether you prefer standing legs or a seated pose, and I’ll fine-tune the stitch counts so your cow comes out perfectly proportioned for your exact materials.


