Introduction#
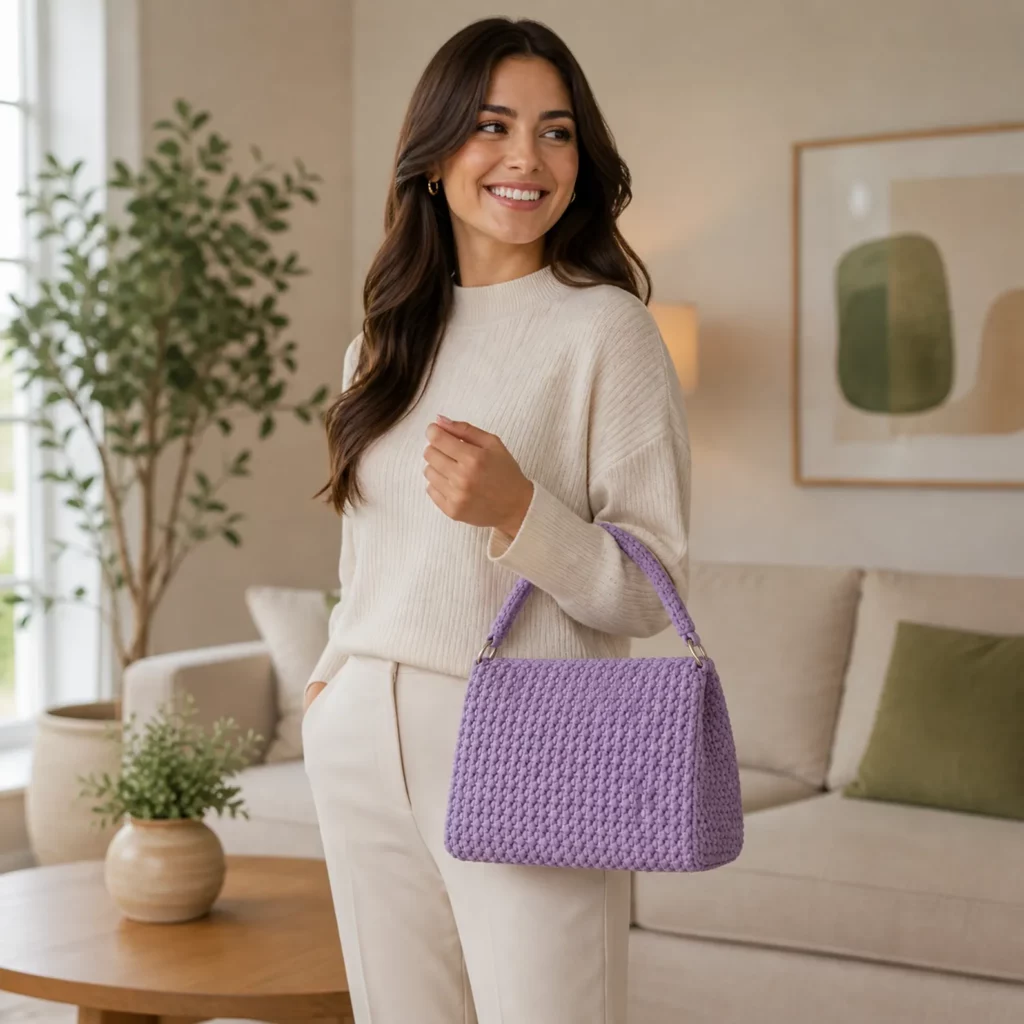
If you’ve been hunting for a crochet pattern that looks high-end but is still practical for everyday life, a structured mini handbag is one of the best projects you can make. It’s the kind of piece that instantly elevates an outfit, holds your essentials, and (bonus!) teaches you crochet skills that translate to other items like baskets, organizers, and sturdy totes.
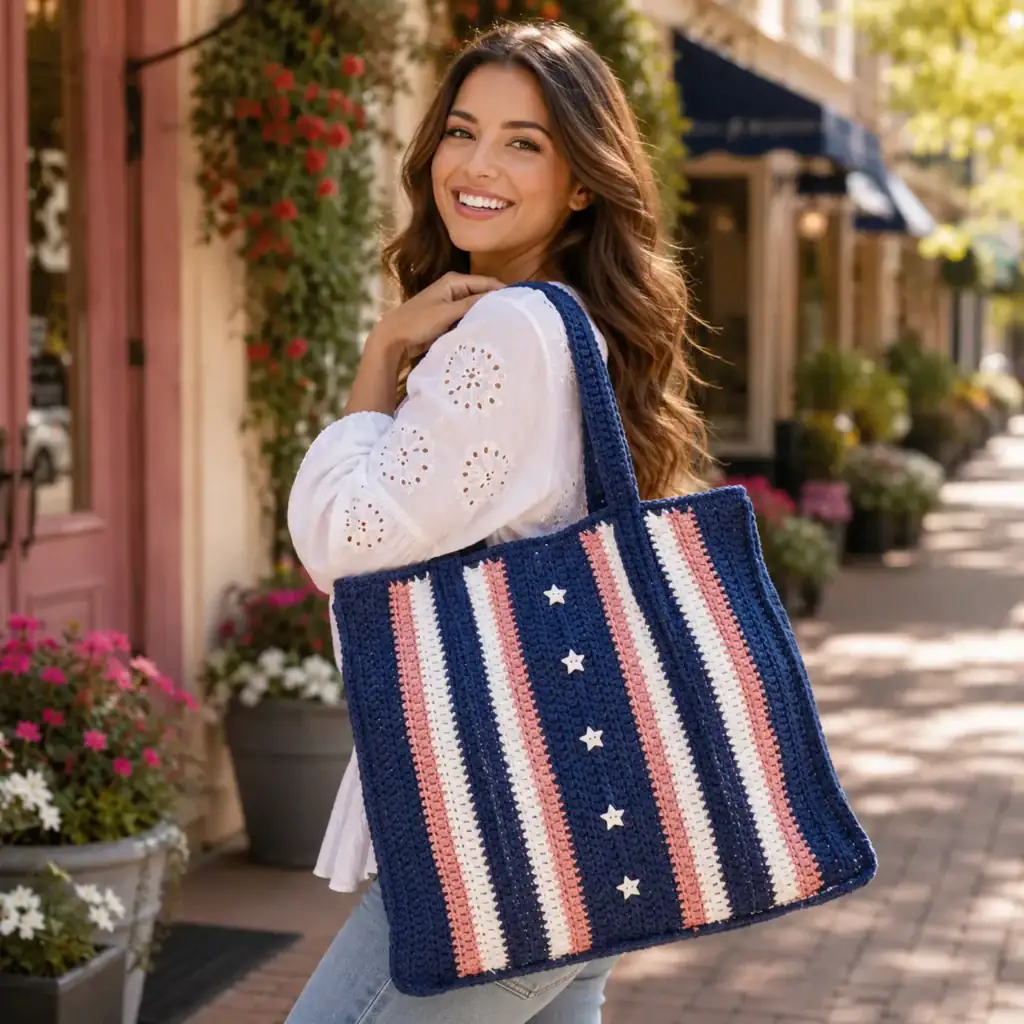
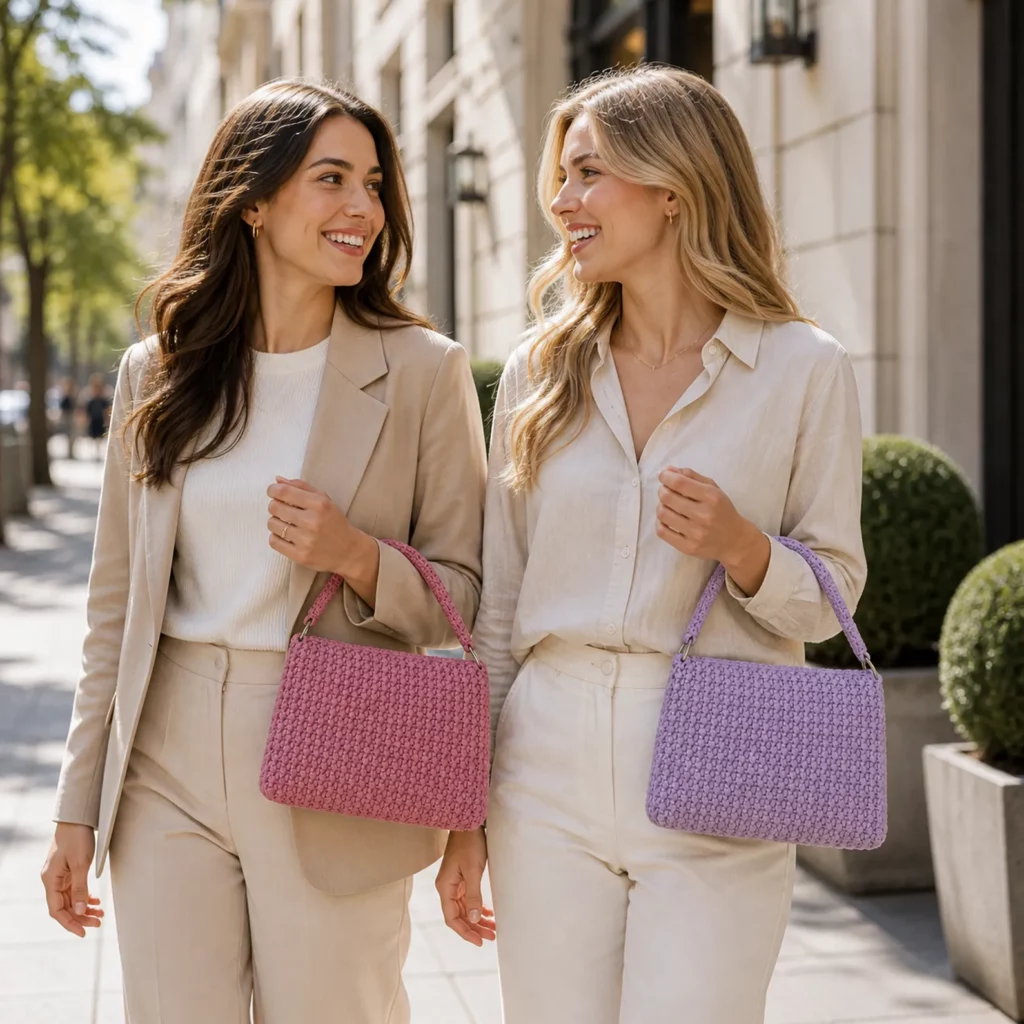
Explore more beginner bags crochet patterns in our pattern library.
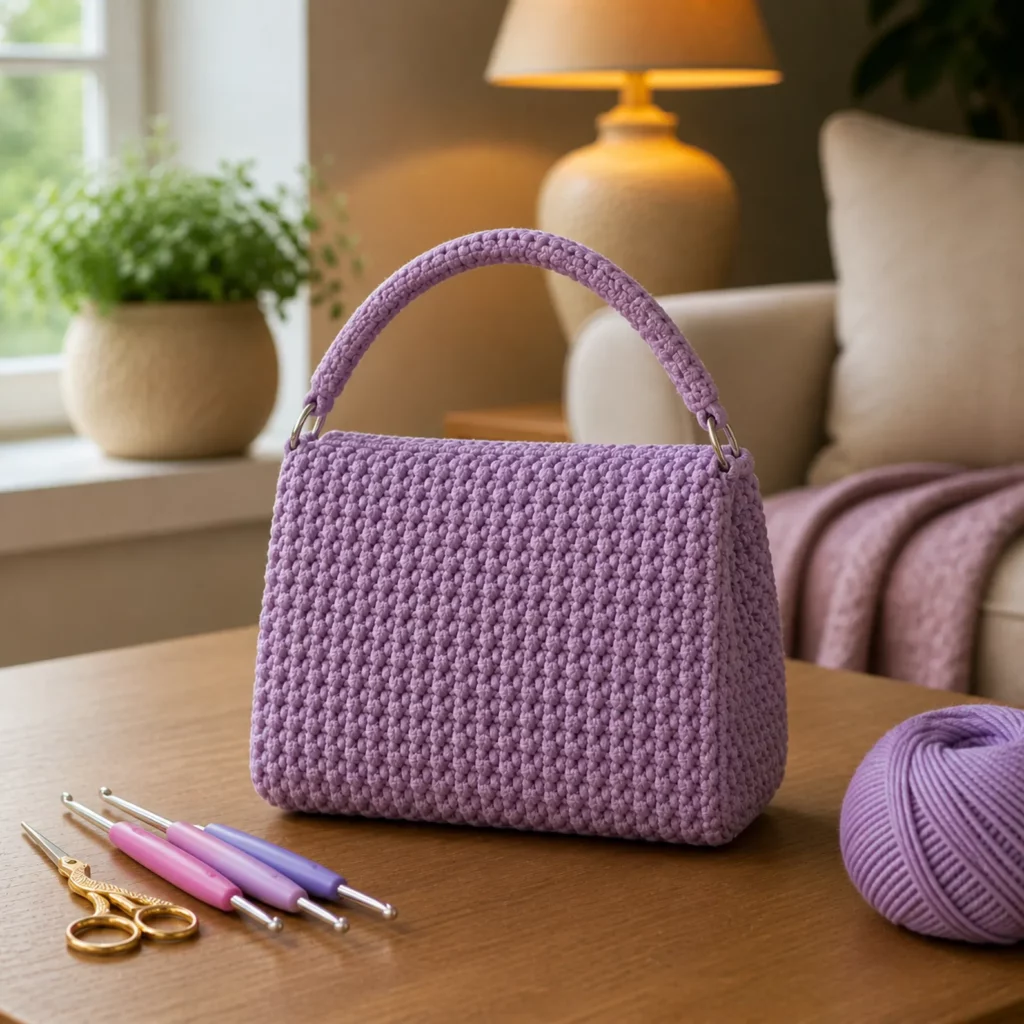
This tutorial-style guide walks you through a modern, boxy bag with a pebble-like texture, a clean flap, and a comfortable top handle. The texture is created with a simple stitch repeat that looks rich and dimensional—especially when you use cord, tube yarn, or tightly spun cotton. You’ll also learn how to shape a firm base, keep edges crisp, and add optional hardware (like D-rings and a strap) for a boutique finish.
Whether you want a casual crossbody or a polished top-handle purse, this free crochet pattern is built to be customized.
Detailed Description of the Crochet Pattern#
This crochet bag has a structured silhouette with a dense, tactile surface:
- Body: a boxy base and straight sides for a clean “designer” shape.
- Texture: a pebble/waffle-like look created with an easy stitch pattern (no complicated cables required).
- Flap: a simple rectangle flap that folds over the front for a classic handbag style.
- Handle: a thick, crocheted top handle that feels sturdy in the hand.
- Hardware options: D-rings for a strap, magnetic snap for closure, and an optional lining for extra durability.
The key to this pattern is tight, dense stitches plus a yarn choice that holds structure. The stitch repeat gives that “little bumps” effect that looks sophisticated in solid colors and becomes extra striking in matte black, neutrals, or jewel tones.
Skill Level Explanation#
This is an easy to intermediate crochet project.
You’ll be comfortable if you can:
- Chain and crochet in rows
- Single crochet (sc) and double crochet (dc)
- Keep stitch counts consistent
- Seam panels together neatly
- Work evenly around edges
Beginner-friendly features:
- The bag is mostly rectangles and straight edges
- The texture repeat is simple and rhythmic
- The pattern is easy to size up/down
Skills that might be new (but totally learnable):
- Maintaining firm tension for structure
- Attaching hardware (optional)
- Adding a lining (optional but recommended)
Materials Needed#
To get a structured finish, materials matter here more than they do for scarves or blankets.
- Yarn (best choices for structure):
- Braided cotton cord (3–5 mm) for a crisp, modern look
- Cotton tube yarn for a slightly softer but still sturdy result
- Worsted cotton held double (if you don’t have cord yarn)
- 200–350 yards of cord/tube yarn (varies by size and handle)
- Crochet hook:
- 4.5–6.0 mm depending on cord thickness
- The goal is a fabric that feels firm, not drapey.
- Notions & bag hardware (optional but recommended):
- Tapestry needle
- Stitch markers
- Scissors
- 2 D-rings (for strap attachments)
- 1 magnetic snap or turn-lock clasp
- 1 strap (store-bought) or crochet your own
- Bag label or charm (optional)
- Lining fabric + needle/thread (optional)
Yarn + hook tip
If you can easily “stretch” the stitches and see big gaps, your hook is too large. For bags, tight stitches = better structure and longer wear.
Stitches & Techniques Explained#
This pattern uses a classic textured stitch often called the griddle stitch (also known as lemon peel stitch). It’s beginner-friendly and creates a pebbly, nubby texture that looks elevated—perfect for handbags.
- ch: chain
- sc: single crochet
- dc: double crochet
- sl st: slip stitch
- st(s): stitch(es)
- sk: skip
- rep: repeat
Helpful techniques
- Griddle stitch (texture):
You alternate sc and dc across the row, then offset the next row so the sc stacks on top of dc and dc stacks on top of sc. This creates a dense, bumpy texture and a thicker fabric. - Crisp edges:
Stitch markers in the first and last stitch of each row help keep the bag panels perfectly even. - Seaming for structure:
A tight whip stitch or slip-stitch seam strengthens the bag and helps it keep a box shape.
Step-by-Step Instructions#
Pattern notes
- Written in US terms.
- Ch-1 at the start of a row does not count as a stitch unless stated.
- Read the entire pattern once before starting so you understand the construction.
- Finished size (approx.): 8 in wide x 6 in tall x 3 in deep (adjustable).
Stitch Pattern: Griddle Stitch (used for body)
Row setup: work across alternating sc and dc.
Next row: alternate again, placing sc into dc and dc into sc.
Tip: Always place a sc into a dc and a dc into a sc. That’s what creates the texture.
PART 1: Base Panel (rectangle)#
The base is worked flat, then we’ll build sides upward from it.
Ch 31 (adjust width by chaining more/less; keep your base length proportional to desired bag size).
Row 1: Sc in 2nd ch from hook and across. (30) Turn.
Row 2: Ch 1, sc in first st, dc in next st, sc in next st rep across, ending with dc or sc depending on stitch count. Turn.
Row 3: Ch 1, dc in first st (because last row began with sc), sc in next st, dc in next st rep across. Turn.
Repeat Rows 2–3 until base measures about 8 inches wide and 3 inches deep (for a structured mini bag, 10–14 textured rows is common depending on yarn thickness).
Fasten off only if you prefer sewing sides separately. If you want a cleaner build, do not fasten off and move to Part 2.
PART 2: Build the Bag Body Upward (working around base)#
Now you’ll crochet around the base to form the sides.
Round 1 (setup edge):
Join yarn at a corner if needed. Ch 1. Work sc evenly around the base:
- Place 1 sc in each stitch across one side,
- 3 sc in each corner,
- 1 sc in each row-end along the short sides (add or skip as needed to keep it flat),
- 3 sc in each corner again.
Join with sl st to first sc.
Round 2: Ch 1, BLO sc in each stitch around. Join.
This BLO round creates a sharp “fold” edge so the bag stands up cleanly.
Rounds 3–? (textured sides):
Work the griddle stitch in joined rounds:
- Round A: sc, dc repeat around
- Round B: dc, sc repeat around (to offset)
Continue until sides measure about 6 inches tall.
Fasten off.
PART 3: Front Flap Panel#
The flap is worked flat and then attached at the back top edge.
Decide flap width:
- For a neat look, make the flap the same width as the front panel (not wrapping around the sides).
Ch 31 (same as base width).
Row 1: Sc in 2nd ch from hook and across. (30) Turn.
Row 2: Ch 1, work griddle stitch across (sc, dc alternating). Turn.
Row 3: Ch 1, offset the griddle stitch (dc, sc alternating). Turn.
Repeat Rows 2–3 until flap is about 5–5.5 inches long.
Optional flap shaping (rounded corners)
On the last 2 rows:
- Work 1 decrease at each edge (sc2tog or dc2tog as appropriate in pattern) to soften the corners.
Fasten off with a long tail for sewing.
PART 4: Top Handle#
You can crochet a sturdy handle that matches the bag, or attach a store-bought handle.
Crochet handle (sturdy tube-style)
Ch 41 (adjust for your preferred handle length).
Row 1: Sc in 2nd ch and across. (40) Turn.
Row 2: Ch 1, sc across. Turn.
Repeat until strip is about 1–1.25 inches wide (usually 4–6 rows).
Fold the strip lengthwise and seam the long edge to create a thick handle.
Fasten off.
PART 5: Assembly (Flap + Handle + Optional Hardware)#
Attach the flap
- Center the flap on the back top edge of the bag body.
- Sew along the flap’s top edge securely.
- Reinforce corners with extra stitches (flaps get tugged a lot!).
Attach the handle
- Position handle ends evenly on the top edges.
- Sew each end firmly with multiple passes.
- If using D-rings, sew handle ends around the ring base for a hardware look.
Add closure (optional but recommended)
Magnetic snap method:
- Mark where the flap lands on the front panel.
- Install the snap according to manufacturer instructions.
- If your yarn is stretchy, add a small piece of fabric behind the snap prongs for stability.
Add strap option
- Sew D-rings to the side top edges.
- Clip on a detachable strap (leather, chain, or crocheted).
PART 6: Optional Lining (highly recommended for longevity)#
A lining helps the bag:
- hold shape
- protect stitches from stretching
- keep small items from poking through gaps
Simple lining approach:
- Cut fabric slightly larger than bag panels.
- Sew into a pouch shape.
- Insert and whip stitch the lining to the inside top edge.
For extra polish, stitch the lining by hand around the magnetic snap area too.
Common Mistakes and How to Avoid Them#
- Bag looks slouchy:
Use a tighter hook size, switch to cord/tube yarn, and add a BLO “turn” round at the base. - Sides flare outward:
You likely added too many stitches along the row ends when working around the base. Remove Round 1 and try again with fewer stitches on the short sides. - Texture looks uneven:
Make sure you’re stacking sc into dc and dc into sc every row/round. - Flap doesn’t sit centered:
Pin the flap before sewing. Count stitches from each side to ensure equal spacing. - Handle feels weak:
Reinforce handle attachment with multiple passes of yarn and consider lining the handle strip or using a thermal stitch handle for extra strength.
Expert Tips for Better Results#
- Use stitch markers for placement: Mark flap center, handle anchor points, and D-ring placement before sewing.
- Block lightly if needed: With cotton cord, gentle shaping (not aggressive blocking) can help edges look crisp.
- Reinforce stress points: Handle ends, flap corners, and snap areas should be sewn extra securely.
- Add a firm base insert: A piece of plastic canvas or bag base insert inside the lining keeps the bottom perfectly flat.
- Keep tension consistent: Cord yarn shows tension changes easily—slow down and keep stitches even.
Variations and Customization Ideas#
- Crossbody version: Add D-rings + longer strap.
- Bigger everyday bag: Increase base width and height (ex: 36 ch base and 8–9 inches tall).
- Even more texture: Swap griddle stitch for:
- waffle stitch (very structured, more yarn)
- mini bean stitch (soft bumps, great look)
- Color blocking: Use one color for body, another for flap/handle.
- Dressy finish: Add a chain strap and a turn-lock clasp.
- Minimalist style: Skip hardware and do a simple button-and-loop closure.
Benefits of This Crochet Project#
- A practical DIY crochet accessory you’ll actually use
- Teaches structure skills (base shaping, crisp edges, firm fabric)
- The texture looks “boutique” without complicated techniques
- Customizable size, strap options, and closures
- Great stash-buster for cord/tube yarn and hardware leftovers
- A polished make that’s ideal for gifts
Internal Linking Suggestions#
If you’re building a crochet blog, link this tutorial to:
- “How to Crochet the Griddle Stitch (Lemon Peel Stitch)”
- “Best Yarn for Crochet Bags (Cord vs Cotton vs Acrylic)”
- “How to Add a Fabric Lining to a Crochet Bag”
- “How to Keep Crochet Edges Straight (Beginner Guide)”
- “Easy Crochet Strap Patterns (Crossbody + Handle Styles)”
FAQ Section#
What yarn is best for a structured crochet bag pattern?
Braided cotton cord or cotton tube yarn is ideal because it holds shape, creates crisp stitches, and resists stretching better than soft acrylic.
Is this an easy crochet pattern for beginners?
Yes—if you already know sc and dc, you can do the griddle stitch. The only “intermediate” part is assembly (sewing flap/handle and adding optional hardware).
How do I make the bag bigger or smaller?
Increase or decrease your starting chain for width, crochet the base to the depth you want, then continue the side rounds to your desired height. Keep flap width aligned with the front panel for a clean look.
How do I stop the bag from stretching over time?
Use tighter stitches, structured yarn (cord), add a lining, and reinforce stress points. A base insert also helps prevent sagging.
Can I crochet a strap instead of using a store-bought one?
Absolutely. A long strap in tight single crochet or thermal stitch works well. You can also crochet around a cotton webbing strap for maximum strength.
Do I need to add a lining?
Not required, but it’s strongly recommended for durability and a more professional finish—especially if you carry keys, lip balm, or anything small that could poke through stitches.
Conclusion#
A textured mini handbag is one of the most satisfying projects because it feels both creative and useful—you’re not just crocheting for the sake of it, you’re making a piece you can style and carry. This free crochet pattern gives you a structured base, a rich pebble texture, and a classic flap-and-handle silhouette that looks polished in any color.
If you tell me the yarn you’re using (cord size or yarn weight) and your preferred finished size (mini, medium, or large), I can adjust the stitch counts and give you a perfectly scaled version—without changing the overall look of the bag.