


Introduction#
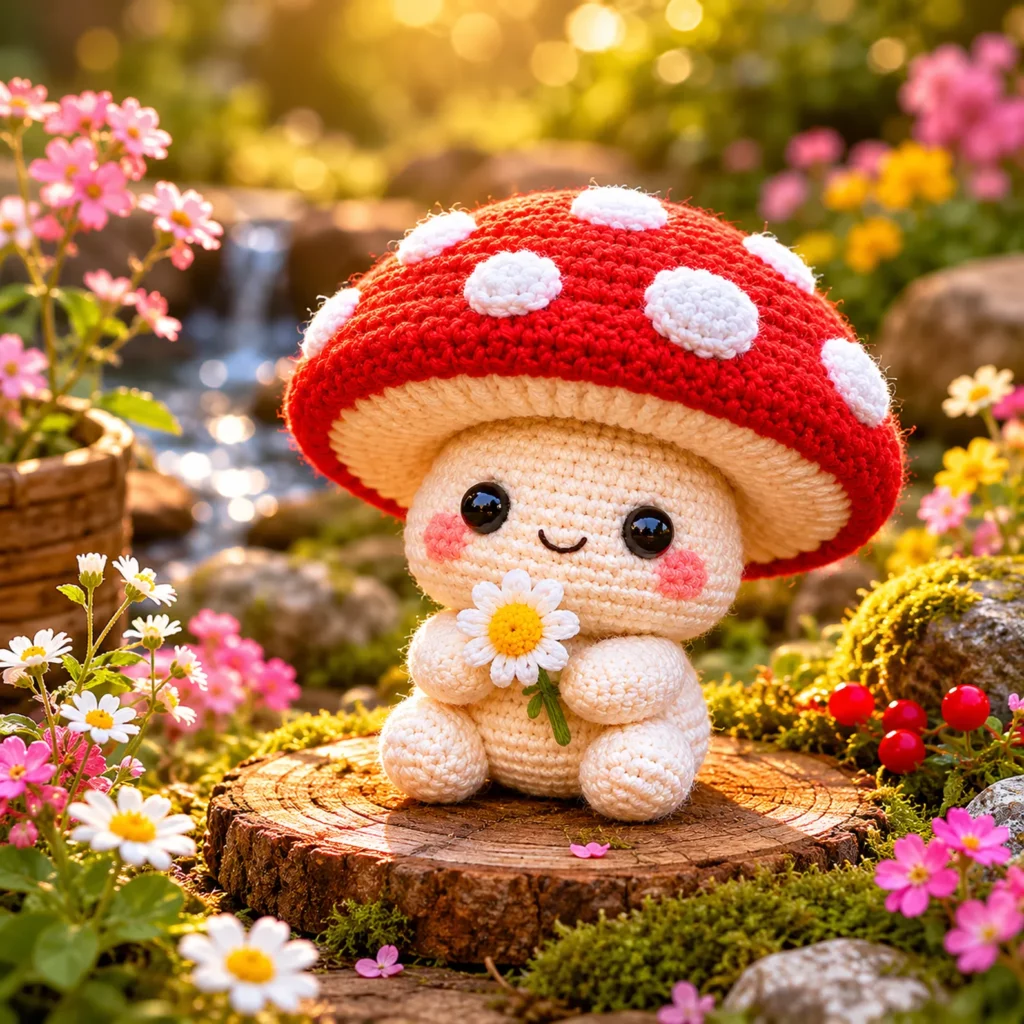
If you’ve been craving a crochet project that’s equal parts adorable and comforting, a kawaii mushroom amigurumi is one of those makes that instantly delivers. It’s round, squishy, and full of personality—especially when you add the signature red cap with white spots, shiny little eyes, and rosy cheeks. It’s also a fantastic “confidence builder” project because the shaping is simple, the parts are small, and the details are what make it look extra polished.
Explore more beginner amigurumi crochet patterns in our pattern library.
This crochet pattern is written as a complete crochet tutorial so you can follow it even if you’re newer to amigurumi. You’ll learn how to get a smooth, tight fabric (no stuffing showing), how to shape a mushroom cap that sits neatly on the head, how to make clean spots, and how to assemble everything so it looks balanced and professional. You can keep it classic red-and-white, or customize it into pastel, cottagecore, or woodland colors.
By the end, you’ll have a giftable plush that works as nursery décor, desk buddy, keychain (mini version), or a cute market item—without complicated techniques.
Detailed Description of the Crochet Pattern#
This amigurumi mushroom is designed as a small seated plush with a big cap and a sweet face. The body is made in one main piece (head and torso shape), the cap is crocheted separately, and the dots are small appliqués that are sewn on for a clean, raised look.
What you’ll make
- Body (cream): a rounded shape that forms the head and torso in one piece
- Arms (cream): two small tubes that sit forward like it’s holding something
- Feet (cream): two rounded nubs that help it sit upright
- Mushroom cap (red): a domed cap with a soft brim that frames the face
- Spots (white): small circles sewn onto the cap
- Optional daisy accessory: a tiny flower the mushroom can “hold” for extra charm
- Face details: safety eyes or embroidered eyes, blush cheeks, and a simple smile
Construction style
- Mostly single crochet in continuous rounds for the body
- A separate cap worked in increasing rounds, then a brim section
- Appliqué spots attached after the cap is complete
- Simple assembly with careful placement so the character looks centered and balanced
The overall effect is “kawaii cute” with clean shapes and a soft plush silhouette.
Skill Level Explanation#
Skill Level: Confident Beginner
You’ll do great if you already know
- Magic ring (MR)
- Single crochet (sc)
- Increase (inc) and decrease (dec)
- Working in continuous rounds
- Sewing amigurumi parts together
Newer skills you’ll practice
- Invisible decrease for smooth shaping
- Even stuffing (so the plush keeps a round shape)
- Appliqué placement and sewing
- Clean cap fit (making the cap sit nicely without wobbling)
This is an easy crochet pattern because the stitches are basic. The “wow” comes from neat finishing and cute details.
Materials Needed#
Yarn
Smooth yarn gives the cleanest amigurumi stitches and the cutest face.
Recommended yarn weights
- DK (Category 3) for a smaller mushroom
- Worsted (Category 4) for a medium plush
Colors
- A: Cream/Beige (body, arms, feet, underside rim)
- B: Red (cap)
- C: White (spots)
- Optional: Pink (cheeks) and Yellow/White/Green (daisy)
Yarn tips
- Cotton gives crisp stitch definition and a “clean” look
- Acrylic is soft and squishy and great for plushies
- Keep all colors the same yarn weight for consistent sizing
Hook
Use a hook slightly smaller than the yarn label suggests to avoid gaps.
- DK: 2.75–3.25 mm
- Worsted: 3.0–4.0 mm
Notions
- Stitch marker
- Yarn needle
- Scissors
- Fiberfill stuffing
- Safety eyes (8–12 mm depending on size) or embroidery thread for eyes
- Black embroidery thread or thin black yarn for mouth
- Optional blush (cosmetic blush or pastel chalk)
- Optional: small piece of felt behind eyes for extra security (if using safety eyes)
Safety Note
If this is for a baby or toddler, embroider the eyes instead of using safety eyes, and stitch all parts very securely.
Stitches & Techniques Explained#
Common Abbreviations
- MR = magic ring
- sc = single crochet
- inc = increase (2 sc in the same stitch)
- dec = decrease (use invisible decrease if possible)
- sl st = slip stitch
- ch = chain
- ( ) = repeat
- = stitch count
Invisible Decrease
Insert your hook into the front loop of the next stitch, then into the front loop of the following stitch, yarn over and pull through, yarn over and pull through two. It keeps the shape smooth and reduces little “bumps.”
Clean Color Changes
This pattern mostly avoids color changes in the body by using appliqués, which keeps everything tidy. If you do change colors, always switch on the last yarn-over of the previous stitch.
Stuffing Tips for a Round, Cute Plush
- Stuff gradually as you go
- Use small pieces of fiberfill, not one big clump
- Firm enough to hold shape, not so firm the stitches stretch
- Pay attention to the face area so it doesn’t bulge unevenly
Step-by-Step Instructions#
Finished Size
With worsted yarn and a 3.25 mm hook, expect about 4.5–6.5 inches (11–16.5 cm) tall depending on tension and stuffing.
Notes Before You Start
- Work in continuous rounds unless stated
- Use a stitch marker and move it every round
- Read through the whole pattern once before starting assembly
- For the cutest look, attach the cap after the face is finished
Color Key
- A = Cream
- B = Red
- C = White
Body (Head + Torso in One Piece, Color A)#
Round 1: 6 sc in MR [6]
Round 2: inc around [12]
Round 3: (sc, inc) around [18]
Round 4: (2 sc, inc) around [24]
Round 5: (3 sc, inc) around [30]
Round 6: (4 sc, inc) around [36]
Rounds 7–11: sc around [36]
Eye placement
- Place eyes between Rounds 8–9
- Space about 7–8 stitches apart for a sweet, wide-eyed look
- If you want extra kawaii, place them slightly lower and closer together
Round 12: (4 sc, dec) around [30]
Round 13: (3 sc, dec) around [24]
Round 14: (2 sc, dec) around [18]
Start stuffing the head area firmly and shape it round.
Round 15: (sc, inc) around [27]
Round 16: (2 sc, inc) around [36]
Rounds 17–20: sc around [36]
This section creates a little “torso” fullness so it looks like a plush character body.
Round 21: (4 sc, dec) around [30]
Round 22: sc around [30]
Round 23: (3 sc, dec) around [24]
Round 24: sc around [24]
Stuff the body firmly, especially the base so it sits nicely.
Round 25: (2 sc, dec) around [18]
Round 26: (sc, dec) around [12]
Round 27: dec around [6]
Fasten off and close.
Arms (Make 2, Color A)#
Round 1: 6 sc in MR [6]
Round 2: (sc, inc) around [9]
Rounds 3–6: sc around [9]
Lightly stuff the lower half only.
Flatten and sc across the opening to close. Fasten off with a long tail.
Feet (Make 2, Color A)#
These are small rounded feet that help the mushroom sit.
Round 1: 6 sc in MR [6]
Round 2: inc around [12]
Round 3: (sc, inc) around [18]
Rounds 4–5: sc around [18]
Round 6: (4 sc, dec) around [15]
Round 7: sc around [15]
Stuff firmly and flatten slightly at the base. Fasten off with a long tail.
Mushroom Cap (Color B)#
The cap is a dome that widens, then forms a brim.
Round 1: 6 sc in MR [6]
Round 2: inc around [12]
Round 3: (sc, inc) around [18]
Round 4: (2 sc, inc) around [24]
Round 5: (3 sc, inc) around [30]
Round 6: (4 sc, inc) around [36]
Round 7: (5 sc, inc) around [42]
Round 8: (6 sc, inc) around [48]
Rounds 9–12: sc around [48]
Brim shaping
Round 13: (7 sc, inc) around [54]
Round 14: sc around [54]
Round 15: sc around [54]
Optional underside rim (Color A)
If you want that classic “mushroom underside” framing the face, switch to Color A for one round.
Round 16: sc around [54]
Fasten off leaving a long tail for sewing.
Cap fit tip
Before sewing, place the cap on the head and adjust where you want the brim to sit. Most people like it slightly low, framing the eyes like a little hat.
White Spots (Make 6–10, Color C)#
Spot size options
- Small spots: MR 6 sc, join, fasten off
- Medium spots: MR 6 sc, inc around [12], join, fasten off
- Large spots: MR 6 sc, (sc, inc) around [9], join, fasten off
For a balanced cap, mix sizes. Place a few larger spots near the top and smaller ones around the sides.
Sew spots evenly onto the cap. Use pins first so spacing looks intentional.
Face Details#
Mouth embroidery
- Use black embroidery thread or thin black yarn
- Stitch a small curved smile centered between the eyes, slightly below eye level
- For extra cute, add a tiny little “nose dot” above the smile (optional)
Blush cheeks
- Use blush powder or pastel chalk lightly
- Place cheeks below and slightly outside each eye
- Build color slowly so it stays soft, not too intense
Optional eye highlights
- Add one tiny white stitch on the upper corner of each eye for sparkle
Optional Daisy Accessory (Tiny Flower)#
This is a cute extra detail if you want the mushroom to look like it’s holding a flower.
Flower center (yellow)
MR 6 sc, join, fasten off.
Petals (white)
Join white to any stitch on the center.
(ch 3, sl st in next stitch) repeat around to make 6 petals.
Fasten off.
Stem (green, optional)
Ch 10–14, sl st back down the chain.
Sew flower to one hand and tack the stem lightly to the body.
Assembly#
Assembly is what makes amigurumi look “professional,” so take your time and pin pieces first.
Attach feet
- Place feet at the front bottom of the body
- Space them evenly and angle slightly outward
- Sew firmly so the plush sits without tipping
Attach arms
- Sew arms to the sides of the body, slightly forward
- If you’re adding a flower, position one arm a bit higher as if holding it
Attach cap
- Place cap so the brim sits just above the eyes (or slightly lower for extra cute)
- Pin all the way around before sewing
- Stitch around the cap edge using small whip stitches
- Add a few hidden stitches from the cap underside to the head to prevent wobble
Final shaping
- Gently squeeze and shape the body so it sits nicely
- Press the base slightly flat if needed
- Adjust stuffing by pushing it into place with your fingers
Common Mistakes and How to Avoid Them#
Safety eyes look uneven
- Use pins to mark placement before inserting
- Count the stitches between eyes and check from the front and side angles
Stuffing shows through stitches
- Use a smaller hook
- Keep tension tight and consistent
- Avoid overstuffing, which stretches stitches
Cap doesn’t sit nicely
- Make sure the head is stuffed firmly and evenly
- Pin the cap before sewing and adjust position until it frames the face
- Add extra anchor stitches on the back of the cap
Spots look messy or bumpy
- Keep spot circles flat by joining neatly and weaving in ends well
- Sew spots with small stitches around the edge so they lie flat
Plush won’t sit upright
- Stuff the base more firmly
- Flatten the bottom slightly when sewing closed
- Position feet slightly forward to counterbalance the cap weight

Expert Tips for Better Results#
- Invisible decreases make the body and cap look much smoother
- Weave in ends as you finish each piece so the inside stays tidy
- If you want a super clean look, sew the cap on with a matching thread or split yarn strand to reduce bulk
- For extra “squish,” use a softer acrylic and slightly looser stuffing in the head while keeping the base firm
- If you’re making many mushrooms, make a “placement template” by measuring your first one’s eye spacing and cap position, then repeat
Variations and Customization Ideas#
- Change the cap color
- Pastel pink cap with cream spots
- Sage green cap with white spots
- Brown cap with tan spots for a woodland vibe
- Add freckles instead of blush using tiny embroidery stitches
- Make it a keychain
- Use DK or sport yarn, smaller hook, and add a loop at the top of the cap
- Add a tiny scarf for winter mushrooms
- Make a whole mushroom family
- Small, medium, and big versions by changing yarn weight and hook size
- Add embroidered “gills” under the cap
- Use cream thread and stitch short lines on the underside rim
Benefits of This Crochet Project#
- Fast, satisfying make with high cuteness payoff
- Great beginner-friendly introduction to amigurumi shaping
- Small amount of yarn required, perfect stash buster
- Easy to customize colors and facial expressions
- Giftable for kids, friends, and cottagecore lovers
- Perfect for craft fairs because it’s portable and repeatable
Internal Linking Suggestions#
- How to Crochet a Magic Ring for Beginners
- Invisible Decrease Tutorial for Smooth Amigurumi
- Best Yarn for Amigurumi: Cotton vs Acrylic
- How to Sew Amigurumi Parts Neatly
- Easy Crochet Flower Applique Pattern
- Beginner Crochet Plushies Collection
FAQ#
Is this crochet pattern suitable for beginners?
Yes. If you can do single crochet, increases, and decreases, you can make this. The parts are small, and the details are simple but effective.
What yarn is best for a mushroom amigurumi?
Smooth DK or worsted yarn works best. Cotton gives crisp stitches, acrylic gives extra softness. Both work beautifully.
How do I make the mushroom cap sit correctly?
Stuff the head firmly, pin the cap in place before sewing, and add a few hidden anchor stitches so it doesn’t wobble.
Can I make it baby-safe?
Yes. Embroider the eyes instead of using safety eyes, avoid small accessories that could detach, and stitch all parts very securely.
How many spots should I add to the cap?
Usually 6–10 looks balanced, depending on cap size. Mix small and medium spots for a more natural look.
How do I change the size of the finished plush?
Use thicker yarn and a larger hook for a bigger plush, or thinner yarn and a smaller hook for a mini version. Keep the same stitch counts and your mushroom will scale naturally.
Conclusion#
A kawaii mushroom plush is one of those crochet pattern projects that feels instantly rewarding: simple shapes, big personality, and endless ways to customize. Once you make one, you’ll probably want a whole little mushroom squad in different colors and expressions.
If you tell me your yarn weight (DK or worsted) and your hook size, I can suggest the ideal safety-eye size and spot count to match your exact finished mushroom size.


