


Introduction#
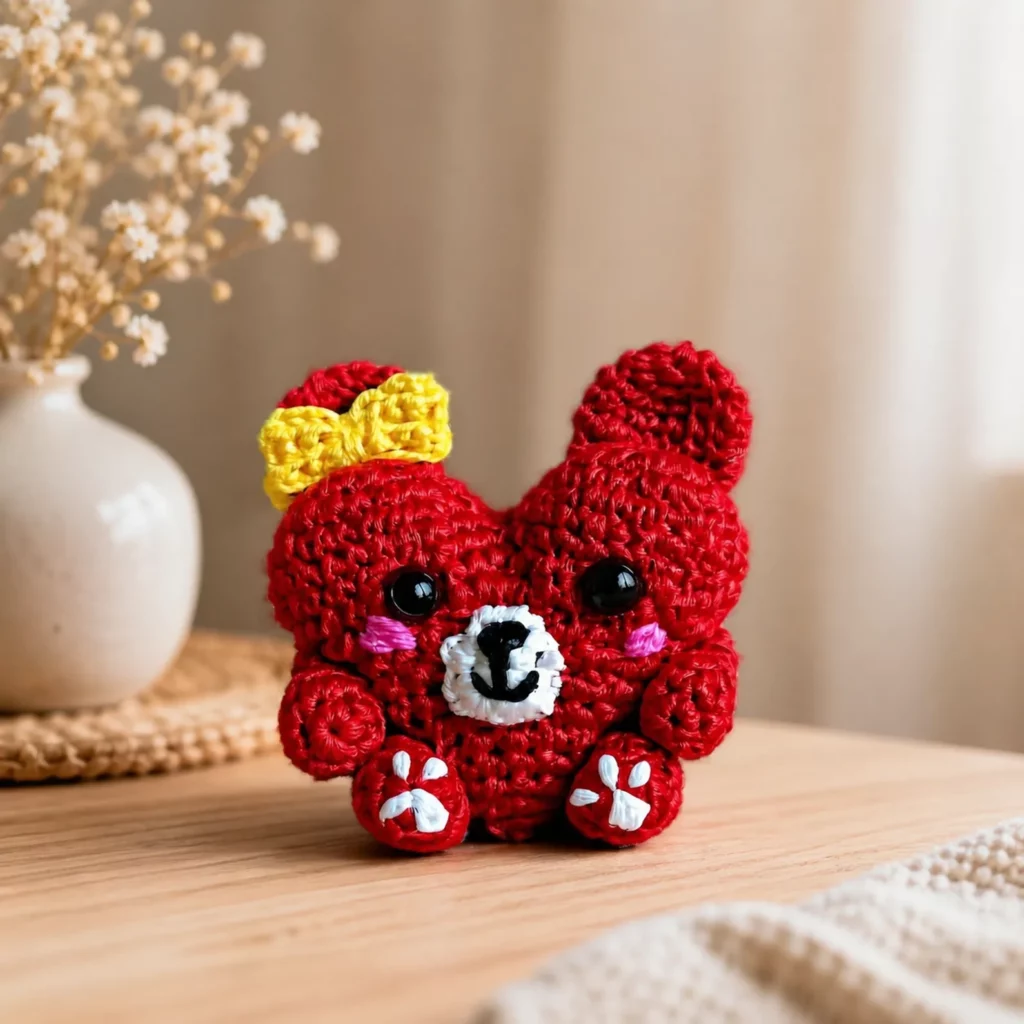
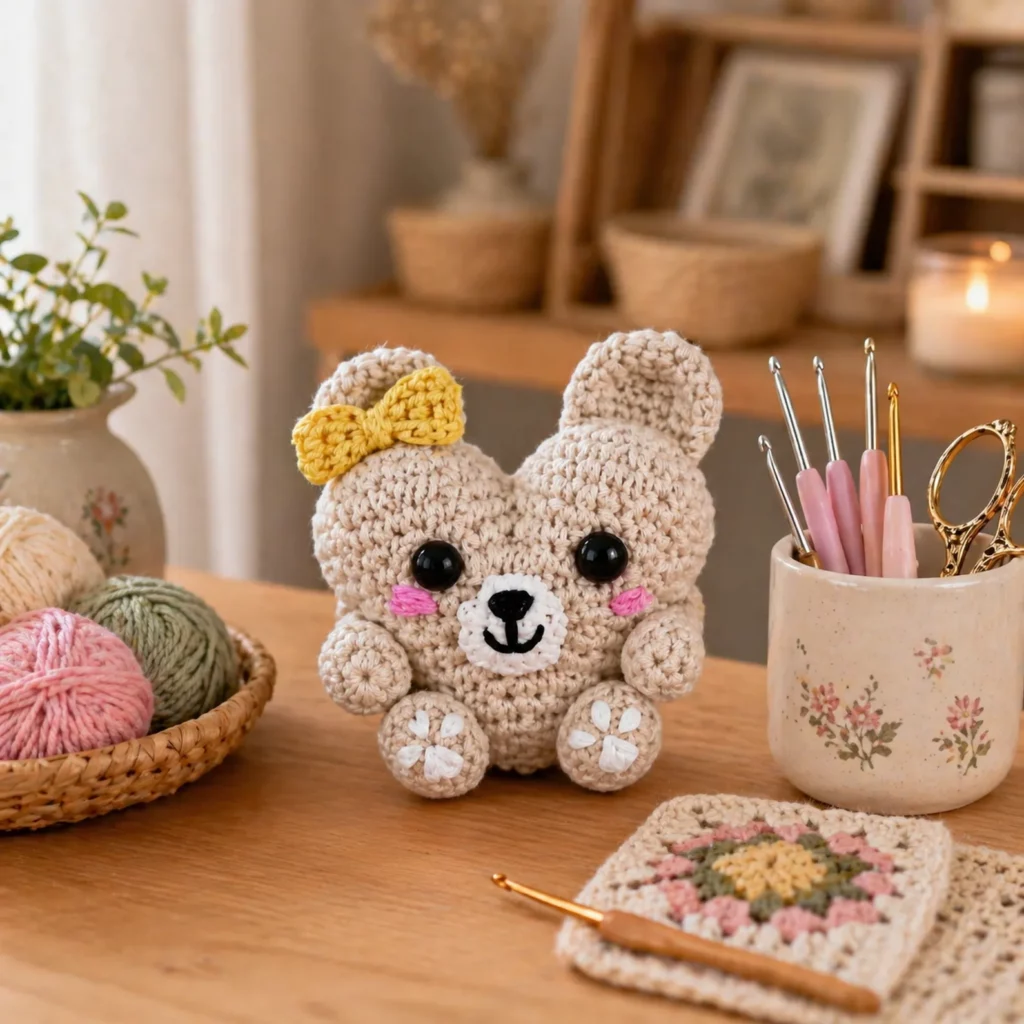
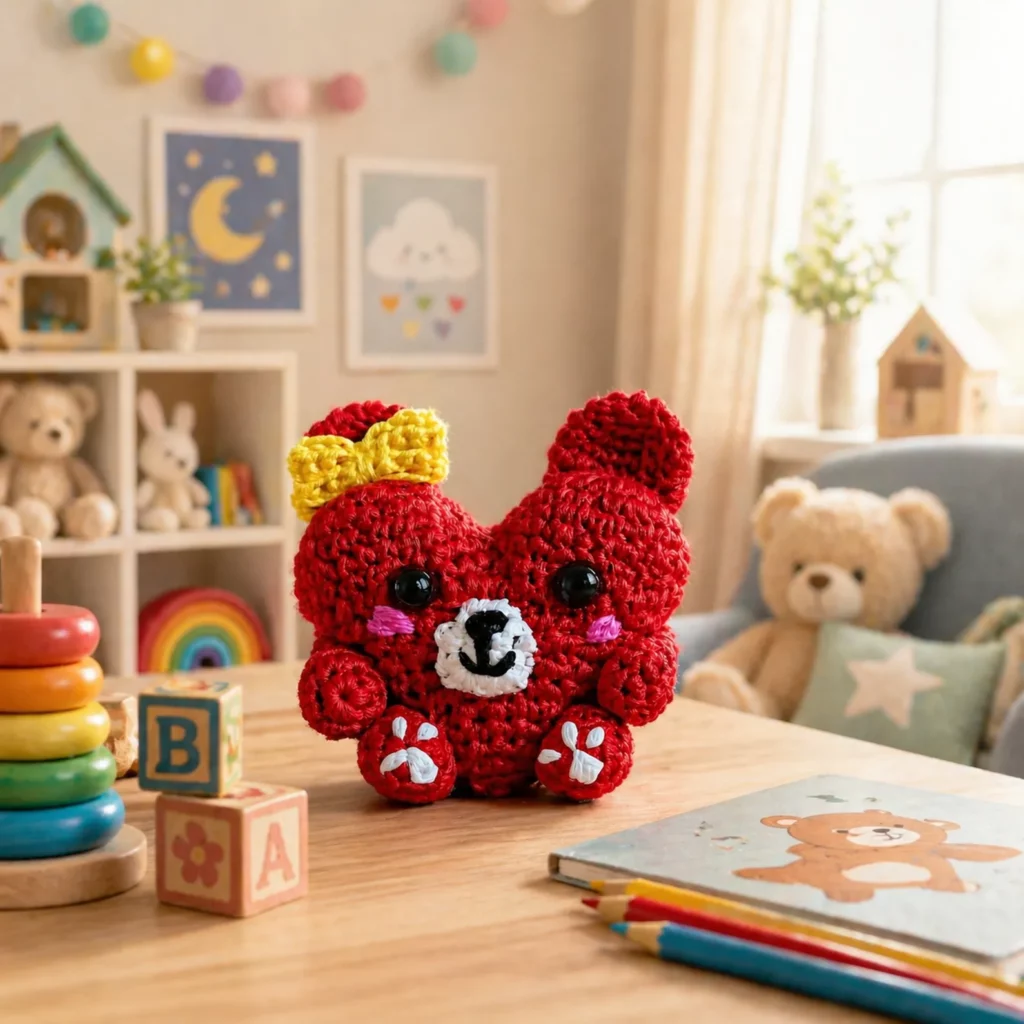
If you’re craving a crochet project that’s small, adorable, and gift-ready, a kawaii bow bear is a perfect pick. This style of amigurumi has everything we love in a “quick win” make: a chubby rounded body, simple little limbs, big eyes, a sweet snout, and one statement detail (the bow!) that makes the plush feel special.
Explore more beginner amigurumi crochet patterns in our pattern library.
This crochet pattern is also ideal for building confidence. You’ll practice the most important amigurumi skills—working in continuous rounds, shaping with increases and invisible decreases, stuffing smoothly, and placing facial details so they look symmetrical. And because the plush is compact, you can finish it fast and immediately see improvement when you make the second one.
Below you’ll find a complete free crochet pattern written as a real crochet tutorial. It includes materials, stitch explanations, step-by-step instructions, common mistakes to avoid, expert finishing tricks, and fun variations (different animals, different bows, keychain version, baby-safe version, and more).
Detailed Description of the Crochet Pattern#
This project creates a small, squishy bear-like amigurumi with a cute “sitting” pose. The design is built from:
- A round body/head base (simple sphere-style shaping)
- Small ears positioned high for a sweet expression
- Tiny arms attached to the front sides
- Chunky feet/paws that help it sit upright
- A snout/muzzle patch (white or light color) with a tiny nose
- Cheek blush accents (embroidered)
- A small bow attached near one ear for extra character
You can easily customize it into other animals by changing ear shape and muzzle size—so this one pattern can become a whole collection.
Skill Level Explanation#
This is an easy crochet pattern for beginners who know the basics.
You’ll need to be comfortable with:
- single crochet in the round
- increasing and decreasing
- counting stitches (stitch marker recommended)
- simple sewing (ears, arms, paws, bow)
- basic embroidery (nose, mouth, cheeks)
If you’ve never made amigurumi before, this is a friendly first project because the shapes are forgiving and the final result is still adorable even if your tension isn’t perfect yet.
Materials Needed#
Yarn
Worsted weight (#4) yarn is a great choice for a neat, sturdy plush. Cotton or acrylic both work well.
Suggested colors:
- Main body: red (or any color you love)
- Muzzle: white or cream
- Bow: yellow (or matching/contrasting color)
- Embroidery: black + pink (cheeks)
Yarn tips:
- Cotton = crisp stitches and cleaner embroidery lines
- Acrylic = soft and budget-friendly
- If making for kids, choose washable yarn
Hook
Use a smaller hook than the yarn label suggests for tight stitches:
- 3.0–3.5 mm for worsted yarn
Notions
- stitch marker
- fiberfill stuffing
- yarn needle
- scissors
- safety eyes (optional): 8–10 mm
- embroidery floss (black and pink) or thin yarn
- optional: felt circles for eye whites (for extra “sparkle”)
Stitches & Techniques Explained#
Abbreviations (US terms)
- MR = magic ring
- sc = single crochet
- inc = increase (2 sc in one stitch)
- dec = invisible decrease (sc2tog through front loops)
- sl st = slip stitch
- ch = chain
- ( ) = repeat
- = stitch count
Invisible decrease (recommended)
Invisible decreases make your plush look smoother than a standard decrease, especially around the head and body curve.
Face mapping (quick, useful habit)
Before attaching eyes or snout, mark the center front with a stitch marker and place pins where you think the features should go. Small changes (even one stitch) can make the expression look much cuter.
Step-by-Step Instructions#
Notes:
- Work in continuous rounds unless stated.
- Use a stitch marker to mark the first stitch of each round.
- Stuff as you go for best shaping.
Body (one main piece)
This body is a rounded shape that sits nicely when stuffed firmly at the base.
R1: MR, 6 sc [6]
R2: inc x6 [12]
R3: (sc, inc) x6 [18]
R4: (2 sc, inc) x6 [24]
R5: (3 sc, inc) x6 [30]
R6: (4 sc, inc) x6 [36]
R7–R11: sc around [36]
Begin shaping the lower half:
R12: (4 sc, dec) x6 [30]
R13: sc around [30]
R14: (3 sc, dec) x6 [24]
Start stuffing firmly, especially the bottom so it sits.
Continue closing:
R15: (2 sc, dec) x6 [18]
R16: (sc, dec) x6 [12]
R17: dec x6 [6]
Fasten off, close the hole, weave in.
Ears (make 2, main color)
R1: MR, 6 sc [6]
R2: (sc, inc) x3 [9]
R3: sc around [9]
Flatten (do not stuff). Fasten off with a long tail for sewing.
Arms (make 2, main color)
R1: MR, 6 sc [6]
R2: (sc, inc) x3 [9]
R3–R5: sc around [9]
Lightly stuff or leave unstuffed for a softer look.
Flatten and close with 4–5 stitches across. Leave tail.
Feet/Paws (make 2, main color)
These are small chunky paws that help the plush sit.
R1: MR, 6 sc [6]
R2: inc x6 [12]
R3: sc around [12]
R4: (sc, dec) x4 [8]
Lightly stuff. Fasten off with tail.
Optional paw pads (white): embroider a few short stitches on the front of each paw.
Muzzle (white/cream)
A simple oval muzzle patch gives that “bear” look.
R1: MR, 6 sc [6]
R2: inc x6 [12]
R3: (sc, inc) x6 [18]
R4: sc around [18]
Fasten off with a long tail. Lightly stuff if you want it slightly raised, or leave flat for a cleaner look.
Bow (yellow)
Simple bow shape that stitches on quickly.
Ch 10.
Row 1: sc in 2nd ch from hook and across (9 sc). Turn.
Row 2–Row 5: ch 1, sc across (9 sc). Turn.
Fasten off.
Pinch the rectangle in the center and wrap yarn around the middle several times to form a bow. Secure tightly and leave tails for sewing.
Face Details
Eyes:
- Safety eyes: place about 5–7 stitches apart, centered above the muzzle area
- Or embroider eyes with black yarn for a baby-safe version
Nose + mouth:
On the muzzle, embroider a small triangle nose and a short line down with a tiny curve for a smile.
Cheeks:
Add two small pink embroidered ovals or a few short stitches below the eyes for a kawaii blush.
Assembly#
- Attach muzzle to the front center of the body. Pin first, then sew around the edge with small stitches.
- Attach eyes (if using safety eyes) before closing the body fully—if you already closed, that’s fine too, just be careful inserting.
- Sew ears near the top sides. Keep them level by pinning both first.
- Sew arms to the front sides, slightly below the face area.
- Sew paws low on the front so the plush sits.
- Attach bow near one ear (slightly angled looks cutest).
- Weave in all ends securely.
Common Mistakes and How to Avoid Them#
- Stuffing shows through: use a smaller hook or tighter tension; amigurumi needs dense fabric.
- Face looks off-center: mark the center front with a stitch marker before placing muzzle and eyes.
- Ears uneven: pin both ears first, step back, then sew.
- Paws make it tip over: stuff the base more firmly and place paws slightly wider apart.
- Bow looks floppy: wrap the center tighter and stitch the bow to the head with multiple passes.
Expert Tips for Better Results#
- Use embroidery floss for the nose and cheeks for cleaner lines than thick yarn.
- Add a tiny weight pouch (poly pellets inside fabric) in the base if you want perfect sitting stability.
- If you want the cheeks to “pop,” embroider in satin stitch rather than single lines.
- Weave ends deep and long—small plushies get handled a lot, and short ends can work loose.
- Make a “set look”: matching bow colors across multiple bears makes them feel like a collection.
Variations and Customization Ideas#
- Keychain version: make the same pattern in DK yarn with a smaller hook, and add a loop at the top (ch 12, sl st back).
- Mini gift topper: skip paws and make it a simple round plush to attach to wrapping.
- Different animals:
- Bunny: longer ears, smaller muzzle
- Cat: triangle ears, add whiskers
- Puppy: floppy ears, bigger snout
- Seasonal themes:
- Valentine’s: heart patch on belly + red/pink bow
- Christmas: green bow + tiny scarf
- Birthday: add a tiny party hat
- Two-tone body: make the muzzle match the bow, or add a contrasting belly patch.
Benefits of This Crochet Project#
- Quick, beginner-friendly amigurumi
- Great gift or craft fair item
- Uses small amounts of yarn (stash-buster friendly)
- Easy to customize colors and expressions
- Teaches core amigurumi skills with a fun result
- Perfect for blog content because it’s a practical, searchable crochet tutorial
Internal Linking Suggestions#
“You may also like…” ideas for your crochet blog:
- How to Crochet a Magic Ring
- Invisible Decrease for Amigurumi
- How to Attach Safety Eyes Securely
- Beginner Amigurumi Patterns
- Easy Crochet Keychain Patterns
- Crochet Gift Ideas You Can Finish in One Day
FAQ Section#
Is this crochet pattern good for beginners?
Yes. It uses simple stitches and minimal shaping. The main skills are counting and basic assembly.
Can I make this without safety eyes?
Absolutely. Embroidered eyes are a great option and often preferred for baby-safe gifts.
What yarn works best for small amigurumi like this?
Worsted cotton or acrylic works great. Cotton gives crisp stitches; acrylic is softer and budget-friendly.
How do I make the plush bigger or smaller?
Change yarn weight and hook size. Thicker yarn makes a larger plush without changing stitch counts.
How do I keep the bow from falling off?
Sew it on with multiple stitches through the center wrap and into the head, then knot and weave the tail inside.
Can I sell finished items made from this free crochet pattern?
Finished handmade items are typically fine to sell. If you publish your own version, keep your wording and photos original.
Conclusion#
This kawaii bow bear is the kind of crochet pattern you’ll end up making more than once—because it’s fast, adorable, and endlessly customizable. Once you nail the basic body shape and face placement, you can create a whole lineup of little characters just by changing the colors, ears, and accessories.
If you tell me whether you’re using cotton or acrylic (and your hook size), I can suggest the best safety eye size and the ideal stitch spacing for the cutest face proportions.


