


Introduction#
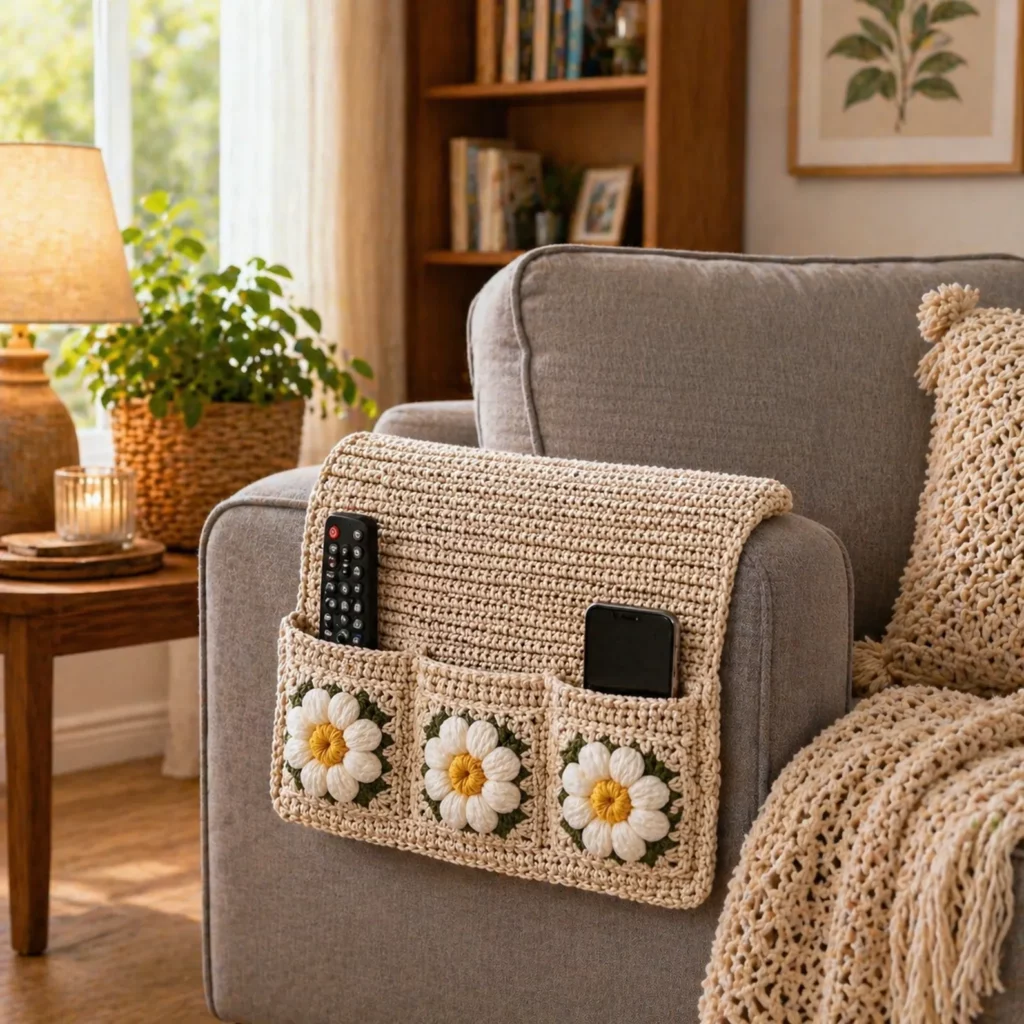
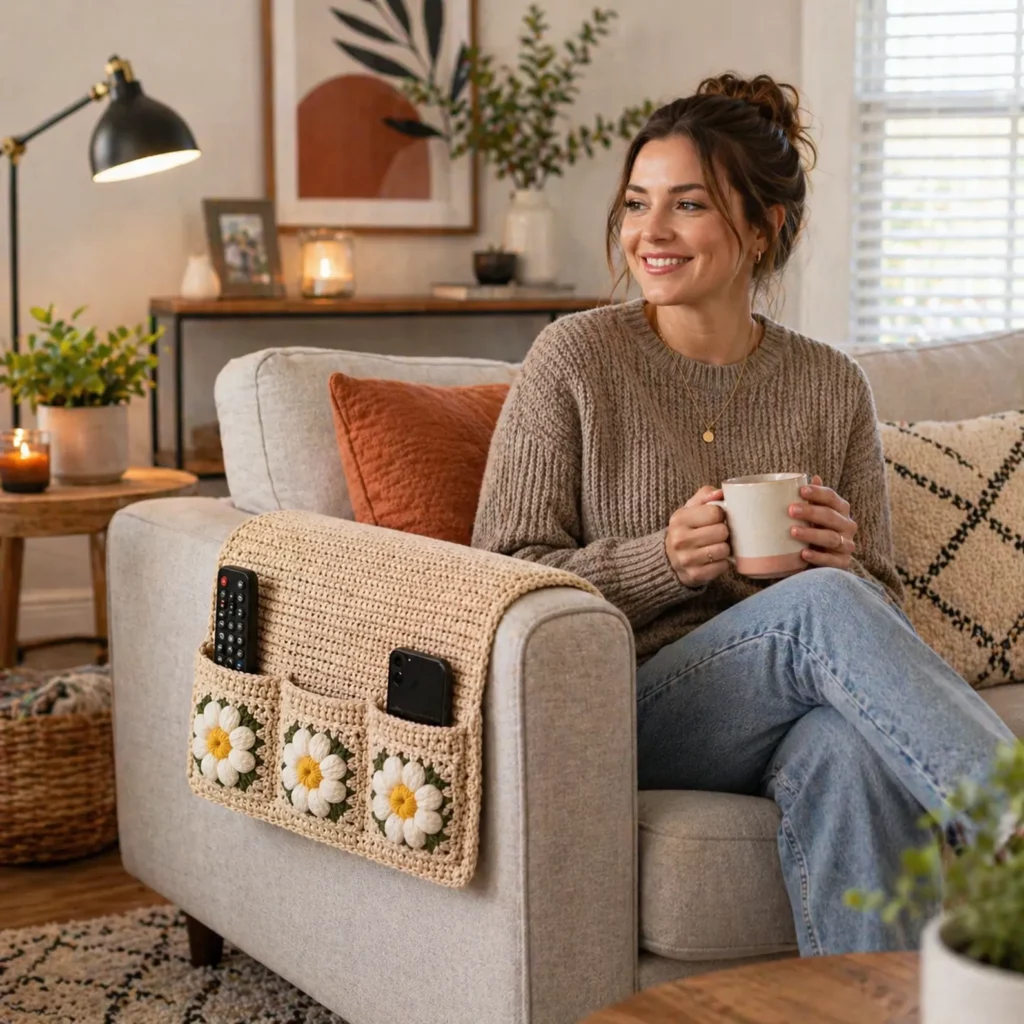
If you’ve ever lost the TV remote between couch cushions (again), or set your phone down “for a second” only to spend ten minutes looking for it, a sofa armrest organizer is about to become your favorite crochet project. It’s one of those rare makes that’s both pretty and genuinely useful: a cozy wrap that hugs your couch arm and gives you pockets for everything you want close—remote, glasses, earbuds, a small notebook, even a crochet hook or two.
Explore more beginner home decor crochet patterns in our pattern library.
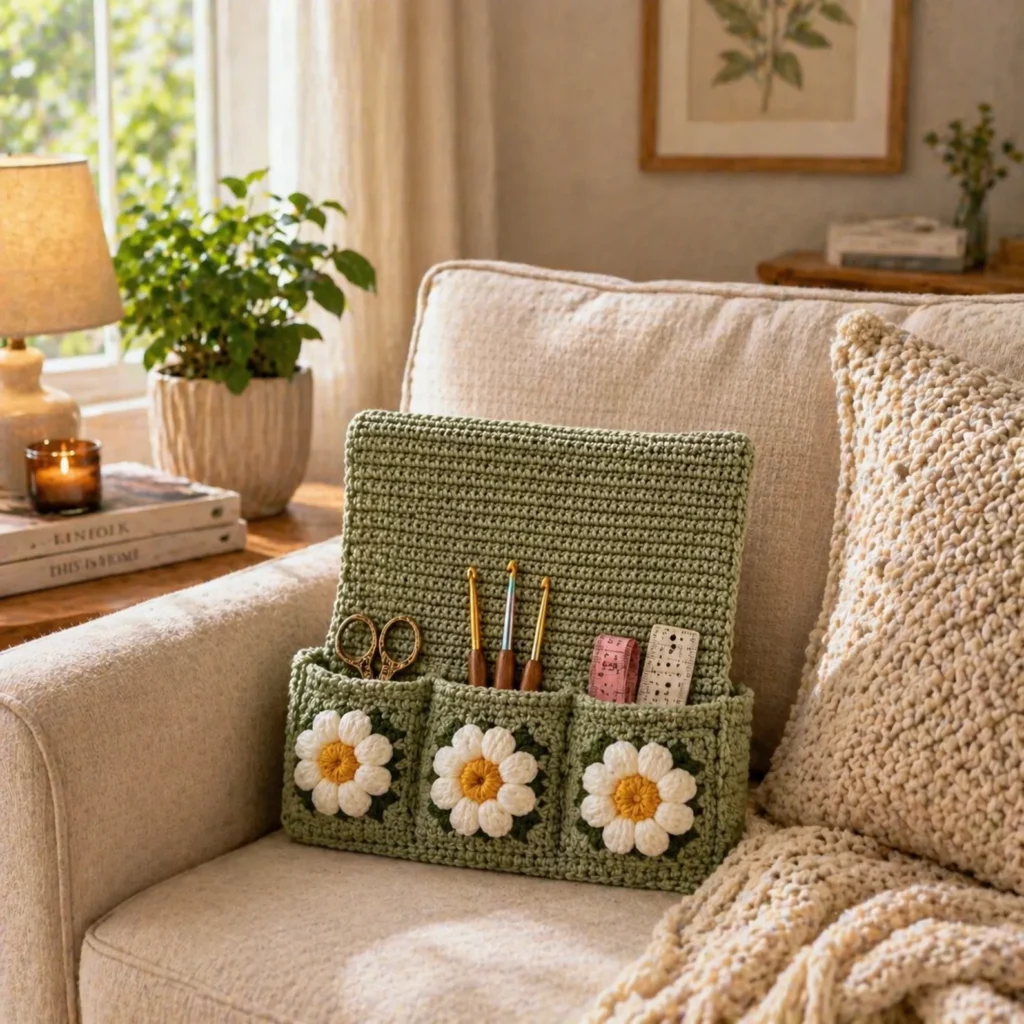
This crochet pattern is designed to look polished and decorative, not like a quick utility pouch. The main body uses a simple, textured stitch that lays flat and sturdy, while the pocket section features three cheerful daisy granny squares framed neatly into a pocket band. The combination makes it feel like home décor, not clutter control.
In this step-by-step crochet tutorial, you’ll learn how to measure your furniture arm for a perfect fit, how to crochet the main wrap so it doesn’t slip, how to assemble a multi-pocket front with granny squares, and how to finish everything with clean borders and optional ties. It’s beginner-friendly, customizable, and perfect for anyone who wants a crochet pattern that actually improves daily life.
Detailed Description of the Crochet Pattern#
This project is a crochet sofa armrest organizer (also called a couch caddy). It’s made from two main components:
- The wrap panel: a long rectangle that drapes over the arm of a sofa, chair, or recliner. This portion is worked in a tight, even stitch pattern for structure and durability.
- The pocket band: a shorter section attached to the lower front edge, divided into compartments. The featured version uses three daisy granny square motifs as decorative pocket fronts, then lines/backs them with a solid fabric-like crochet panel so the pockets are functional and sturdy.
Key features you’ll build:
- Flat, tidy texture (great for beginners and easy counting)
- A pocket area that sits on the outside face of the couch arm
- Optional tie or elastic loop to keep the organizer from sliding
- Clean edging so it looks finished and gift-worthy
It’s the kind of DIY crochet that’s perfect for home décor, quick gifting, and content that performs well on search because people are constantly looking for practical crochet projects.
Skill Level Explanation#
This is an easy-to-intermediate crochet pattern.
Beginner-friendly parts:
- Simple stitches in rows (great tension practice)
- Straightforward measuring and customizing
- Basic seaming
Intermediate elements (still very doable):
- Making and joining granny square motifs
- Attaching pockets neatly so they sit flat and don’t sag
- Keeping edges straight with an even border
If you can crochet a basic dishcloth, you can make the wrap panel. If you can make a granny square (or follow instructions for one), you can make the decorative pockets.
Materials Needed#
Yarn
For something that gets daily use (and might be tugged), choose a yarn with durability and easy care.
Recommended yarn:
- Worsted weight (#4) cotton or cotton blend (best for structure)
- Acrylic works too, but cotton is more grippy and less slippery on upholstery.
Color plan (suggested):
- Main body: cream/neutral (hides wear, looks clean)
- Daisy centers: yellow
- Daisy petals: white
- Daisy background/leaf ring: green
- Optional: a second neutral for borders
Yardage (approximate):
- Main wrap panel: 350–700 yards depending on size
- Motifs + pocket band + border: 150–350 yards
Having extra of the main neutral is helpful for borders and seaming.
Hook
- Worsted cotton: 4.5–5.5 mm
Choose a hook that makes a firm fabric. For organizers, slightly tighter stitches are better than loose drape.
Notions
- Stitch markers
- Measuring tape
- Yarn needle
- Scissors
- Optional: button, elastic, or ribbon tie for anti-slip
- Optional: thin craft foam or felt insert (if you want extra stiffness inside the pocket band)
Stitches & Techniques Explained#
Abbreviations (US terms)
- ch = chain
- sl st = slip stitch
- sc = single crochet
- hdc = half double crochet
- dc = double crochet
- sp = space
- sk = skip
- rep = repeat
- BLO = back loop only
Best stitches for a sturdy organizer
- Single crochet (sc): dense and durable, great for borders and pocket tops
- Half double crochet (hdc): slightly taller but still firm
- BLO sc rows: create subtle ridges that add grip and prevent sliding
Granny square joining tips
For a neat pocket front:
- Block motifs so they’re all identical size
- Use whip stitch for a flat seam, or slip stitch join for a subtle raised outline
- Keep tension even—tight joins can cause puckering
Step-by-Step Instructions#
This crochet tutorial is written as made-to-measure, because couch arms vary a lot. You’ll crochet the wrap to fit your furniture, then build a pocket band that matches the wrap width.
Measure your couch arm
You need three measurements:
- Arm width (A): across the top of the armrest
- Arm drop (B): how far down you want it to hang on each side
- Wrap length (C): total length = B + A + B (plus a little extra drape if you want)
Typical measurements:
- Arm width: 6–9 inches
- Drop: 8–14 inches each side
- Total wrap length: often 24–36 inches
Crochet the wrap panel
This is a long rectangle. The stitch pattern can be simple sc or hdc. For a subtle ridged look that grips upholstery, BLO sc is excellent.
Foundation chain:
Chain until the chain length equals your desired wrap width (this is the width along the armrest from front to back). Many organizers look good at 10–14 inches wide.
Row 1: sc in 2nd ch from hook and sc across, turn.
Row 2: ch 1, sc BLO across, turn.
Repeat Row 2 until the panel reaches your desired wrap length (C).
Tip: If you prefer a smoother look, replace BLO sc with regular hdc rows:
- Row 2 alternative: ch 1, hdc across, turn.
Fasten off and weave in ends.
Create the daisy granny squares
You’ll make three motifs (or more if you want a longer pocket band). These are classic “daisy in a square” motifs: center circle, petal round, green framing, and a final square round.
Daisy center (yellow)
Round 1: MR, ch 1, 8–12 sc into ring. Join.
Round 2: (inc around) to make a fuller center. Join.
Petals (white)
In each stitch around the center, create petals using a puff or cluster style stitch. A simple petal option:
In each stitch: (sl st, ch 2, 2 dc, ch 2, sl st) or use puff stitches for a raised look.
Join and fasten off.
Leaf/background round (green)
Join green into a space between petals. Work sc/hdc around to stabilize the flower and begin squaring off.
Square round (neutral or green)
Work classic granny-square style corners:
- Corners: (3 dc, ch 2, 3 dc)
- Sides: 3 dc in spaces between corners
Fasten off. Block squares to match.
Build the pocket band
There are two reliable construction options.
Option: Pocket band with a backing panel
This is the strongest and easiest to keep neat.
- Join your three granny squares in a row to create a strip.
- Crochet a solid backing rectangle the same size as the joined strip. Use sc rows for firmness.
Backing rectangle:
Chain to the same width as the granny strip.
Work sc rows until the height matches the granny strip height.
Now place granny strip and backing rectangle wrong sides together, and seam around the sides and bottom—leaving the top open (this creates a pocket “tube”).
Divide into pockets
To make three compartments:
- Sew vertical seams between squares through both layers (front and backing).
- Reinforce the top of each seam with extra stitches (this is where stress happens).
Attach pocket band to the wrap
Decide where you want pockets to sit: typically on the outside-facing side, near the lower half.
- Pin pocket band to the wrap panel, keeping it straight.
- Sew the bottom and sides of the pocket band securely to the wrap panel (do not sew the top edge closed).
Add finishing border
A border makes the whole organizer look professional and helps edges stay flat.
Join yarn at a corner of the wrap panel and work:
- 1 round of sc evenly around the entire wrap
- Add (sc, ch 1, sc) in corners for crisp corners
- Optional: a second round of sc for extra firmness
Also add a sc round along the top edge of the pocket openings to reinforce (this prevents stretching).
Optional anti-slip tie
If your couch arm is slippery, add a simple tie:
- Crochet a chain cord 18–30 inches long (depending on couch size).
- Slip stitch back down the chain to thicken it.
- Attach at the center underside of the wrap (so you can tie around the arm).
Alternative: sew a small button and create a loop, or add a strip of elastic.
Common Mistakes and How to Avoid Them#
- Organizer slides off the couch arm: Use BLO sc for grip, add a tie/elastic, or make the wrap slightly longer on the inside drop.
- Pockets sag: Use a solid backing panel and reinforce the top edge with an extra sc round.
- Granny squares don’t match size: Block each square to the same measurement before joining.
- Edges curl: Use a smaller hook for the border, or add a second border round in sc.
- Pocket seams split over time: Reinforce vertical dividers with tight stitching and go over the top inch twice.
Expert Tips for Better Results#
- Cotton yarn is your best friend for a sturdy organizer. It holds shape and grips upholstery.
- Add a hidden stiffener: a thin strip of felt or craft foam between pocket layers can make pockets stand up beautifully.
- Keep pocket depth practical: too deep and items get lost; too shallow and the remote falls out. A pocket height around 6–8 inches is usually perfect.
- For a “luxury finish,” use slip stitch or crab stitch edging on the pocket tops.
- Make a matching set: coasters or a small basket in the same daisy motif looks adorable as a gift bundle.
Variations and Customization Ideas#
- More pockets: Join 4–6 squares in a row for a longer organizer.
- Different motifs: Swap daisies for sunflowers, solid granny squares, or textured squares.
- Tablet pocket: Make one wide pocket with no dividers to hold a tablet or book.
- Charging pocket: Add a buttonhole or grommet opening for a charging cable.
- Seasonal themes: Pastel flowers for spring, warm oranges for fall, icy blues for winter.
- Hanging loop: Add a loop at one end so it can hang on a hook when not in use.
Benefits of This Crochet Project#
- Practical daily-use crochet that reduces clutter
- Great beginner-friendly pattern with room to learn granny square joins
- Custom-fit for any couch or chair
- Fast to crochet because it’s mostly straight rows
- Perfect gift for new homeowners, parents, or students
- AdSense-friendly long-form content topic (high search intent + useful tutorial)
Internal Linking Suggestions#
If you’re building a crochet blog, link this post to:
- “How to Crochet a Granny Square for Beginners”
- “How to Block Crochet Motifs”
- “Best Yarn for Home Décor Crochet Projects”
- “How to Join Granny Squares Neatly”
- “Easy Crochet Baskets for Organizing”
- “Beginner Crochet Projects for the Home”
FAQ Section#
What is the best yarn for a crochet couch organizer?
Cotton or cotton blends are best because they’re durable, washable, and less slippery than acrylic on upholstery.
How do I stop my crochet armrest organizer from sliding?
Use BLO sc rows for grip, add a tie or elastic strap, and ensure the wrap length is long enough to drape on both sides.
Can I make this pattern without granny squares?
Yes. You can crochet solid pocket panels instead. The granny squares are decorative, but the organizer works either way.
How deep should the pockets be?
For remotes and phones, 6–8 inches tall is usually ideal. For books/tablets, increase pocket height and make a wider compartment.
Can I wash it?
Usually yes, especially with cotton yarn. Follow yarn label instructions and reshape flat to dry.
How do I resize the organizer for a wider armrest?
Increase the wrap panel width (foundation chain) and match the pocket band width to the new measurement.
Conclusion#
A crochet sofa armrest organizer is one of the most satisfying “use it every day” crochet patterns you can make. It’s simple enough for beginners, customizable for any furniture, and the daisy pocket front adds a cheerful décor touch that makes the whole piece look intentional and beautiful.
If you tell me your couch arm measurements (top width and drop), I can give you a precise starting chain and row count so your organizer fits perfectly the first time.


