


Introduction#
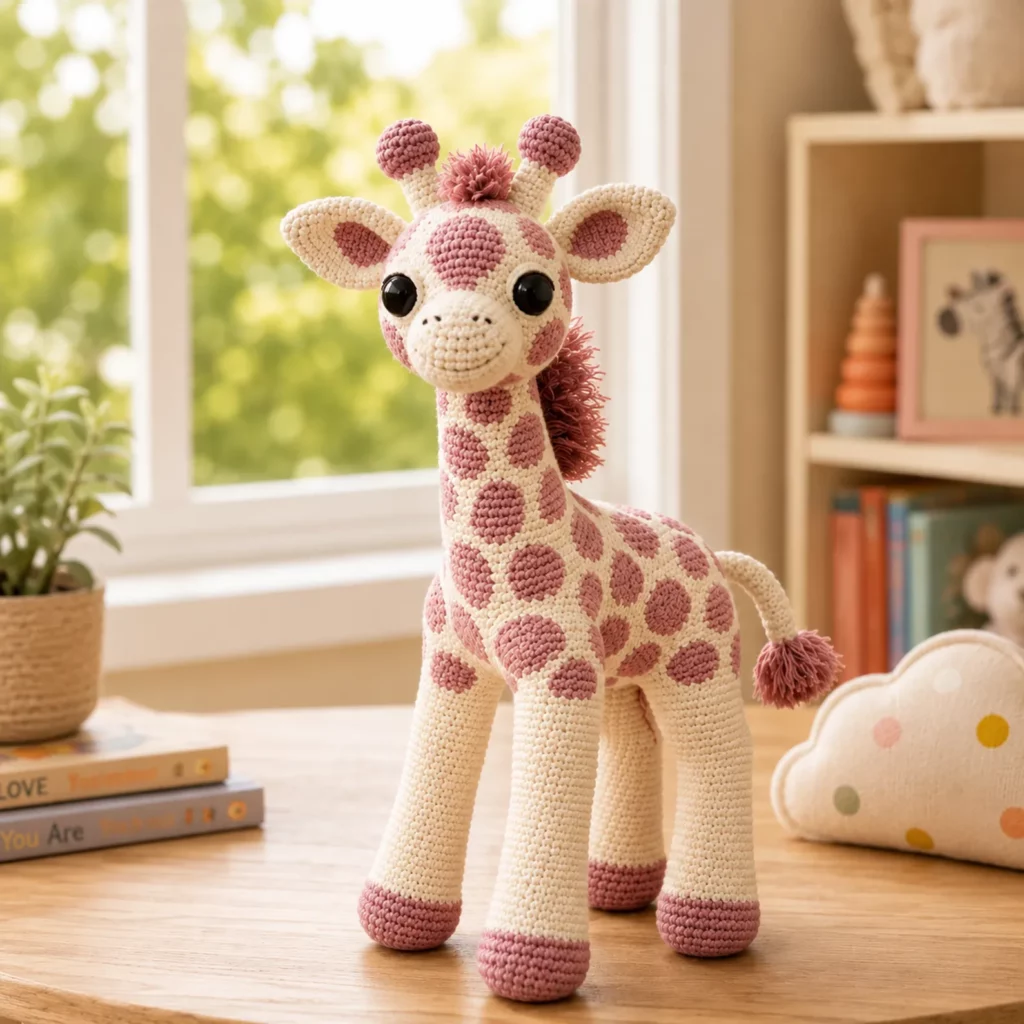
When you want a crochet project that feels like a true keepsake, a giraffe amigurumi is a perfect choice. It’s tall, cheerful, and instantly recognizable—plus it has those fun details that make crocheting feel extra satisfying: long legs, cute little horns, big ears, and sweet spots. A giraffe plush is also a wonderful gift idea for baby showers and birthdays, and it looks beautiful as nursery décor.
Explore more beginner amigurumi crochet patterns in our pattern library.
This crochet pattern is designed to help you make a standing giraffe amigurumi with a long neck, stable legs, a soft snout, and a textured mane and tail tuft. The look is polished without being overly complicated, and the “spot” pattern can be done in a beginner-friendly way (no stressful tapestry work required unless you want it).
In this crochet tutorial, you’ll learn how the giraffe is constructed, how to keep the legs sturdy so it stands nicely, and how to place details like spots and the mane for that adorable, professional finish.
Detailed Description of the Crochet Pattern#
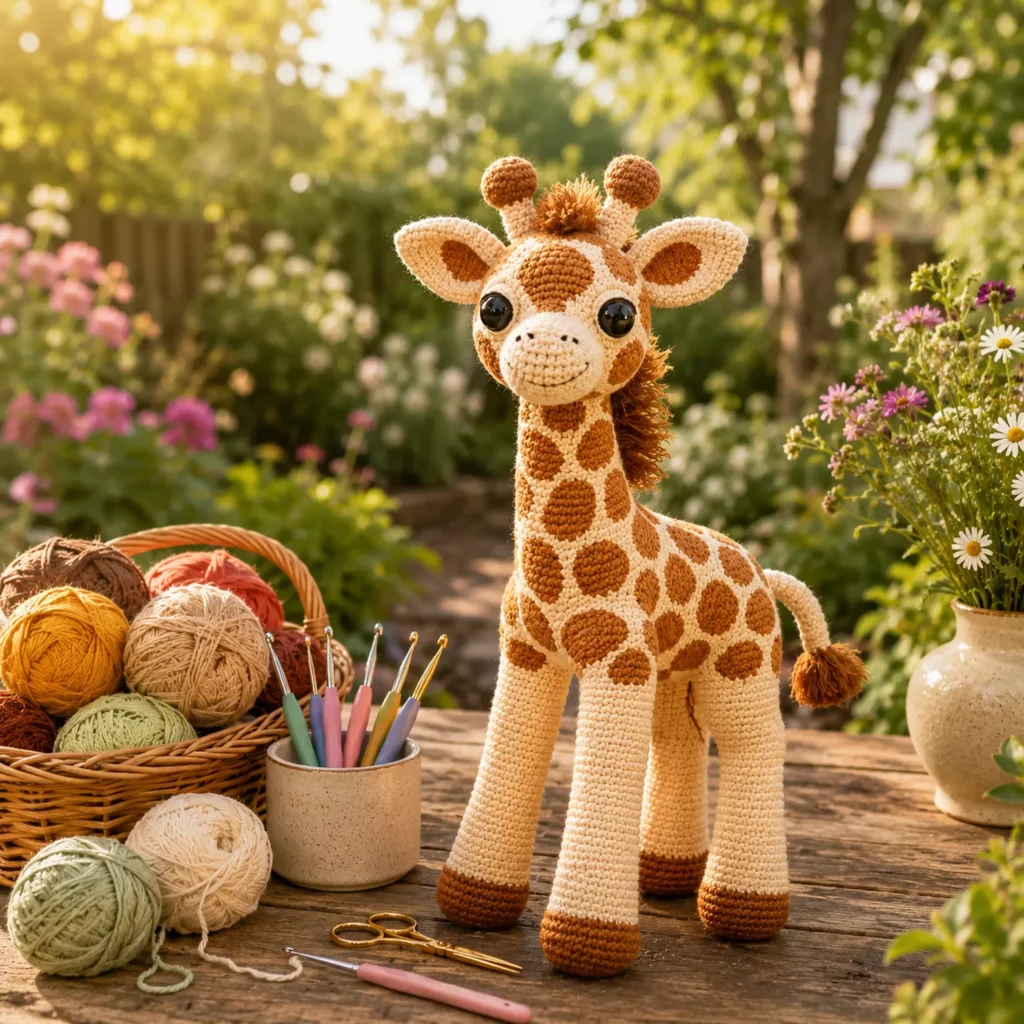
This giraffe amigurumi has classic proportions: a slightly oversized head with big eyes, a long slender neck, and a rounded body with four long legs. The hooves are a darker contrast color, giving the legs definition and helping the giraffe look “real,” while still staying sweet and cartoon-cute.
The key design elements are
- A rounded head with a gentle snout and nostril detail
- Two ossicones (giraffe “horns”) with rounded tips
- Large ears with a lighter inner ear section
- A long neck that attaches securely to the body
- A standing body shape that balances on four legs
- Spots across the head, neck, and body for a giraffe look
- A fluffy mane down the neck (tufted yarn)
- A tail with a tufted tip
This crochet pattern can be simplified into one solid color if you prefer, but adding the spots and mane is what makes it feel special.
Skill Level Explanation#
This is a confident beginner to intermediate crochet pattern.
You’ll be comfortable if you can
- Crochet single crochet in the round
- Increase and decrease evenly
- Count stitches and rounds using a stitch marker
- Sew parts together neatly and securely
- Add simple embroidery details
You’ll practice
- Building a sturdy standing plush with long legs
- Attaching a long neck so the head doesn’t wobble
- Adding surface details like spots and a mane
- Shaping with stuffing for a smooth finish
If you’ve made any basic amigurumi animal (bear, bunny, cat), you can absolutely tackle this giraffe.
Materials Needed#
Yarn
Smooth yarn gives the cleanest stitch definition—especially for spots and facial details.
Recommended yarn weight
- DK weight for a smaller giraffe with crisp detail
- Worsted weight for a medium-size plush with a sturdier feel
Suggested colors
- Main body: cream, ivory, or light tan
- Spot color: warm brown or caramel
- Hooves: the same warm brown (or one shade darker)
- Mane and tail tuft: warm brown, or a slightly fuzzy yarn for extra texture
- Optional: small amount of black thread/yarn for nostrils and mouth
Yarn tips
- Cotton makes the stitches crisp and the giraffe holds its shape well
- Acrylic is softer and often easier care for toys
- If you plan to tuft the mane, a slightly brushed yarn can look extra fluffy
Hook
Use a slightly smaller hook than the yarn label suggests, so stuffing doesn’t show.
- DK: 2.75 mm to 3.25 mm
- Worsted: 3.25 mm to 4.0 mm
Notions
- Stitch marker
- Tapestry needle
- Scissors
- Fiberfill stuffing
- Safety eyes (10 mm to 14 mm depending on size) or embroidery floss
- Optional: pipe cleaner or floral wire for neck stability (display only, not child-safe)
- Optional: small piece of cardboard or plastic canvas to reinforce feet (display only)
Safety note
For babies and toddlers, embroider eyes and avoid anything hard inside the neck.
Stitches & Techniques Explained#
US terms
Abbreviations
- MR magic ring
- ch chain
- sl st slip stitch
- sc single crochet
- inc increase (2 sc in one stitch)
- dec decrease (sc 2 stitches together)
- BLO back loop only
Invisible decrease
For smooth shaping, use invisible decreases by working through the front loops of the next two stitches.
How to add spots without hard colorwork
You have two easy options
- Sew on crocheted spot patches (clean and beginner-friendly)
- Surface crochet spots on top of the fabric using slip stitches (fast and adjustable)
Tufted mane and tail
The mane is created by attaching short yarn strands along the neck seam and trimming them. This creates a soft, fuzzy ridge without complicated stitches.
Step-by-Step Instructions#
Work in continuous rounds unless stated. Use a stitch marker to track the first stitch of each round.
Finished size
Size depends on yarn and hook, but a giraffe in this style often ends up tall and display-ready.
Head
Use main body color.
Round 1
- 6 sc in MR (6)
Round 2
- inc around (12)
Round 3
- (sc, inc) around (18)
Round 4
- (2 sc, inc) around (24)
Round 5
- (3 sc, inc) around (30)
Round 6
- (4 sc, inc) around (36)
Rounds 7 to 11
- sc around (36)
Eye placement
- Place eyes between rounds 9 and 10
- Space about 8 stitches apart for a gentle, friendly look
Begin shaping down
Round 12
- (4 sc, dec) around (30)
Round 13
- sc around (30)
Round 14
- (3 sc, dec) around (24)
Round 15
- sc around (24)
Stuff firmly now. Shape the snout area slightly forward.
Round 16
- (2 sc, dec) around (18)
Round 17
- (sc, dec) around (12)
Round 18
- dec around (6)
Fasten off and close.
Optional snout shaping
If you want a more defined snout, sew a small oval muzzle patch in a slightly lighter shade and embroider nostrils on it.
Ossicones (make two)
Use main body color with spot/hoof color for the tips.
Start with spot color tip
Round 1
- 6 sc in MR (6)
Round 2
- sc around (6)
Switch to main body color
Rounds 3 to 6
- sc around (6)
Stuff lightly and fasten off with tail. Sew to the top of the head.
Ears (make two)
Outer ear in main body color
Round 1
- 6 sc in MR (6)
Round 2
- inc around (12)
Round 3
- (sc, inc) around (18)
Round 4
- sc around (18)
Fasten off with tail.
Inner ear in lighter tan (optional)
Round 1
- 6 sc in MR (6)
Round 2
- (sc, inc) around (9)
Round 3
- sc around (9)
Sew inner ear onto outer ear, then pinch the ear base slightly and sew to the head.
Neck
Use main body color.
Round 1
- 6 sc in MR (6)
Round 2
- inc around (12)
Round 3
- sc around (12)
Rounds 4 to 26
- sc around (12)
Stuff firmly, especially near the base. Fasten off leaving a long tail for sewing.
Neck stability tip
If you want extra stability without wire, stuff very firmly and sew the neck to the head and body with multiple passes.
Body
Use main body color.
Round 1
- 6 sc in MR (6)
Round 2
- inc around (12)
Round 3
- (sc, inc) around (18)
Round 4
- (2 sc, inc) around (24)
Round 5
- (3 sc, inc) around (30)
Round 6
- (4 sc, inc) around (36)
Rounds 7 to 12
- sc around (36)
Round 13
- (5 sc, inc) around (42)
Rounds 14 to 18
- sc around (42)
Begin taper
Round 19
- (5 sc, dec) around (36)
Round 20
- sc around (36)
Round 21
- (4 sc, dec) around (30)
Round 22
- sc around (30)
Stuff firmly, shaping into a smooth oval. Flatten the bottom slightly for stability.
Round 23
- (3 sc, dec) around (24)
Round 24
- (2 sc, dec) around (18)
Round 25
- (sc, dec) around (12)
Round 26
- dec around (6)
Fasten off and close.
Legs (make four)
Start with hoof color, then switch to main body color.
Hoof
Round 1
- 6 sc in MR (6)
Round 2
- inc around (12)
Round 3
- (sc, inc) around (18)
Rounds 4 to 5
- sc around (18)
Switch to main body color
Round 6
- sc around (18)
Taper slightly into leg
Round 7
- (4 sc, dec) around (15)
Rounds 8 to 24
- sc around (15)
Stuff firmly. Flatten the hoof bottom slightly. Fasten off with long tail.
Attach legs
- Pin legs to the underside of the body
- Space evenly like a rectangle for best balance
- Sew securely with multiple stitches around each leg join
Standing tip
Test on a table before final stitches. If it tips, adjust leg angle slightly outward.
Tail
Use main body color, then add a tuft.
Tail tube
- 6 sc in MR (6)
- sc around for 10 to 14 rounds
Stuff lightly and sew to the back of the body.
Tuft
Attach short strands of brown yarn to the tail tip and trim.
Spots
Use spot color (brown). Choose one method.
Spot patch method (cleanest)
Make several small circles in different sizes.
Small spot
- 6 sc in MR, join, fasten off
Medium spot
- 6 sc in MR
- inc around (12)
Fasten off
Large spot
- 6 sc in MR
- inc around (12)
- (sc, inc) around (18)
Fasten off
Pin spots first, then sew around the edges with small stitches.
Surface crochet method (fast)
Use spot color yarn and slip stitch on the surface to draw rounded shapes. This is great if you want fewer sewn pieces.
Mane
Cut many short brown strands (about 5 to 8 cm depending on fluff). Attach along the back of the head and down the neck using a lark’s head knot. Trim gently for an even mane.
Common Mistakes and How to Avoid Them#
Giraffe won’t stand
- Stuff legs firmly and keep hoof bottoms flat
- Space legs evenly and slightly outward
- Flatten the body base slightly while stuffing
Neck wobbles
- Stuff neck very firmly
- Sew neck joins with multiple passes
- Consider adding an internal support only if it’s for display, not for children
Spots look messy
- Use sewn spot patches for cleaner edges
- Pin spots before sewing to balance placement
- Use slightly different spot sizes so it looks natural
Face looks uneven
- Count stitches between eye placement
- Pin ears and ossicones before sewing
- Check symmetry from the front before final stitching
Stuffing shows through
- Use a smaller hook
- Tighten tension
- Avoid overstuffing at the last rounds (it stretches stitches)

Expert Tips for Better Results#
- Add tiny embroidered nostrils and a soft smile for personality
- Use a slightly smaller hook for the head to make it extra smooth
- Make the mane fuller at the top and slightly shorter toward the shoulders
- Add a few spots on the face but keep them smaller than body spots
- Weave in ends inside the body/neck to keep the finish clean
- Light blocking can help ears sit nicely (especially with cotton)
Variations and Customization Ideas#
- Baby giraffe version: shorter neck and shorter legs for extra cuteness
- Pastel giraffe: swap natural tones for soft nursery colors
- Sleepy giraffe: embroider closed eyes instead of safety eyes
- Pocket-size giraffe: use sport yarn and a smaller hook
- Extra fluffy mane: use brushed yarn strands or a slightly fuzzy yarn
- Personalized gift: add a tiny scarf or name tag
Benefits of This Crochet Project#
- A high-impact crochet pattern that looks like a keepsake plush
- Teaches standing amigurumi structure (great skill-builder)
- Customizable spots make every giraffe unique
- Great stash-buster for small amounts of brown yarn
- Perfect for nursery décor and handmade gifts
- Relaxing, repeatable shapes once you understand the construction
Internal Linking Suggestions#
You may also like
- Easy crochet pattern for a safari animal set
- Crochet tutorial for invisible decrease
- How to sew amigurumi pieces neatly
- Crochet tutorial for yarn hair and tufting
- Free crochet pattern for a baby-safe embroidered face
FAQ Section#
Is this crochet pattern suitable for beginners
Yes, confident beginners can make it. The stitches are simple; the key is careful assembly and firm stuffing so the giraffe stands.
Can I make this giraffe baby-safe
Yes. Embroider the eyes, avoid any internal wire, and stitch the mane and spots very securely.
How do I keep the giraffe standing
Stuff the legs firmly, flatten the hooves, and attach legs evenly. A slightly flattened body base helps too.
Do I have to crochet spots into the fabric
No. Sewing spot patches or using surface crochet is easier and usually looks cleaner than in-round color changes.
What yarn is best for an amigurumi giraffe
Smooth cotton or acrylic is best. Cotton gives crisp stitches and structure; acrylic is softer and often more washable.
How do I resize the giraffe
Use thicker yarn and a larger hook for a bigger giraffe, or thinner yarn and a smaller hook for a mini. Keep stitches tight to prevent gaps.
Conclusion#
This giraffe amigurumi crochet pattern is a joyful project with big “wow” factor. The long neck, cute ossicones, and playful spots give it instant character, and the tufted mane and tail make it feel extra special. With firm stuffing and careful leg placement, you’ll end up with a giraffe that stands proudly and looks gift-ready.
If you tell me your yarn weight and the height you want your giraffe to be, I can suggest the best eye size and exactly how many neck and leg rounds to adjust for perfect proportions.


