


Introduction#
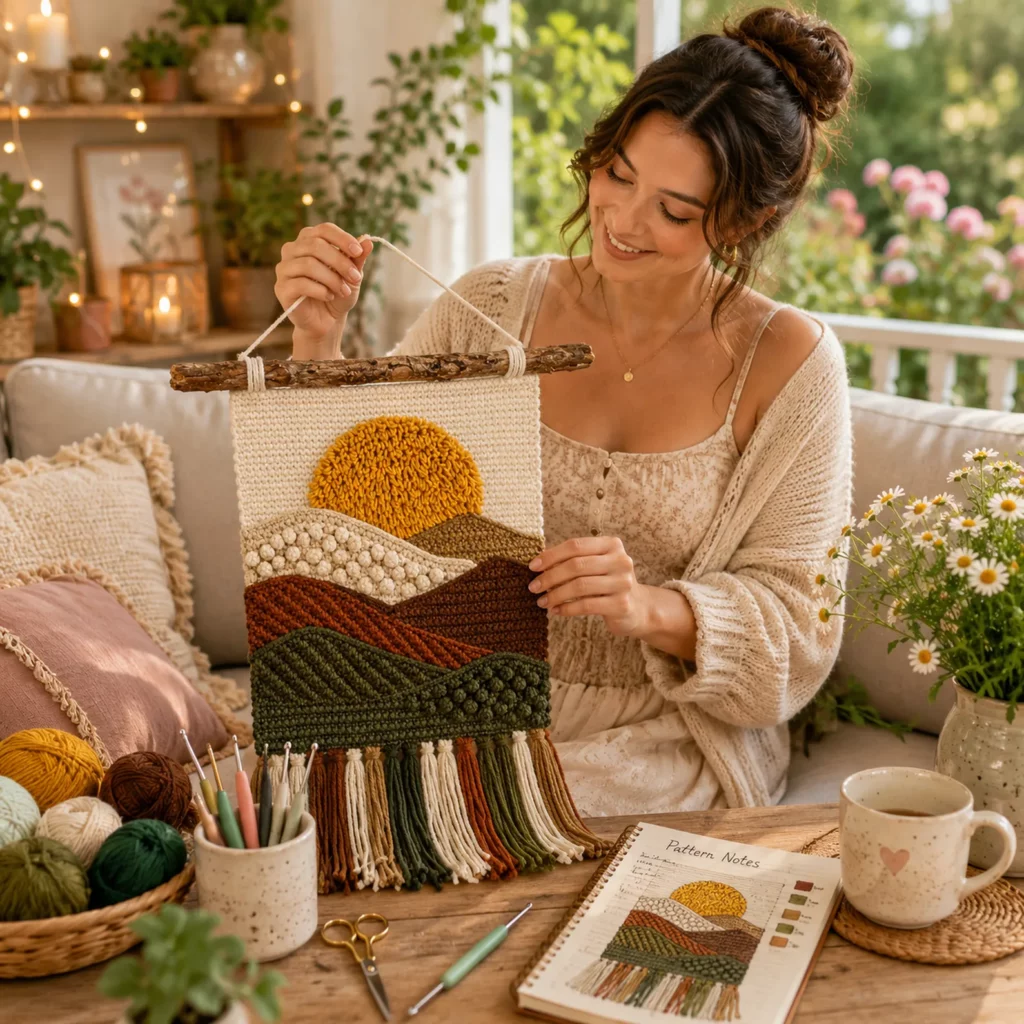
If you love crochet projects that feel like art, a landscape wall hanging is one of the most rewarding things you can make. It’s relaxing like a blanket panel, but it finishes like décor—something you can hang in a nursery, living room, office, or entryway and enjoy every day. Even better, it’s a fantastic way to use earthy yarn colors and learn texture techniques that instantly elevate your work.
Explore more beginner home decor crochet patterns in our pattern library.
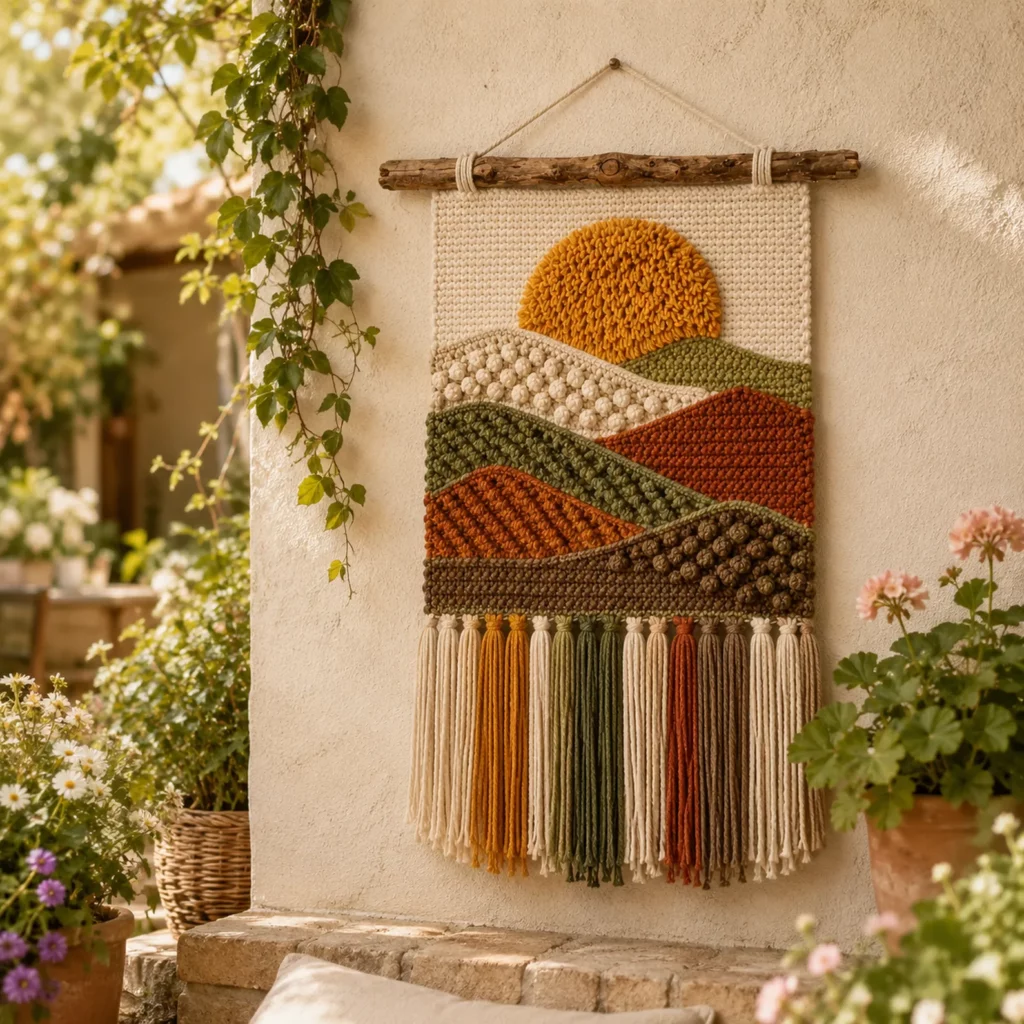
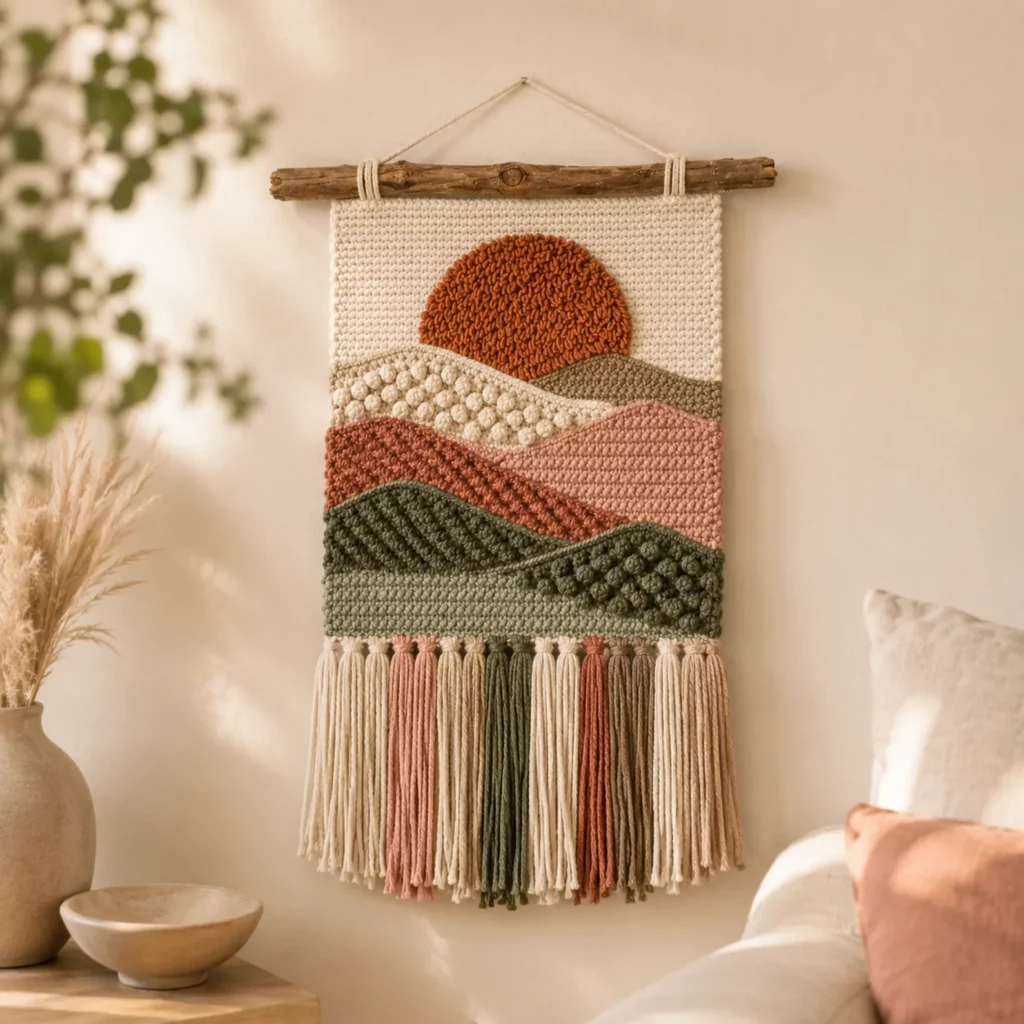
This crochet pattern creates a sunset-inspired textile artwork with layered “hills,” a bold golden sun, and multiple textures—smooth stitches, puffed bobbles, and looped tufting—plus a dramatic fringe finish. The look is modern boho: warm neutrals, rich rusts, soft creams, and deep greens. You can keep it exactly as shown, or customize it with your favorite palette (desert sunset, ocean sunrise, or even winter mountains).
In this crochet tutorial, you’ll learn how to build the base panel, how to shape the color-block landscape layers, how to add raised textures for a tactile effect, and how to finish with clean edges, a hanging sleeve, and perfectly even fringe.
Detailed Description of the Crochet Pattern#
This piece is a rectangular wall hanging worked mostly in rows. The design is built in bands that stack from top to bottom:
- A soft sky background in a creamy neutral
- A large half-sun shape near the horizon in golden yarn
- A light “ridge” band featuring bobble/puff texture
- A mid-tone hill band in warm brown
- A deeper accent ridge in rust/terracotta
- A green foreground section with ribbed texture and a cluster of raised bobbles
- A thick fringe at the bottom using multiple yarn colors
The visual magic comes from mixing simple stitch fabrics with intentional texture placement. The sun is plush and raised (tufted/looped), the cream ridge has bobbles that look like stones or clouds, and the foreground uses ribbing that reads like grass or rolling land.
This crochet pattern is also very modular. You can resize it by changing the width (starting chain) and adjusting the height of each band. You can even make a matching set of two or three panels to create a mini gallery wall.
Skill Level Explanation#
This is a beginner-friendly to intermediate crochet pattern.
You’ll be comfortable if you can
- Crochet in rows with even edges
- Work single crochet and half double crochet consistently
- Change colors cleanly between sections
- Follow basic shaping for curves (increases/decreases)
- Weave in ends and seam or attach pieces neatly
You’ll practice
- Bobble or puff stitches for texture
- Loop stitch or tufting for the sun
- Working gentle curves for layered hills
- Finishing techniques for wall hangings (hanging sleeve, fringe, blocking)
If you’re a beginner, you can still make it by simplifying one or two textures: crochet the sun flat instead of tufted, or skip the bobble cluster. The silhouette will still look stunning.
Materials Needed#
Yarn
Cotton or cotton-blend yarn is ideal for wall hangings because it holds shape and displays stitch definition beautifully. Acrylic is also fine, especially if you want a softer, lighter panel.
Suggested yarn weights
- Worsted weight for a bold, textured tapestry look
- DK weight for a slightly finer, more detailed finish
Color palette (suggested)
- Cream/ivory for the sky and ridge band
- Golden yellow for the sun
- Taupe or light tan for a soft hill layer
- Medium brown for the main hill band
- Rust/terracotta for an accent ridge
- Deep olive green for the foreground
- Fringe colors: cream, tan, brown, olive, and rust
Yarn tips
- Use the same yarn family for all colors so the fabric stays consistent
- Choose matte yarns if you want a modern, earthy look
- Mercerized cotton gives crisp stitches and a clean tapestry vibe
- Save extra yarn for fringe—it uses more than people expect
Hook
Use a hook that creates a firm fabric (especially important for wall hangings).
- Worsted yarn: 4.0 mm to 5.0 mm
- DK yarn: 3.5 mm to 4.0 mm
Notions and tools
- Stitch markers
- Tapestry needle
- Scissors
- Measuring tape or ruler
- Wooden dowel or driftwood stick (for hanging)
- Strong cord or yarn for hanging loop
- Optional: blocking mat and pins
- Optional: fabric backing or fusible interfacing (for extra stability)
Stitches & Techniques Explained#
Abbreviations (US terms)
- ch chain
- sl st slip stitch
- sc single crochet
- hdc half double crochet
- dc double crochet
- blo back loop only
- bobble or puff stitch (texture)
Clean color changes
Change yarn color on the last yarn-over of the final stitch in the old color. This keeps your stripe edge crisp and prevents little “dots” of the previous shade.
Ribbed texture (for the foreground)
Ribbing is created by working in the back loop only. This makes raised ridges that catch light and look very dimensional on a wall.
Bobble or puff texture
Bobble stitches create small raised bumps. They work best when placed in a planned cluster, not scattered randomly—this keeps the design intentional.
Tufted sun
The sun texture can be made with loop stitch (built-in loops) or by adding cut strands (like a small latch-hook effect) and trimming into a tidy semicircle. If you want the simplest version, crochet the sun as a flat half-circle and stitch it down.
Step-by-Step Instructions#
This is a crochet tutorial style pattern. You can use these steps exactly or adapt them to your preferred size.
Choosing your size
A classic wall hanging size is about the width of a standard throw pillow (so it feels balanced on a wall). If you want a smaller piece, reduce the starting chain. If you want a larger statement piece, increase the width and add more height to the sky.
Practical sizing tip
Make your panel width about two-thirds the width of your dowel so the hanging cord and side ties look proportional.
Base panel foundation
Start with cream/ivory.
- Chain to your desired width
- Work a foundation row of sc or hdc across
- Continue working rows in sc or hdc to create the sky section
A dense stitch (sc) gives a structured, clean tapestry feel. Hdc works up faster and still looks neat.
Creating the sun
There are two reliable methods.
Flat crochet sun (simplest)
- Crochet a half-circle separately in golden yarn
- Sew it onto the sky section
Tufted sun (textured)
- Crochet a half-circle base in golden yarn
- Add loops or fringe strands to the surface
- Trim gently into a rounded sun shape
Half-circle base idea
Increase evenly along the curved edge so it stays smooth. A half-circle can be built from a magic ring and turned rows, or from a chain and increases.
Placement
Position the sun so it sits behind the hills, like it’s rising or setting.
Layered hills and ridges
This design is built with curved “bands.” You can achieve the curves in two common ways:
- Crochet each band separately with a gentle curve, then sew to the base
- Crochet bands directly onto the panel using short rows and shaping
For most crocheters, separate bands are easier and cleaner.
How to create a curved band
- Start with a chain roughly the width of your panel
- Work rows but increase slightly at one side and decrease slightly at the other every few rows
This creates a subtle slope without sharp angles.
Suggested band order (top to bottom)
- Light tan ridge (smooth texture)
- Cream ridge with bobbles (textured)
- Medium brown hill (smooth or lightly ridged)
- Rust ridge (thin accent band)
- Green foreground (ribbed)
Attach the bands
- Pin bands in place first to ensure the overlaps look natural
- Sew along edges with matching yarn using small, tidy stitches
- Keep the top edges smooth; let overlaps create depth
Bobble texture cluster
The light cream ridge includes a cluster of bobbles that resemble stones or fluffy texture. To recreate it:
- Choose an area on the cream ridge band
- Work bobbles in a scattered-but-clustered formation (denser in the center, fewer at edges)
- Keep bobbles on the same “right side” of the work so the texture pops forward
If you prefer a cleaner look, replace bobbles with puff stitches or even small embroidered French knots.
Foreground ribbing and raised texture
The green section has strong texture. The easiest way is to crochet it in rows of sc in BLO.
- Work several rows in BLO to create horizontal ridges
- Add a cluster of bobbles (or popcorn stitches) in one corner for extra interest
This bobble cluster is optional, but it adds a lovely “organic” feel—like shrubs, rocks, or textured ground.
Borders and structure
Once the panel is assembled, add a clean border in cream (or your chosen neutral).
- Work sc evenly around the entire panel
- In corners, work extra stitches to prevent curling
- If the edges ripple, skip stitches occasionally
- If the edges pull tight, add occasional increases
This border frames the piece and helps it hang straight.
Hanging sleeve or dowel ties
You have two clean finishing options:
Loop-over sleeve
- Fold the top edge to the back to create a sleeve
- Stitch along the fold, leaving space for the dowel
This looks very polished and hides the attachment.
Top loops
- Crochet or tie two to three loops that wrap around the dowel
This creates a rustic look, especially with driftwood.
Add a hanging cord
Tie a cord to both ends of the dowel and adjust the length so the panel hangs flat against the wall.
Fringe finish
Fringe is what turns this from a crochet panel into a true wall hanging.
How to cut fringe evenly
- Wrap yarn around a book or cardboard to create consistent lengths
- Cut loops at one end to create strands
- Attach strands to the bottom edge using a simple lark’s head knot
Color placement
Alternate fringe colors in a repeating rhythm: cream, tan, brown, olive, rust. This echoes the landscape colors and looks intentional.
Trim
After attaching, hang the piece and trim the fringe slightly to even it out. Cut small amounts at a time.
Common Mistakes and How to Avoid Them#
Wavy edges
This happens when the stitch count changes between rows or your border has too many stitches. Use stitch markers at corners and count your edge stitches.
Curves look too sharp
Use gentler shaping. Instead of frequent increases/decreases, space them out more and let the curve be subtle.
Sun looks messy
If tufting feels tricky, crochet a flat sun and add texture later with surface slip stitches or simple embroidery lines.
Bobbles pull the fabric tight
Bobbles can shrink the width slightly. Keep your tension relaxed when making bobbles, and avoid placing too many in a single row without spacing.
Fringe looks uneven
Measure and cut using a template. Then trim while the piece is hanging so gravity helps you see the true length.
Expert Tips for Better Results#
- Block the panel before adding fringe. A flat panel makes fringe look more professional.
- Weave in ends as you go, especially with many color changes.
- Use a slightly smaller hook for crisp texture stitches (bobbles and ribbing).
- If the panel droops, add a simple fabric backing or stitch a lightweight interfacing to the back.
- For extra depth, lightly brush the tufted sun (if you used a brushable yarn) to make it fuller.
Variations and Customization Ideas#
- Sunrise version with peach and coral sky and a pale yellow sun
- Ocean version with blue waves and a pale moon
- Mountain version with snowy peaks (white bobbles) and deep pine foreground
- Minimal version with no bobbles and a flat sun
- Larger statement piece by repeating the landscape bands and extending the sky
- Matching mini set: make a second small panel as a companion piece
Benefits of This Crochet Project#
- A crochet pattern that doubles as home décor art
- Great stash-buster for earthy yarn scraps
- Teaches texture skills that improve all your crochet projects
- Perfect for gifts, nurseries, and boho interiors
- Lightweight and easy to hang
- Looks high-end without complicated stitch work
Internal Linking Suggestions#
You may also like
- Free crochet pattern for a boho wall hanging with fringe
- Crochet tutorial for bobble stitch and popcorn stitch
- Easy crochet pattern for textured pillow covers
- Crochet for beginners guide to clean color changes
- DIY crochet home décor projects roundup
FAQ Section#
What yarn is best for a crochet wall hanging
Cotton or cotton-blend yarn is ideal because it holds shape, shows texture clearly, and hangs neatly. Acrylic can work too, especially for softer fringe.
Do I need to block the wall hanging
Blocking helps a lot. It makes edges straight, smooths curves, and improves the overall “finished” look—especially before adding fringe.
How do I keep the panel from curling
Use a firm stitch, keep tension consistent, and add a border round. If it still curls, block and consider adding a simple fabric backing.
Can beginners make this crochet pattern
Yes. The base is simple rows, and the textures can be simplified if needed. It’s a great beginner-friendly project because it’s decorative and forgiving.
How do I resize the wall hanging
Change the starting chain for width and add or remove rows in each band for height. Keep the landscape proportions balanced by adjusting bands gradually.
How do I attach fringe securely
Use lark’s head knots and pull them snug. For extra durability, stitch once through the knots on the back with matching yarn.
Conclusion#
This sunset landscape wall hanging crochet pattern is a beautiful way to turn yarn into art. The layered hills, textured ridges, and tufted sun create depth you can see and feel, while the long fringe and driftwood hanger give it that modern boho finish. Whether you hang it in a nursery, living room, or creative space, it’s the kind of DIY crochet project that gets compliments every time.
If you tell me the approximate width you want and the yarn weight you’re using, I can give you a simple starting chain estimate and a balanced band-height plan so your landscape proportions look perfect.


