


Introduction#
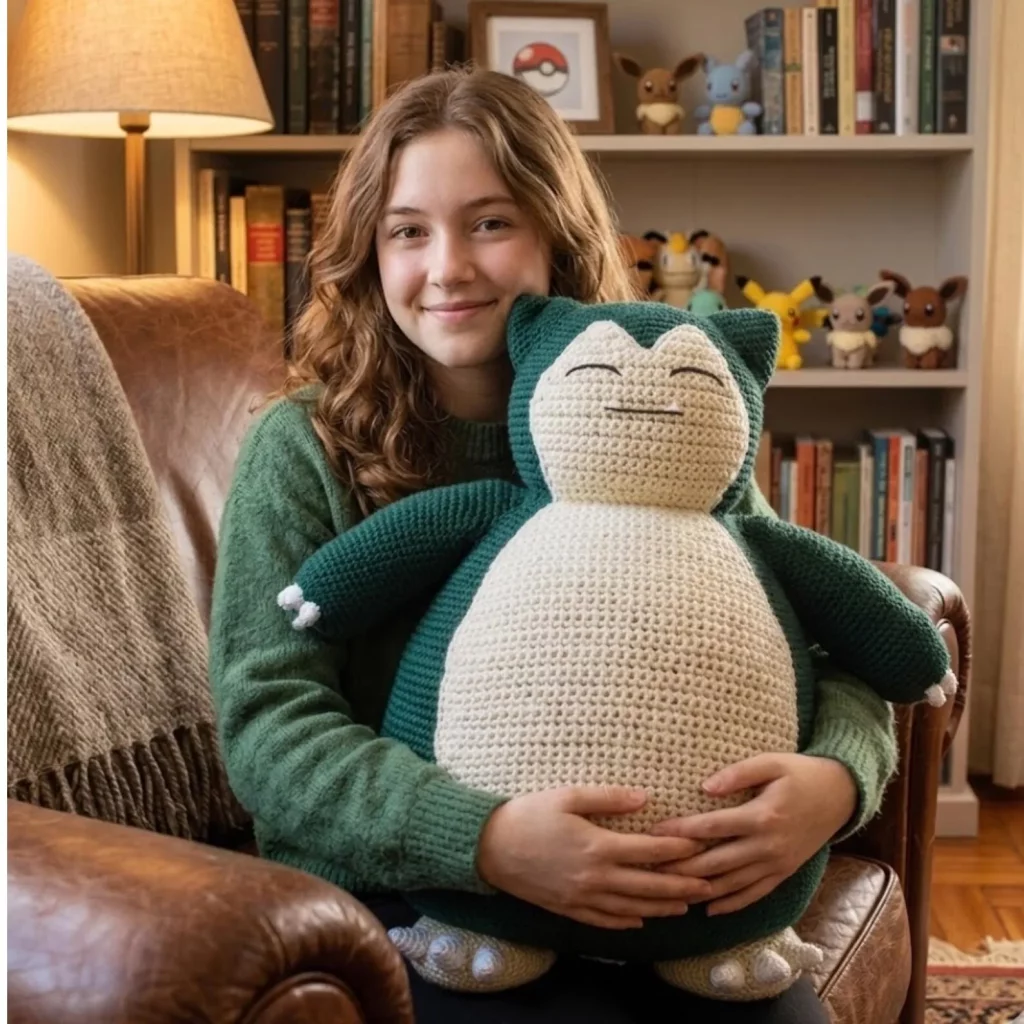
Oversized amigurumi hits different. A tiny keychain bunny is cute, sure—but a big, squishy, nap-worthy plush you can hug like a pillow? That’s the kind of crochet project people remember. It becomes part decor, part comfort item, and part “how did you even make that?” conversation starter.
Explore more beginner amigurumi crochet patterns in our pattern library.
This crochet pattern is all about that giant sleepy plush vibe: a rounded body, a contrasting belly panel, relaxed embroidered eyes, and chunky arms and feet that make it feel friendly and sturdy. Even though the final result looks impressive, the construction is surprisingly approachable because it’s built from simple shapes: a large body, a head, and a handful of limbs. The “wow” comes from clean shaping, careful assembly, and the right yarn choice.
This article is written like a true crochet tutorial. You’ll learn what stitches and techniques matter most for a clean, professional finish, how to scale the plush up or down, and how to keep a large amigurumi from sagging or looking lumpy. By the end, you’ll have a free crochet pattern you can follow confidently—even if you’re new to big plush builds.

Detailed Description of the Crochet Pattern#
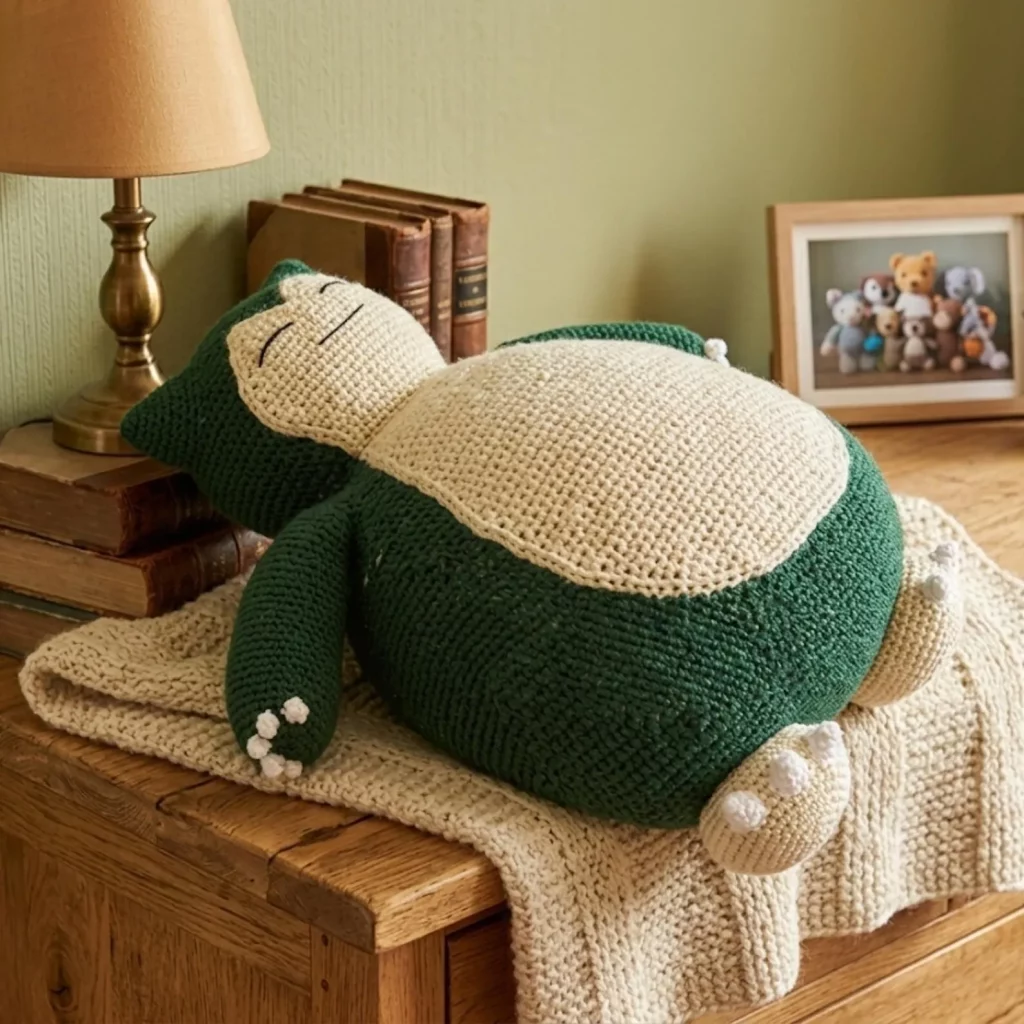
This crochet pattern creates a large, sleepy, bear-like plush with a rounded silhouette and a soft, contrasting belly. The design features:
- Extra-large round body that doubles as a cushion-style plush
- Contrasting belly/front panel in a light neutral shade for that classic plush look
- Calm sleepy face with embroidered closed eyes and a simple mouth line
- Chunky arms that sit slightly forward in a relaxed pose
- Wide feet with small “claw/toe” bumps for personality and balance
- Small ear points on the head for a recognizable, cozy shape
The plush is designed to look smooth and tidy even at a larger scale. The body is the star: it’s big, round, and satisfying to stuff. The belly panel is worked separately and attached, which helps you get crisp color separation without complicated color changes.
Skill Level Explanation#
This is an easy-to-intermediate crochet pattern, mainly because of scale and assembly.
You’ll do well if you’re comfortable with:
- Single crochet in continuous rounds
- Increasing and invisible decreasing
- Counting stitches and using stitch markers
- Basic sewing/assembly (pinning parts in place first)
- Stuffing a large piece evenly
If you’re a beginner, this is still doable—just take your time. The stitches are simple; the “skill” comes from consistent tension and patient finishing.
Materials Needed#
Yarn
For a plush this size, your yarn choice affects everything: weight, drape, stitch definition, and how much stuffing you’ll need.
Best yarn options (recommended):
- Super bulky (#6) chenille/blanket yarn for a soft, squishy plush
- Bulky (#5) acrylic/wool blend for more structure
- Worsted (#4) held double if you want a dense fabric without buying thicker yarn
Color palette (classic):
- Main body: deep teal/green-blue
- Belly/face: cream or beige
- Details: small amount of black and white for embroidery/toe tips
Yardage guidance (very approximate):
- Super bulky plush yarn: 600–1200 yards main + 300–700 yards belly
- Bulky yarn: 900–1600 yards main + 500–900 yards belly
(Exact yardage varies hugely based on your finished size and stuffing firmness.)
Hook
Use a hook that creates a tight fabric so stuffing doesn’t show:
- Super bulky chenille: 6.0–8.0 mm
- Bulky: 5.5–6.5 mm
- Worsted held double: 6.0–7.0 mm
Notions
- Fiberfill stuffing (you will need a lot for a giant plush)
- Stitch markers (multiple markers help at this scale)
- Yarn needle (large eye)
- Scissors
- Pins or clips for assembly
- Optional: poly pellets in a fabric pouch for weight at the base
- Optional: felt (for eye highlights or mouth line), but embroidery is usually best
Finished Size
With super bulky plush yarn, this can easily land in the 18–28 inch range depending on your hook size and stuffing. With bulky yarn it may be slightly smaller but still “hug size.”
Stitches & Techniques Explained#
Abbreviations (US terms)
- MR = magic ring
- ch = chain
- sc = single crochet
- inc = increase (2 sc in same stitch)
- dec = invisible decrease (sc2tog through front loops)
- sl st = slip stitch
- BLO/FLO = back/front loop only
- ( ) = repeat
- = stitch count
Techniques that matter for a large plush
Invisible decreases
They keep the surface smoother—especially important on big shapes where bumps show more.
Stuffing in layers
Large plushies look lumpy if you stuff in big handfuls. Use small tufts and shape constantly.
Strategic firmness
Stuff the bottom of the body more firmly than the top. That keeps the plush upright and prevents sagging.
Assembly with pins
Always pin arms, feet, and belly panel before sewing. Step back and check symmetry from different angles.
Step-by-Step Instructions#
Notes:
- Work in continuous rounds unless stated.
- Use a stitch marker for the first stitch of each round.
- Stuff as you go, especially for large parts.
- If you are using plush yarn, count by touch and mark key points (front center, sides).
This pattern is written as a giant plush base. You can scale it by adding or removing “even rounds” in the body and head.
Head (main color)
R1: MR, 6 sc [6]
R2: inc x6 [12]
R3: (sc, inc) x6 [18]
R4: (2 sc, inc) x6 [24]
R5: (3 sc, inc) x6 [30]
R6: (4 sc, inc) x6 [36]
R7: (5 sc, inc) x6 [42]
R8: (6 sc, inc) x6 [48]
R9: (7 sc, inc) x6 [54]
R10: (8 sc, inc) x6 [60]
R11–R15: sc around [60]
Begin shaping closed:
R16: (8 sc, dec) x6 [54]
R17: (7 sc, dec) x6 [48]
R18: (6 sc, dec) x6 [42]
Stuff firmly.
R19: (5 sc, dec) x6 [36]
R20: (4 sc, dec) x6 [30]
R21: (3 sc, dec) x6 [24]
R22: (2 sc, dec) x6 [18]
R23: (sc, dec) x6 [12]
R24: dec x6 [6]
Fasten off, weave in.
Body (main color)
This is the big “pillow” shape. You can add extra even rounds in the middle to make it taller.
R1: MR, 6 sc [6]
R2: inc x6 [12]
R3: (sc, inc) x6 [18]
R4: (2 sc, inc) x6 [24]
R5: (3 sc, inc) x6 [30]
R6: (4 sc, inc) x6 [36]
R7: (5 sc, inc) x6 [42]
R8: (6 sc, inc) x6 [48]
R9: (7 sc, inc) x6 [54]
R10: (8 sc, inc) x6 [60]
R11: (9 sc, inc) x6 [66]
R12: (10 sc, inc) x6 [72]
R13–R24: sc around [72]
(For an extra-large plush, add 4–8 more even rounds here.)
Begin taper:
R25: (10 sc, dec) x6 [66]
R26: sc around [66]
R27: (9 sc, dec) x6 [60]
R28: sc around [60]
R29: (8 sc, dec) x6 [54]
Start stuffing heavily now. Focus on the bottom first.
R30: (7 sc, dec) x6 [48]
R31: (6 sc, dec) x6 [42]
R32: (5 sc, dec) x6 [36]
R33: (4 sc, dec) x6 [30]
R34: (3 sc, dec) x6 [24]
R35: (2 sc, dec) x6 [18]
R36: (sc, dec) x6 [12]
R37: dec x6 [6]
Fasten off leaving a long tail for attaching head (or leave open if you prefer to attach head before closing—both methods work).
Belly Panel (light color)
This is a big oval that you sew onto the front of the body. It creates a clean contrast without tricky colorwork.
R1: MR, 6 sc [6]
R2: inc x6 [12]
R3: (sc, inc) x6 [18]
R4: (2 sc, inc) x6 [24]
R5: (3 sc, inc) x6 [30]
R6: (4 sc, inc) x6 [36]
R7–R10: sc around [36]
R11: (4 sc, dec) x6 [30]
R12: sc around [30]
Fasten off with a long tail.
Tip: If you want a taller belly, add 2–4 extra even rounds before R11.
Arms (make 2, main color)
R1: MR, 6 sc [6]
R2: (sc, inc) x3 [9]
R3: sc around [9]
R4: (2 sc, inc) x3 [12]
R5–R12: sc around [12]
Lightly stuff (more at the end, less near the top).
Flatten and close with 6 sc across. Leave long tail for sewing.
Feet (make 2, light color base + toe tips)
Feet are wide and help balance the plush.
R1: MR, 6 sc [6]
R2: inc x6 [12]
R3: (sc, inc) x6 [18]
R4: (2 sc, inc) x6 [24]
R5–R7: sc around [24]
Stuff firmly.
Flatten and close with 12 sc across. Leave tail.
Toe/claw bumps (small, make 6–8 in light color or white):
MR, 4 sc, sl st, fasten off.
Sew 3–4 bumps on each foot front.
Ears (make 2, main color)
Simple triangle ears give the character silhouette.
Ch 2.
Row 1: 2 sc in 2nd ch from hook, turn
Row 2: ch 1, inc, sc, inc (4 sc), turn
Row 3: ch 1, inc, sc 2, inc (6 sc), turn
Row 4: ch 1, sc across (6 sc), turn
Fasten off with tail.
Sew ears to the top sides of the head.
Face Details (embroidery)
For the calm sleepy look:
- Eyes: two curved lines using black yarn/floss
- Mouth: a short straight or slightly curved line
- Optional tiny “tooth” detail: small white triangle felt or embroidered stitch
Tip: embroider eyes with the head stuffed and fully shaped; it’s easier to keep symmetry.
Common Mistakes and How to Avoid Them#
- The plush looks lumpy: Stuff in small tufts and shape constantly. Large plushies need more “sculpting by hand.”
- The body slumps backward: Add more stuffing at the base or add a small weighted pouch inside the bottom.
- Arms and feet look uneven: Pin everything first and measure placement from center front.
- Belly panel puckers: Don’t sew too tightly. Use a relaxed whip stitch and distribute stitches evenly.
- Stitches show gaps: Use a smaller hook or tighter tension, especially with smooth yarn.
Expert Tips for Better Results#
- Use a consistent “front center” marker on the body to keep everything aligned.
- If your yarn is stretchy, add a few rounds of tighter stitches (sc) at the base for stability.
- Reinforce limbs with extra stitching—big plushies get hugged and pulled.
- For an ultra-smooth finish, sew the belly panel using only the outer loops so the seam hides.
- If using chenille yarn, weave ends longer than usual—plush yarn can loosen over time.
Variations and Customization Ideas#
- Make a mini version with DK yarn for a desk plush.
- Add a removable sleep mask (simple rectangle with elastic strap).
- Change the face to open eyes with safety eyes for a different expression.
- Add a pocket on the belly for a small note or gift card.
- Make it a pillow: skip arms/feet and keep just the big body + face.
Benefits of This Crochet Project#
- Creates a high-impact plush that feels like a real “statement make”
- Great for gifts and collector-style decor
- Mostly simple stitches—success comes from assembly, not complexity
- Easy to scale bigger or smaller
- Perfect for using plush yarn for maximum softness
- AdSense-friendly, high-value tutorial content people will search and save
Internal Linking Suggestions#
If you’re building a crochet blog, link this post to:
- How to Crochet a Magic Ring
- Invisible Decrease Tutorial for Amigurumi
- How to Stuff Amigurumi Smoothly (No Lumps)
- Best Yarn for Giant Crochet Plushies
- How to Embroider Faces on Crochet Toys
- Beginner Amigurumi Patterns That Scale Up Easily
FAQ Section#
Is this a good crochet pattern for beginners?
Yes, if you’re comfortable with single crochet in the round. The stitches are simple; the main challenge is stuffing and assembly.
What yarn is best for a giant plush crochet pattern?
Chenille/blanket yarn makes the softest plush, while bulky acrylic gives more structure. Use a hook size that creates tight stitches.
How do I make the plush bigger or smaller?
Change yarn weight and hook size to scale easily. You can also add more increase rounds and more even rounds in the body.
Do I have to use safety eyes?
No. Embroidered eyes are perfect for a sleepy expression and are often preferred for soft plush toys.
How do I keep a large crochet plush from sagging?
Stuff the base firmly, consider adding a small weight pouch, and avoid over-soft stuffing near the bottom.
Can I wash it?
If you use washable yarn, gentle washing is usually fine. Plush yarn often does best with hand wash and air dry to maintain softness.
Conclusion#
A giant sleepy plush is one of the most satisfying crochet projects you can make: it’s huggable, display-worthy, and built with simple stitches that anyone can learn. The secret to a professional finish is patience—steady shaping, careful stuffing, and thoughtful assembly.
If you tell me your yarn type (chenille, bulky acrylic, worsted held double) and your target size (small, medium, jumbo), I can adapt the stitch counts and recommend the best hook size so your finished plush comes out exactly the size you want.


