


Introduction#
A crochet halter top is one of those projects that feels instantly rewarding: it’s wearable, stylish, and you can finish it quickly compared to larger garments. Even better, a halter top is forgiving on fit because it’s adjustable—most of the shaping comes from clean increases and smart ties rather than complicated grading.
Explore more beginner tops crochet patterns in our pattern library.
This crochet pattern walks you through a classic triangle halter top with a snug underbust band, a comfortable neck strap, and an adjustable back tie. It’s designed to be beginner-friendly while still looking polished enough to wear outside the house (and proudly say, “I made this!”). You’ll also learn how to tweak coverage, add lining, change strap styles, and choose yarn that feels good against the skin.
If you’re looking for a free crochet pattern that doubles as a true crochet tutorial, this one will give you clear steps and practical tips so your halter top comes out neat, supportive, and wearable.
Detailed Description of the Crochet Pattern#
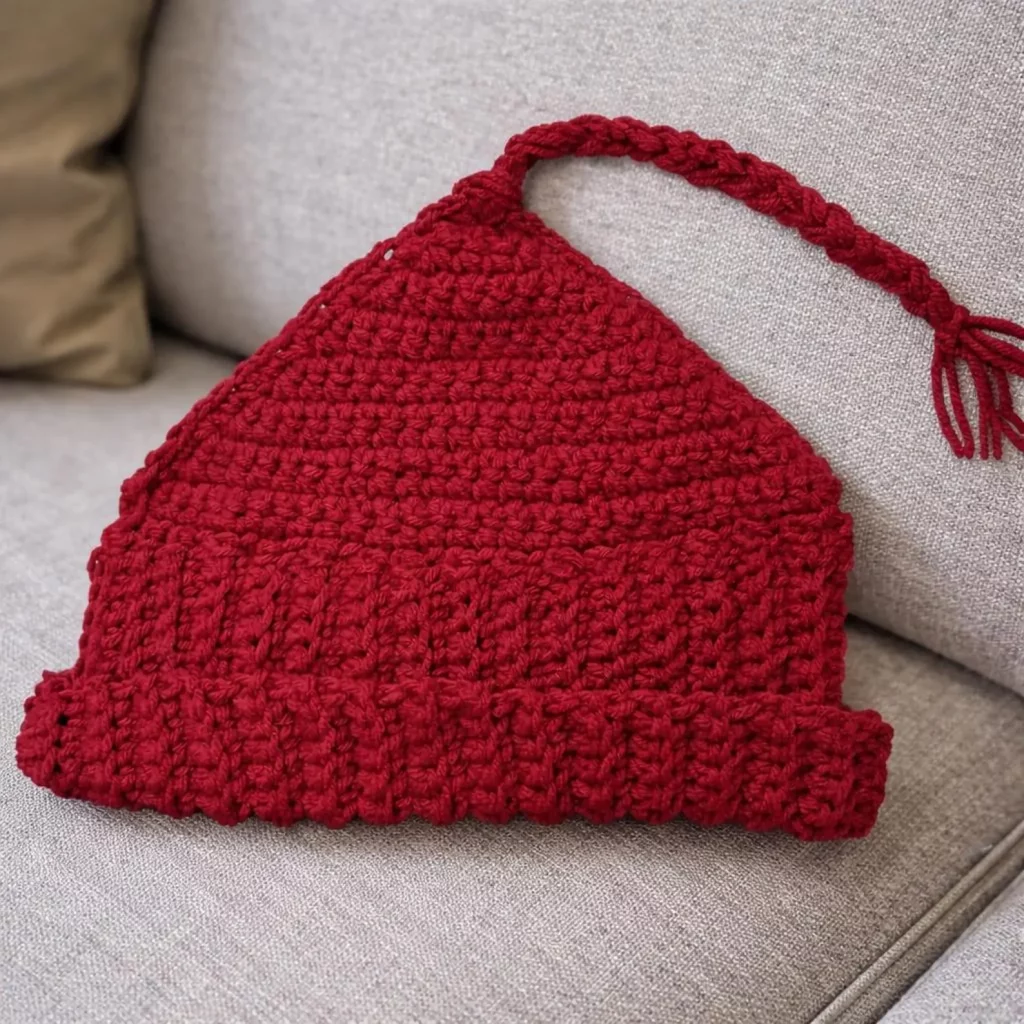
This is a crochet halter top made from two main triangles (cups) that are joined and finished with a band and straps. The overall look is clean and minimal, with a slightly textured stitch pattern that holds shape well.
Key features:
- Triangular cups with steady, symmetrical shaping
- Comfortable underbust band for stability and better fit
- Tie neck strap (braided/corded look or classic crochet strap)
- Adjustable back tie so the top fits multiple body types
- Optional scalloped or ruffle edge for a more feminine finish
- Customizable coverage (you decide how tall/wide the cups are)
Construction is straightforward and modular: crochet the cups, join, add the band, then finish with straps and edging. This makes it easy to try on as you go.
Skill Level Explanation#
This is an easy-to-intermediate crochet pattern. It’s beginner-friendly if you can:
- Chain, single crochet, and double crochet
- Increase at edges and in corners
- Work evenly across rows
- Measure your work and adjust length
- Sew or slip-stitch pieces together neatly
The “intermediate” part is mainly fit adjustments—getting the cup size and band snugness right. But because halter tops use ties, you have a lot of flexibility.
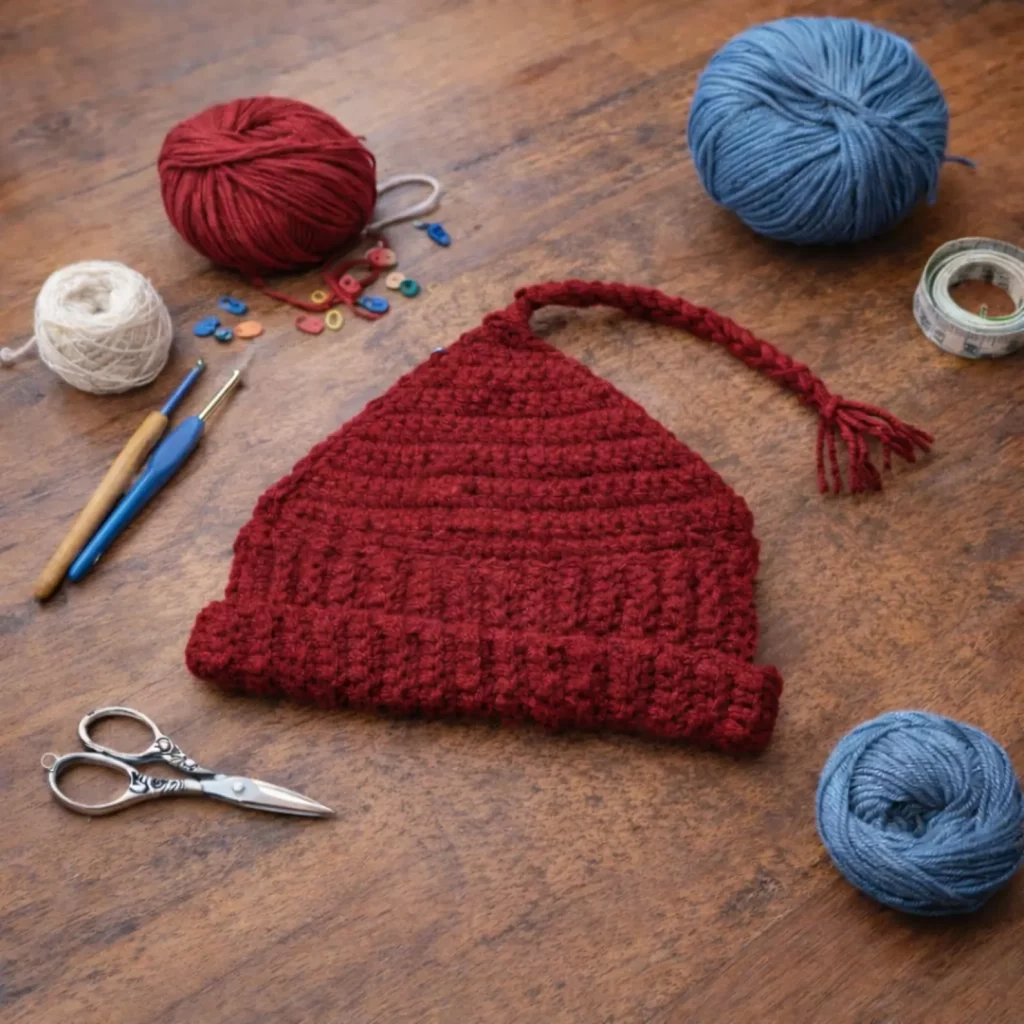
Materials Needed#
Yarn
For a wearable halter top, choose yarn that’s comfortable, breathable, and holds up to washing.
Best yarn choices:
- Cotton (most recommended): breathable, sturdy, great stitch definition
- Cotton blends (cotton/bamboo, cotton/linen): softer drape
- Bamboo/rayon blends: very soft, extra drapey (may stretch—see tips below)
Recommended weight:
- DK (#3) for a lighter, flexible fabric
- Worsted (#4) for more structure and coverage
Yardage estimate (very approximate):
- XS–S: 350–600 yards
- M–L: 600–900 yards
- XL–2XL: 900–1200 yards
- 3XL+: 1200–1600 yards
Hook
Choose a hook that creates a dense, supportive fabric (you don’t want big gaps).
- DK yarn: 3.5–4.5 mm
- Worsted yarn: 4.5–5.5 mm
Notions
- Stitch markers
- Measuring tape
- Yarn needle
- Scissors
- Optional: bra cups/liner fabric, or removable padding
- Optional: elastic (¼ inch / 6 mm) for the underbust edge
- Optional: stitch counter (handy for repeat consistency)
Stitches & Techniques Explained#
Abbreviations (US terms)
- ch = chain
- sc = single crochet
- hdc = half double crochet
- dc = double crochet
- sl st = slip stitch
- inc = increase (2 stitches in same stitch)
- dec = decrease (2 stitches together)
- RS/WS = right side/wrong side
- sp = space
Recommended stitches for supportive cups
For a halter top, the goal is coverage + stability. These stitches work well:
- Half double crochet (hdc): dense, supportive, slightly stretchy
- Double crochet (dc): faster, slightly more open (use smaller hook if needed)
- Single crochet (sc): most dense and firm (best for edging/bands)
How to make neat edges
- Turn your work the same direction each row
- Use consistent turning chains
- Add an edging round at the end to straighten everything
Step-by-Step Instructions#
This free crochet pattern is written in a made-to-measure friendly way, with clear stopping points so you can size cups and band accurately.
Before you start: quick measurements
You’ll get the best fit if you take two measurements:
- Underbust (snug, where a bra band sits)
- Bust point to underbust (vertical cup height you prefer)
Also decide your coverage:
- Minimal: triangle bikini style
- Medium: classic halter coverage
- Full: taller triangle or added rows along the top edge
Cup Pattern (make 2)
This cup is worked as a triangle that grows evenly.
Foundation: ch 2.
Row 1: Work 2 hdc into the second ch from hook. Turn.
Row 2: ch 1, 2 hdc in first st, hdc in next st, 2 hdc in last st. Turn.
Row 3: ch 1, 2 hdc in first st, hdc across to last st, 2 hdc in last st. Turn.
Repeat Row 3 until the cup reaches your desired size.
How to know when a cup is big enough:
- Measure the top edge width of the triangle.
- A helpful fit check: hold the cup to your body; it should cover from the inner bust area toward the outer side with the amount of coverage you want.
- If you want more coverage, add more rows. If you want less, stop earlier.
Optional shaping tweak for better coverage:
After you reach your preferred width, add 1–3 rows without increasing (hdc across). This gives a slightly flatter top edge.
Joining the Cups
Place cups side-by-side with the points facing downward.
Option A (simple join):
- With yarn attached, sl st or sc through both cups along the inner edges for 2–4 stitches (just enough to connect).
Option B (gap join):
- Ch 1–3 between cups for a small center gap, then join.
Fit tip: The smaller the join, the closer the cups sit together. The wider the join, the more space at center front.
Underbust Band
The band makes the top feel secure.
Attach yarn to the bottom edge of one cup. Work along the bottom edges of both cups.
Band Row 1: sc evenly across the entire bottom edge of the joined cups.
- Place 1 sc per row end on each triangle side.
- Place 1 sc in each stitch across the base edges.
Band Row 2–6 (or more): ch 1, sc across.
Add rows until the band height looks balanced (usually 1–2 inches).
Band length / ties:
You have two popular options:
Option: Long tie band (adjustable)
- After finishing the band rows, continue crocheting a strap from each side:
- Ch 45–80 (depending on your back tie preference).
- sc back down the chain for sturdiness.
Repeat for the other side.
Option: Fitted band (less tie, more bra-like)
- Crochet the band to match underbust measurement with slight negative ease, then add a small button closure or lace-up back.
Most beginners prefer the long tie band because it’s forgiving.
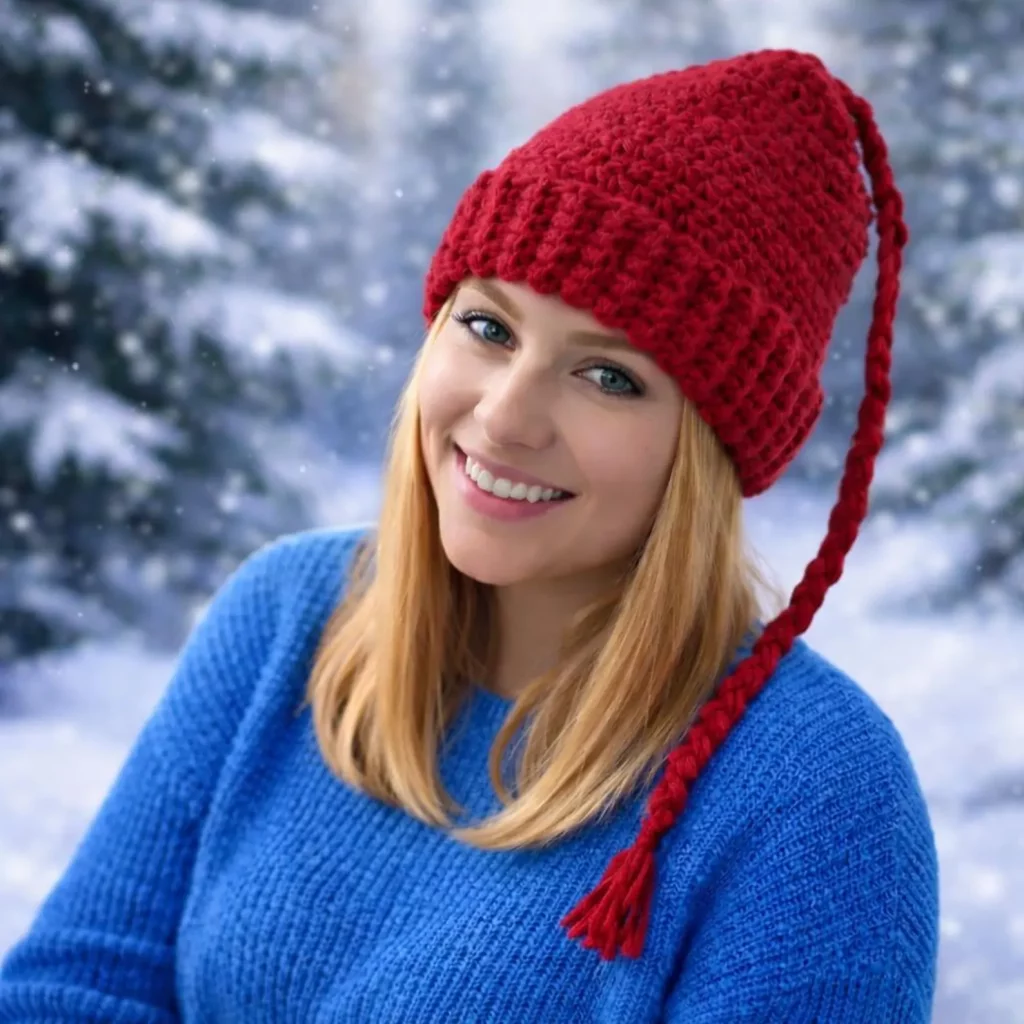
Neck Straps
You can do a classic strap or a thicker braided/corded strap.
Option: Simple crochet straps (clean + supportive)
Attach yarn to the top corner of each cup.
- Ch 55–80 (long enough to tie behind the neck)
- sc back down the chain
Fasten off and repeat for the other side.
Option: Corded/braided neck strap (chunky look)
- Cut 6 long strands of yarn (3 strands per side) and braid them into a cord.
- Or crochet an i-cord style strap (tight chain + slip stitches).
Attach securely to cup corners with multiple stitches.
Comfort tip: If neck ties dig in, make straps wider by crocheting 2–3 rows of sc (flat strap) instead of a single chain strap.
Optional Bottom Edge Detail
If you want a decorative touch, add one of these:
Scallop edge:
- Skip 1, 5 dc in next st, skip 1, sl st in next st repeat.
Picot edge (subtle):
- sc, ch 3, sl st into same sc.
Simple clean edge:
- One round of sl st or crab stitch (reverse sc).
Finishing and Weaving Ends
- Weave ends into dense areas (band and cup bases).
- Try the top on and adjust strap lengths before trimming too short.
- If your fabric feels slightly loose, a gentle wash and lay-flat dry often helps cotton settle.
Common Mistakes and How to Avoid Them#
- Cups too pointy: Add 1–3 non-increase rows at the end of the cup for a flatter top edge.
- Band flips or curls: Use single crochet for the band and keep tension consistent. Add one more row if needed.
- Gaps show too much: Use a smaller hook or switch from dc to hdc for denser fabric.
- Neck tie hurts: Make the strap wider or use a softer yarn. Also avoid tying too tight—support should come from the band.
- Uneven cups: Count rows and stitch totals. If one cup is bigger, add a row to the smaller one to match.
Expert Tips for Better Results#
- Cotton is your friend: It holds shape and is comfortable for summer wear.
- Block lightly: A quick steam block helps triangles lay flat and edges look crisp.
- Reinforce strap joins: Stitch straps on with extra passes—those points take the most stress.
- Add elastic for security: A thin elastic sewn or crocheted into the underbust edge helps prevent stretching over time.
- Line for confidence: If you prefer more coverage, add a simple fabric lining or sew in bra cups.
Variations and Customization Ideas#
- Crop top version: Add more rows below the band to create a longer body.
- Ruffle hem: Add increases on the last band round for a flouncy edge.
- Lace-up back: Replace tie straps with a crisscross lace-up panel.
- Striped or color-blocked cups: Change color every few rows for a modern look.
- Boho fringe: Add fringe to the tie ends for a playful finish.
- Festival style: Add a granny stripe band or shell stitch border for texture.
Benefits of This Crochet Project#
- Fast, satisfying, and wearable
- Great beginner garment pattern with adjustable fit
- Uses simple stitches with big style impact
- Easy to customize coverage and shape
- Perfect stash-buster for cotton yarn
- Ideal for summer outfits, layering, and gifts
Internal Linking Suggestions#
If you run a crochet blog, this post pairs well with:
- “How to Crochet a Magic Ring”
- “Beginner Guide to Crochet Garment Sizing”
- “How to Change Colors Neatly in Crochet”
- “Best Yarn for Summer Crochet Wearables”
- “How to Block Crochet Garments”
- “Easy Crochet Straps and Ties Tutorial”
FAQ Section#
Is this a good crochet pattern for beginners?
Yes. The stitches are basic and the fit is adjustable with ties, which makes it forgiving.
What yarn is best for a crochet halter top?
Cotton or cotton blends are best for brhttps://www.pinterest.com/cozylooppattern/eathability and shape. Rayon blends feel soft but can stretch more.
How do I know what size to make?
Use your underbust measurement for the band and your preferred coverage for the cups. Try on as you go.
Can I make this without tying behind the neck?
Yes. You can convert it to shoulder straps by attaching straps to the back band instead of tying at the neck.
How do I make the top more supportive?
Use hdc or sc for denser fabric, add a wider band, and consider adding elastic along the underbust edge.
Can I wash a crochet halter top?
Usually yes, depending on yarn. Cotton is often machine washable; lay flat to dry for best shape.
Conclusion#
A crochet halter top is the perfect mix of simple construction and high-impact style. Once you learn the triangle cup + band formula, you can remake it in different colors, adjust coverage for your comfort, and experiment with straps and edging for totally different looks.
If you want, tell me your underbust measurement and the yarn weight you’re using, and I can convert this into a more “numbers-based” version (exact stitch counts and strap lengths) tailored to your size and desired coverage.


