


Introduction#
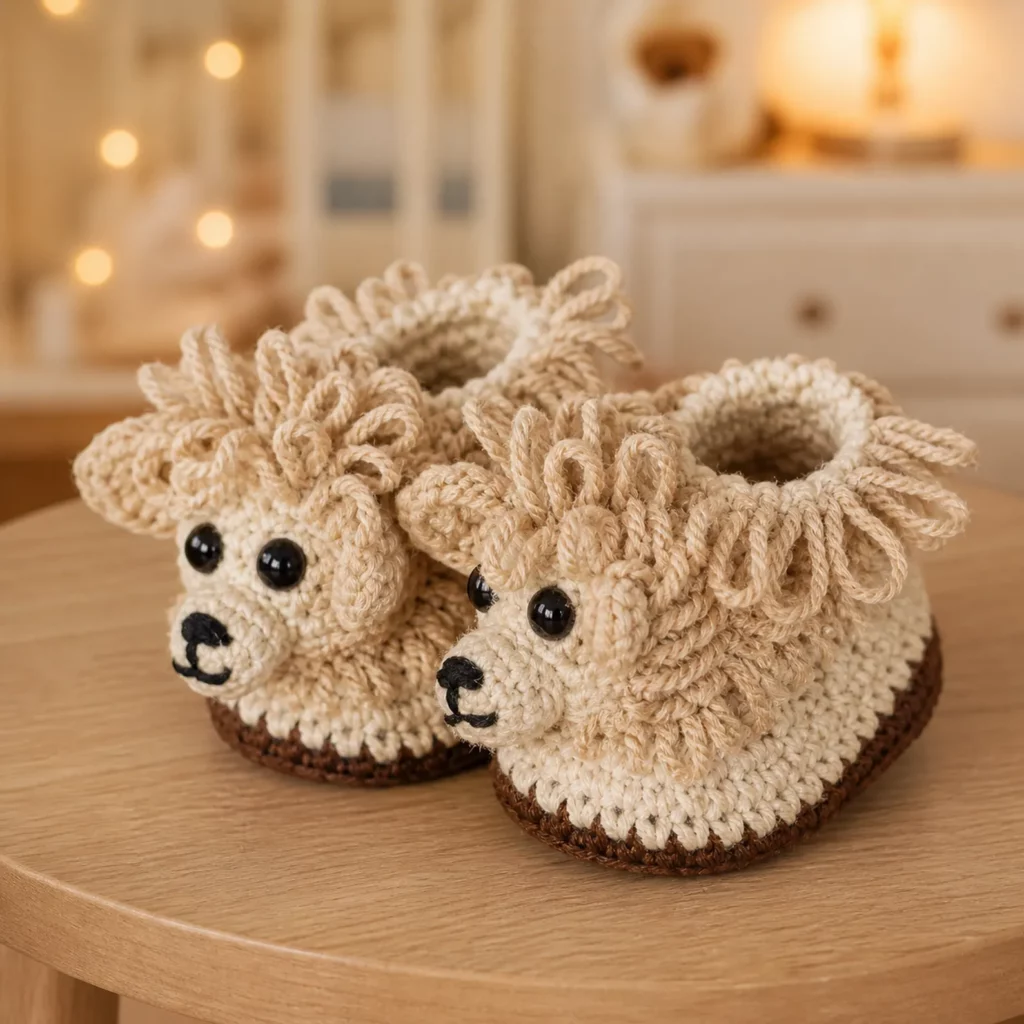
If you want a crochet project that’s both practical and guaranteed to make people smile, these fluffy puppy slippers are it. They’re cozy, quick enough to finish over a weekend, and they have that irresistible “handmade-but-wow” look thanks to the shaggy fur texture and cute little face details.
Explore more beginner amigurumi crochet patterns in our pattern library.
This crochet pattern is designed to create soft slip-on slippers that look like tiny fluffy dogs—complete with a fuzzy top, simple embroidered nose, and sweet button/safety eyes. The best part is that the construction is straightforward: you crochet a sturdy sole, build the sides, then add the fluffy “fur” upper and a back heel section for a snug fit.
If you’re searching for a free crochet pattern that feels special (and giftable), this is a fun DIY crochet project that teaches real footwear skills without complicated shaping.
Detailed Description of the Crochet Pattern#
These slippers are a closed-toe, low-ankle slip-on style with a fluffy upper that mimics “puppy fur.” The design has three key parts:
- Sturdy sole: Worked in dense stitches so the slipper holds its shape and lasts.
- Side walls + upper: Built up from the sole, then shaped around the toes and sides.
- Fur texture layer: A loop stitch (or faux-fur yarn option) creates that shaggy, plush look.
What makes them look like puppies
- Shaggy loops on the top mimic fluffy fur.
- Simple black nose + mouth embroidery gives instant character.
- Eye placement is wide and low, which reads as “cute puppy face.”
- A slightly rounded toe makes the front look like a little muzzle.
Finished fit (how they wear)
They sit comfortably on the foot with a snug heel and a cozy toe box. You can wear them as indoor slippers, and with a non-slip sole treatment they’re perfect for smooth floors.
Skill Level Explanation#
This is an easy-to-intermediate crochet project.
Great for confident beginners who can:
- crochet in the round and in rows
- increase/decrease for shaping
- crochet evenly around an oval
- seam a heel (simple whip stitch)
- follow stitch counts (important for matching pairs)
Intermediate elements (still very manageable):
- loop stitch or faux-fur yarn handling
- shaping the upper around the toe
- attaching facial features securely
If you’ve made a hat or basic amigurumi before, this easy crochet pattern will feel very doable.
Materials Needed#
Yarn
You have two good options depending on the look you want:
Option A: Regular yarn + loop stitch (best control)
- Worsted weight (#4) acrylic or wool blend for the base
- Worsted weight (#4) in white/cream for the “fur” loops
Option B: Faux fur/eyelash yarn (fastest fluffy look)
- Worsted or bulky base yarn for structure
- Faux fur yarn for the fluffy top layer
Recommended colors
- White/cream for the fur
- Black for nose/mouth embroidery
- Optional: a small amount of gray/tan for ears or accents
Yardage estimate
- Base yarn: 200–300 yards (pair, depending on size)
- Fur yarn or loop stitch color: 150–250 yards
Hook
Choose a hook that makes dense stitches (no gaps):
- Worsted base: 3.5–4.5 mm
- If using faux fur yarn: use the hook that matches the base fabric and keep tension steady.
Notions
- Stitch markers (very helpful for soles)
- Yarn needle
- Scissors
- Measuring tape
- Optional: thin foam insole insert (extra comfort)
Eyes + safety
- 8–12 mm safety eyes or sew-on buttons
- For children under 3: embroider eyes instead
Optional: non-slip bottom
- Puffy fabric paint, silicone grip, or non-slip sole spray
- Or sew on suede/faux leather sole patches
Stitches & Techniques Explained#
Abbreviations (US terms)
- ch = chain
- sl st = slip stitch
- sc = single crochet
- hdc = half double crochet
- dc = double crochet
- inc = increase (2 stitches in one stitch)
- dec = decrease (sc2tog)
- BLO = back loop only
- st(s) = stitch(es)
- rep = repeat
Loop Stitch (for the fluffy “fur”)
Loop stitch creates loops on the right side of the fabric.
Basic method:
- Insert hook into stitch, yarn over and pull up a loop (like sc).
- Before completing the sc, wrap yarn around your index finger to form a loop.
- Yarn over and pull through both loops on hook to finish the sc, trapping the loop.
Loop size tip: Keep your finger position consistent so loops are even. You can trim loops later for a “poodle fluff” look.
Working faux fur yarn (if you choose Option B)
- Use a bright light and stitch markers because stitches are hard to see.
- Crochet with the base yarn at the same time (held together) or crochet a base fabric and stitch the fur yarn on afterward.
Why slippers need dense fabric
Footwear stretches and takes friction. Dense stitches:
- last longer
- hold shape
- feel warmer and cushier
Step-by-Step Instructions#
Pattern notes
- Written in US terms
- Make two identical soles, then build uppers
- Sizing is adjustable by sole length (details below)
- Keep tension firm for durability
Sizing guide (quick)
Measure the wearer’s foot length from heel to longest toe.
Use these rough targets for the sole:
- Toddler: 5–6.5″
- Child: 7–8″
- Women S/M: 9–10″
- Women L / Men S: 10–11″
- Men M/L: 11–12″
Rule: Crochet the sole about ¼–½ inch shorter than the actual foot length (crochet stretches with wear).
Part 1: Sole (make 2)
Use base yarn.
Foundation: Ch 11 (adjust for size)
(For larger sizes, chain more. For smaller, chain fewer.)
Rnd 1:
Sc in 2nd ch from hook and in each ch across to last ch.
In last ch, work 3 sc.
Working along the underside of chain: sc in each ch back to start.
In last ch (at start), work 2 sc. Join if desired or continue in continuous rounds.
You should have an oval.
Rnd 2:
Inc in first st, sc across to the 3-sc corner.
Inc in each of the 3 corner sts.
Sc along underside to last 2 sts, inc in each of last 2 sts.
Rnd 3:
(sc, inc) at start, sc across to corner.
At corner: (sc, inc) in each of the 3 corner sts.
Sc across underside; finish with increases mirroring the first end.
Continue increasing in this style until your sole is the correct length/width.
Sole tip: Keep increases concentrated at the toe and heel curves only. The long sides should stay mostly “even” to avoid ruffling.
Fasten off after the sole is the right size.
Part 2: Build the Side Wall
Join base yarn at the heel.
Wall Round 1 (fold round):
Ch 1, sc around the entire sole in BLO only.
This creates a crisp vertical edge.
Wall Rounds 2–4:
Ch 1, sc around (working in both loops now).
Stop and try it against the foot—this should start to look like a shallow bowl.
Part 3: Shape the Toe (Upper Start)
Now we build the top and close the toe area.
Place stitch markers to define the toe section:
- Mark the center front stitch.
- Count about ⅓ of stitches across the front as your “toe zone.”
Toe Round 1:
Sc around to first toe marker.
Across the toe zone: (sc, dec) repeat to pull the top inward.
Sc around the rest of the round.
Toe Round 2:
Repeat with slightly more decreases across the toe zone if needed.
Keep trying on as you go. You want the toe snug but not tight.
Part 4: Fluffy Upper (Loop Stitch Layer)
Switch to your fur color (or faux fur yarn).
Work loop stitch on the top half of the slipper (toe and instep) for the puppy look.
Loop Round:
- Work sc (normal) around the sides and heel area for strength.
- Work loop stitch sc across the toe and instep section.
Repeat 2–4 rounds depending on how fluffy you want them.
Fluff tip: If you want maximum “poodle” texture, do loop stitch on the entire upper (except maybe the sole edge).
Part 5: Heel Shaping + Back Seam
To create a snug heel, you can do a simple back seam method:
- Crochet until the slipper opening reaches the ankle line.
- Flatten the heel opening so the back edges meet.
- Seam the heel with whip stitch for 1.5–2.5″ (depending on size).
This creates a clean heel cup.
Part 6: Top Edging (Neat Finish)
Join base yarn around the opening.
Edging Round:
Ch 1, sc evenly around.
Optional: crab stitch for a decorative edge.
For extra snugness, you can add elastic thread in this round (woven through the stitches).
Part 7: Puppy Face Details
Now add the personality.
Eyes
- Place eyes low on the fluffy toe area, spaced evenly.
- Sew-on buttons work great (more secure than safety eyes for slippers).
Nose
- Use black yarn to embroider a small oval or triangle.
Mouth
- Add a tiny “J” or “U” shape under the nose.
Optional: add tiny ears (small half-circles) and stitch them to the sides near the front.
Part 8: Optional Non-Slip Soles
Add grip dots with puffy paint or silicone grip on the bottom. Let fully dry.
For a longer-lasting upgrade, cut suede/faux leather ovals and stitch to the soles.
Common Mistakes and How to Avoid Them#
- Sole ruffles: Too many increases along the sides. Keep increases only at the ends.
- Slippers too loose: Use a smaller hook, add a snug top edging, or add elastic thread.
- Toe too tight: Reduce decreases in the toe zone or add 1 extra wall round.
- Loop stitch looks messy: Keep loop length consistent; trim gently after finishing.
- Faux fur yarn is frustrating: Crochet the base in regular yarn first, then add fluff as loop stitches or surface crochet.
- Face looks uneven: Mark the center line and measure eye spacing before sewing.
Expert Tips for Better Results#
- Make a “left” and “right”: After seaming the heel, the slippers naturally shape—mirror your toe decreases so they fit better.
- Reinforce the heel seam: Slippers take stress at the back. Sew twice.
- Add an insole: A thin foam insert makes them feel store-bought.
- Trim loops for realism: Lightly trim the loop stitch to get that fluffy “dog fur” finish.
- Use cotton for the sole edge: If you want extra durability, switch the sole round to cotton yarn.
- Secure eyes extra well: Slippers get handled—double-knot and weave ends in multiple directions.
Variations and Customization Ideas#
- Different dog breeds:
- tighter loops = “curly poodle”
- longer loops = “shaggy sheepdog”
- add floppy ears for “spaniel” vibes
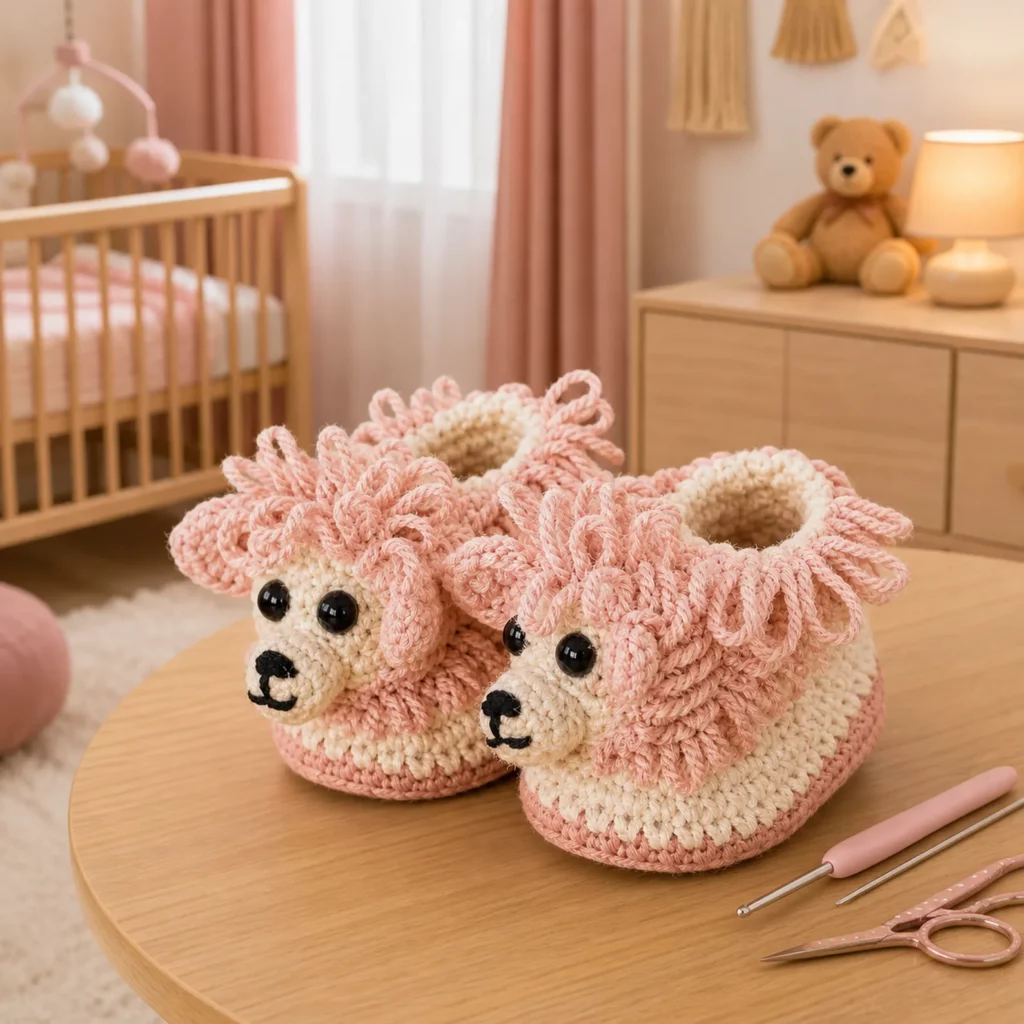
- Colorways: cream, tan, gray, black-and-white “puppy” looks
- Add a tongue: a tiny pink oval stitched under the nose
- Make them booties: crochet more rounds up the ankle and add a rib cuff
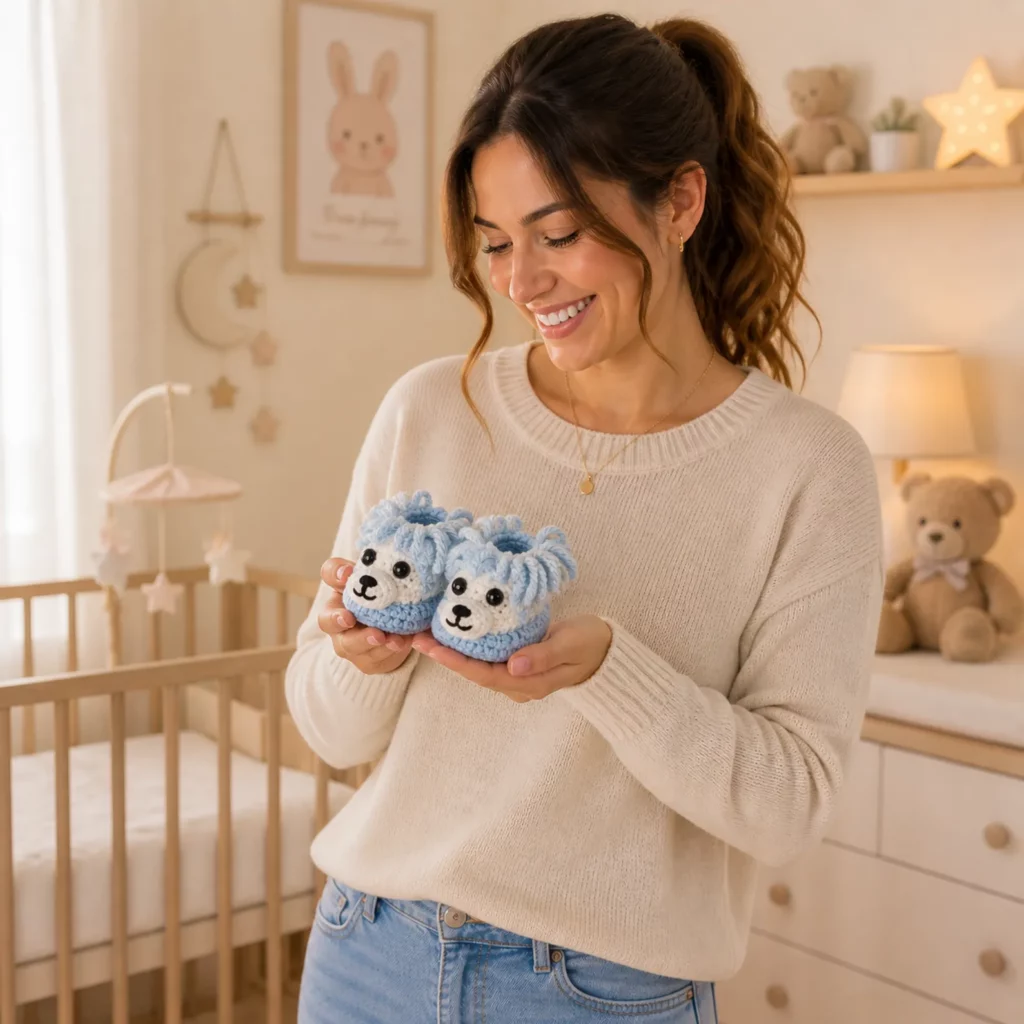
- Turn into baby booties: reduce sole size and embroider eyes (baby-safe)
- Add a bow: tiny bow applique on one side for extra cuteness
Benefits of This Crochet Project#
- Warm, cozy slippers that feel special and giftable
- Teaches practical skills: soles, shaping, and finishing
- Great stash-buster for fluffy yarn or scraps
- Customizable for many sizes and styles
- Looks impressive without complicated construction
- Fun, wearable crochet tutorial that beginners can follow
Internal Linking Suggestions#
You may also like…
- Free Crochet Pattern: Basic Crochet Slipper Sole Tutorial
- Crochet Tutorial: Loop Stitch for Fluffy Crochet Projects
- Best Yarn for Crochet Slippers (Durability + Comfort)
- DIY Crochet: How to Add Non-Slip Soles to Slippers
- Free Crochet Pattern: Cozy Crochet House Socks
- Crochet for Beginners: How to Count Rounds and Use Stitch Markers
FAQ Section#
What yarn is best for a fluffy crochet slipper pattern?
Worsted cotton or acrylic works well for the base, and loop stitch with a matching yarn gives the fluffiest look. Faux fur yarn can also be used, but it’s harder to see stitches.
Is this an easy crochet pattern for beginners?
Yes. The construction is simple (sole + walls + toe shaping). Loop stitch is the only “new” technique, and it’s easy once you get the rhythm.
How do I make sure the slippers fit?
Measure foot length and crochet the sole about ¼–½ inch shorter than the foot. Try on as you build the walls and toe to adjust decreases.
Can I make these without loop stitch?
Absolutely. Use a textured yarn (like faux fur) or crochet normally and brush the surface lightly (if using appropriate fibers). Loop stitch just gives the most “puppy” effect.
How do I keep crochet slippers from slipping?
Add grip dots with puffy paint or silicone, or sew on suede/faux leather sole patches. This makes them safer on smooth floors.
Are safety eyes okay for slippers?
For adult slippers, yes—if installed correctly. For kids or gifts where safety matters, embroidered or sewn-on eyes are safer and more durable.
Conclusion#
These fluffy puppy slippers are the perfect mix of cozy and adorable—warm enough for everyday wear, cute enough to gift, and fun enough to make in every color. This free crochet pattern gives you a sturdy sole, a snug fit, and that fluffy “fur” finish that makes the design stand out.
If you tell me the size you’re making (kids, women’s, men’s) and what yarn you plan to use (worsted, bulky, or faux fur), I can recommend an exact starting chain and increase plan so your crochet pattern fits perfectly.


