Introduction#
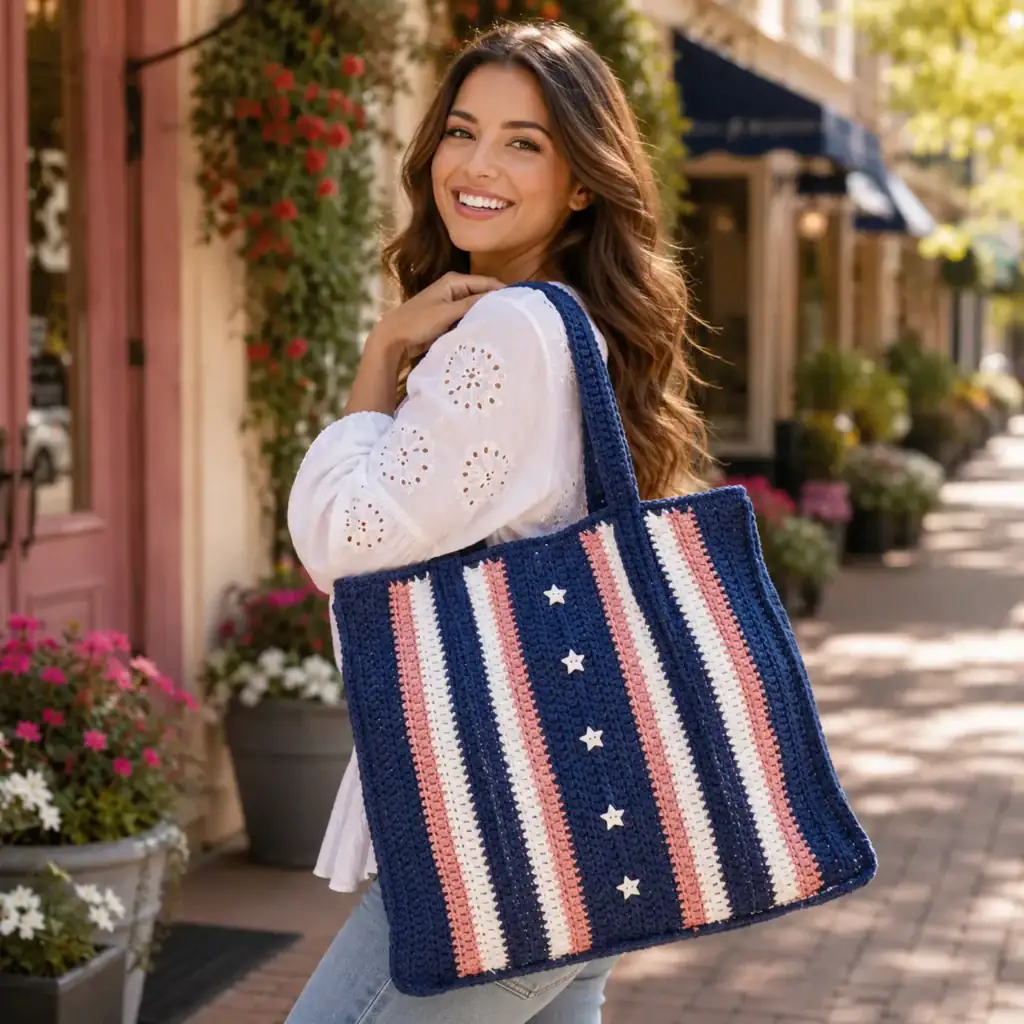
A drawstring crochet bag is one of those projects that feels instantly useful. It’s roomy enough for everyday essentials, easy to carry, and forgiving if you’re still building confidence with shaping. The best part? You can make it look designer with just two things: clean stripes and a fabric that holds its structure.
Explore more beginner bags crochet patterns in our pattern library.
This crochet pattern will guide you through a stylish striped drawstring bag with a gently rounded base, tall body, and a cinched top that creates that beautiful gathered “pouch” silhouette. The stripes give it a modern, graphic look, and the strap makes it wearable as a shoulder bag or casual crossbody.
If you’ve been looking for a free crochet pattern that’s practical, customizable, and beginner-friendly (with optional upgrades like lining and a sturdier strap), this is the perfect DIY crochet project.
Detailed Description of the Crochet Pattern#
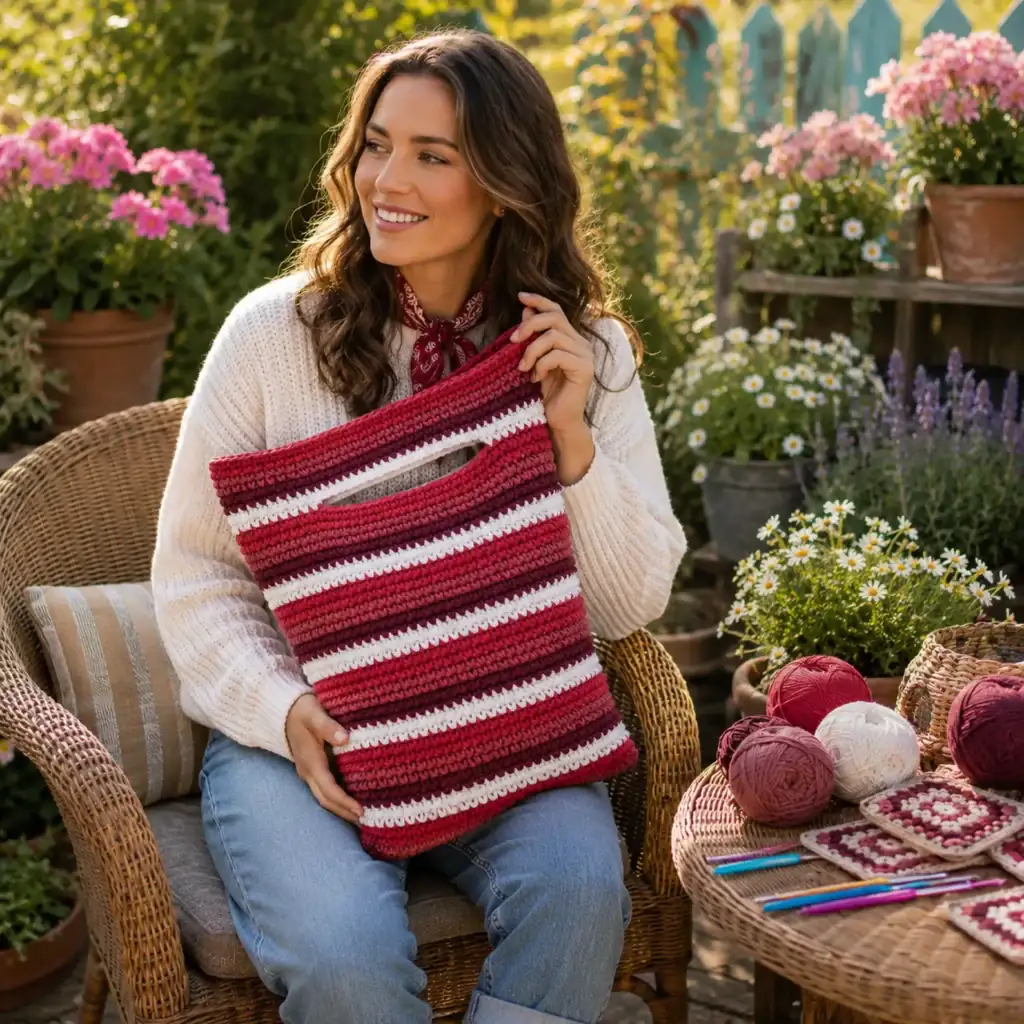
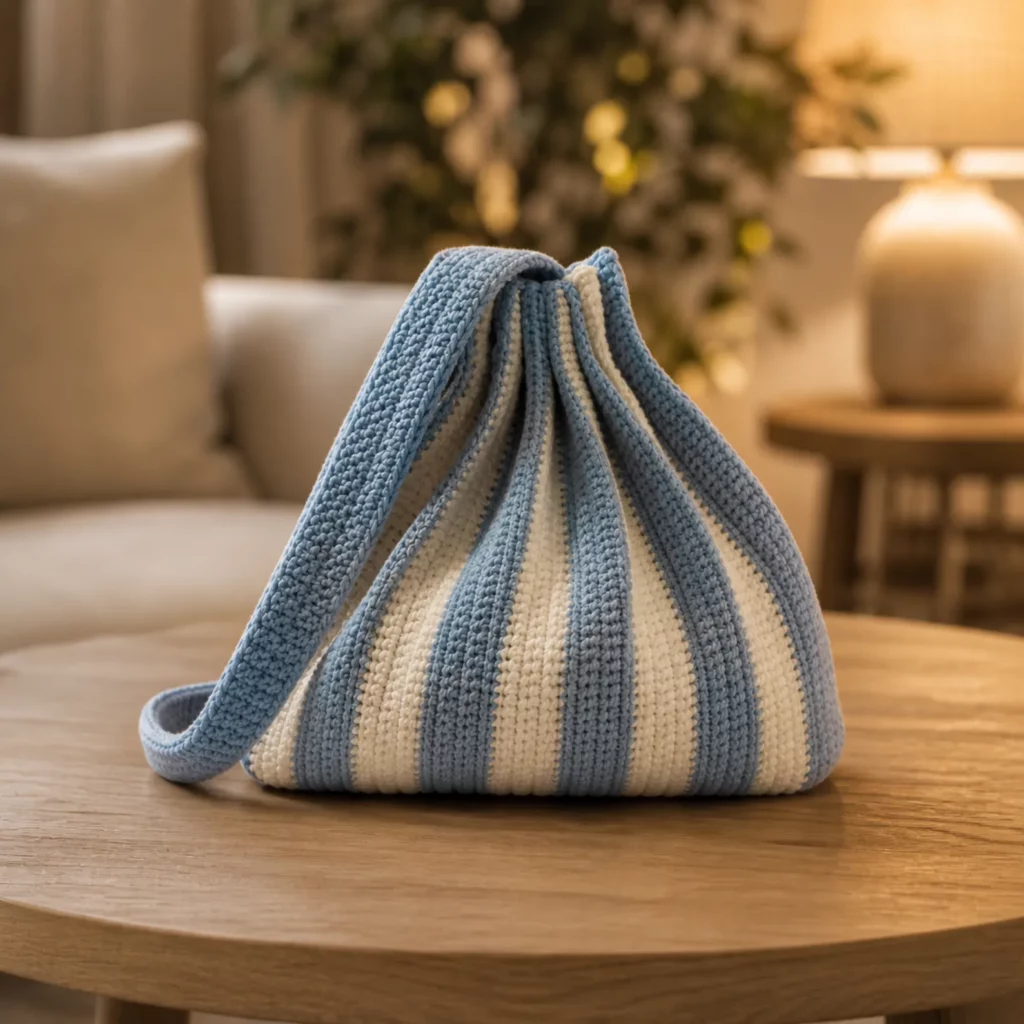
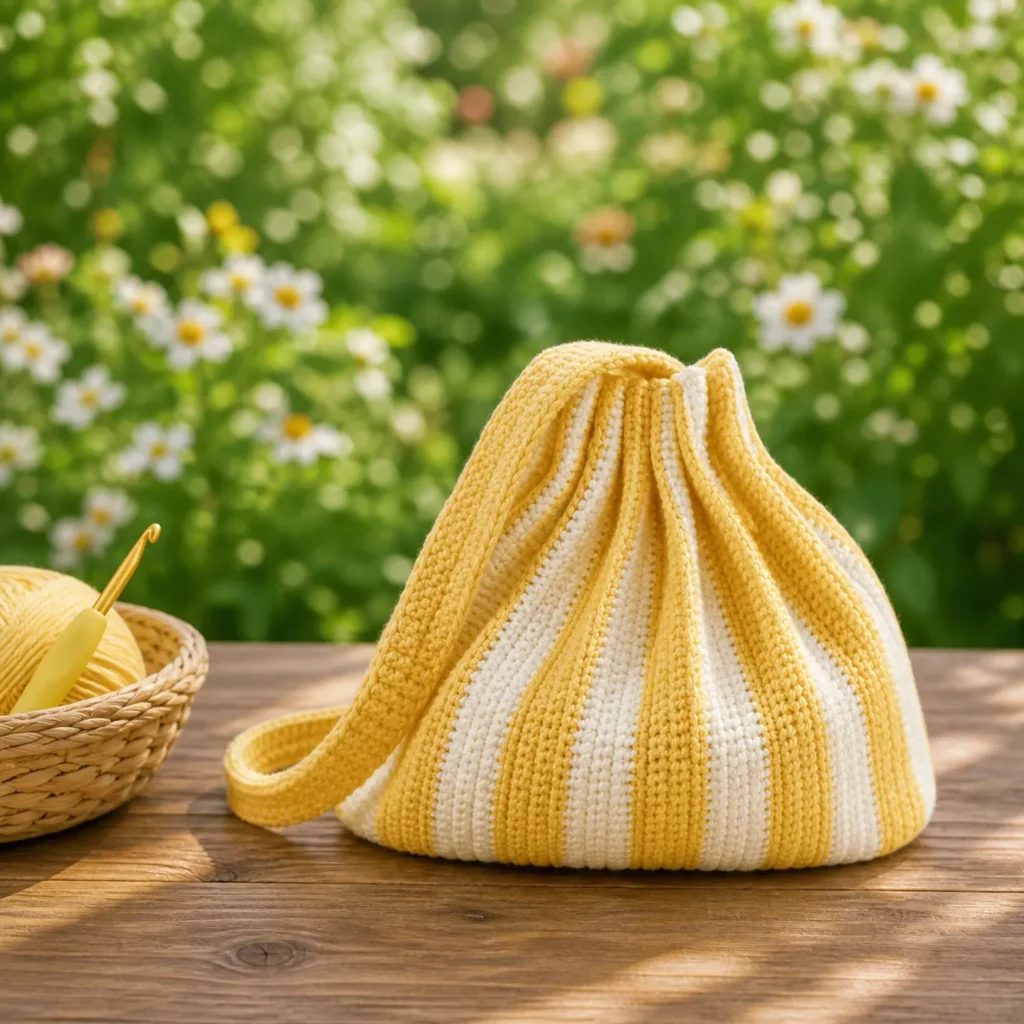
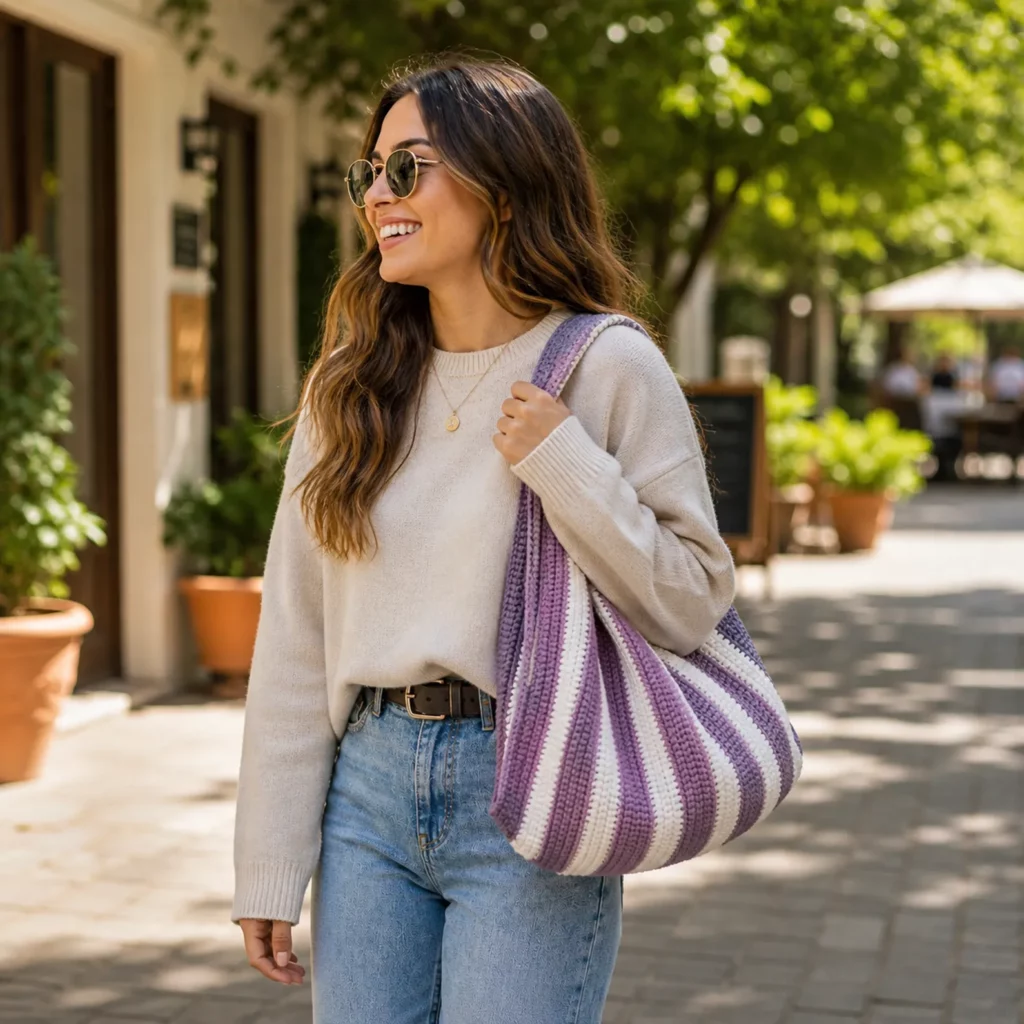
This bag is a soft-structured drawstring tote/backpack-style pouch with vertical stripes. The body is built as a large rectangle with stripe sections, then seamed into a tube and gathered at the top with a drawstring channel. A wide strap attaches near the bottom/side area, giving it an easy, slouchy carry.
Key design features
- Vertical stripes: Achieved by alternating colors in clean sections for a modern look.
- Textured, sturdy fabric: The stitch pattern is dense enough to hold shape but still drapes nicely.
- Drawstring closure: Cinches the top securely without needing zippers or hardware.
- Roomy base: Comfortable capacity for wallet, phone, small notebook, and more.
- One-strap option: Simple and comfortable, with easy customization to add two straps if you prefer a backpack style.
Construction overview
You’ll make:
- Main body panel (striped rectangle)
- Bottom shaping (either a flat oval/circle base or a gathered base seam)
- Top drawstring channel
- Drawstring cord
- Strap (reinforced for strength)
The result is a wearable, minimal bag that looks polished—without complicated shaping.
Skill Level Explanation#
This is an easy-to-intermediate crochet project.
Great for confident beginners who can:
- crochet evenly in rows
- keep consistent stitch counts
- change colors neatly (simple stripe changes)
- seam edges together with a yarn needle
- crochet a strap and attach it securely
Intermediate upgrades (optional but recommended):
- adding a fabric lining for durability
- inserting a base support
- adding grommets for an extra-professional drawstring channel
If you’ve made a scarf or simple pouch and want an accessory that feels “real-life useful,” this easy crochet pattern is an ideal next project.
Materials Needed#
Yarn
Pick yarn that’s durable and not overly stretchy.
Best yarn options:
- Worsted cotton (#4) (great structure and stitch definition)
- Cotton-blend yarn (durable with a little softness)
- Braided cotton cord (3–4 mm) (more structured, modern finish)
Color needs:
- Color A (main stripe)
- Color B (contrast stripe)
Yardage estimate (medium bag):
- Worsted cotton: 350–550 yards total
- Color A: 200–320 yards
- Color B: 150–230 yards
Hook
Choose a hook that makes a dense fabric:
- Worsted cotton: 4.0–5.5 mm
- Cotton cord: 4.5–6.0 mm
Tip: If your fabric feels floppy or holey, go down one hook size.
Notions
- Stitch markers
- Yarn needle
- Scissors
- Measuring tape
Optional finishing upgrades
- Fabric for lining + needle/thread
- Lightweight fusible interfacing (for a crisp lining)
- Plastic canvas or purse base insert (for a firm bottom)
- Grommets (for drawstring holes)
Stitches & Techniques Explained#
Abbreviations (US terms)
- ch = chain
- sl st = slip stitch
- sc = single crochet
- hdc = half double crochet
- dc = double crochet
- BLO = back loop only
- st(s) = stitch(es)
- rep = repeat
Stitch choice for structure
For this style of bag, you want a stitch that’s:
- firm enough to hold a shape
- smooth enough for clean stripes
- not too open (so items don’t poke through)
Two excellent options:
- Single crochet (sc) for maximum structure
- Half double crochet (hdc) for a slightly faster build with still-good density
This pattern uses hdc for a balanced look and speed, with optional sc reinforcements at stress points.
Clean stripe changes (no messy steps)
To change colors neatly:
- Work the last stitch of the old color until the final yarn-over.
- Yarn over with the new color and pull through to finish that stitch.
- Continue with the new color.
Creating a drawstring channel
A drawstring channel is simply a row/round with holes:
- ch-1 spaces every few stitches (or skip stitches) create openings
- a cord weaves through and cinches the top
Step-by-Step Instructions#
Pattern notes
- Written in US terms
- Bag is built from a striped rectangle, then seamed and finished
- Keep tension firm for a stronger bag
- Size is adjustable (notes included)
Finished size (example)
Approx. 12″ tall x 12″ wide when laid flat, with a gathered drawstring top.
Part 1: Main Body Panel (Striped Rectangle)
Foundation: Ch 46
(Adjust width by chaining more/less. A good flat width is 11–13″.)
Row 1: Hdc in 2nd ch from hook and across. (45) Turn.
Row 2: Ch 1, hdc across. (45) Turn.
Repeat Row 2 for 6 rows in Color A.
Stripe sequence (example)
- 6 rows Color A
- 6 rows Color B
- 6 rows Color A
- 6 rows Color B
- 6 rows Color A
Continue until the panel measures about 24–26″ long (this becomes the circumference of the bag).
Tip for proportions:
- Shorter panel length = narrower bag
- Longer panel length = wider/slouchier bag
Fasten off, weave in ends neatly.
Part 2: Seam Into a Tube
Fold the rectangle so the short edges meet (right sides together).
Sew the side seam using:
- Whip stitch (strong and simple)
- or mattress stitch (neater seam)
Turn right side out. You now have a tube.
Part 3: Shape the Bottom
You have two beginner-friendly options:
Option A (easiest): Gathered base seam
Thread a long tail of yarn around the bottom edge (like a running stitch), pull tight to cinch closed, then stitch securely across the gathered area to flatten.
This makes a rounded, soft base—great for a slouchy look.
Option B (more structured): Crochet a round base and attach
Round base (Color A):
- Rnd 1: MR, 6 sc (6)
- Rnd 2: inc around (12)
- Rnd 3: (sc, inc) around (18)
- Rnd 4: (2 sc, inc) around (24)
Continue increasing until the circle matches the bag’s bottom circumference when laid flat (usually 7–9″ diameter).
Sew the circle to the bottom opening of the tube with whip stitch.
Pro tip: If you want it to stand up, Option B + base insert is the best combo.
Part 4: Top Edge Stabilizing Rounds
Join yarn at the top opening.
Rnd 1: Ch 1, sc evenly around the top edge. Join with sl st.
Rnd 2: Ch 1, sc around again. Join.
This stabilizes the opening and helps prevent stretching.
Part 5: Drawstring Channel
Channel Round: Ch 2, sk 1 st, dc in next st, ch 1 rep around.
Join with sl st.
This creates evenly spaced holes for your drawstring. If you prefer smaller holes, do:
- (sc, ch 1, sk 1) around instead.
Part 6: Top Finish Round
Next Round: Ch 1, sc in each st and each ch-1 space around. Join.
Fasten off and weave in ends.
Part 7: Make the Drawstring Cord
Choose one option:
Option A: Chain cord (fast)
Ch 120–160 (depending on how long you want the ties).
Sl st back along the chain for thickness (optional).
Option B: I-cord style (sturdy)
Crochet a tight cord by working sc around a foundation chain or using a Romanian cord technique.
Weave the cord through the channel holes. Pull to cinch and tie.
Part 8: Strap (Sturdy + Comfortable)
A bag strap must resist stretching. Use a dense stitch.
Strap (Color A):
Ch 9
Row 1: Sc in 2nd ch from hook and across (8). Turn.
Row 2: Ch 1, sc BLO across (8). Turn.
Repeat Row 2 until strap measures 30–42″ depending on shoulder/crossbody preference.
Fasten off leaving long tails.
Attach strap:
- Sew one end near the bottom side of the bag.
- Sew the other end higher on the opposite side (for a sling style), or both ends near the top sides (for a shoulder bag).
Reinforce with multiple passes of yarn—strap points are stress points.
Optional Part 9: Lining (Highly Recommended)
A lining:
- adds durability
- prevents stretching
- keeps items from catching on stitches
- makes the bag look professional
Simple lining:
- Measure bag interior height and circumference.
- Sew a fabric tube with a base circle (or flat bottom shape).
- Insert and whip stitch lining to inside top edge under the drawstring channel.
- Reinforce strap attachment areas with extra stitching.
Common Mistakes and How to Avoid Them#
- Bag stretches out:
Use cotton yarn, smaller hook, and add a lining. Reinforce strap points. - Stripes look jagged:
Change color on the final yarn-over of the last stitch. Keep row counts consistent. - Top edge ripples:
You may have too many stitches around the top edge—redo Round 1 with slightly fewer sc. - Drawstring holes are too big:
Use sc + chain spaces instead of dc. - Bottom looks lumpy:
Stuffing isn’t needed here—flatten and shape the base seam, or use a structured round base. - Strap feels weak:
Use sc BLO or thermal stitch, and sew strap ends with multiple reinforcement passes.
Expert Tips for Better Results#
- Go denser than garments: Bags need firm fabric—tight stitches matter.
- Block the panel before seaming: It helps stripes align and makes the tube smoother.
- Reinforce the rim: A couple sc rounds make the opening look finished and last longer.
- Add a base insert: Plastic canvas in the lining makes the bag stand up and look boutique.
- Hide color-change tails as you go: Weave ends between stripe rows to reduce bulk.
- Test strap placement before sewing: Pin it and try it on—small adjustments change the hang a lot.
Variations and Customization Ideas#
- Two-strap backpack version: Attach two straps to the lower back and upper back edges.
- Short handle tote: Replace strap with two small handles.
- Add a pocket: Sew a fabric pocket into the lining or crochet a front pocket panel.
- Change stripe widths: Try 4-row stripes for thinner lines or 8-row stripes for bold blocks.
- Add leather accents: Leather strap ends or tabs elevate the look instantly.
- Make it mini: Reduce foundation chain and panel length for a small pouch bag.
Benefits of This Crochet Project#
- Practical everyday bag with a secure drawstring closure
- Great stash-buster for two-color yarn combos
- Beginner-friendly construction (panel + seam + finish)
- Easy to customize size, strap length, and stripe layout
- Teaches useful skills: color changes, channels, reinforced straps
- Looks modern and polished without complicated shaping
Internal Linking Suggestions#
You may also like…
- Crochet Tutorial: How to Change Colors Cleanly in Rows
- Best Yarn for Crochet Bags (Cotton vs Cord vs Acrylic)
- Crochet Tutorial: Thermal Stitch Strap (No-Stretch Handles)
- DIY Crochet: How to Add a Fabric Lining to a Crochet Bag
- Free Crochet Pattern: Simple Crochet Drawstring Pouch
- Free Crochet Pattern Roundup: Beginner Crochet Bags and Totes
FAQ Section#
What yarn is best for a drawstring crochet bag pattern?
Cotton yarn or braided cotton cord is best because it holds shape and resists stretching. Acrylic can work, but a lining is strongly recommended.
Is this an easy crochet pattern for beginners?
Yes. The bag is made from a rectangle and seamed, with simple rounds at the top. The drawstring channel is straightforward and beginner-friendly.
How do I make the bag bigger or smaller?
Adjust the foundation chain for height and the rectangle length for circumference. More rows = wider bag; fewer rows = slimmer bag.
How do I keep the strap from stretching?
Use single crochet (BLO) or thermal stitch for the strap, and reinforce attachments with multiple passes. Cotton yarn helps reduce stretch.
Can I make the stripes without messy color changes?
Yes—change colors on the final yarn-over of the last stitch of the row. This keeps stripe edges clean.
Do I need a lining?
Not required, but highly recommended for durability and to keep the bag from stretching—especially if you plan to carry heavier items.
Conclusion#
A striped drawstring bag is the perfect mix of stylish and practical: easy to crochet, easy to wear, and endlessly customizable. This free crochet pattern focuses on clean stripes, a neat drawstring finish, and a strong strap so your bag looks polished and holds up to real use.
If you tell me your yarn type (worsted cotton or cord thickness) and how you want to wear it (shoulder, crossbody, or backpack), I can adjust the stitch counts and strap placement so your crochet pattern turns out perfectly.