


Introduction#
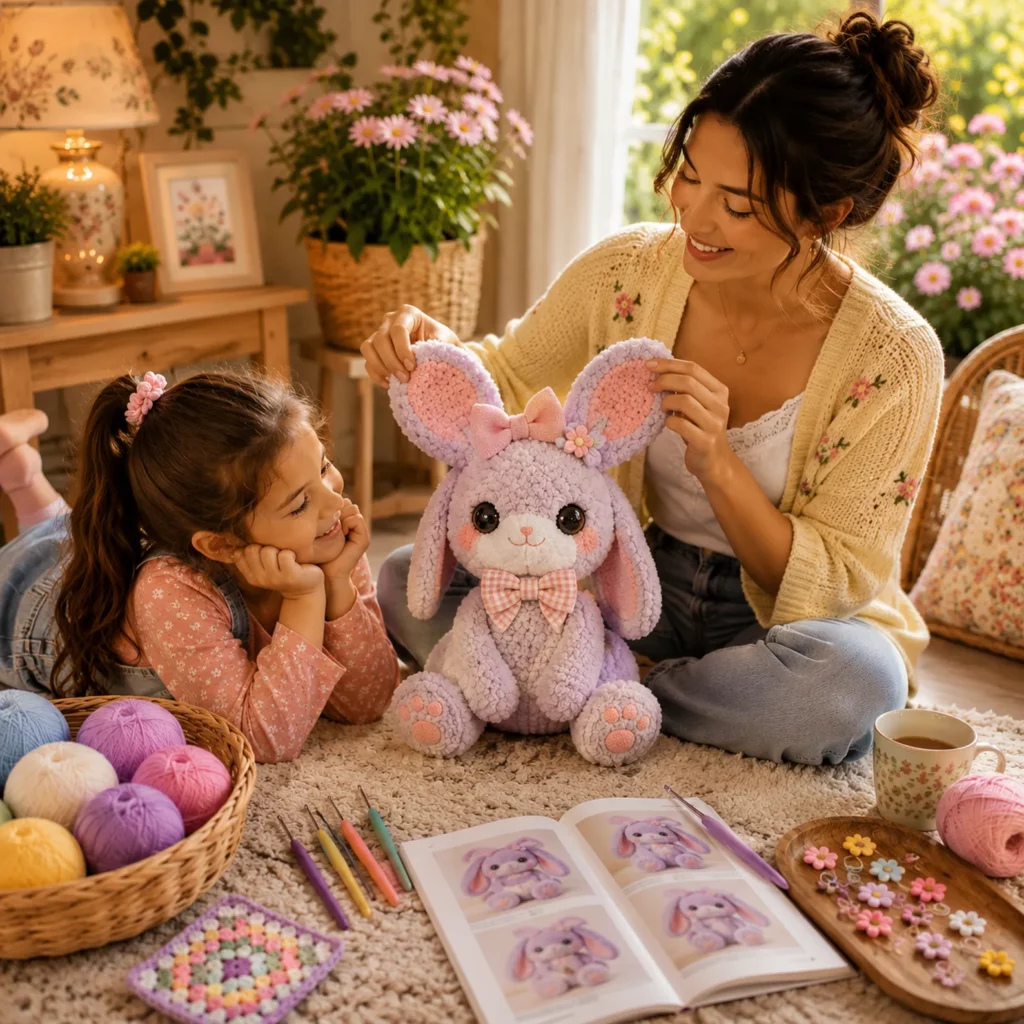
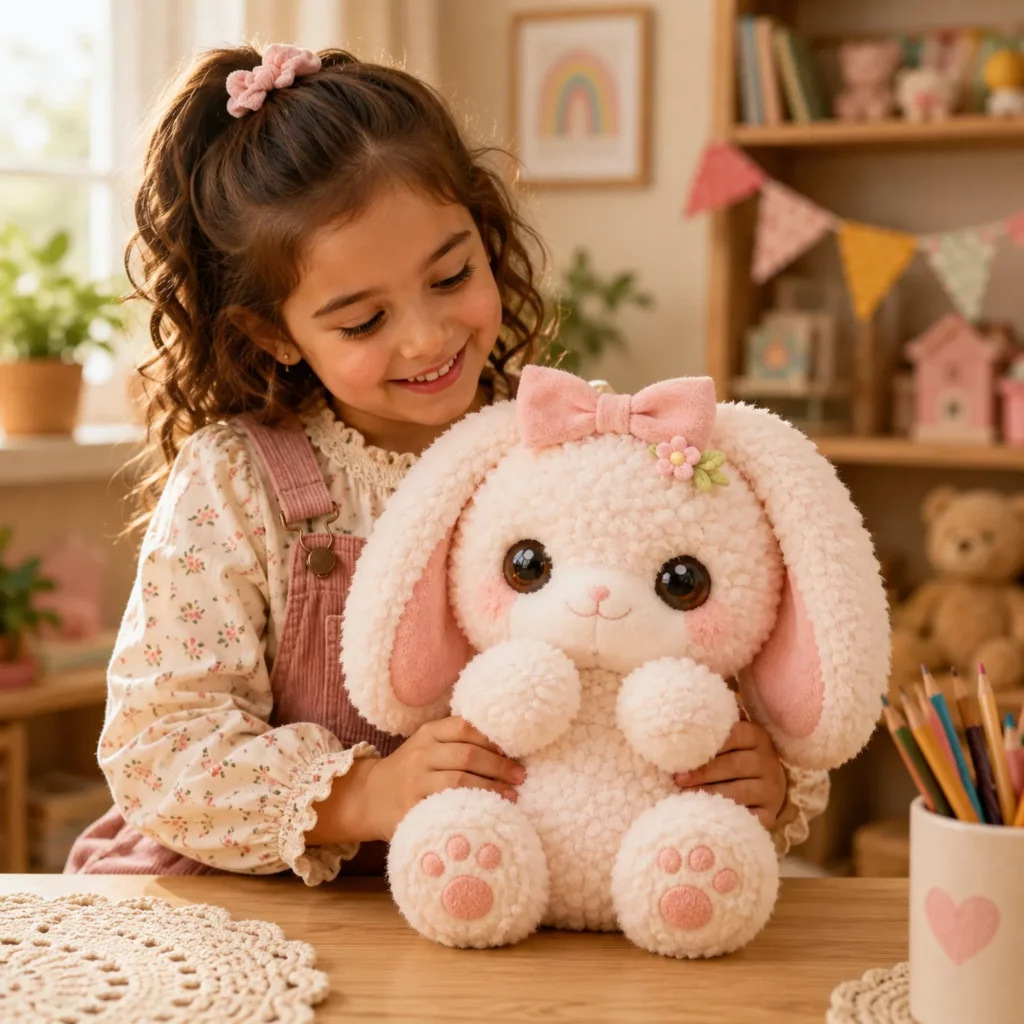
If you’ve ever wanted to make a crochet plush that looks like a cuddly “keepsake toy,” a fluffy bunny is one of the most rewarding projects you can choose. It’s timeless, giftable, and instantly charming—especially when you add those signature details that make a bunny feel extra special: long floppy ears, soft rounded cheeks, and little paw pads that make people go “aww” every time they pick it up.
Explore more beginner amigurumi crochet patterns in our pattern library.
This crochet pattern is designed to help you create a plush bunny with a super soft, fluffy texture while still keeping the construction beginner-friendly. The shaping is based on simple amigurumi building blocks (rounds of single crochet with increases and decreases), and the cuteness comes from smart assembly choices—like how you place the eyes, how you stuff the body, and how you angle the ears.
You’ll also learn practical techniques that matter a lot when working with plush or fuzzy yarn: how to keep stitch counts consistent even when stitches are harder to see, how to avoid lumps, and how to make the face look symmetrical. By the end, you’ll have a bunny you can display, gift, or cuddle—plus a pattern you can reuse to make a whole collection in different colors and sizes.
Detailed Description of the Crochet Pattern#
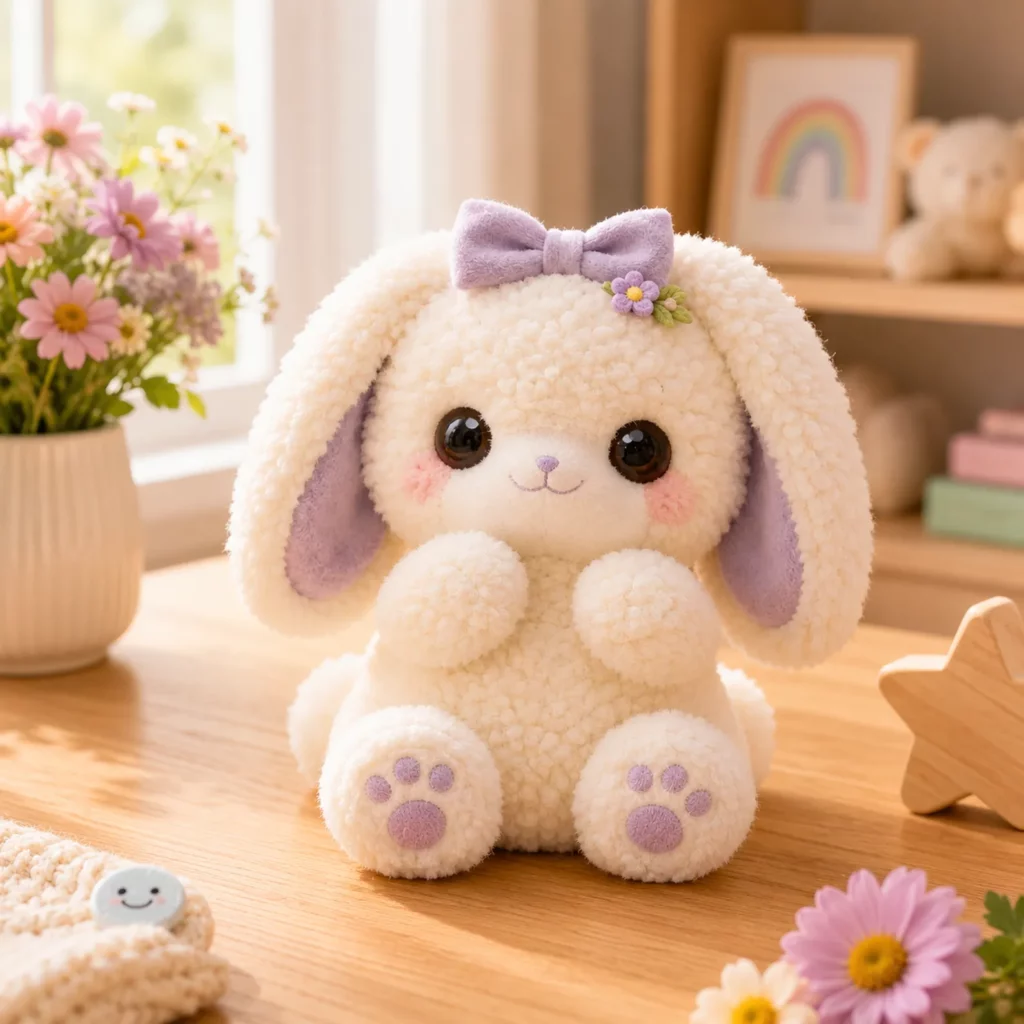
This is a seated plush bunny amigurumi with a round head, compact body, small arms, chunky feet, and long floppy ears. The overall look is soft and squishy, with a minimal embroidered face and cute blush cheeks. The paws feature gentle pink pads for a sweet “kawaii” style finish.
Key components you’ll crochet:
Head: a large round sphere with a soft, centered face
Body: a plump oval that supports a seated posture
Ears: long floppy ears with a slightly flatter shape so they drape nicely
Arms: small rounded arms positioned high on the body for a cuddly pose
Feet: chunky oval feet that stabilize the bunny and show off paw pads
Paw pads: small pink circles or ovals sewn to the feet
Accessories: a bow at the top of the head and an optional tiny flower detail
Construction overview: crochet all parts, stuff firmly but softly, sew the head and limbs, then add facial embroidery and accessories last. The pattern uses a simple silhouette so it works beautifully with fluffy yarns, chenille, blanket yarn, or brushed plush yarn.
Skill Level Explanation#
Skill Level: Confident Beginner (with plush-yarn tips included)
You’ll be comfortable with this easy crochet pattern if you can do:
Single crochet (sc)
Increase (inc) and decrease (dec)
Working in continuous rounds (spiral)
Basic sewing and weaving in ends
Skills you’ll learn or practice:
Invisible decrease for smoother shaping
Safe and symmetrical placement of eyes and face details
Stuffing for a rounded, professional finish
How to crochet with plush yarn when stitches are harder to see
How to add paw pad appliqués neatly
This project is very friendly for crochet for beginners who want to try amigurumi, especially if you follow the stitch-count checkpoints in each section.
Materials Needed#
Yarn
Plush yarn gives the bunny its signature soft, fluffy look. Choose one of these options:
Super bulky chenille/blanket yarn (Category 6) for a bigger plush
Bulky plush yarn (Category 5) for a medium plush
Worsted (Category 4) held with a strand of eyelash yarn for a fuzzy effect (more advanced)
Suggested colors:
Main bunny: white, cream, pale pink, light gray, or lavender
Inner ear (optional): soft pink
Paw pads: light pink
Nose and mouth: embroidery floss in light brown, pink, or black
Bow and flower: pastel pink, blush, or any accent color
Yarn selection tips (important for plush yarn):
Pick a yarn that feels soft but still holds shape when stuffed
If your yarn is extremely fuzzy, use a stitch marker every round and count carefully
Use the same yarn brand/weight for all main pieces so everything fits together
Hook
Use a hook size that creates tight stitches (plush yarn needs firm tension to prevent gaps).
For Category 6 plush: 6.0–7.0 mm (often smaller than the label recommends)
For Category 5 plush: 5.0–6.0 mm
For worsted: 3.0–4.0 mm
If you can see stuffing through stitches, go down one hook size.
Notions
Stitch markers (highly recommended)
Yarn needle
Scissors
Fiberfill stuffing
Safety eyes (14–20 mm depending on size) or embroidered eyes for baby-safe version
Embroidery floss (for nose and mouth)
Optional: blush, pastel chalk, or fabric-safe marker for cheeks
Optional: felt circles for paw pads (only if not intended for small children)
Safety Note
If this bunny is for a baby or toddler, embroider the eyes instead of using safety eyes and sew all accessories securely. Avoid glued pieces for child-safe toys.
Stitches & Techniques Explained#
Common Abbreviations
MR = magic ring
sc = single crochet
inc = increase (2 sc in the same stitch)
dec = decrease (single crochet 2 together)
inv dec = invisible decrease
sl st = slip stitch
ch = chain
( ) = repeat
[ ] = stitch count
Working in Continuous Rounds
You’ll crochet in a spiral without joining rounds. Use a stitch marker in the first stitch of each round and move it up as you go.
Invisible Decrease (inv dec)
Insert hook into the front loop of the next stitch, then the front loop of the following stitch, yarn over and pull through, yarn over and sc. This creates a smoother finish than a standard decrease.
Plush Yarn Stitch-Counting Trick
When stitches are hard to see, use these strategies:
Feel for each stitch with your fingers
Count by locating the “post bumps” rather than the loops
Place a stitch marker every 10 stitches in big rounds
Write down your counts and check them at the end of each round
If you lose your place, stop and count before continuing
Stuffing for a Smooth Finish
Add small pieces of fiberfill at a time. Push stuffing into the edges first, then fill the center. Overstuffing creates lumps; understuffing makes the bunny sag.
Step-by-Step Instructions#
Finished Size
Size depends on yarn. As a guide:
Category 6 plush: 10–14 inches (25–35 cm) seated
Category 5 plush: 8–12 inches (20–30 cm) seated
Worsted: 6–9 inches (15–23 cm) seated
Notes Before You Start
Work in continuous rounds unless stated
Use a stitch marker
Count your stitches every round
Stuff as you go, especially the head and body
Leave long tails for sewing on all parts
Color Key (optional)
A = main bunny color (white/cream)
B = pink (inner ear + paw pads)
C = bow accent color
Head (A)
Round 1: 6 sc in MR [6]
Round 2: inc around [12]
Round 3: (sc, inc) around [18]
Round 4: (2 sc, inc) around [24]
Round 5: (3 sc, inc) around [30]
Round 6: (4 sc, inc) around [36]
Round 7: (5 sc, inc) around [42]
Round 8: (6 sc, inc) around [48]
Rounds 9–16: sc around [48]
Eye placement
Place safety eyes between Rounds 12–13, about 8–10 stitches apart. For a sweeter look, place them slightly lower and wider than you think. If using embroidered eyes, wait until the head is stuffed and shaped.
Round 17: (6 sc, dec) around [42]
Round 18: (5 sc, dec) around [36]
Round 19: (4 sc, dec) around [30]
Round 20: (3 sc, dec) around [24]
Begin stuffing firmly and evenly.
Round 21: (2 sc, dec) around [18]
Round 22: (sc, dec) around [12]
Round 23: dec around [6]
Fasten off and close. Weave in end.
Face Embroidery (after stuffing)
Nose: embroider a tiny triangle or rounded “V” shape centered a few rounds below the eyes
Mouth: stitch a small “Y” or soft curved smile
Optional cheek blush: lightly add pink blush circles under each eye
Body (A)
The body is a plump oval that helps the bunny sit.
Round 1: 6 sc in MR [6]
Round 2: inc around [12]
Round 3: (sc, inc) around [18]
Round 4: (2 sc, inc) around [24]
Round 5: (3 sc, inc) around [30]
Round 6: (4 sc, inc) around [36]
Round 7: (5 sc, inc) around [42]
Round 8: (6 sc, inc) around [48]
Rounds 9–13: sc around [48]
Shape down slightly
Round 14: (6 sc, dec) around [42]
Round 15: sc around [42]
Round 16: (5 sc, dec) around [36]
Round 17: sc around [36]
Stuff firmly, especially at the base. If you want extra stability, add a small pouch of pellets (sealed in fabric) at the bottom center before finishing stuffing.
Round 18: (4 sc, dec) around [30]
Round 19: (3 sc, dec) around [24]
Round 20: (2 sc, dec) around [18]
Round 21: (sc, dec) around [12]
Round 22: dec around [6]
Fasten off and close, leaving a long tail if you want to sew head directly with that tail.
Arms (Make 2, A)
Round 1: 6 sc in MR [6]
Round 2: (sc, inc) around [9]
Rounds 3–6: sc around [9]
Lightly stuff (mainly the bottom half).
Flatten the opening and sc across to close (about 4–5 sc).
Fasten off with a long tail.
Feet (Make 2, A)
These are chunky oval feet designed to show paw pads.
Round 1: 6 sc in MR [6]
Round 2: inc around [12]
Round 3: (sc, inc) around [18]
Round 4: (2 sc, inc) around [24]
Round 5: (3 sc, inc) around [30]
Rounds 6–7: sc around [30]
Round 8: sc BLO around [30] (creates the “edge” of the foot)
Rounds 9–10: sc around [30]
Stuff the toe area so the front is rounded, then keep the back slightly flatter.
Flatten opening and close with sc across (about 12–15 sc depending on your flatten).
Fasten off with a long tail.
Paw Pads (B)
Make 2 large pads and optional toe beans.
Large pad (make 2)
Round 1: 6 sc in MR [6]
Round 2: inc around [12]
Round 3: (sc, inc) around [18]
Fasten off with a long tail.
Optional toe beans (make 6–8)
Round 1: 5 sc in MR [5]
Fasten off.
Sew one large pad to the bottom/front of each foot. Add 3–4 small toe pads above it if desired. For the softest look, stitch pads on with small hidden stitches so the edges sit flat.
Ears (Make 2)
You can do a one-color ear (simple and fluffy) or a two-tone ear (extra cute). Plush yarn ears look best slightly flatter and longer.
One-color ear (A)
Round 1: 6 sc in MR [6]
Round 2: inc around [12]
Round 3: (sc, inc) around [18]
Rounds 4–10: sc around [18]
Round 11: (sc, dec) around [12]
Rounds 12–16: sc around [12]
Fasten off leaving a long tail. Do not stuff or only lightly stuff the base.
To shape: fold ear slightly lengthwise and stitch a few stitches at the base so it curves inward.
Two-tone ear (A + B)
Inner ear panel (B):
Ch 6
Row 1: sc in 2nd ch from hook and across (5 sc), ch 1, turn
Rows 2–6: sc across (5 sc), ch 1, turn
Fasten off.
Outer ear (A): crochet the one-color ear above, then sew the pink inner panel onto the front of the ear.
Bow (C)
Bow loop (make 2)
Ch 10–14 depending on size you want
Row 1: sc in 2nd ch from hook and across, ch 1, turn
Rows 2–6: sc across, ch 1, turn
Fasten off.
Pinch each rectangle in the middle and stitch to cinch.
Center wrap
Ch 6, sc back across (5 sc).
Wrap around both pinched centers and sew in place.
Attach bow near the top of the head between the ears (or slightly to one side). Add a tiny flower appliqué if you want an extra “spring bunny” feel.
Simple Flower (Optional)
Center: 6 sc in MR, sl st to join
Petals: ch 3, sl st back into next stitch repeat 5–6 times
Sew near the bow.
Assembly
- Sew head to body
Center head on top of body. Use strong stitches. Go around twice for stability, especially with plush yarn. - Attach feet
Sew feet to the lower front of the body so the bunny sits with feet visible. Angle them slightly outward. - Attach arms
Sew arms to the sides of the upper body. Position them a bit forward for a cuddly pose. - Attach ears
Pin ears first to check symmetry. Attach near the top sides of the head. For floppy ears, sew only the base so the rest hangs naturally. - Add accessories
Sew on the bow and optional flower. If you want them removable, tack them with just a few stitches instead of fully sewing around.
Common Mistakes and How to Avoid Them#
Stitches are hard to see in fluffy yarn
Use a stitch marker every round and count carefully
Add extra markers every 10 stitches in large rounds
Work in bright lighting and feel stitches with your fingers
Stuffing shows through
Use a smaller hook
Keep tension firm
Stuff gradually instead of forcing large amounts at once
Head looks lumpy
Stuff in small pieces
Push filling to edges first
Massage and reshape the head before closing
Ears look uneven
Count rows/rounds carefully
Pin both ears before sewing
Measure ear length side-by-side before attaching
Bunny won’t sit upright
Sew feet slightly more forward
Stuff the bottom of the body firmly
Add a small weighted pouch in the base (sealed pellets in fabric) for stability
Face looks off-center
Mark the centerline of the head with a stitch marker
Pin the beak/nose placement before embroidering
Step back and check symmetry before committing
Expert Tips for Better Results#
Use invisible decreases on the head for the smoothest finish
Embroider the face after stuffing so the expression matches the final shape
For extra softness, keep arms and ears lightly stuffed or unstuffed
If using safety eyes with plush yarn, install them before the head is fully closed and stuffed
To keep paw pads perfectly placed, pin them first and sew from the center outward
If you want a super “baby plush” look, place eyes slightly lower and widen the spacing by 1–2 stitches
Variations and Customization Ideas#
Mini bunny keychain: use DK yarn and a smaller hook, shorten ears and feet
Sleepy bunny: embroider closed eyes and add a tiny curved smile
Pastel bunny: cream body with pink inner ears and lavender bow
Spring bunny: add a small flower crown instead of a bow
Holiday bunny: swap bow for a scarf or tiny sweater
Bunny lovey style: crochet only the head and add a small blanket body panel
Different textures: use smooth yarn for face and plush yarn for body for extra definition (advanced but adorable)
Benefits of This Crochet Project#
A high-value crochet tutorial project that teaches core amigurumi skills
The plush texture makes it look extra professional and gift-worthy
Perfect for baby showers, birthdays, nursery decor, and Easter baskets
Customizable colors and accessories let you create many versions from one crochet pattern
Great stash-buster for accents like bows, flowers, and paw pads
Works up in manageable pieces, so it’s easy to do in short sessions
Internal Linking Suggestions#
How to Crochet a Magic Ring (Beginner Guide)
Invisible Decrease Tutorial for Amigurumi
Best Yarn for Amigurumi and Plush Crochet Toys
How to Stuff Amigurumi Smoothly (No Lumps!)
Safety Eyes vs Embroidered Eyes: What’s Best for Toys?
Easy Crochet Bow Pattern for Amigurumi Accessories
Beginner Guide to Sewing Amigurumi Parts Neatly
FAQ#
Is this suitable for beginners?
Yes. This is an easy crochet pattern if you know single crochet, increases, and decreases. Plush yarn makes stitch visibility harder, but the counting tips and stitch markers make it manageable.
What yarn is best for a fluffy bunny?
Chenille or blanket yarn creates the softest plush look. If you want sharper stitch definition, use cotton or acrylic, or use a smooth yarn with a strand of eyelash yarn for a fuzzy effect.
What size safety eyes should I use?
For super bulky plush yarn, 16–20 mm often looks best. For bulky yarn, 14–16 mm is common. For smaller worsted versions, 10–12 mm works well. If making for babies, embroider eyes instead.
How do I make it baby-safe?
Use embroidered eyes, skip small detachable accessories, and sew everything very securely. Avoid glue. Make sure all ends are woven in and stitched down tightly.
Why does my bunny look lopsided?
This usually comes from missed stitch counts or uneven tension. Use a stitch marker, count each round, and try to keep your tension consistent. Also check stuffing distribution before closing.
How do I keep the bunny sitting upright?
Stuff the base firmly and sew the feet slightly forward. If you want extra stability, add a small weighted pouch inside the bottom of the body.
Can I make the ears stand up instead of flopping?
Yes. Make the ears shorter and slightly wider, and lightly stuff them. You can also stitch a small “crease” at the base to help them hold shape.
Conclusion#
A fluffy bunny plush is one of those crochet projects that feels comforting to make and incredibly satisfying to finish. The simple amigurumi shaping keeps the build beginner-friendly, while the long ears, pink paw pads, and sweet bow turn it into a polished, gift-ready keepsake.
If you tell me what yarn weight you’re using (blanket/chenille, bulky, or worsted) and your hook size, I can recommend the best safety-eye size and help you scale the stitch counts so your bunny turns out exactly the size you want.


