


Introduction#
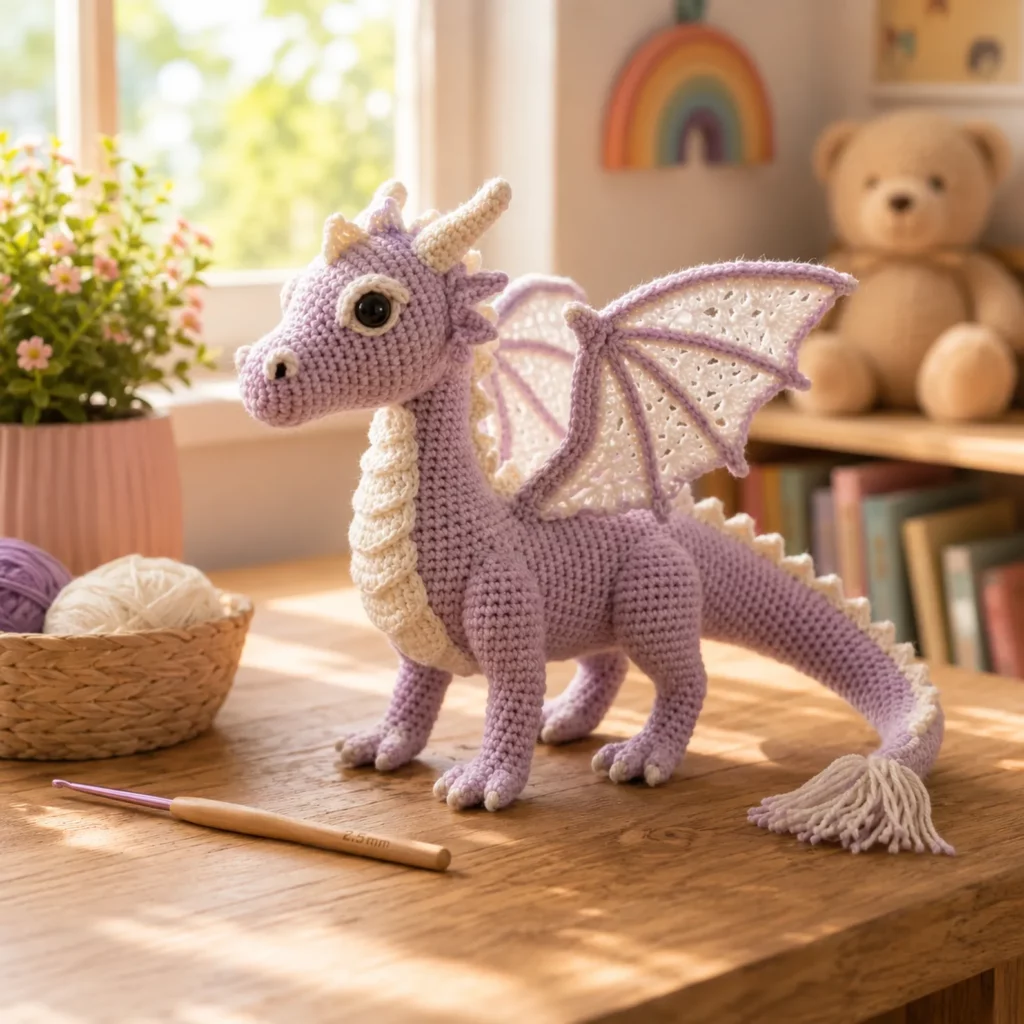
Some crochet projects are cute. Some are practical. And then there are the “statement makes” that stop people in their tracks—this fantasy dragon is absolutely one of those. With a proud little stance, sculpted legs, a long sweeping tail, and delicate lace-style wings, it looks like a collectible plush you’d find in a specialty shop. But the best part is that it’s built from approachable shapes: tubes, ovals, and simple increases and decreases—plus a few special details that make it feel truly magical.
Explore more beginner amigurumi crochet patterns in our pattern library.
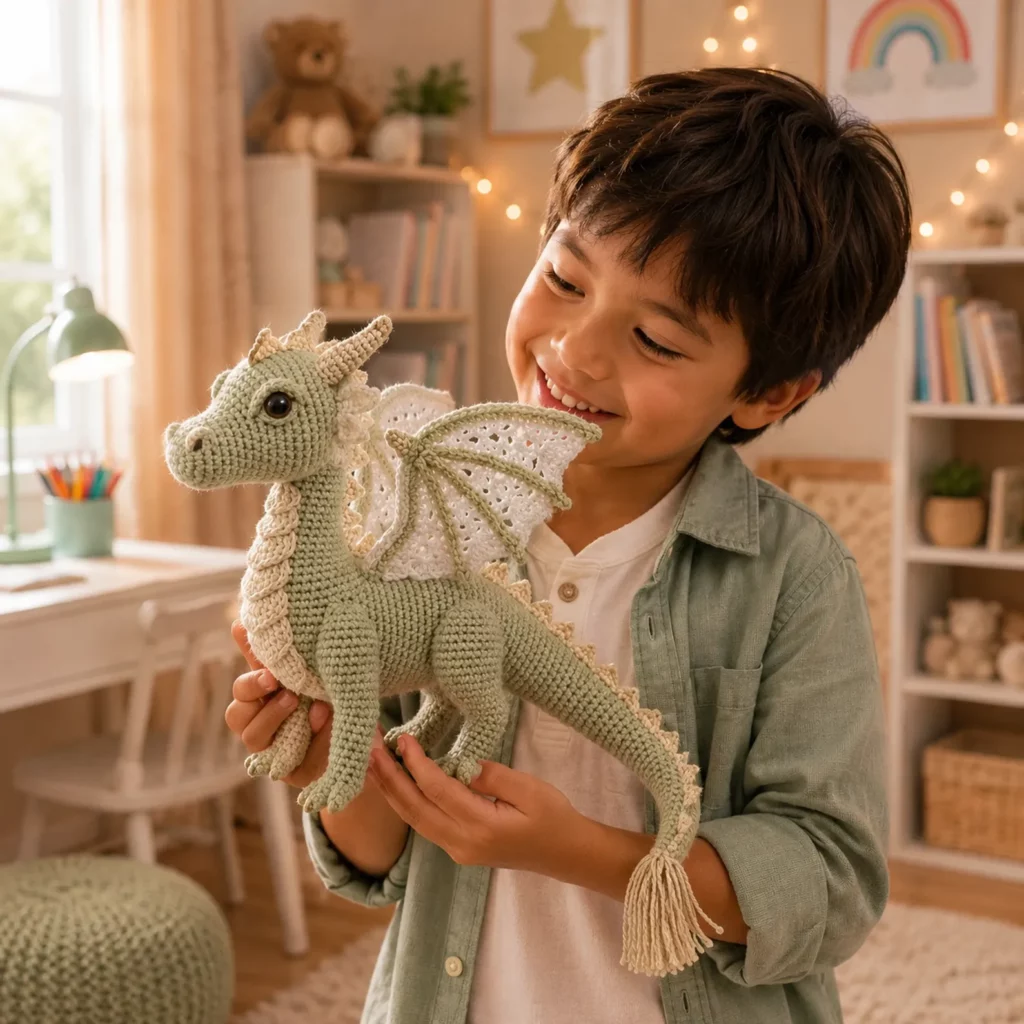
This crochet pattern is written as a full crochet tutorial so you can confidently create a dragon that feels polished and display-worthy. You’ll learn how to shape a strong body that stands, how to build a curved neck and expressive head, how to add a line of spines for that classic dragon silhouette, and how to make wings that look airy and elegant without being hard to crochet. You can keep it all in one color for an icy “snow dragon” vibe, or switch to bold shades for a more traditional fantasy look.
If you’ve been wanting a crochet pattern that feels like a real achievement (and makes an amazing gift), this is it.
Detailed Description of the Crochet Pattern#
This dragon amigurumi is a four-legged plush with a slightly arched back, a long tail, and upright wings. The design balances realism and cuteness: the head is friendly, the eyes are large, and the body is sturdy and well-proportioned.
Key features you’ll recreate
A smooth, shaped head with a defined snout
A long neck that curves naturally into the body
Four legs with slightly wider feet for stability
A long tail that tapers and ends with a tassel or tuft
A line of back spines from head to tail for a dragon silhouette
Lace-style wings with visible “wing bones” and openwork panels
Optional chest texture to give the front a scaled/armored look
Construction overview
The dragon is crocheted in separate components, then assembled carefully for balance and symmetry. The wings are made separately and attached after the body is complete, which makes placement easier and keeps them crisp.
How the wings are made
The wings use a frame-and-panel method: you crochet a wing outline (the “bones”), then fill the spaces with openwork stitches to mimic a delicate wing membrane. It looks fancy, but it’s built from simple chains and double crochets.
Skill Level Explanation#
Skill Level: Intermediate Beginner to Intermediate
Great for you if you’re comfortable with
Magic ring
Single crochet (sc)
Increases and decreases
Working in continuous rounds
Basic sewing/assembly
You’ll also practice
Shaping long pieces (neck and tail) so they don’t twist
Attaching legs so the dragon stands evenly
Making decorative spines that look consistent
Working an openwork wing panel (chains + dc)
Reinforcing join points for a sturdy plush
This is not difficult because of complicated stitches. It’s detailed because it has multiple parts and a few finishing techniques that make the final dragon look professional.
Materials Needed#
Yarn
This dragon looks best in a smooth yarn with good stitch definition.
Recommended yarn weights
DK (Category 3) for a smaller dragon
Worsted (Category 4) for a medium dragon
Fiber suggestions
Cotton for crisp stitches and structured wings
Acrylic for a softer plush feel
Cotton blend for the best of both
Color palette ideas
Snow dragon: white or cream with matching wings
Forest dragon: moss green body, lighter wings, tan horns
Fire dragon: red body, charcoal spines, orange/yellow wing details
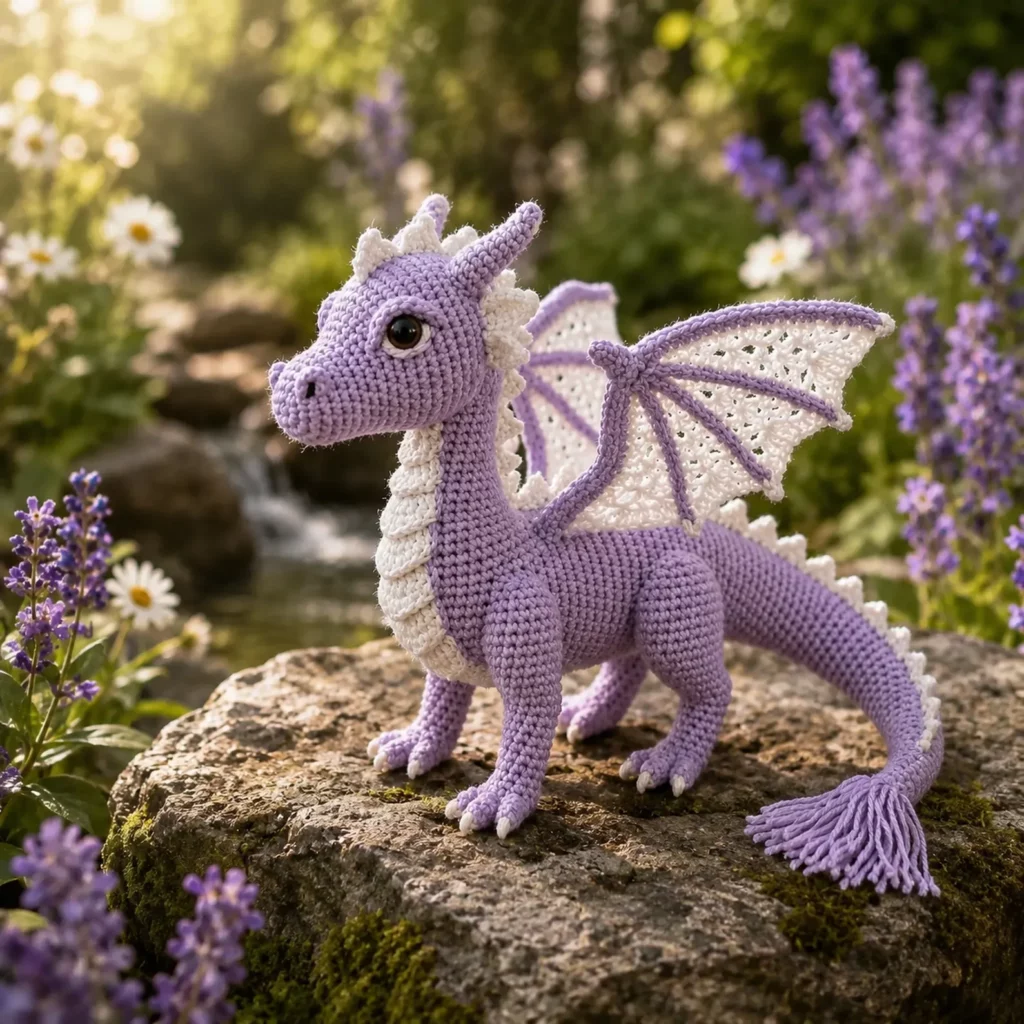
Pastel dragon: lavender body, mint wings, pink spines
Yardage estimate (medium dragon)
Main color: 300–500 yards (275–460 m)
Wing contrast (optional): 50–120 yards (46–110 m)
Small amounts for horns/spines/claws
Hook
Use a smaller hook than the yarn label suggests for a tight amigurumi fabric.
DK: 2.75–3.25 mm
Worsted: 3.0–4.0 mm
Notions
Stitch marker
Tapestry needle
Scissors
Fiberfill stuffing
Safety eyes (10–14 mm) or embroidery thread for eyes
Optional: pipe cleaners or floral wire for gentle pose support (not for small children)
Optional: poly pellets in a fabric pouch for weight in the body base
Optional: stitch markers or pins for assembly alignment
Stitches & Techniques Explained#
Abbreviations
MR = magic ring
ch = chain
sl st = slip stitch
sc = single crochet
hdc = half double crochet
dc = double crochet
inc = increase (2 sc in same stitch)
dec = decrease (use invisible decrease)
BLO = back loop only
FLO = front loop only
sp = space
( ) repeat
[ ] stitch count
Invisible decrease
Insert hook into front loop of next stitch, then front loop of following stitch, yarn over, pull through, yarn over, pull through two. This keeps shaping smooth and neat.
Turning a round piece into a 3D body
Using one BLO round creates a ridge that helps the piece “turn upward” (useful for feet and sometimes for wing frames).
Making consistent spines
Dragon spines look best when they are repeated evenly. You can create them as tiny triangles or as chained picots stitched along the back. Both methods work; the triangle method is sturdier.
Lace wing basics
A lace wing is usually
A firm outer edge (wing bones)
Chain spaces that create “membranes”
A final edging to sharpen the shape
Step-by-Step Instructions#
Finished size
With worsted yarn and a 3.5 mm hook, expect about 10–14 inches (25–36 cm) from nose to tail tip depending on tail length and stance.
Notes before you start
Work in continuous rounds unless stated
Use a stitch marker
Stuff firmly but don’t overstretch stitches
Pin all parts before sewing for best balance
Color Key
A = Main body color
B = Wing accent color (optional)
C = Horn/spine/claw accent (optional)
Head (A)#
Round 1: 6 sc in MR [6]
Round 2: inc around [12]
Round 3: (sc, inc) around [18]
Round 4: (2 sc, inc) around [24]
Round 5: (3 sc, inc) around [30]
Round 6: (4 sc, inc) around [36]
Rounds 7–10: sc around [36]
Eye placement
Place eyes between Rounds 8–9, about 7–9 stitches apart depending on size. Slightly forward placement gives a curious, friendly look.
Snout shaping
Round 11: (4 sc, dec) around [30]
Round 12: sc around [30]
Round 13: (3 sc, dec) around [24]
Round 14: sc around [24]
Stuff the head firmly, shaping the snout slightly forward.
Round 15: (2 sc, dec) around [18]
Round 16: (sc, dec) around [12]
Round 17: dec around [6]
Fasten off and close.
Optional nostrils
Add two tiny embroidery stitches on the snout.
Neck (A)#
Round 1: 6 sc in MR [6]
Round 2: (sc, inc) around [9]
Rounds 3–6: sc around [9]
Round 7: (2 sc, inc) around [12]
Rounds 8–18: sc around [12]
Curve support option
Stuff lightly and add hidden anchor stitches during assembly, or insert a pipe cleaner if you want a poseable neck (skip for kids).
Fasten off with a long tail for sewing.
Body (A)#
Round 1: 6 sc in MR [6]
Round 2: inc around [12]
Round 3: (sc, inc) around [18]
Round 4: (2 sc, inc) around [24]
Round 5: (3 sc, inc) around [30]
Round 6: (4 sc, inc) around [36]
Round 7: (5 sc, inc) around [42]
Rounds 8–12: sc around [42]
Create a slightly broader belly
Round 13: (6 sc, inc) around [48]
Rounds 14–16: sc around [48]
Shape toward the back
Round 17: (6 sc, dec) around [42]
Round 18: sc around [42]
Round 19: (5 sc, dec) around [36]
Round 20: sc around [36]
Stuff firmly. Add a small weight pouch at the base if you want the dragon to stand more easily.
Round 21: (4 sc, dec) around [30]
Round 22: sc around [30]
Fasten off leaving a long tail. Do not close fully if you want to attach tail directly into an opening.
Tail (A)#
Round 1: 6 sc in MR [6]
Rounds 2–8: sc around [6]
Round 9: (sc, dec) around [4]
Rounds 10–24: sc around [4] (or until desired length)
Fasten off leaving tail for sewing. Stuff lightly near the base only, leaving the tip softer.
Tail tuft option
Cut strands of yarn, fold into a tassel, and attach at the tail tip.
Legs (Make 4, A)#
Feet base
Round 1: 6 sc in MR [6]
Round 2: inc around [12]
Round 3: (sc, inc) around [18]
Round 4: sc around [18]
Round 5: sc in BLO around [18] (creates a foot edge)
Rounds 6–10: sc around [18]
Round 11: (4 sc, dec) around [15]
Rounds 12–14: sc around [15]
Stuff firmly. Flatten the top slightly.
Fasten off with long tail for sewing.
Claw option (C)
Add tiny black or darker stitches at the toe tips, or embroider claws with thread.
Horns (Make 2, C or A)#
Round 1: 4 sc in MR [4]
Round 2: sc around [4]
Round 3: (sc, inc) around [6]
Round 4: sc around [6]
Fasten off with a tail.
Sew on top of head behind the brow line.
Back Spines (C or A)#
Option A: Triangle spines (sturdier)
Make 10–20 depending on size.
For each spine
Ch 4
Row 1: sc in 2nd ch, hdc in next, dc in next
Fasten off with tail.
Sew in a line from the top of head down the neck, along the spine, and continuing down the tail.
Option B: Picot ridge (faster)
Surface crochet along the back: (sl st, ch 3, sl st in first ch) repeat, anchoring into the body stitches.
Wings (Make 2, A with optional B)#
These wings use a frame + lace fill.
Wing frame
Ch 18
Row 1: sc in 2nd ch and across (17), ch 1, turn
Row 2: sc across (17), ch 1, turn
Row 3: sc2tog, sc 13, sc2tog (15), ch 1, turn
Row 4: sc across (15), ch 1, turn
Row 5: sc2tog, sc 11, sc2tog (13), ch 1, turn
Row 6: sc across (13), ch 1, turn
Fasten off.
Wing bones (raised ribs)
Attach yarn along the wing and create “bones” by surface slip stitching lines from base toward outer edge (3–4 lines). This gives the wing that structured look.
Lace fill
Between ribs, create openwork using chains and dc. A simple approach
Attach yarn at a rib line
Ch 3, dc into next open area, ch 2, dc into next open area
Repeat in a fan-like pattern so the holes form a wing membrane look
Finish with a sc edging around the wing for firmness
If you want the laciest look
Use ch 3 spaces instead of ch 2.
Assembly#
Attach neck to head
Sew the neck to the base of the head. Use tight stitches and go around twice for strength.
Attach head/neck to body
Position the neck slightly forward so the dragon looks alert. Sew securely. Add extra stitches at the back of the neck to prevent wobble.
Attach tail
Sew tail to the back of the body. If you left an opening, stitch tail base into that opening for a smoother join.
Attach legs
Pin legs first. A stable stance usually has
Front legs slightly forward
Back legs slightly back
Check that all four feet touch the table before sewing permanently.
Attach wings
Pin wings on the upper back/shoulder area. Angle slightly backward. Sew wing bases firmly. Add a few hidden stitches into the back to keep them upright.
Add horns and spines
Sew horns and then attach spines evenly. The spines create the final dragon silhouette, so take your time spacing them.
Final shaping
Gently squeeze and shape the body. Adjust stuffing if needed. Make sure the dragon stands evenly.
Common Mistakes and How to Avoid Them#
Dragon won’t stand
Stuff the body base more firmly
Add a small weight pouch
Reposition legs before sewing
Flatten feet slightly by shaping stuffing
Neck flops forward
Stuff neck lightly but evenly
Add anchor stitches from neck to upper body
Use reinforcement only for display pieces
Wings droop
Use a firmer edging round
Sew more of the wing base to the body
Add a hidden tack stitch from wing tip to back
Spines look uneven
Count and mark positions with pins
Start at head and work down, spacing evenly
Use the same spine size throughout
Holes show stuffing
Use a smaller hook
Tighten tension
Avoid overstuffing
Expert Tips for Better Results#
Use cotton for crisp wings and spines
Weave ends as you go to keep the inside clean
Pin everything before sewing, then step back and check symmetry
For a more realistic dragon, make back legs slightly thicker than front legs
Add subtle shading by using a slightly darker yarn for spines and horns
Variations and Customization Ideas#
Mini dragon keychain: use DK yarn and shorten legs and tail
Baby dragon: make smaller wings and fewer spines, add blush cheeks
Elemental dragons: add flame tail in orange/yellow, or icy spines in pale blue
Add a crown or tiny scarf for a cute character look
Change wings: make solid wings for a “bat wing” look, or extra lacy wings for a fairy dragon
Benefits of This Crochet Project#
A display-worthy plush with big “wow” factor
Teaches shaping and assembly skills you can use in other amigurumi
Customizable colors and details
Great gift for fantasy lovers
Mostly simple stitches with high visual payoff
Perfect for building confidence beyond basic plushies
Internal Linking Suggestions#
How to Crochet Invisible Decreases for Smooth Amigurumi
How to Sew Amigurumi Parts Neatly
Easy Crochet Wing Patterns and Edging Ideas
How to Add Weight to Amigurumi for Standing Plushies
Beginner-Friendly Fantasy Amigurumi Collection
FAQ Section#
Is this crochet pattern suitable for beginners?
Confident beginners can make it. The stitches are basic, but the number of parts and the wing details require patience.
What yarn is best for a dragon amigurumi?
Cotton gives the cleanest stitch definition and the crispest wings. Acrylic is softer and more plush, but can be slightly stretchier.
How do I make the dragon stand up?
Stuff the base firmly, shape the feet flat, and position legs evenly. Adding a small weight pouch inside the body base helps a lot.
Do I need wire in the neck or wings?
No. You can hold the neck curve with anchor stitches. Wire is optional for display only and not recommended for children’s toys.
How do I make the wings more lace-like?
Use larger chain spaces (ch 3) in the wing fill, and add more rib lines so the openwork panels look intentional.
Can I make it bigger or smaller?
Yes. Change yarn weight and hook size. The same stitch counts will scale the dragon naturally.
Conclusion#
A fantasy dragon amigurumi is one of the most rewarding crochet pattern projects because it combines simple shapes with magical details that make it feel truly special. With a sturdy body, a graceful neck, layered spines, and lace wings, you’ll end up with a plush that looks collectible and gift-worthy.
If you tell me your yarn weight and hook size, I can suggest the best safety-eye size and recommend the exact number of spine pieces and wing fill rows to match the size you’re making.


