


Introduction#
A granny square tote bag is one of those crochet projects that checks every box: it’s fun to make, easy to customize, and genuinely useful once it’s finished. You get the satisfying rhythm of crocheting small motifs, the creative freedom of mixing colors, and the reward of turning your squares into a real everyday bag you can take to the market, the beach, or just out and about.
Explore more beginner granny squares crochet patterns in our pattern library.
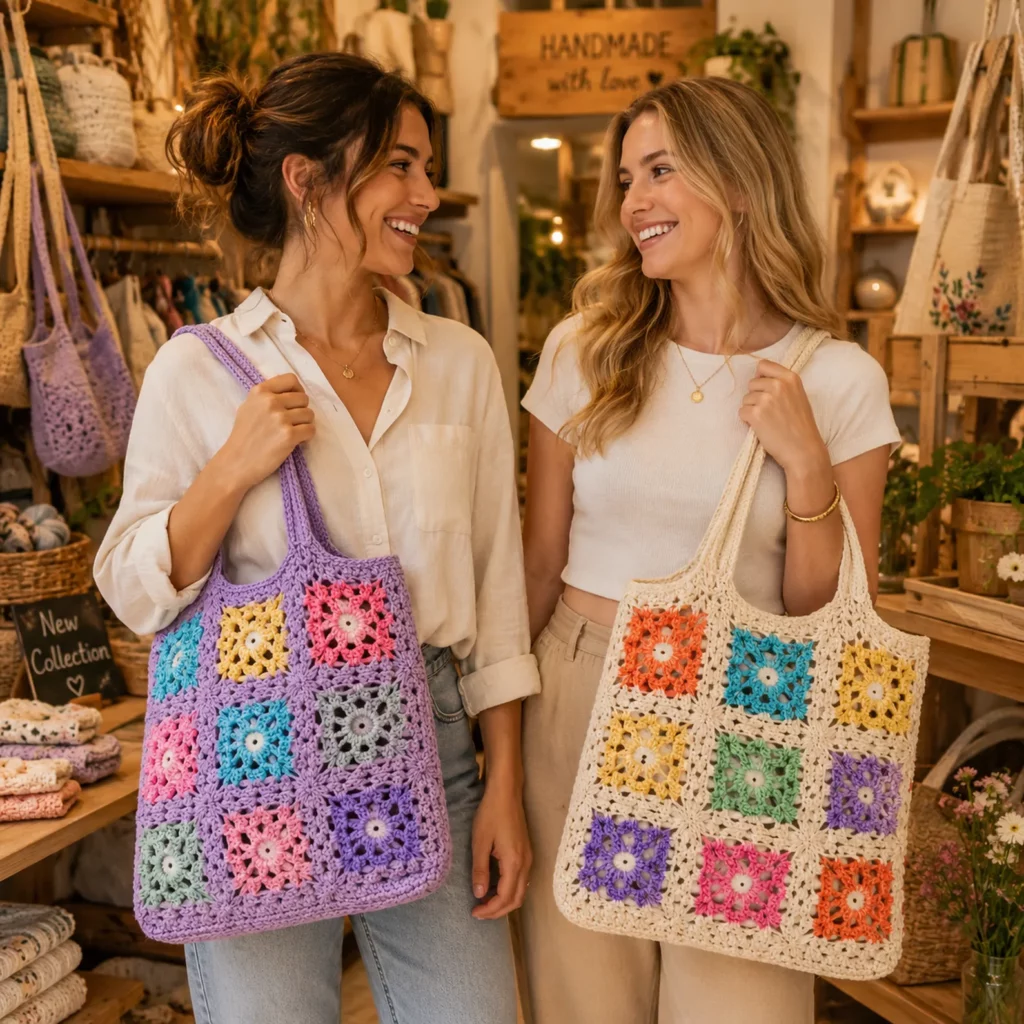
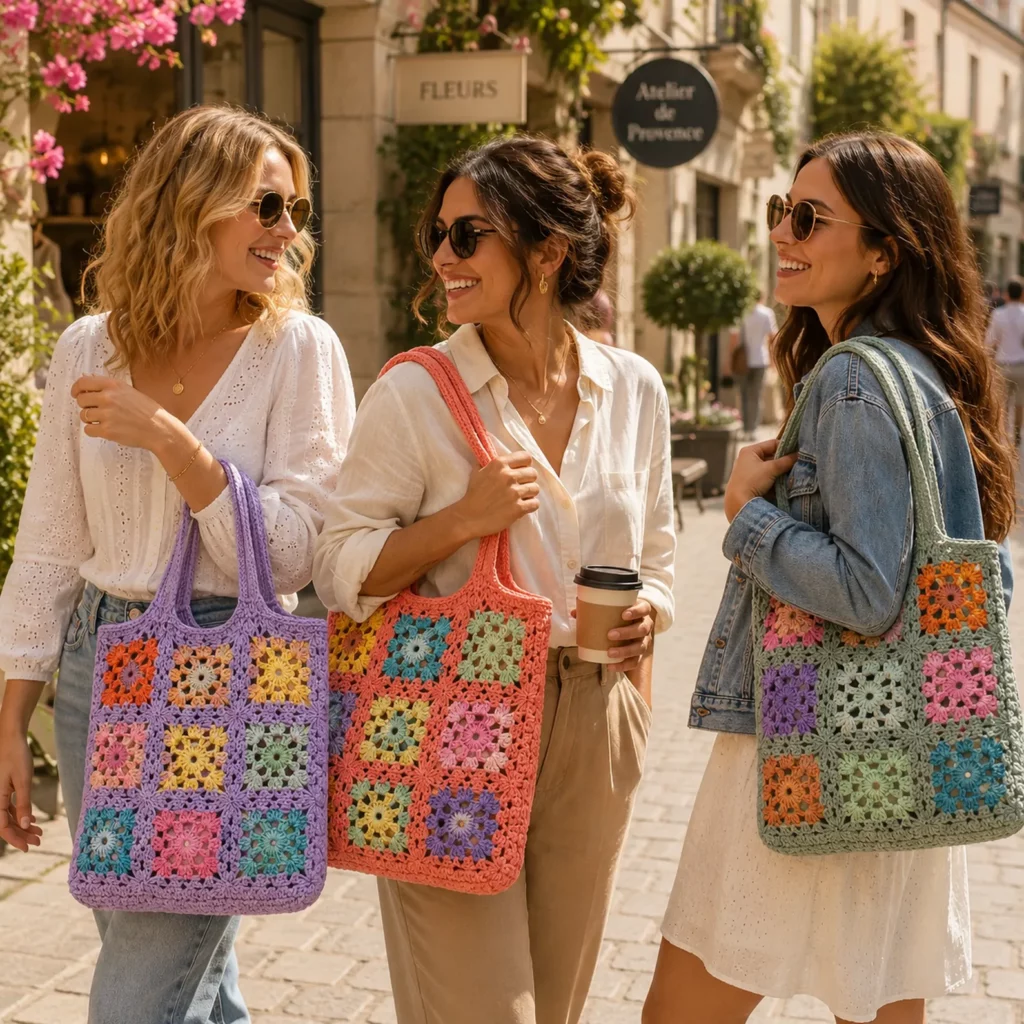
This crochet pattern is built around a patchwork layout with bright floral granny squares framed by a neutral background. The bag has a structured rectangular shape, a sturdy top edge, and long shoulder straps that feel comfortable and hold weight without stretching too much. The motifs give it personality, while the neutral joins keep it looking polished and “intentional,” not messy.
In this crochet tutorial, you’ll learn how to keep all your squares the same size, how to plan the front and back panels, how to join them neatly, and how to finish the bag so it looks professional. Even if you’re a crochet for beginners maker, this is a fantastic first bag project because it’s modular and forgiving.
Detailed Description of the Crochet Pattern#
This tote is made from multiple granny squares joined into a flat front panel and a flat back panel. The sides and bottom are created by either adding extra squares or joining with a simple strip, depending on how wide you want the bag. The top edge is reinforced with solid rounds so the bag doesn’t stretch out. The straps are long, narrow, and dense so they feel strong and wearable.
Design features you’ll recreate
A patchwork grid of granny squares with a flower style center
A neutral join that frames each motif
A rectangular tote shape with a flat bottom
A sturdy top border that keeps the opening neat
Long shoulder straps that are comfortable and strong
Optional lining for extra strength and to keep small items from slipping through
What the bag looks like finished
A soft structured tote with colorful square “windows” on the front and back, and a clean neutral frame around them. The open lace in the motifs gives it a light, summer feel, but the neutral border and top rounds add the structure you want in a real tote.
Skill Level Explanation#
Skill Level: Confident Beginner
You’ll do great if you already know
How to chain, slip stitch, single crochet, and double crochet
How to count stitches and repeat a pattern
How to weave in ends
How to do basic seaming with a needle or slip stitch join
New skills you’ll practice
Making motif squares consistently the same size
Joining squares so seams stay straight
Building a bag shape from flat panels
Reinforcing edges and handles so the bag holds weight
Optional lining basics
This is an easy crochet pattern in stitches, and the main challenge is neat assembly, which is totally learnable.
Materials Needed#
Yarn
Best yarn for a tote
Cotton is ideal because it’s strong, washable, and doesn’t stretch as much as acrylic. A cotton blend also works well.
Recommended yarn weight
Worsted weight (Category 4) for a sturdy tote
DK (Category 3) for a lighter tote with more drape
Color plan like the sample style
Neutral main color for joining and borders (cream or natural)
Several bright accent colors for squares (coral, turquoise, yellow, mint, lavender, pink)
Yardage estimate (for an average tote about 14 in wide x 12 in tall)
Main neutral color: 350–550 yards (320–500 m)
Accent colors combined: 250–450 yards (230–410 m)
If you add a full lining and longer straps, plan toward the high end.
Hook
Worsted cotton: 4.0–5.0 mm
DK cotton: 3.5–4.0 mm
Choose a hook that gives you a firm fabric without huge holes.
Notions
Tapestry needle
Scissors
Stitch markers
Measuring tape
Optional fabric lining, needle and thread
Optional magnetic snap or button
Optional leather tag or label
Stitches & Techniques Explained#
Abbreviations
ch = chain
sl st = slip stitch
sc = single crochet
dc = double crochet
hdc = half double crochet
sp = space
( ) repeat
[ ] stitch count
Granny square basics
A classic granny square uses dc clusters separated by chain spaces. The corners are what define the square shape.
Typical corner
(3 dc, ch 2, 3 dc) in the corner space
Typical side
3 dc in each chain space along the side
Clean joins
For totes, joins matter because the bag gets handled. Two excellent methods
Whip stitch join (flat and strong)
Use a needle and stitch through outer loops for a tidy seam
Slip stitch join (slightly raised ridge)
Crochet slip stitches through both squares’ loops for a decorative join
Making handles that don’t stretch
Handles stretch when they are made with tall stitches and loose tension. For straps, use
Single crochet
Single crochet back loop only
Slip stitch reinforcement edge
Optional hidden cord inside the strap

Step-by-Step Instructions#
Choose your finished size and square count
This tote style often uses a grid of squares on the front and back. A beginner-friendly layout
Front panel: 3 squares across x 3 squares tall
Back panel: 3 squares across x 3 squares tall
That gives a medium tote size depending on your square size.
If your squares are about 4.5 inches after blocking
3 across = about 13.5 inches wide
3 tall = about 13.5 inches tall before borders
You can adjust
Make it wider: 4 squares across
Make it taller: 4 squares tall
Make it smaller: 2 across x 3 tall for a slim tote
Crochet the floral granny square motif
This square matches a flower in the center with open lace petals and a frame.
Color A: center
Color B: petals
Color C: square background (accent color)
Color N: neutral border (same neutral used for joining)
Round 1 (center)
Magic ring, ch 3, 11 dc in ring, join (12 dc)
Round 2 (build center)
Ch 1, 2 sc in each dc around, join (24 sc)
Fasten off
Round 3 (petal loops, petals color)
Join in any stitch
(Ch 4, sl st in next stitch) repeat around
You’ll have 12 loops
Fasten off
Round 4 (fill petals, petals color)
Join into any loop
In each loop work (sc, hdc, 3 dc, hdc, sc)
Sl st between loops to separate petals
Repeat around
Fasten off
Round 5 (turn into a square, background color)
Join in a space between petals
Work 3 dc clusters between petals
At four evenly spaced points, create corners with (3 dc, ch 2, 3 dc)
Join and fasten off
Round 6 (neutral border to standardize size)
Join neutral color in any corner space
In each corner work (3 dc, ch 2, 3 dc)
Along sides work 3 dc in each space between clusters
Join and fasten off
Consistency tip
Make one square fully, block it, measure it. Then make all squares with the exact same rounds and corner construction.
How many squares to make
For the 3 x 3 layout
Make 18 squares total (9 for the front, 9 for the back)
Optional sides and bottom
You can create the bag depth in two ways
Option A: Add squares for a gusset
Make 3 squares for each side (6 total)
Make 3 squares for the bottom (3 total)
This creates a “square built” tote with nice depth.
Option B: Crochet a gusset strip instead of extra squares
Use fewer squares and crochet a long strip in sc or hdc to form sides and bottom
This is easier for beginners and makes the bag more solid.
The bag in this style often looks like a flat front and back with a simple side seam depth, so Option B is a great default.
Block your squares
Blocking is the secret to a tote that looks professional.
How to block
Lightly mist squares with water
Pin corners to a consistent measurement
Let dry fully
Stack squares to confirm they match
Join squares into panels
Lay out your front panel in a 3 x 3 grid. Do the same for the back panel. Mix colors so it looks balanced.
Join method: whip stitch (recommended)
Place two squares right sides together
Stitch through outer loops along the edge
Keep tension even
Join squares into rows first, then join rows together
Repeat for the back panel.
Join front and back to form the bag body
If using a simple gusset strip (Option B)
Crochet a strip
Width: desired bag depth (usually 3–4 inches)
Length: go around sides and bottom of the panel
Simple gusset strip pattern
Ch enough to match your depth + 1 turning chain
Row 1: sc in 2nd ch and across
Row 2+: sc across, ch 1, turn
Work until strip length matches three sides of your panel (one side, bottom, other side)
Pin and sew the gusset strip to the front panel first
Then sew the gusset strip to the back panel
Leave the top open
If using extra squares for sides and bottom (Option A)
Join side squares into vertical strips
Join bottom squares into a horizontal strip
Join strips around front panel, then attach back panel
Reinforce the top edge
This step prevents stretching and makes the opening look clean.
Attach neutral yarn at a side seam
Round 1: sc evenly around the top opening
Place extra sc at corners if needed so it lies flat
Join
Round 2: sc around again
Join
Optional Round 3 for extra structure
Work a round of sl st around for a firmer edge
Crochet the handles
Two long handles attached to the inside top edge look clean and feel comfortable.
Handle pattern (dense and strong)
Ch 9
Row 1: sc in 2nd ch and across (8)
Row 2: sc BLO across (8), ch 1, turn
Repeat Row 2 until strap reaches length you want
Length guide
Short shoulder: 18–22 inches (46–56 cm)
Long shoulder: 22–26 inches (56–66 cm)
Reinforce strap
Work a sl st edging along both long sides for strength (optional but very helpful)
Make 2 handles.
Attach handles
Mark handle positions on the inside top edge
Common placement: about 3–4 inches from each side seam
Sew handle ends securely with many passes
Attach to several stitches, not just one spot, so weight spreads
Optional lining
A lining makes a granny square tote feel more durable and prevents small items from slipping out.
Simple lining method
Cut fabric the size of the inside bag panels plus seam allowance
Sew fabric into a bag shape
Insert and hand stitch along the top edge under the crochet border
Optional: add a pocket
You can also add a magnetic snap by sewing it to the lining before insertion.
Common Mistakes and How to Avoid Them#
Squares are different sizes
Block early
Count rounds and corner stitches
Use the same hook and tension
Bag looks wavy or uneven
Uneven joins cause rippling
Join in rows first, then join rows
Use stitch markers on corners while joining
Top edge stretches out
Add at least 2 sc rounds
Use cotton yarn
Avoid tall stitches at the opening
Handles stretch
Use sc or sc BLO straps
Reinforce with slip stitch edging
Attach handles with wide sewing area
Items fall through holes
Add lining
Or crochet a solid inner panel and stitch inside
Or use a smaller hook for tighter squares
Expert Tips for Better Results#
Use one neutral color for all joins to unify patchwork
Weave in ends as you finish each square so the inside stays neat
Add a base insert like plastic canvas or cut felt for a flatter bottom
If you carry heavy items, use a tighter stitch for the gusset and top edge
For a cleaner look, seam with mattress stitch so joins lie flatter
Variations and Customization Ideas#
Make it a market bag by using more open lace squares and skipping lining
Make it a beach tote by increasing size to 4 x 4 squares per panel
Add a zip top by sewing a zipper to the lining and stitching lining to bag
Add a drawstring channel by crocheting a round with ch spaces near the top edge
Change the motif style: daisies, sunburst, solid granny squares, or puff flower squares
Use a single color palette (all pastels or all brights) for a themed look
Benefits of This Crochet Project#
Portable and fun because it’s made from small squares
Great stash buster for leftover cotton
Easy to customize size and color
Makes a practical everyday tote
Teaches joining, finishing, and strap construction
Looks boutique with minimal shaping
Internal Linking Suggestions#
How to Crochet a Granny Square for Beginners
How to Join Granny Squares Neatly
Best Yarn for Crochet Bags
How to Make Crochet Straps That Don’t Stretch
Easy Crochet Bag Lining Tutorial
Free Crochet Market Bag Patterns
FAQ Section#
How many granny squares do I need for a tote bag?
A common medium tote uses 18 squares for the front and back panels (3 x 3 each). Add more squares for a bigger bag or for side gussets.
What yarn is best for a crochet tote bag?
Cotton or cotton blend yarn is best because it’s durable and stretches less than acrylic.
Do I need to line a granny square bag?
Lining is optional, but it makes the bag stronger and prevents small items from slipping through the holes.
How do I keep my bag handles from stretching?
Use single crochet straps, reinforce edges, and sew the handles onto a wide area of the bag opening to spread the weight.
How do I make the bag bigger or smaller?
Adjust the number of squares across and down. You can also add more border rounds around each square to increase finished square size.
What joining method is best for a tote?
Whip stitch and mattress stitch are strong and comfortable. Slip stitch joins are also strong but create a raised ridge.
Conclusion#
A granny square tote bag is a classic crochet pattern because it’s creative, customizable, and actually useful. With bright motif squares, clean neutral joins, and sturdy straps, you’ll end up with a bag that feels like a real accessory, not just a craft project. Take your time making consistent squares, block before joining, and reinforce the top edge and handles, and your tote will hold up beautifully.
If you tell me your square size after blocking and the bag width you want, I can calculate the exact square grid and gusset depth so your tote comes out perfectly proportioned.


