


Introduction#
If you’ve ever wanted to crochet something a little different—still cute, still squishy, but with a fun “creepy-cute” vibe—this spider amigurumi is the perfect project. The rounded body, thick bendy legs, and tiny accent “spots” give it loads of personality without making the pattern complicated.
Explore more beginner amigurumi crochet patterns in our pattern library.
This crochet pattern is built from simple shapes you’ll recognize from classic amigurumi: a sphere for the body, tubes for the legs, and easy add-ons for details. That means it’s approachable for crochet for beginners, but still interesting enough to keep experienced crocheters entertained. Whether you make it as a playful desk buddy, a Halloween decoration, or a quirky handmade gift, this little spider works up surprisingly fast.
Detailed Description of the Crochet Pattern#
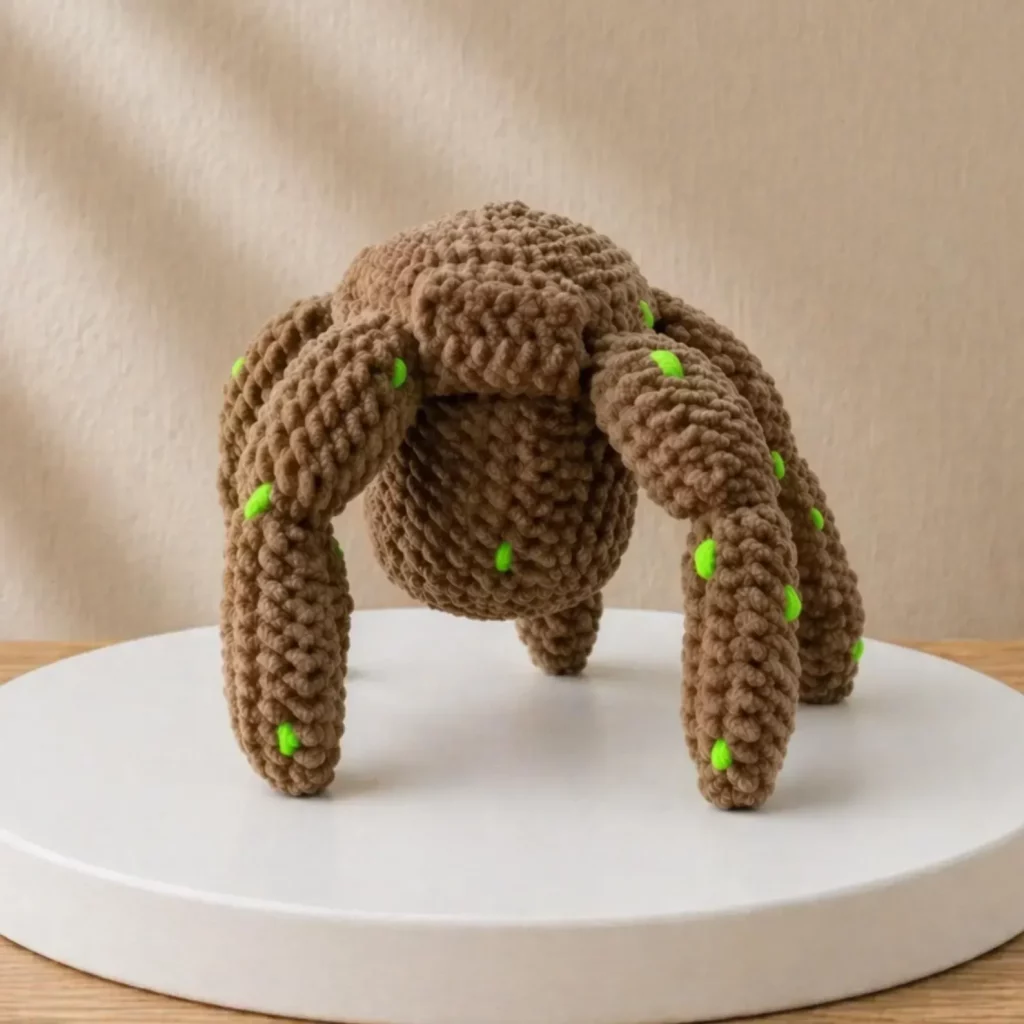
This amigurumi spider has a bold, modern look with these key features:
- One main rounded body (big and plush, like a little “bubble”)
- Thick, segmented-looking legs that curve naturally for a standing pose
- Minimalist face area (you can keep it simple or add eyes)
- Bright accent stitches along the legs and body that look like tiny spots
- Stable stance thanks to the leg placement and slight forward curve
The texture looks like standard single crochet fabric, but because the legs are chunky and slightly curved, the finished spider stands on its own and looks sculptural—even without extra details.
Skill Level Explanation#
This is an easy crochet pattern for confident beginners.
You’ll need to know:
- how to crochet in the round (magic ring or chain-2 start)
- single crochet, increases, and decreases
- basic seaming (stitching legs to the body)
- optional embroidery (if you add eyes or extra details)
The most “advanced” part is assembly—getting all the legs evenly placed. But don’t worry: pinning first makes it very manageable.
Materials Needed#
Yarn
Worsted weight (#4) is ideal for a medium spider, but you can scale it easily.
- Main color (MC): brown (or black, purple, orange—anything fun)
- Accent color (AC): bright green for spots/details (scrap amount)
Yarn suggestions:
- Smooth acrylic for easy stitching and washable results
- Cotton blend for crisp stitch definition
- Plush yarn for a bigger, extra cuddly spider (optional)
Hook
- Worsted yarn: 3.0–3.5 mm for tight amigurumi fabric
- Plush yarn: match yarn thickness (usually 5.5–7.0 mm)
Notions
- Fiberfill stuffing
- Stitch marker
- Yarn needle
- Scissors
- Pins (very helpful for even leg placement)
- Optional: safety eyes or embroidery thread
Finished Size
With worsted yarn and a small hook, expect about 5–7 inches across, depending on leg spread. Plush yarn can create a much larger spider.
Stitches & Techniques Explained#
Abbreviations (US terms)
- MR = magic ring
- ch = chain
- sc = single crochet
- inc = increase (2 sc in same stitch)
- dec = invisible decrease (sc2tog through front loops)
- sl st = slip stitch
- ( ) = repeat
- [ ] = stitch count
Helpful techniques
- Invisible decrease: keeps the body smooth and round.
- Stuffing balance: a firmly stuffed body holds shape, while slightly softer legs pose better.
- Pin-first assembly: pin all legs before sewing any of them, so spacing stays symmetrical.
- Accent stitches: small surface stitches in a contrast color create those bright “spots.”
Step-by-Step Instructions#
Notes: Work in continuous rounds unless stated. Use a stitch marker for the first stitch of each round. Stuff as you go.
Body (MC)
R1: MR, 6 sc [6]
R2: inc x6 [12]
R3: (sc, inc) x6 [18]
R4: (2 sc, inc) x6 [24]
R5: (3 sc, inc) x6 [30]
R6: (4 sc, inc) x6 [36]
R7: (5 sc, inc) x6 [42]
R8: (6 sc, inc) x6 [48]
R9–R13: sc around [48]
Begin closing:
R14: (6 sc, dec) x6 [42]
R15: (5 sc, dec) x6 [36]
R16: (4 sc, dec) x6 [30]
Stuff firmly.
R17: (3 sc, dec) x6 [24]
R18: (2 sc, dec) x6 [18]
R19: (sc, dec) x6 [12]
R20: dec x6 [6]
Fasten off, weave in.
Legs (make 8, MC)
These are thick tubes that curve naturally.
R1: MR, 6 sc [6]
R2: (sc, inc) x3 [9]
R3–R5: sc around [9]
R6: (2 sc, inc) x3 [12]
R7–R14: sc around [12]
To create a gentle bend (optional but recommended):
Work a few rounds in BLO:
R15–R16: sc around in BLO [12]
R17–R18: sc around [12]
Lightly stuff just the top half (optional). Leaving the ends softer helps pose the legs.
Flatten the top and close with 6 sc across. Leave a long tail for sewing.
Optional Face (choose one style)
Minimalist (like the photo vibe): skip eyes and keep it “mystery cute.”
Classic cute: add two small eyes.
Safety eye option: place 6–8 mm safety eyes between R9–R10 about 6–8 stitches apart.
Embroidered option: stitch tiny eyes with black yarn and add a small smile.
Accent Spots (AC)
Using the accent yarn, add tiny surface stitches:
- On each leg: stitch small “dash” marks spaced along the outside edge
- On the body: add a few evenly spaced dashes around the sides/front
Keep them simple—too many can look busy. The charm comes from the small pops of color.
Assembly#
Attach legs evenly
This step makes the whole spider look balanced.
- Decide which side is the “bottom” of the body (slightly flatter area).
- Arrange legs in pairs: 4 on the left, 4 on the right.
- Pin legs first before sewing:
- Place the front legs slightly forward
- Middle legs slightly outward
- Back legs slightly back for stability
Sew each leg securely with tight stitches. Reinforce the first and last legs because they take the most pressure when the spider stands.
Add accent stitches last
Once the spider is standing nicely, add the green (or contrast) dashes so you can place them where they look best.
Common Mistakes and How to Avoid Them#
- Spider won’t stand: Make sure legs are attached low enough and angled outward. Add more stuffing to the body base for balance.
- Legs look uneven: Pin all legs first, then check symmetry from the front and top before sewing.
- Body looks lumpy: Stuff in small handfuls and shape the sphere as you go.
- Accent stitches get messy: Use shorter stitches and weave ends inside the body/leg before trimming.
- Legs too stiff: Use less stuffing in the legs (or none) so they curve naturally.
Expert Tips for Better Results#
- Use invisible decreases for a smoother body.
- Mark the body into “quarters” with stitch markers to help place legs evenly.
- If you want a sturdier stance, insert a small felt circle inside the bottom before closing the body.
- For plush yarn, use extra stitch markers because stitches are harder to see.
- Add a tiny weighted pouch (poly pellets inside fabric) in the bottom for a “never tips over” spider.
Variations and Customization Ideas#
- Halloween version: black body + orange accents.
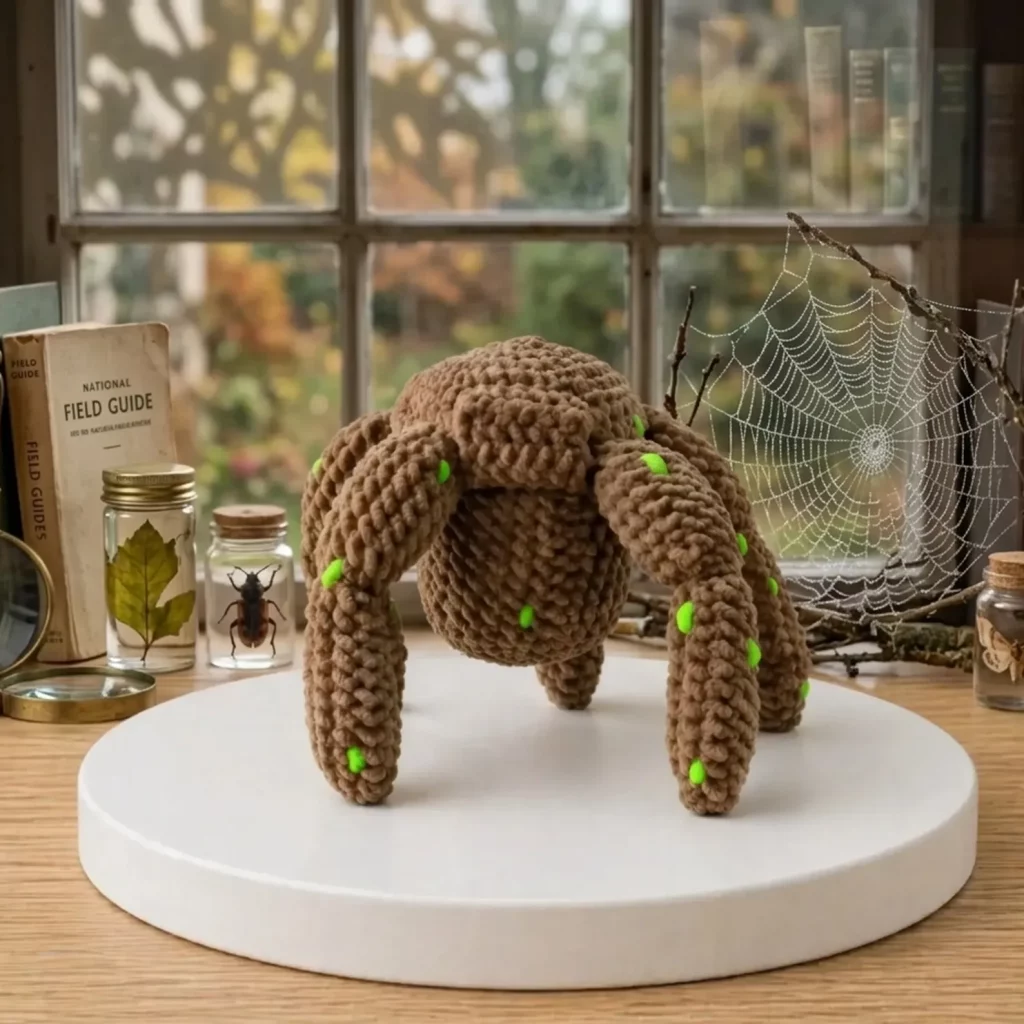
- Forest version: brown body + mossy green accents (like the photo vibe).
- Candy version: pastel purple + neon dots.
- Big fluffy spider: use blanket yarn for a jumbo plush.
- Spider keychain: make a mini with DK yarn and a smaller hook, then add a hanging loop.
- Add fangs: two tiny white triangles stitched under the face.
Benefits of This Crochet Project#
- Quick, fun, and different from typical plushies
- Great practice for amigurumi shaping and assembly
- Uses small amounts of yarn—perfect stash buster
- Customizable for seasons and gifts
- Looks impressive without complicated stitches
- A playful way to make “spooky” cute for kids and adults
Internal Linking Suggestions#
If you’re building a crochet blog, link to:
- Magic Ring Crochet Tutorial
- Invisible Decrease for Amigurumi
- How to Sew Amigurumi Parts Neatly
- Best Yarn for Crochet Toys
- Beginner Amigurumi Patterns
- Crochet Halloween Decor Ideas
FAQ Section#
Is this spider crochet pattern beginner-friendly?
Yes. The crochet itself is simple; the main focus is attaching the legs evenly.
How do I make the spider bigger or smaller?
Change yarn weight and hook size. Plush yarn makes a jumbo spider without changing stitch counts.
Do I need to stuff the legs?
Not necessarily. Light stuffing at the top helps shape, but leaving legs mostly unstuffed makes them bend nicely.
How can I make it stand up better?
Attach legs low and angled outward. Add extra stuffing or a small weight pouch in the bottom of the body.
Can I add eyes even if I want a minimalist style?
Absolutely—small safety eyes or simple embroidery can make it extra cute.
What can I use instead of the green accent stitches?
Try embroidery floss, a different yarn color, beads (for decor only), or skip accents for a clean solid look.
Conclusion#
This cute spider amigurumi is the perfect mix of simple and sculptural—an easy crochet pattern that still looks unique when finished. Once you make one, it’s hard not to imagine a whole set in different colors: classic black for Halloween, earthy brown for a woodland vibe, or bright neon for a playful twist.
If you tell me what yarn weight you’re using and the size you want (mini, medium, jumbo), I can tweak the leg length and body rounds so your spider stands perfectly and matches your vision.


