


Introduction#
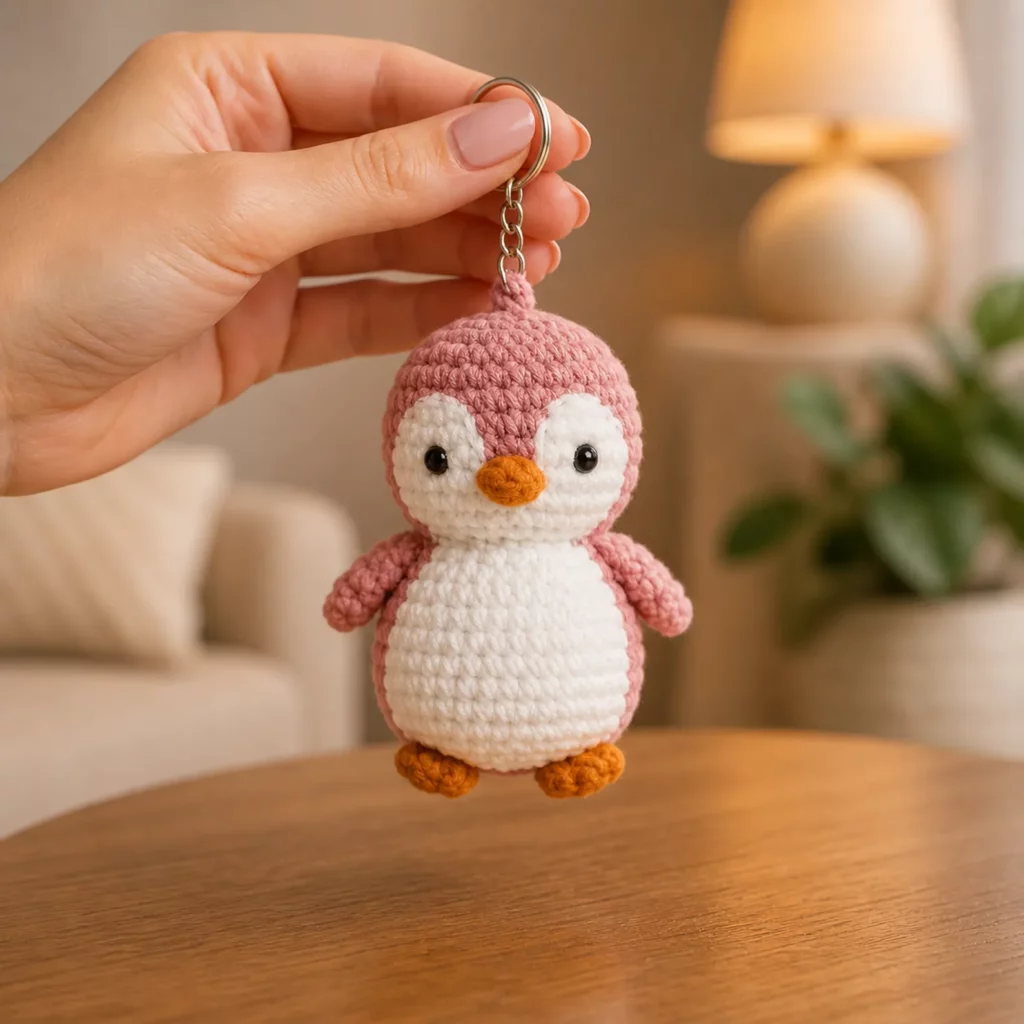
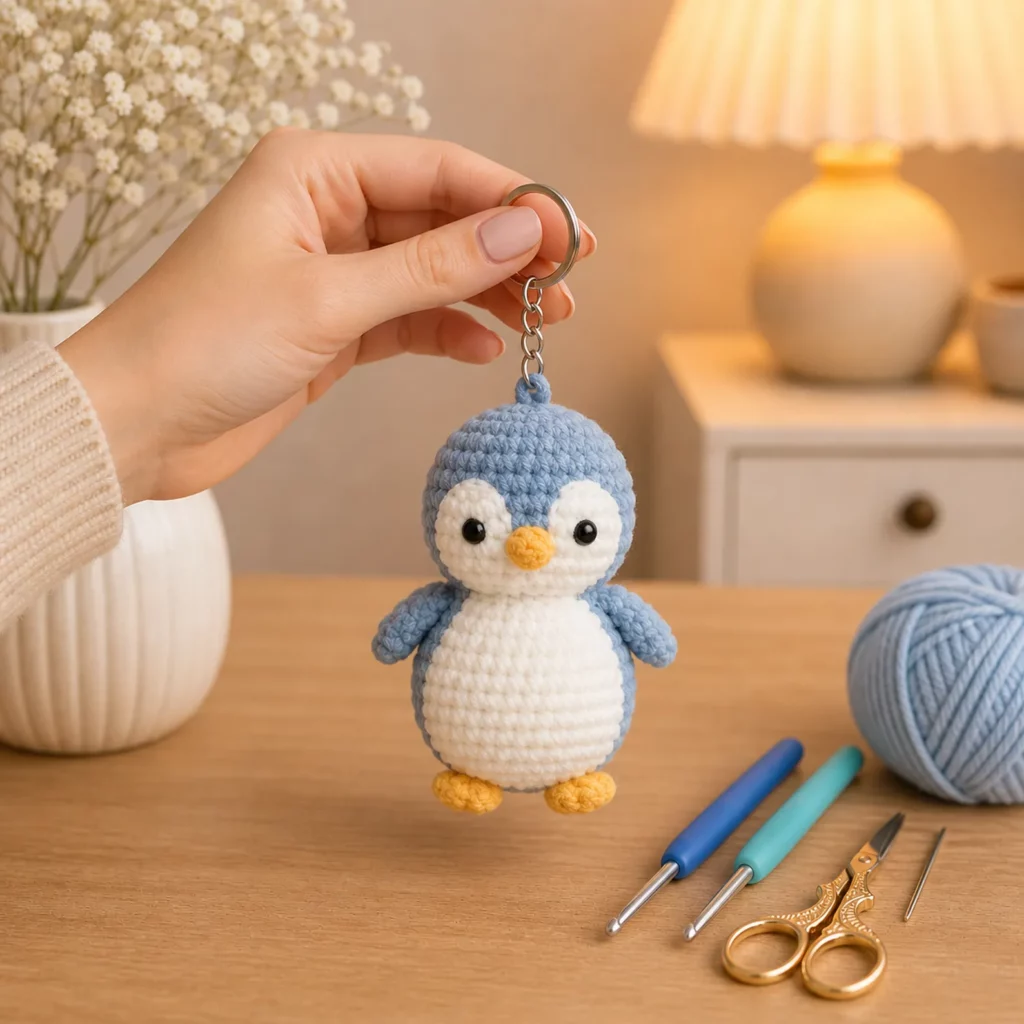
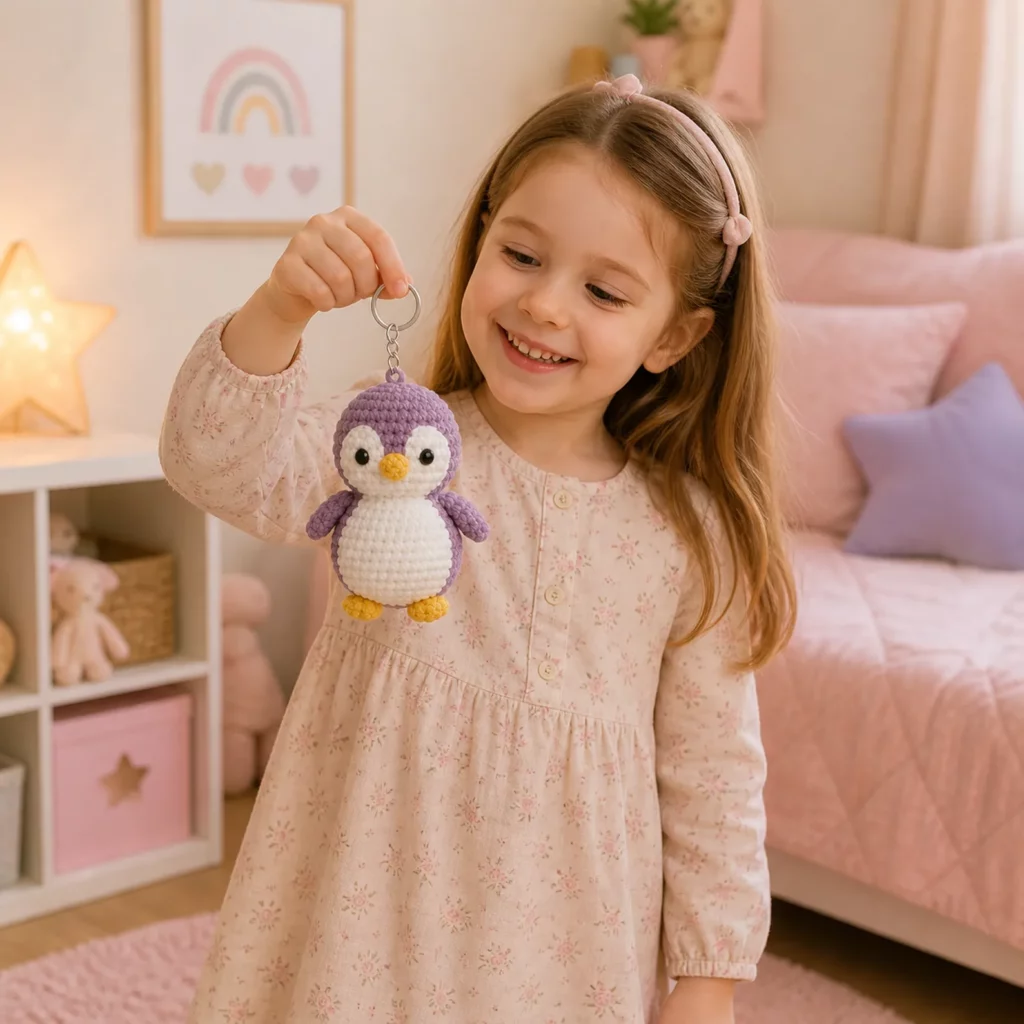
Tiny amigurumi keychains are the kind of crochet projects that make you feel like a magician: a little ball of yarn becomes a character you can clip to your keys, backpack, or zipper in an afternoon. And if you love cute animals, a mini penguin is one of the best “small but impressive” makes—simple shaping, big personality, and endless color options.
Explore more beginner amigurumi crochet patterns in our pattern library.
This crochet pattern is designed to create a small penguin charm with a round head, plump belly, stubby wings, a tiny beak, and sweet little feet. It’s especially adorable in plush/chenille yarn because the penguin looks extra squishy, but you can also make it in smooth cotton or acrylic for sharper stitch definition.
In this tutorial-style guide, you’ll learn:
- how to shape a clean, round amigurumi body
- how to place facial features so your penguin looks cute (not surprised!)
- how to add a strong keychain loop that won’t stretch out over time
If you’re looking for a free crochet pattern that’s beginner-friendly, giftable, and perfect for making multiples, this penguin is it.
Detailed Description of the Crochet Pattern#
This mini penguin keychain is built from a few simple pieces that come together quickly:
- Head + body: a single rounded shape (worked in continuous rounds) so there’s less sewing and a smoother silhouette.
- Belly patch: a white oval/circle piece stitched onto the front, giving that classic penguin look even if you don’t love color changes.
- Face area: optional white eye patches (or you can place eyes directly on the body for an even simpler version).
- Beak: a tiny triangle/oval in orange (quick and cute).
- Wings: two small rounded “flippers” sewn to the sides.
- Feet: two little orange pieces sewn to the bottom so the penguin looks like it’s standing (or sitting).
- Keychain loop: a reinforced loop at the top of the head for attaching hardware.
The finished penguin is palm-sized and lightweight—perfect as a bag charm, zipper pull, stocking stuffer, party favor, or “just because” gift.
Skill Level Explanation#
This is an easy to intermediate amigurumi project.
You’ll be comfortable if you can:
- Crochet in the round
- Make increases and decreases
- Count stitches and rounds (stitch marker recommended!)
- Sew small parts neatly
- Attach safety eyes (optional)
If you’re newer to amigurumi, you can absolutely make this. The main challenge is simply consistency—keeping your stitch count correct and placing parts symmetrically.
Materials Needed#
To match the cute, plush look and keep the penguin sturdy enough for a keychain, gather:
- Yarn (best options):
- Main color: gray, navy, black, or dark teal (penguin body)
- Contrast: white or cream (belly + optional face patches)
- Accent: orange (beak + feet)
- Plush/chenille yarn for a squishy, “kawaii” look
- Cotton yarn for crisp stitches and clean details
- Worsted acrylic for a budget-friendly option
- Crochet hook:
- Plush yarn: typically 3.5–5.0 mm (go smaller than label for tighter fabric)
- Worsted yarn: typically 2.5–3.5 mm for keychain-size amigurumi
- Stuffing: polyester fiberfill
- Safety eyes: 6–10 mm (or embroider)
- Tapestry needle for sewing
- Stitch marker
- Scissors
- Keychain hardware:
- Key ring + chain + jump ring OR lobster clasp
- (Optional) split ring pliers to make attaching easier
Yarn + hook tip
For keychains, tighter is better. If your fabric stretches open and you can see stuffing, use a smaller hook or tighten tension. Plush yarn hides stitches, so count carefully even if you can’t “see” every stitch clearly.
Stitches & Techniques Explained#
This crochet pattern uses standard amigurumi stitches (US terms):
- MR: magic ring
- ch: chain
- sc: single crochet
- inc: increase (2 sc in same stitch)
- dec: invisible decrease (recommended)
- sl st: slip stitch
- BLO/FLO: back loop only / front loop only (optional)
- st(s): stitch(es)
Helpful techniques
- Invisible decrease (neat shaping):
Insert hook into the front loop of the next stitch, then into the front loop of the following stitch, yarn over and pull through, yarn over and pull through both loops. - Clean color changes (if you choose to change colors):
Finish the last yarn over of the stitch with the new color. - Reinforced keychain loop:
A plain chain loop can stretch over time. This pattern includes an option to single crochet around the loop for strength.
Step-by-Step Instructions#
Pattern notes
- Worked in continuous rounds unless stated.
- Use a stitch marker in the first stitch of each round.
- Stuff firmly and evenly as you go.
- This crochet pattern is written in US terms.
Finished size (approx.)
- Plush yarn: 4–5.5 inches tall
- Worsted yarn: 2.5–4 inches tall
(Size varies with yarn/hook/tension.)
PART 1: Head + Body (one-piece)
Use main color (gray/black/navy).
Round 1: MR, 6 sc (6)
Round 2: inc around (12)
Round 3: (sc, inc) around (18)
Round 4: (2 sc, inc) around (24)
Round 5: (3 sc, inc) around (30)
Round 6: (4 sc, inc) around (36)
Now build height (this creates the head and upper body):
Rounds 7–10: sc around (36)
Shape slightly into the belly (keep round and plump):
Round 11: (5 sc, inc) around (42)
Rounds 12–14: sc around (42)
Start tapering toward the bottom:
Round 15: (5 sc, dec) around (36)
Round 16: sc around (36)
Round 17: (4 sc, dec) around (30)
Round 18: sc around (30)
Round 19: (3 sc, dec) around (24)
Begin stuffing now—pack the top firmly (head area) and keep the shape smooth.
Round 20: (2 sc, dec) around (18)
Stuff a bit more, shaping into a rounded egg/bean.
Round 21: (sc, dec) around (12)
Round 22: dec around (6)
Fasten off, close the hole, weave in end.
Shape tip: If your penguin looks too tall, reduce one plain round from Rounds 12–14. If it looks too round/ball-like, keep the height but taper earlier (start decreases one round sooner).
PART 2: Belly Patch (sewn-on option)
Use white. (This avoids color changes and still gives a clear penguin belly.)
Belly (oval):
Ch 6.
Round 1: Sc in 2nd ch from hook, sc in next 3 ch, 3 sc in last ch.
Working on the other side of the chain: sc in next 3 ch, 2 sc in last ch. (12)
Round 2: inc, sc 3, inc x3 (around the curve), sc 3, inc x2 (16)
Round 3: sc around (16)
Fasten off leaving a long tail.
Pin the belly centered on the front of the body and sew around the edge with small stitches.
Optional puffy belly: Lightly stuff the belly patch before closing the seam for a 3D look.
PART 3: Eye Patches (optional, makes it extra cute)
Use white. Make 2.
Round 1: MR, 6 sc (6)
Round 2: inc around (12)
Round 3: sc around (12)
Fasten off leaving a tail.
Sew eye patches near the top front of the body, spaced evenly. Then add eyes (or place eyes first, then sew patches around them—both methods work).
PART 4: Eyes (safety or embroidered)
Safety eyes option:
- Place eyes between Rounds 7–9 (depending on your penguin’s size).
- Space them about 6–8 stitches apart for a sweet look.
- Add washers securely before final stuffing.
Embroidered eyes option (child-safe):
With black yarn, stitch small ovals. Add a tiny white highlight stitch to make them sparkle.
PART 5: Beak (tiny triangle/oval)
Use orange.
Round 1: MR, 4 sc (4)
Round 2: (sc, inc) around (6)
Round 3: sc around (6)
Fasten off leaving a tail.
Sew beak centered between the eyes, slightly above the belly patch line.
Beak placement trick: If the beak is too low, the penguin looks grumpy. If it’s too high, it looks surprised. Aim for the “middle third” of the face.
PART 6: Wings (make 2)
Use main color.
Round 1: MR, 6 sc (6)
Round 2: (sc, inc) around (9)
Round 3: sc around (9)
Flatten and sc through both layers across the top (4–5 sc) to close.
Fasten off leaving a tail.
Sew wings to each side of the body around Rounds 12–14, angled slightly forward (this looks like the penguin is holding its belly—extra cute).
PART 7: Feet (make 2)
Use orange.
Round 1: MR, 6 sc (6)
Round 2: inc around (12)
Round 3: sc around (12)
Round 4: (2 sc, dec) around (9)
Round 5: sc around (9)
Stuff lightly or leave unstuffed for flatter feet. Fasten off leaving a tail.
Sew feet to the bottom front so the penguin sits nicely and looks balanced.
Balance tip: Before sewing tight, pin both feet and set the penguin down. Adjust until it sits evenly, then sew securely.
PART 8: Top Keychain Loop (strong + neat)
Use main color (or a strong cotton thread in a matching color for extra durability).
Option A: Quick loop
- Insert hook at the top center of the head.
- Pull up a loop, ch 10–14 (enough to fit jump ring).
- Sl st back into the same stitch to form a loop.
Fasten off and weave in securely.
Option B: Reinforced loop (recommended for keychains)
After making the chain loop:
- Ch 1 and sc around the chain (10–14 sc).
- Sl st to secure at the base.
Fasten off and weave in ends firmly.
Attach jump ring + chain + key ring.
Final Assembly Checklist
- Sew belly patch centered
- Sew eye patches (optional) and attach eyes
- Sew beak
- Sew wings
- Sew feet
- Add keychain loop and attach hardware
- Final stuffing/shape massage + weave in ends
Common Mistakes and How to Avoid Them#
- Plush yarn makes stitches hard to see:
Count every round and use a stitch marker. Feel stitches with your fingers if needed. - Face looks “off”:
Pin eyes and beak before sewing anything permanently. Symmetry matters most on tiny faces. - Belly patch looks crooked:
Use pins or stitch markers at top/bottom/left/right points of the patch first, then sew around. - Penguin looks lumpy:
Stuff in small amounts and distribute evenly. Massage the shape from the outside to smooth it. - Keychain loop stretches out:
Reinforce it by crocheting sc around the chain loop (Option B) or using strong cotton yarn for the loop. - Parts feel loose:
For keychains, sew with multiple passes and knot securely. Keychains get tugged a lot—extra reinforcement is worth it.
Expert Tips for Better Results#
- Pin everything first: Wings, feet, eye patches—pinning prevents “why does it look weird?” moments.
- Use the “triangle rule” for cute faces: Eyes form the top corners of a triangle, beak forms the bottom point.
- Add tiny blush cheeks: A small pink embroidery stitch or fabric blush makes the penguin look extra sweet.
- Make it extra sturdy: Add a small felt circle behind safety eyes and use cotton thread for the keychain loop.
- Keep wings slightly forward: It gives the penguin a more cuddly, animated pose.
- Make multiples assembly-line style: Crochet all bodies first, then all wings, then all feet—it’s faster and more consistent.
Variations and Customization Ideas#
- Baby penguin: Use light gray for body and add a tiny “tuft” on top (3–4 chains anchored and trimmed).
- Bow tie penguin: Crochet a small bow and sew under the beak for a dressed-up charm.
- Winter scarf: Make a mini scarf strip and wrap it around the neck.
- Different colorways: Navy + cream, charcoal + white, pastel penguin, or rainbow belly patch.
- Heart belly patch: Replace the oval belly with a heart applique for Valentine gifts.
- Big-eyed kawaii style: Use larger safety eyes and place them slightly lower for an extra-cute look.
- Ornament version: Replace keychain hardware with ribbon and hang it as a tree ornament.
Benefits of This Crochet Project#
- A quick, satisfying DIY crochet make with instant “cute” payoff
- Uses small amounts of yarn—great for stash busting
- Teaches core amigurumi skills: shaping, assembly, and feature placement
- Makes a functional accessory (keychain, bag charm, zipper pull)
- Easy to customize for seasons, gifts, and themes
- Perfect for batch-making (craft fairs, party favors, stocking stuffers)
Internal Linking Suggestions#
If you’re building a crochet blog, link this tutorial to:
- “How to Crochet an Invisible Decrease (Amigurumi Tutorial)”
- “How to Attach Safety Eyes Securely”
- “Best Yarn for Amigurumi: Plush vs Cotton”
- “How to Sew Amigurumi Parts Neatly”
- “Free Crochet Pattern Roundup: Keychains & Bag Charms”
FAQ Section#
What yarn is best for a penguin keychain crochet pattern?
Plush/chenille yarn makes the penguin extra soft and squishy, which is great for charms. Cotton gives the cleanest stitch definition if you want crisp details.
Is this a free crochet pattern for beginners?
Yes—this is an easy crochet pattern if you already know how to crochet in the round with increases and decreases. Plush yarn can be trickier, so counting is the key.
How do I make the keychain loop stronger?
Reinforce the loop by crocheting single crochet around the chain loop, and sew the base down with multiple passes. You can also use strong cotton yarn just for the loop.
Can I make it without safety eyes?
Absolutely. Embroidered eyes are safer for small children and work beautifully with plush yarn. Felt eyes are another option if sewn securely.
How big will the finished penguin be?
With plush yarn, it’s usually about 4–5.5 inches tall. With worsted yarn, it’s more like 2.5–4 inches, depending on hook size and tension.
How do I resize the penguin?
The easiest way is to change yarn weight and hook size. For a mini penguin, use sport weight + small hook; for a bigger one, use thicker plush yarn + a slightly larger hook (while still keeping stitches tight).
Conclusion#
A mini penguin keychain is one of those crochet projects that never gets old—fast to make, ridiculously cute, and easy to personalize. The simple round body gives you a great amigurumi foundation, while the belly patch, beak, and tiny feet bring the character to life. Add a reinforced loop and you’ve got a charm that’s cute and durable enough for everyday use.
If you tell me what yarn you’re using (plush #5, chenille #6, cotton, worsted, etc.) and your preferred finished size, I can fine-tune the stitch counts so your penguin comes out perfectly proportioned every time.


