


Introduction#
If you love amigurumi but want something a little different from the usual animals, a tiny robot is such a fun “wow” project. The best part? This style of crochet pattern is all about simple shapes—boxes, tubes, discs—so you can get a super cute result without complicated stitch work.
Explore more beginner amigurumi crochet patterns in our pattern library.
In this tutorial-style guide, you’ll learn how to crochet a small, boxy robot with big “binocular” eyes, chunky track-like feet, and little arms. It’s a perfect DIY crochet project for gifting, desk décor, or adding to your amigurumi collection.
Detailed Description of the Crochet Pattern#
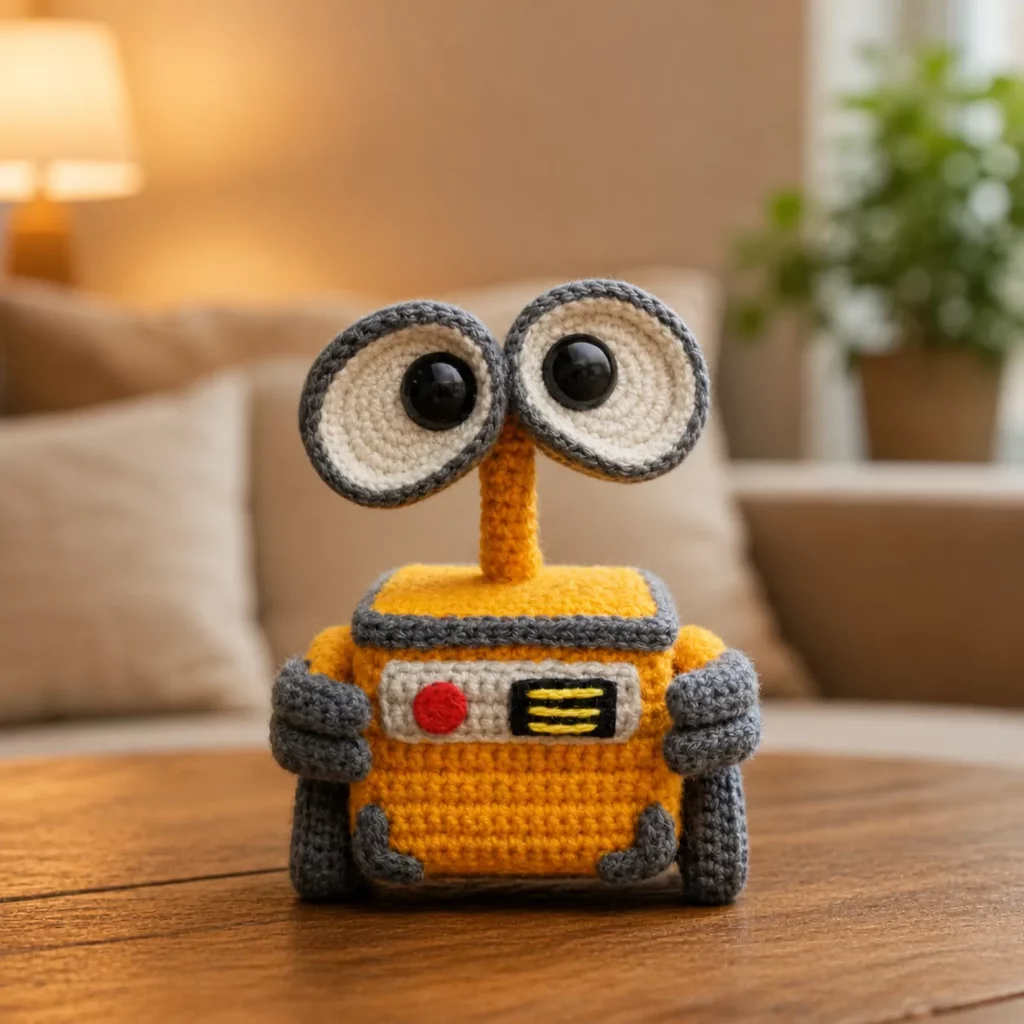
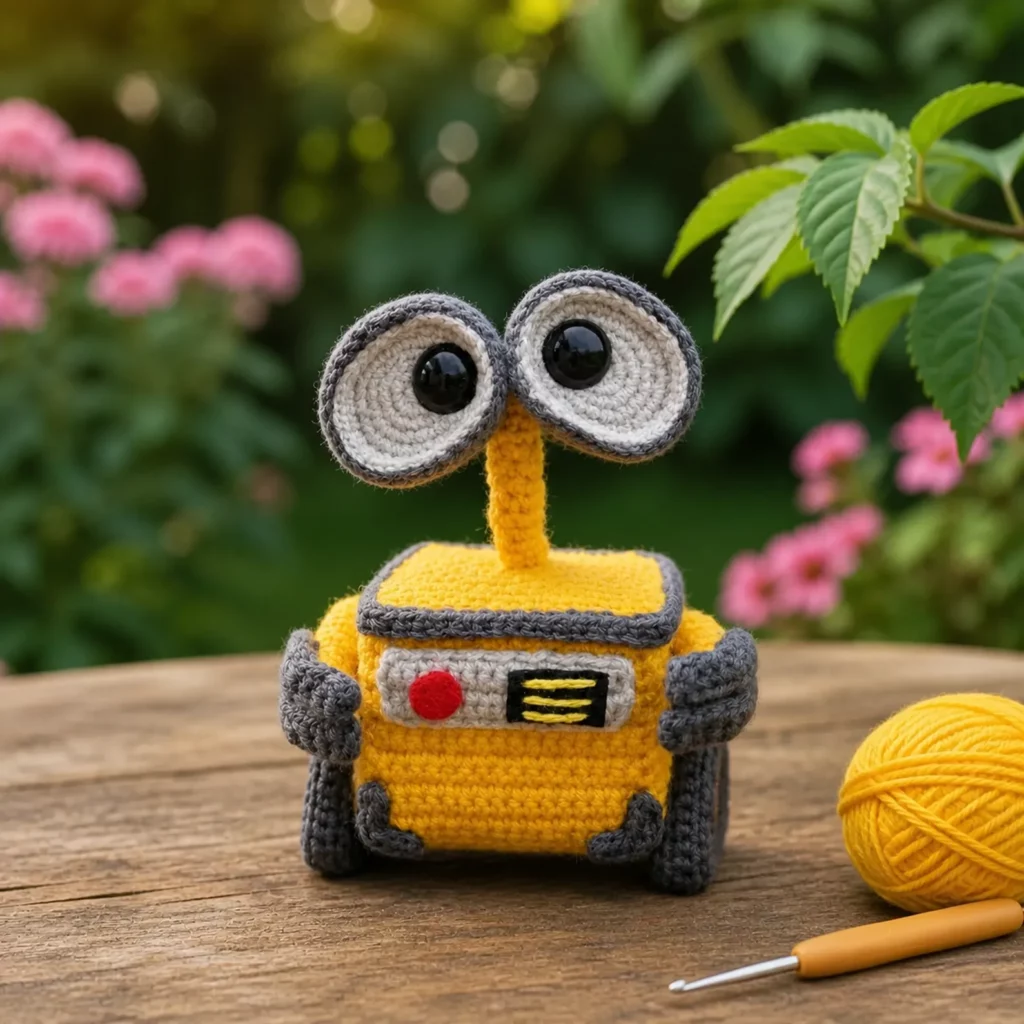
This crochet pattern creates a small robot plush with a sturdy, geometric look:
- Body: a rectangular “box” (worked as panels or a continuous shaped body) with clean edges.
- Tracks/Feet: two thick side pieces that act like wheels/tracks, helping the robot sit upright.
- Head/Neck: a short neck post with a slightly rounded head base.
- Eyes: two large round “goggles” made from crocheted circles and stitched onto the head.
- Arms: slim tubes with simple hands/claws for character.
The overall texture is tight single crochet (amigurumi style), which keeps the stuffing in and makes the shape crisp.
Skill Level Explanation#
This is an easy to intermediate crochet for beginners who already know the basics.
You’ll be comfortable if you can:
- Crochet in the round
- Make increases and decreases
- Count stitches and keep track of rounds
- Sew parts together neatly
If you’re brand new to amigurumi, you can still do it—just go slowly and use stitch markers.
Materials Needed#
To match the look (bright body, darker hands/track details, and bold eye pieces), gather:
- Yarn (worsted / DK works best):
- Main color: yellow (robot body)
- Accent: medium gray (details/trim)
- Dark gray or black (hands, track shadows, mouth line)
- White (eye whites)
- Small accent: red (button/light detail)
- Crochet hook: 2.75 mm–3.5 mm (choose smaller than yarn label for tighter stitches)
- Stuffing: polyester fiberfill
- Safety eyes: optional (you can also crochet eyes)
- Tapestry needle for sewing
- Stitch markers
- Scissors
- Optional: thin craft foam or plastic canvas to place inside the base for extra stability
Yarn + hook tip
For amigurumi, your stitches should be tight enough that stuffing doesn’t show. If gaps appear, go down a hook size.
Stitches & Techniques Explained#
You’ll use mostly classic amigurumi stitches:
- MR: magic ring
- ch: chain
- sc: single crochet
- inc: increase (2 sc in same stitch)
- dec: invisible decrease (recommended for neat shaping)
- sl st: slip stitch
- BLO/FLO: back loop only / front loop only (optional for sharper edges)
Helpful techniques
- Invisible decrease: insert hook into front loop of next stitch, then front loop of following stitch, yarn over and pull through, yarn over and pull through both loops.
- Neat color changes: finish last yarn over of previous stitch with new color.
Step-by-Step Instructions#
Pattern notes
- Worked in continuous rounds unless stated. Use a stitch marker to track the first stitch of each round.
- Stuff firmly as you go for clean shapes.
- This crochet pattern is written in US terms.
Body panel method (clean box shape)
This method gives sharp edges and is beginner-friendly.
Front Panel (make 1)
Ch 21 (or any width you like).
Row 1: sc in 2nd ch from hook and across (20)
Row 2–20: ch 1, turn, sc across (20)
Fasten off.
Back Panel (make 1)
Repeat Front Panel. Fasten off.
Side Panels (make 2)
Ch 11
Row 1: sc in 2nd ch from hook and across (10)
Row 2–20: ch 1, turn, sc across (10)
Fasten off.
Bottom Panel (make 1)
Ch 21
Row 1: sc in 2nd ch from hook and across (20)
Row 2–10: ch 1, turn, sc across (20)
Fasten off.
Top Panel (make 1)
Repeat Bottom Panel. Fasten off.
Assemble the body box
- Sew side panels to the front panel (use whip stitch or mattress stitch).
- Sew the back panel on, forming a box sleeve.
- Sew the bottom panel on.
- Stuff firmly (add a flat foam insert at the base if you want it to stand extra well).
- Sew the top panel on, closing the box.
Track units (make 2)
These sit on each side of the body and create the “robot track” silhouette.
Using dark gray (or main color + dark trim):
Ch 16
Row 1: sc in 2nd ch from hook and across (15)
Row 2–6: ch 1, turn, sc across (15)
Now work around the rectangle to thicken it:
Round edge: sc evenly around the outside of the rectangle, placing 3 sc in each corner.
Repeat 2–3 rounds around to build thickness (stuff lightly if desired).
Fasten off with a long tail.
Attach tracks: Sew one track to each side of the body near the bottom edge. Keep them symmetrical so the robot sits evenly.
Neck post
Using gray:
Round 1: MR, 6 sc
Round 2: inc around (12)
Round 3–6: sc around (12)
Stuff lightly. Fasten off leaving a tail.
Sew neck centered on top of the body.
Head base (rounded boxy dome)
Using gray:
Round 1: MR, 6 sc
Round 2: inc around (12)
Round 3: (sc, inc) around (18)
Round 4: (2 sc, inc) around (24)
Round 5: (3 sc, inc) around (30)
Round 6: sc around (30)
Round 7: sc around (30)
Round 8: (3 sc, dec) around (24)
Round 9: (2 sc, dec) around (18)
Stuff firmly.
Round 10: (sc, dec) around (12)
Round 11: dec around (6)
Fasten off and close.
Sew the head onto the neck post.
Eye goggles (make 2)
These are the signature look—big circles with an inner ring.
Outer ring (gray):
Round 1: MR, 6 sc
Round 2: inc around (12)
Round 3: (sc, inc) around (18)
Round 4: (2 sc, inc) around (24)
Round 5: sc around (24)
Fasten off, leave long tail.
Inner ring (white, make 2):
Round 1: MR, 6 sc
Round 2: inc around (12)
Round 3: (sc, inc) around (18)
Fasten off.
Optional pupil (black, make 2):
Round 1: MR, 6 sc
Fasten off.
Assemble each eye:
- Center the white circle on the gray circle and sew it down.
- Add the black pupil on top (or use a safety eye through the layers if preferred).
Attach both eyes to head:
Place them side-by-side like binoculars, slightly angled outward for cuteness. Sew securely.
Arms (make 2)
Using gray:
Round 1: MR, 6 sc
Round 2–10: sc around (6)
Stuff lightly. Fasten off leaving tail.
Attach arms to the sides of the body, slightly forward.
Hands/claws (optional detail)
Using dark gray or black:
Ch 7
Row 1: sc in 2nd ch from hook, sc across (6)
Fold slightly and sew to the end of each arm.
Front “control panel” detail (optional)
Using gray: stitch a small rectangle onto the front.
Add:
- A tiny red circle (MR 6 sc) for a button
- Yellow/black lines with embroidery for vents or stripes
Final face detail
Embroider a small curved mouth line in dark gray/black under the eyes for expression.
Common Mistakes and How to Avoid Them#
- Gaps in stitches: use a smaller hook and keep tension consistent.
- Lopsided eyes: pin eyes in place before sewing; step back and check symmetry.
- Body collapsing: stuff firmly, especially corners. Add a flat insert at the bottom if needed.
- Tracks not even: count rows carefully and sew at the same height on both sides.
- Messy sewing lines: use mattress stitch where possible, and keep stitches small and even.
Expert Tips for Better Results#
- Use stitch markers everywhere: mark where arms and tracks should align.
- Shape as you stuff: push stuffing into corners with the handle of your hook.
- Edge definition: working some seams through back loops can create crisp corners.
- Weighted base: a small pouch of poly pellets inside the bottom helps it sit nicely (only if this is for décor, not for small children).
- Clean color changes: always finish the last yarn over of the stitch with the new yarn color.
Variations and Customization Ideas#
- Mini keychain version: use thinner yarn (sport) and a smaller hook; skip stuffing the tracks heavily.
- Different expressions: sleepy eyes, a tiny smile, or a surprised mouth.
- Accessory add-ons: a tiny plant, a heart, a little “tool,” or a scarf.
- Colorways: pastel robot, classic yellow, or even rainbow panel accents.
- Textured body: add surface crochet lines or faux “panels” with embroidery.
Benefits of This Crochet Project#
- A unique crochet pattern that stands out from typical plush animals
- Great practice for box shaping, which helps with bags, baskets, and home décor projects
- Uses small amounts of yarn—perfect for stash busting
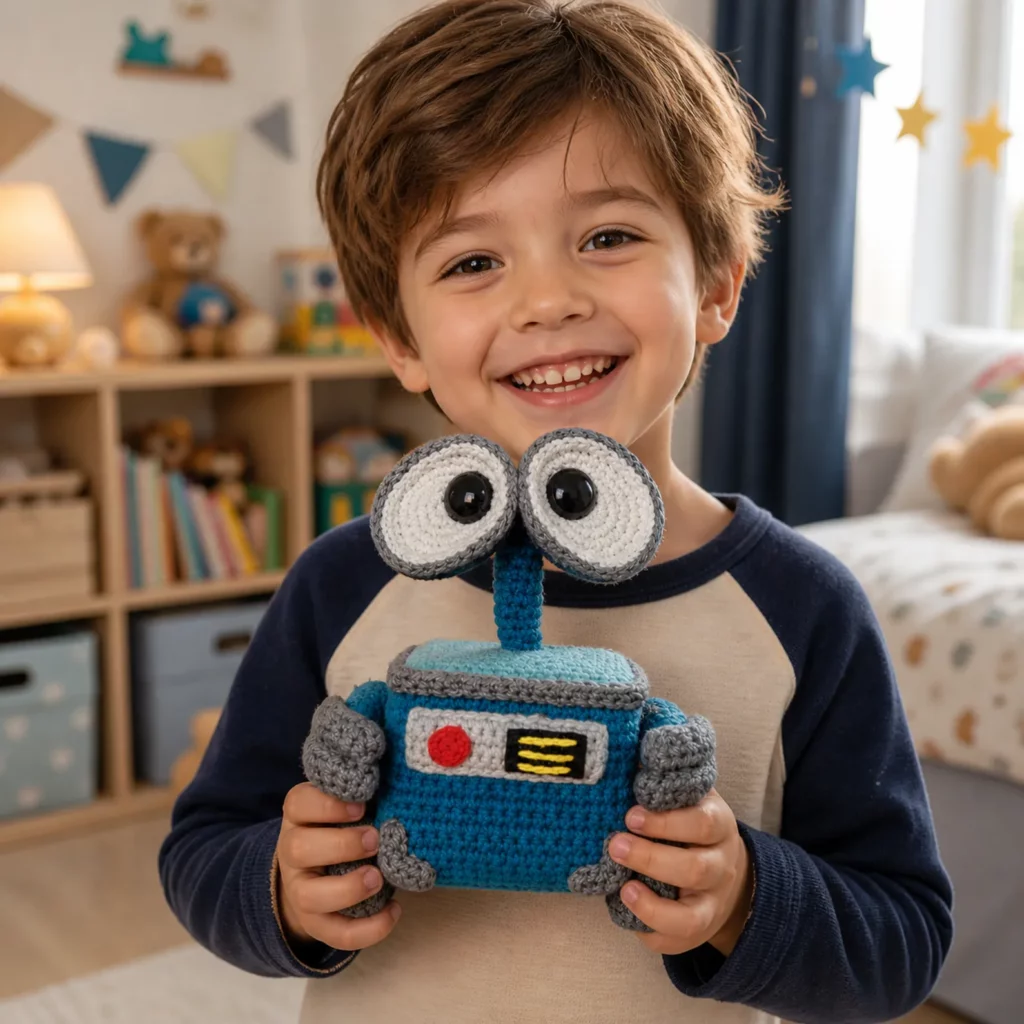
- Makes an adorable handmade gift for kids, tech lovers, or desk décor fans
- Teaches assembly skills that improve all amigurumi projects
Internal Linking Suggestions#
If you’re building a crochet blog, link this tutorial to:
- “How to Do Invisible Decrease in Amigurumi”
- “Best Yarn for Amigurumi: Cotton vs Acrylic”
- “How to Sew Amigurumi Parts Neatly”
- “Beginner-Friendly Free Crochet Pattern Roundup”
- “Safety Eyes vs Embroidered Eyes: Which Is Better?”
FAQ Section#
What yarn is best for a robot amigurumi crochet pattern?
Worsted cotton or a smooth acrylic works great because it shows stitch definition and keeps edges crisp. Plush yarn is softer but can hide shaping details.
Can I make this as a free crochet pattern for beginners?
Yes—if you already know single crochet, increasing, and decreasing. The shapes are simple, but the key is careful counting and neat assembly.
How do I stop the body from looking squishy?
Stuff firmly and evenly, especially in the corners. Adding a flat insert at the bottom (foam or plastic canvas) helps the box hold its shape.
Do I need safety eyes?
Not required. You can crochet pupils or embroider them. If gifting to young children, embroidered eyes are the safest choice.
How big will the finished robot be?
With worsted yarn and a 3.0–3.5 mm hook, expect a palm-sized plush (roughly 6–9 inches tall, depending on your panel size and stuffing).
Can I adjust the size easily?
Absolutely. Increase the panel width/height for a bigger body, or switch yarn weight and hook size. Keep all parts proportional (bigger body = slightly bigger eyes and tracks).
Conclusion#
A little robot plush is one of those crochet projects that looks impressive but is built from friendly, repeatable shapes. Once you’ve made one, you’ll realize you can remix the same crochet pattern structure into lots of different “character” designs—just by changing eye style, colors, and small details.
If you make this project, try a new colorway or add a tiny accessory to make it your own. And if you want another easy crochet pattern next, go for something that uses the same skills—like a boxy bag, a mini basket, or another amigurumi character with big eyes.


