Introduction#
If you love crochet projects that are both pretty and useful, a textured tote bag is one of the best places to invest your time. You get that satisfying “wow” texture, a bag that holds real weight, and a finished piece you’ll actually carry—groceries, library books, yarn shopping (of course), or daily essentials.
Explore more beginner bags crochet patterns in our pattern library.
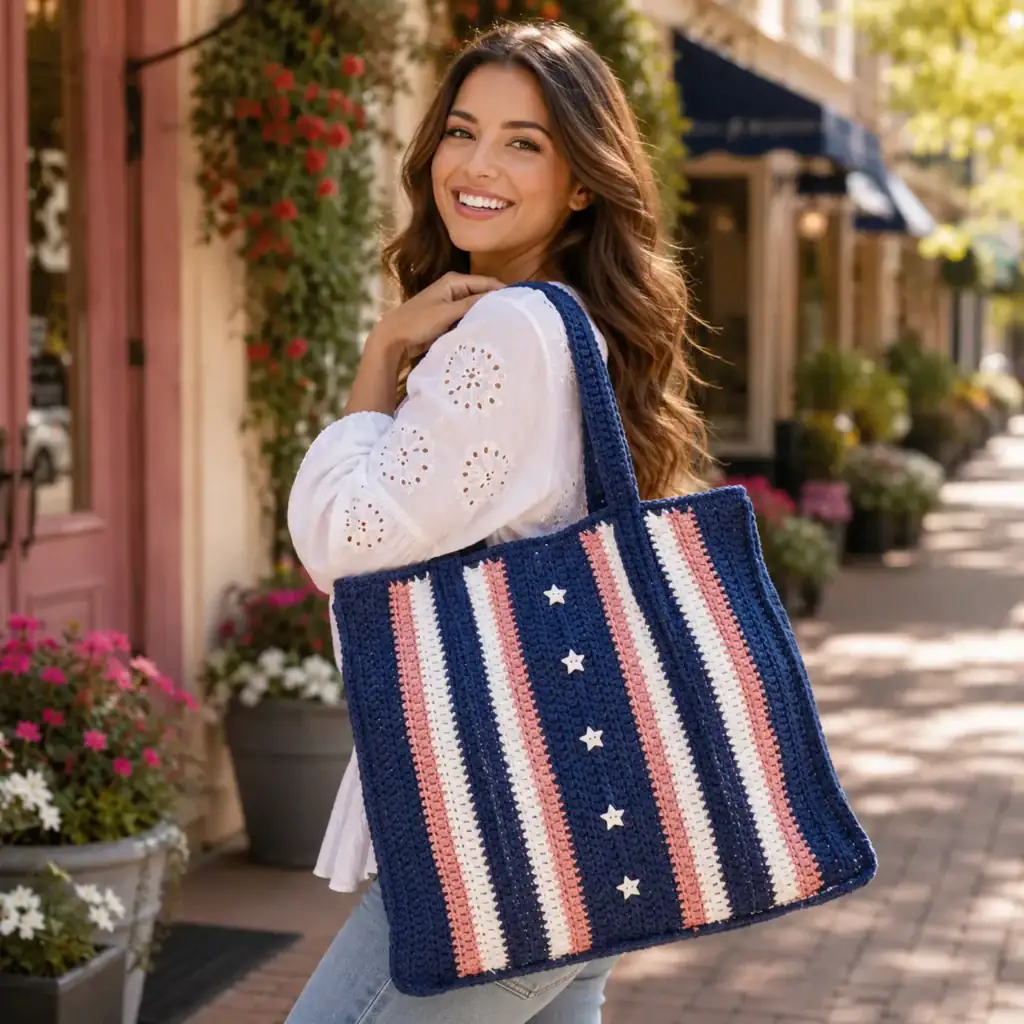
This crochet pattern walks you through a structured tote with a dense base, a richly textured body, a clean top band, and sturdy handles that won’t stretch out after a few uses. The design uses a raised, star-like stitch texture (worked in neat repeating rows) to create that dimensional look you usually see in boutique bags. The two-tone stripe adds a modern pop without complicated colorwork.
Whether you’re hunting for a free crochet pattern, an easy crochet pattern that still looks impressive, or a detailed crochet tutorial you can follow confidently, you’re in the right place. I’ll teach you how to build the bag step-by-step, plus how to adjust the size, reinforce the handles, and keep the shape crisp.
Detailed Description of the Crochet Pattern#
This tote is built like a “real bag,” not a floppy sack.
What makes it special
- Structured base: a solid oval/rectangle base worked in tight stitches so the bottom doesn’t sag
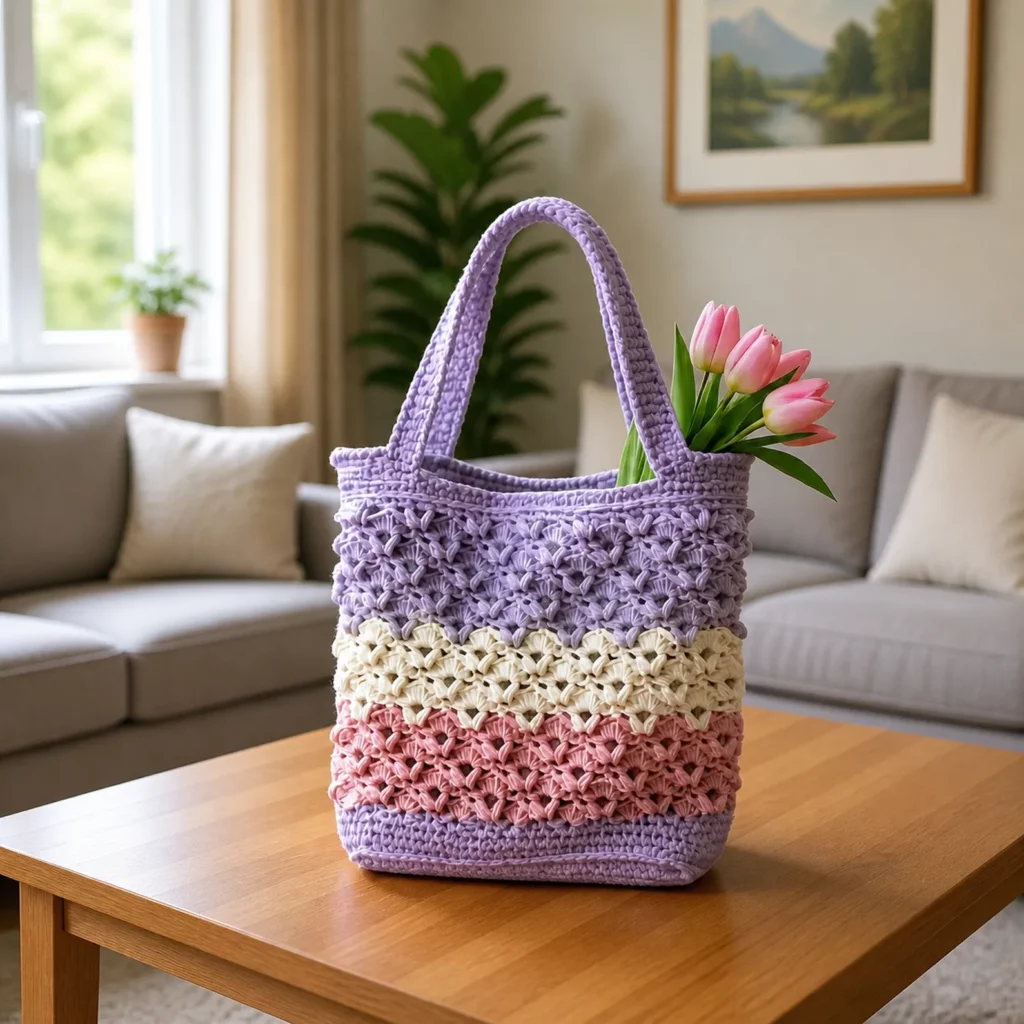
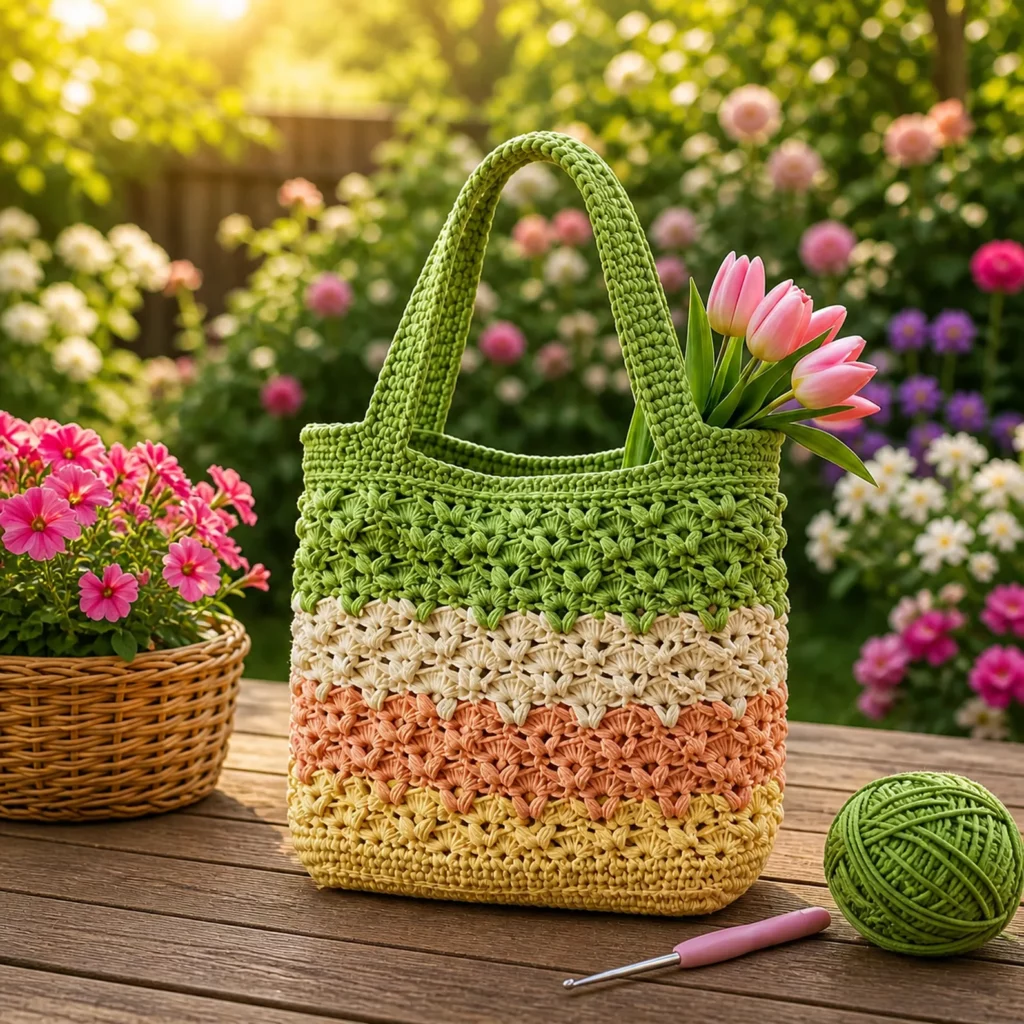
- Textured body: a raised, star/petal texture created with repeating clusters (it looks fancy, but it’s rhythmic once you learn the stitch)
- Two-tone stripe: a single wide contrast band for a clean, modern look
- Reinforced top edge: a sturdy top band that keeps the opening neat
- Comfort handles: thick handles crocheted and stitched down securely so they sit nicely and hold weight
How it’s made
- You’ll crochet a firm base first.
- Then you’ll work the bag body upward in joined rounds or continuous rounds (either works—I’ll show you both options).
- The texture is worked in rows around the bag, so it stacks in tidy horizontal bands.
- Finally, you’ll add a reinforced top edge and attach handles.
This is a great DIY crochet project because you can customize it endlessly: color blocks, lining, zipper pocket, leather straps, smaller market bag, or oversized beach tote.
Skill Level Explanation#
This tote is confident-beginner to intermediate—but you can absolutely do it as a beginner if you go step-by-step.
Beginner-friendly skills you’ll use
- Single crochet and double crochet
- Working in the round
- Counting stitches and using markers
- Basic seaming (slip stitching or sewing handles down)
New-to-you skills (I teach them below)
- A textured “star/cluster” stitch pattern
- Clean color changes
- Reinforcing handles and top edge
If you want the simplest version, you can crochet the whole body in half double crochet or single crochet and still follow the same bag construction. But if you want that boutique texture, the cluster stitch is worth learning.
Materials Needed#
Yarn
To keep the bag sturdy, choose a yarn with body.
Best yarn types
- Worsted weight cotton (great structure, easy care)
- Cotton-blend (cotton + acrylic)
- T-shirt yarn (super sturdy, chunky look)
- Macramé cord or braided cotton rope (very structured, heavier)
For a bag like this
- Main color (deep navy): about 400–650 yards depending on size
- Contrast color (teal band): about 120–200 yards
Yarn tip:
If you use soft acrylic, the tote may stretch. If you use rope/cord, the tote will be heavier but very crisp and durable.
Hook
Use a hook size that creates a tight fabric.
- Worsted cotton: 4.0 mm to 5.0 mm
- Rope/cord: 5.0 mm to 7.0 mm (depends on thickness)
Notions
- Stitch markers
- Yarn needle
- Scissors
- Optional: fabric lining, zipper, magnetic snap, purse feet, or stiff base insert
- Optional: macramé cord or nylon thread for reinforcement (especially for handles)
Stitches & Techniques Explained#
Abbreviations (US terms)
- ch: chain
- sl st: slip stitch
- sc: single crochet
- hdc: half double crochet
- dc: double crochet
- inc: increase (2 stitches in one stitch)
- dec: decrease (2 stitches together)
- st(s): stitch(es)
Clean color change
To change colors neatly:
- On the last yarn over of the final stitch in the old color, pull through with the new color.
- Continue with the new color in the next stitch.
The textured cluster stitch
This tote uses a raised “petal/star” texture. There are many ways to create this look; here’s a beginner-friendly option that produces a similar dimensional pattern:
Puff Cluster (PC)
- Yarn over, insert hook in stitch, pull up a loop (3 loops)
- Yarn over, insert in same stitch, pull up a loop (5 loops)
- Yarn over, insert in same stitch, pull up a loop (7 loops)
- Yarn over, pull through all loops
- ch 1 to lock (this chain counts as part of the cluster top)
This creates a bold, rounded texture that stacks beautifully on a tote.
Where the clusters go
- You’ll work clusters into a “spaced” foundation round so they sit evenly.
- Between clusters, you’ll usually chain and skip to keep the pattern balanced.
Don’t worry—once you do one round, it becomes very repeatable.
Step-by-Step Instructions#
This is written as a standard tote size. You can adjust width and height in the customization section.
Pattern notes
- Use stitch markers at the start of each round.
- For the firmest bag: keep tension snug and use cotton yarn.
- The base is worked in continuous rounds; the textured body can be joined rounds to keep the seam tidy.
Base construction
Start with a rectangle base (excellent for tote shape and stability).
Ch 31 (or any odd number for a wider tote).
Round base setup
- Row 1: sc in second ch from hook and across until last ch.
- In last ch, place 3 sc to turn the corner.
- Continue along the underside of the chain: sc in each ch.
- In the last remaining ch (the starting end), place 3 sc to turn the corner.
- Join with sl st to first sc.
Now you have an oval-rectangle base.
Build the base depth
Round 2: sc around, working 3 sc in each corner stitch (the center of each 3-sc corner).
Round 3: sc around, again increasing at corners the same way.
Round 4: sc around, increasing at corners.
Stop when the base is the size you want (a common tote base is around 10–12 inches wide and 3–5 inches deep, depending on your starting chain and number of rounds).
Turn the base upward
Next round: sc around in back loop only.
This creates a crisp fold line so the bag stands up neatly.
Body foundation round
Work one round in sc or hdc around the entire bag (both loops now).
This stabilizes the transition and gives you a clean foundation.
Textured body rounds
Now you’ll begin the puff cluster texture.
Textured Round A (cluster round)
- ch 1, (PC in next stitch, ch 1, skip 1 stitch) repeat around
- Adjust at the end so the pattern stays even (if you have one extra stitch, sc in the last stitch and continue)
Join with sl st to the first PC top (or to the first stitch space).
Textured Round B (anchor round)
This round locks the clusters in place.
- sc in each stitch and in each chain space around
Join.
Repeat Round A and Round B until the bag is almost the height you want.
Color stripe band
When you reach the stripe placement:
- Change to contrast color at the end of the anchor round.
Work: - One Textured Round A in contrast
- One Textured Round B in contrast
Repeat once more if you want a thicker stripe.
Change back to the main color and continue the textured rounds until desired height.
Reinforced top band
Finish with a sturdy top edge so the opening doesn’t flare.
Work 2–4 rounds of sc around the top (joined rounds).
For an extra-firm rim:
- Work one round in sl st (or crab stitch) as the final edge.
Handles#
Strong handles are what make or break a tote bag. This pattern uses thick crocheted handles sewn down securely.
Handle style
Make two identical handles.
Ch 60–75 depending on how long you want the straps.
Row 1: sc in second ch from hook and across.
Row 2–4: ch 1, turn, sc across.
This creates a sturdy strap. If you want an even firmer handle, use hdc instead of sc, or work the strap in thermal stitch.
Fasten off with a long tail for sewing.
Attach handles
- Place handles evenly on the bag (front and back), about 3–4 inches apart.
- Stitch each end down using a strong sewing method: whip stitch or backstitch through multiple rows of the top band.
- For heavy-use reinforcement: stitch an “X-box” shape (a square with an X inside) where the handle meets the bag.
Optional reinforcement tip
Run a strand of nylon thread, crochet cord, or macramé cord inside the handle (or stitch it to the underside) to reduce stretching.
Common Mistakes and How to Avoid Them#
- Bag grows wider as you crochet up: Your tension is loosening. Go down a hook size or tighten your stitch tension.
- Texture looks uneven: Make sure your puff clusters have the same number of yarn-overs each time. Consistency matters more than speed.
- Top edge ripples: You may have too many stitches at the top. Work one round of sc with occasional decreases (evenly spaced) to smooth it.
- Handles stretch: Use cotton yarn, reinforce the handle, and sew the ends down with multiple passes.
- Stripe looks jagged: Always change color on the last yarn-over of the stitch before the new round begins.
Expert Tips for Better Results#
- Add a base insert (plastic canvas, cut-up placemat, or thick felt) to keep the bottom perfectly flat.
- Line the bag with cotton fabric if you’ll carry small items (keys, lip balm, earbuds). Lining also helps the tote keep its shape.
- Steam-block lightly (if yarn allows) to relax and even out stitches—but don’t overheat acrylic or chenille.
- For a “designer” finish, add a magnetic snap and a small inside pocket.
- If you’re using rope yarn, take breaks—your hands will thank you.
Variations and Customization Ideas#
- Market tote version: make it taller with fewer base rounds and add longer straps.
- Mini handbag version: start with a shorter chain and fewer rounds; add short handles.
- Crossbody strap: crochet one long strap and attach at side seams.
- More stripes: alternate colors every few textured repeats for a bold look.
- Different texture: swap the puff cluster for star stitch, lemon peel stitch, or mini bobbles.
Benefits of This Crochet Project#
- You learn practical construction skills you can reuse for many bag styles
- The stitch texture gives a high-end look while still being approachable
- Cotton yarn makes it washable and durable
- A tote is a perfect “functional gift” that people actually use
- This crochet pattern fits strong search intent for free crochet pattern, easy crochet pattern, crochet tutorial, DIY crochet, and crochet for beginners without needing complicated shaping
Internal Linking Suggestions#
You may also like…
- Beginner Crochet Bag Base Tutorial (Oval and Rectangle Bases)
- How to Crochet Puff Stitch and Keep It Even
- Best Yarns for Crochet Bags (Cotton vs Acrylic vs Cord)
- How to Add a Fabric Lining to a Crochet Tote
- Crochet Handle Reinforcement Tips (No Stretch Straps)
FAQ Section#
Is this an easy crochet pattern or more advanced?
It’s beginner-friendly if you already know basic crochet stitches. The textured cluster is repetitive and becomes easy after one or two rounds.
What yarn is best for a sturdy crochet tote bag?
Cotton is the top choice because it holds shape and doesn’t stretch as much as acrylic. Cord yarn is even sturdier but heavier.
How do I keep the tote from stretching out?
Use tight tension, choose cotton or cord yarn, reinforce handles, and consider adding a fabric lining.
Can I make this into a beach bag?
Yes. Make the base wider, crochet the body taller, and add longer straps. Cotton is great for beach use.
How do I adjust the size of the bag?
Change the starting chain for width, add or remove base rounds for depth, and repeat textured rounds for height.
Do I need to line the bag?
Not required, but lining improves durability and keeps small items from poking through stitch gaps.
Conclusion#
A textured tote bag is one of those crochet projects that feels like a “level up” without being overwhelming. You get structure, style, and a practical finished piece you can carry every day. Once you master the base + textured body combo, you can remix it into endless bag designs—different sizes, stripes, closures, and strap styles.
If you tell me what yarn weight you’re using (cotton worsted, cord, or something else), I’ll recommend the best hook size and help you calculate the exact starting chain and base rounds to match the tote size you want.