


Introduction#
Some crochet projects are spooky. Some are sweet. And every once in a while you get the best combo: a tiny bat that’s more “cuddly friend” than “creepy creature.” That’s exactly what this crochet pattern is all about.
Explore more beginner amigurumi crochet patterns in our pattern library.
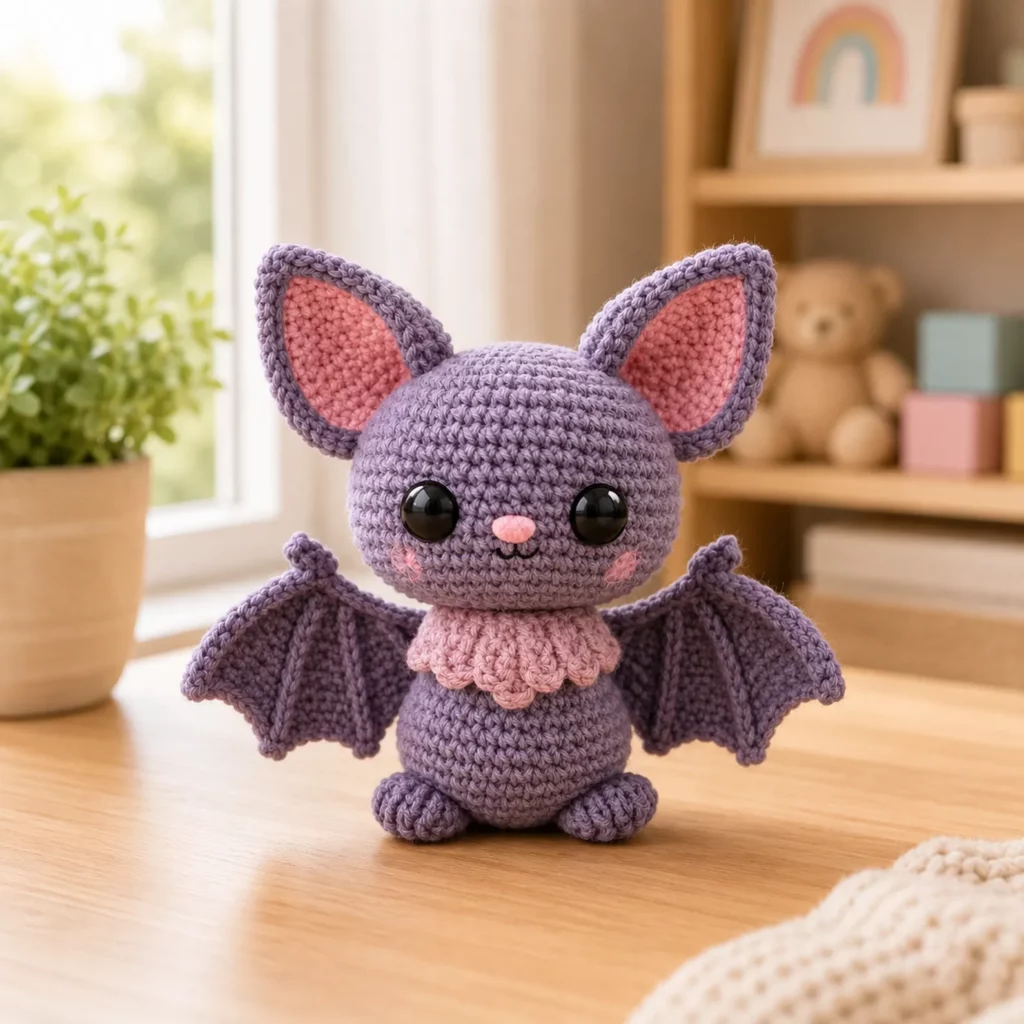
This little bat amigurumi has oversized ears, shiny round eyes, a tiny nose, and soft wings that sit like a hug around its body. It’s the kind of plush you can make for Halloween, sure—but it’s also perfect as year-round decor, a desk buddy, a gift for a bat-lover, or a cute “first amigurumi animal” if you’re still building confidence with shaping and assembly.
The design stays beginner-friendly because it uses the core amigurumi techniques you’ll use again and again: single crochet in the round, simple increases and decreases, and straightforward sewing. The “fancy” details (like the ruffled collar and wing texture) look impressive but are made with easy repeats.
Detailed Description of the Crochet Pattern#
This bat is a seated amigurumi plush made from simple rounded shapes, then finished with character details.
The main parts include:
Head: a smooth sphere with a gentle dome at the top
Body: a small oval that supports a sitting pose
Ears: two large triangular ears with pink inner panels for contrast
Wings: two textured wings with simple rib lines and a scalloped edge
Feet: small claw-like “toes” made with bobble-style bumps or simple rounded nubs
Collar: a short ruffle around the neck that adds a cute, classic bat silhouette
Face: safety eyes (or embroidered eyes), a small nose, and a tiny stitched smile
Construction is classic amigurumi: crochet all parts, stuff firmly, sew head to body, attach ears and wings, then add face and finishing touches.
Skill Level Explanation#
Skill Level: Confident Beginner
You’ll do well with this easy crochet pattern if you know:
Magic ring (or another method to start a circle)
Single crochet (sc)
Increase (inc) and decrease (dec)
Working in continuous rounds (spiral)
Basic sewing and weaving in ends
Skills you’ll practice:
Invisible decrease for smoother shaping
Working flat rows (for wing sections)
Simple color changes (for inner ears and nose)
Shaping by stuffing (how you stuff matters for that cute look)
This is a great “next step” crochet tutorial if you’ve made one basic amigurumi before—or if you’re a confident beginner ready to learn wings and assembly.
Materials Needed#
Yarn
Worsted weight (Category 4) yarn gives a sturdy plush with clear stitch definition. DK (Category 3) also works for a smaller bat.
Suggested colors:
Main bat: medium gray
Inner ears: soft pink
Nose and blush: light pink
Optional collar contrast: slightly darker gray (or keep it the same)
Yarn choice tips:
Cotton gives crisp stitches and very clean edges
Acrylic is softer and squishier (great for plushies)
Try to keep all yarns the same weight so pieces fit together
Hook
Use a hook slightly smaller than the yarn label suggests to prevent gaps.
Worsted: 3.25–4.0 mm
DK: 2.75–3.5 mm
If you can see stuffing through stitches, go down 0.5 mm.
Notions
Stitch marker
Yarn needle
Scissors
Fiberfill stuffing
Safety eyes (10–14 mm depending on yarn and size)
Black embroidery floss or thin black yarn for mouth details
Optional: blush or pastel chalk for cheeks
Safety Note
If this toy is for a baby or toddler, embroider the eyes instead of using safety eyes and sew all parts extremely securely. Avoid glued embellishments.
Stitches & Techniques Explained#
Common Abbreviations
MR = magic ring
sc = single crochet
inc = increase (2 sc in the same stitch)
dec = decrease (sc2tog)
inv dec = invisible decrease
sl st = slip stitch
ch = chain
BLO = back loop only
FLO = front loop only
( ) = repeat
[ ] = stitch count
Invisible Decrease (Recommended)
Insert hook through the front loop of the next stitch, then through the front loop of the following stitch, yarn over and pull through, yarn over and single crochet. This keeps the head smooth with fewer “dimples.”
Working in Continuous Rounds
You won’t join rounds. Use a stitch marker in the first stitch of each round and move it up each round.
Wing Shaping Basics
These wings are made from a top “arm” section plus a fan-shaped membrane. The membrane uses increases and decreases to create gentle scallops, and optional surface lines create that bat-wing rib look.
Step-by-Step Instructions#
Finished Size
With worsted yarn and a 3.75 mm hook: about 6–9 inches (15–23 cm) tall depending on stuffing and wing span.
With DK yarn and a 3.0–3.25 mm hook: about 5–7 inches (12–18 cm) tall.
Notes Before You Start
Work in continuous rounds unless stated otherwise
Stuff firmly for a smooth, rounded finish
Pin parts in place before sewing so everything is symmetrical
Weave in ends as you go—small parts create lots of tails
Color Key (Optional)
A = main bat color (gray)
B = inner ear (pink)
C = nose (pink)
Head (A)
Round 1: 6 sc in MR [6]
Round 2: inc around [12]
Round 3: (sc, inc) around [18]
Round 4: (2 sc, inc) around [24]
Round 5: (3 sc, inc) around [30]
Round 6: (4 sc, inc) around [36]
Round 7: (5 sc, inc) around [42]
Round 8: (6 sc, inc) around [48]
Rounds 9–15: sc around [48]
Eye placement
Place safety eyes between Rounds 11–12 or 12–13, about 8–10 stitches apart. For a cute expression, place them slightly lower and wider.
Round 16: (6 sc, dec) around [42]
Round 17: (5 sc, dec) around [36]
Round 18: (4 sc, dec) around [30]
Round 19: (3 sc, dec) around [24]
Stuff firmly, shaping the head into a smooth ball.
Round 20: (2 sc, dec) around [18]
Round 21: (sc, dec) around [12]
Round 22: dec around [6]
Fasten off and close. Weave in end.
Nose (C)
A tiny oval nose keeps the face soft and friendly.
Round 1: 6 sc in MR [6]
Round 2: (sc, inc) around [9]
Round 3: sc around [9]
Fasten off leaving a long tail. Lightly stuff if desired, then sew centered between the eyes, slightly lower than midpoint.
Optional mouth
With black floss, stitch a tiny “w” or a small curved smile under the nose.
Optional cheeks
Lightly dab blush under each eye.
Body (A)
Round 1: 6 sc in MR [6]
Round 2: inc around [12]
Round 3: (sc, inc) around [18]
Round 4: (2 sc, inc) around [24]
Round 5: (3 sc, inc) around [30]
Round 6: (4 sc, inc) around [36]
Rounds 7–11: sc around [36]
Start shaping down
Round 12: (4 sc, dec) around [30]
Round 13: sc around [30]
Round 14: (3 sc, dec) around [24]
Stuff firmly, especially the bottom so the bat sits well.
Round 15: sc around [24]
Round 16: (2 sc, dec) around [18]
Round 17: (sc, dec) around [12]
Round 18: dec around [6]
Fasten off and close, leaving a long tail if you want to use it to sew head to body.
Collar Ruffle (A)
This little ruffle gives a “cute vampire bat” vibe without being scary.
Round 1: 18 sc in MR (or ch 18 and join) [18]
Round 2: (inc) around [36]
Round 3: (sc, inc) around [54]
Fasten off with a long tail.
To attach: stretch the ruffle around the neck seam (between head and body) and stitch in place after the head is attached, or sew it to the body top before attaching the head.
Ears (Make 2, Outer A + Inner B)
The ears are large triangles, made as flat pieces, then sewn on. You’ll make an outer ear and a smaller inner ear.
Outer ear (A)
Row 1: ch 2, 2 sc in 2nd ch from hook [2]
Row 2: ch 1, turn, inc in each st [4]
Row 3: ch 1, turn, (sc, inc) across [6]
Row 4: ch 1, turn, (2 sc, inc) across [8]
Row 5: ch 1, turn, (3 sc, inc) across [10]
Row 6: ch 1, turn, sc across [10]
Fasten off leaving a long tail.
Inner ear (B)
Row 1: ch 2, 2 sc in 2nd ch [2]
Row 2: ch 1, turn, inc in each st [4]
Row 3: ch 1, turn, (sc, inc) across [6]
Row 4: ch 1, turn, sc across [6]
Fasten off leaving a tail.
Sew inner ear centered onto outer ear. Then sew ears onto the head, angled slightly outward. Place them high on the head so they look extra oversized and cute.
Wings (Make 2, A)
These wings are designed to sit like little arms, with a ribbed look and scalloped bottom edge.
Wing top (arm)
Round 1: 6 sc in MR [6]
Round 2: (sc, inc) around [9]
Rounds 3–5: sc around [9]
Do not stuff. Flatten and crochet 4 sc across to close the top. This creates a small “shoulder” attachment point.
Wing membrane (worked flat off the arm)
With the wing folded so the closed edge is at the top, join yarn at one end of the flattened edge.
Row 1: ch 1, sc across the 4 stitches [4]
Row 2: ch 1, turn, inc, sc 2, inc [6]
Row 3: ch 1, turn, sc, inc, sc 2, inc, sc [8]
Row 4: ch 1, turn, sc 2, inc, sc 2, inc, sc 2 [10]
Row 5: ch 1, turn, sc across [10]
Create scalloped edge (bottom)
Row 6: ch 1, turn, (sl st, sc, hdc) in next st, sl st in next st, repeat across to create soft dips
Fasten off leaving a tail.
Optional wing ribs
With the same yarn, use surface slip stitch lines from the top edge down toward the scallops (2–3 lines per wing). This gives that classic bat-wing look.
Sew wings to the sides of the body, slightly forward, so they look like they’re open and hugging.
Feet (Make 2, A)
Simple rounded feet that look like little “toes.”
Round 1: 6 sc in MR [6]
Round 2: inc around [12]
Round 3: sc around [12]
Round 4: (sc, dec) around [8]
Lightly stuff. Flatten and close with 4 sc across. Fasten off with a tail.
If you want extra toe texture, add tiny bobbles on the last round:
Instead of Round 3 sc around, do (bo, sc) repeat around for bumpy toes.
Sew feet to the lower front of the body.
Assembly
Sew head to body centered. Go around twice for stability.
Attach collar ruffle around the neck seam and stitch down.
Sew ears to the top sides of the head, angled outward evenly.
Sew wings to the sides of the body, slightly forward.
Attach feet to the bottom front so the bat sits nicely.
Sew nose and embroider mouth details. Add blush if desired.
Weave in all ends securely and do a final shape check.
Common Mistakes and How to Avoid Them#
The head looks lopsided
Count stitches every round and use a stitch marker
Stuff gradually and reshape before closing
Use invisible decreases for cleaner shaping
Stuffing shows through
Use a smaller hook
Keep tension firm
Don’t overstuff small parts like the nose
Ears look uneven
Make both ears at the same time (row-by-row)
Pin both ears before sewing and check symmetry from the front
Wings feel too floppy
Use a slightly smaller hook for wings
Add surface slip stitch “ribs” to give structure
Sew the wings in a slightly cupped shape rather than fully flat
The bat won’t sit upright
Stuff the base of the body extra firmly
Place feet slightly more forward
Flatten the bottom slightly when you finish stuffing to create a stable base
Expert Tips for Better Results#
Place eyes before stuffing the head fully so you can adjust spacing
For a super cute look, keep eyes slightly low and a bit wide
Pin everything first: ears, wings, feet, collar—then sew
Weave in ends along stitch “ridges” so they disappear in the texture
If you want a more “premium plush” look, add a tiny white eye highlight stitch with embroidery thread
Variations and Customization Ideas#
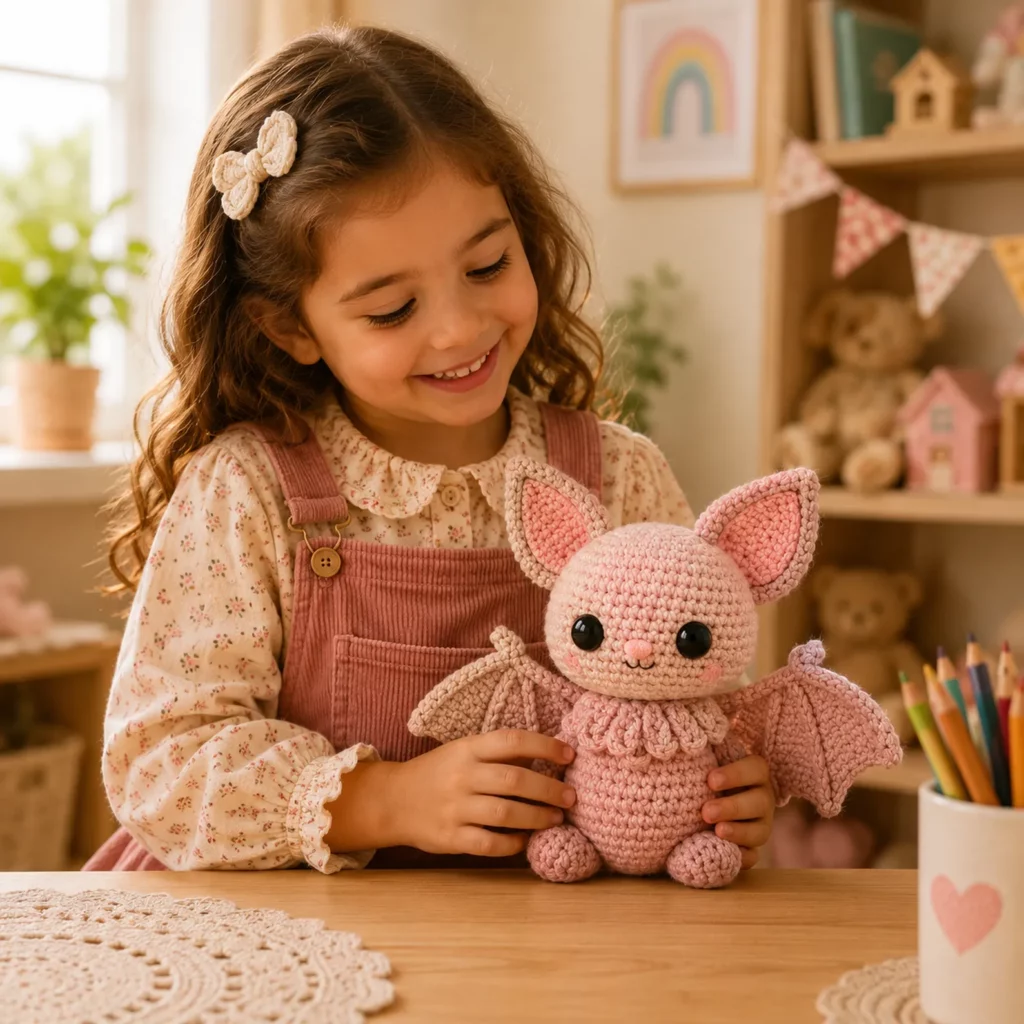
Pastel bat: use lavender or dusty pink body with cream inner ears
Spooky bat: black body with purple inner ears and a tiny embroidered fang
Tiny keychain bat: use DK yarn and a smaller hook; skip collar for simplicity
Sleepy bat: embroidered closed eyes with little lashes
Holiday bat: add a tiny scarf, bow tie, or mini hat
Different collar: replace ruffle with a small capelet (a short half-circle)
Add a hanging loop: chain 12–15, slip stitch back, and sew to the head top
Benefits of This Crochet Project#
A beginner-friendly crochet pattern with a high “cute payoff”
Small parts make it easy to crochet in short sessions
Great stash-buster for accent colors (inner ears, nose, cheeks)
Perfect for Halloween gifts, but cute enough for year-round decor
Builds confidence with wings, flat pieces, and neat assembly
Easy to customize in different colors and themes
Internal Linking Suggestions#
How to Crochet a Magic Ring for Amigurumi
Invisible Decrease Tutorial for Smooth Amigurumi
How to Place Safety Eyes for the Cutest Plush Face
Beginner Guide to Stuffing Amigurumi (No Lumps!)
How to Crochet Wings (Free Mini Guide)
Easy Crochet Animal Patterns for Beginners
Amigurumi Sewing Tips: Attaching Ears and Limbs Neatly
FAQ#
Is this crochet pattern suitable for beginners?
Yes. This is an easy crochet pattern using mostly single crochet, increases, and decreases. The wings are worked in simple rows and are very manageable with stitch counts.
What yarn works best for a crochet bat?
Worsted weight yarn is ideal for a sturdy plush with clean definition. Acrylic is soft and washable; cotton is crisp and shows details like wing ribs beautifully.
What size safety eyes should I use?
For worsted yarn, 10–14 mm works well. For DK yarn, 8–12 mm is usually best. If making for babies, embroider the eyes instead.
How do I make the bat look extra cute?
Place the eyes slightly lower and wider, keep the nose small, and add soft blush cheeks. Oversized ears also help a lot.
Can I make the wings bigger?
Yes. Add 1–2 extra increase rows to the wing membrane (continue the pattern by increasing near the edges), then add one more plain row before the scalloped edge.
Why are my wings curling or twisting?
This usually comes from tight tension on the scalloped edge. Try using a slightly larger hook for the last row or loosen your tension while working the scallops.
How do I make it child-safe?
Use embroidered eyes, stitch everything securely, and avoid small detachable pieces. Make sure all ends are woven in and stitched down tightly.
Conclusion#
This cute bat amigurumi crochet pattern is proof that “spooky” can also be sweet. With a simple, beginner-friendly body, oversized ears, soft wings, and a charming little collar, it’s a plush you can make for Halloween or keep out all year long. Once you finish one, it’s incredibly tempting to make a whole little bat family in different colors.
If you tell me your yarn weight (DK or worsted) and hook size, I can recommend the best eye size and help you adjust wing width so your bat’s proportions turn out exactly how you want.


