


Introduction#
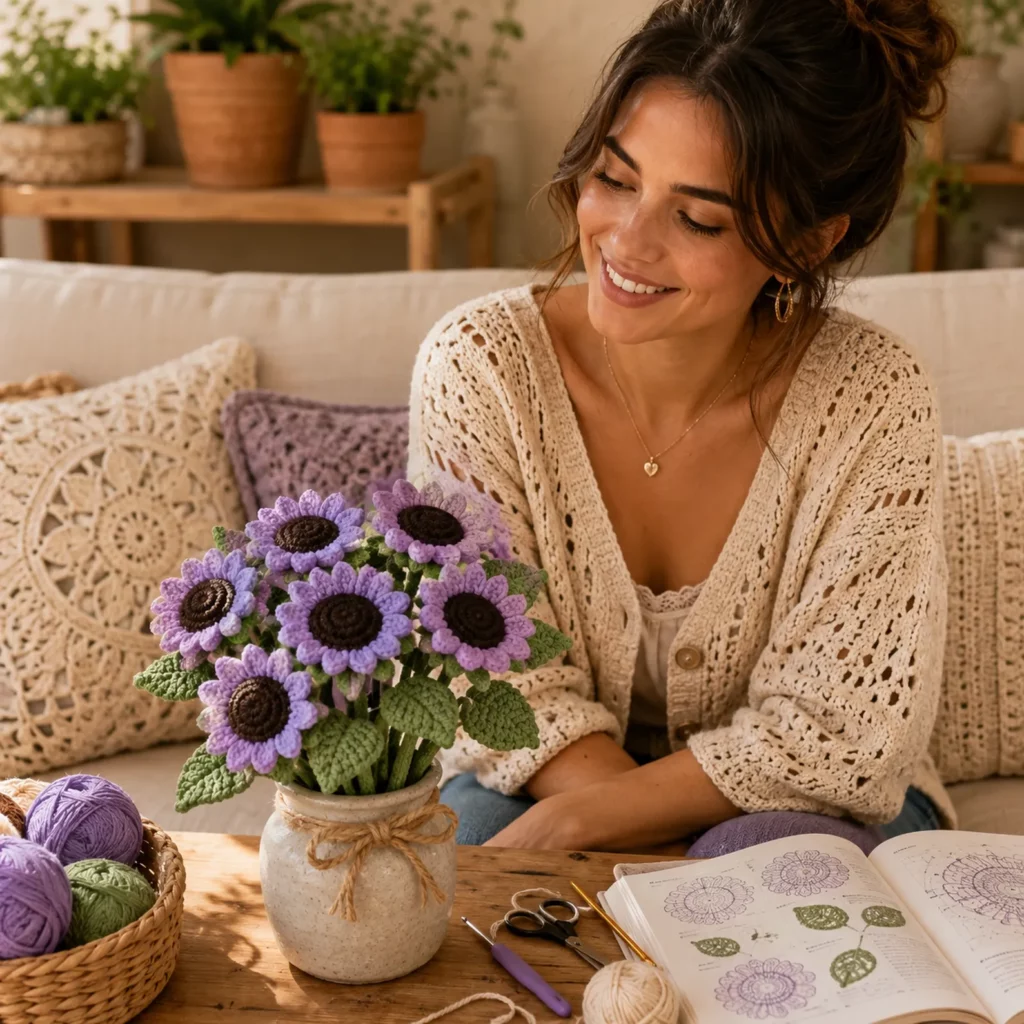
If you want a crochet project that instantly brightens a room (and never wilts), a crochet sunflower bouquet is the perfect make. It’s the kind of handmade décor that looks thoughtful and impressive, but it’s actually built from repeatable pieces: a simple center, a ring of petals, a sturdy stem, and a few leaves. Make one sunflower for a sweet gift, or make a whole bunch for a full vase arrangement that looks like real flowers at a glance.
Explore more beginner amigurumi crochet patterns in our pattern library.
This crochet pattern is written like a crochet tutorial so you can follow it even if you’re new to crochet flowers. You’ll learn how to make sunflower heads that look full and realistic, how to create petals that hold their shape, how to make leaves that add volume, and how to assemble everything into a bouquet that stands nicely in a jar or vase.

Detailed Description of the Crochet Pattern#
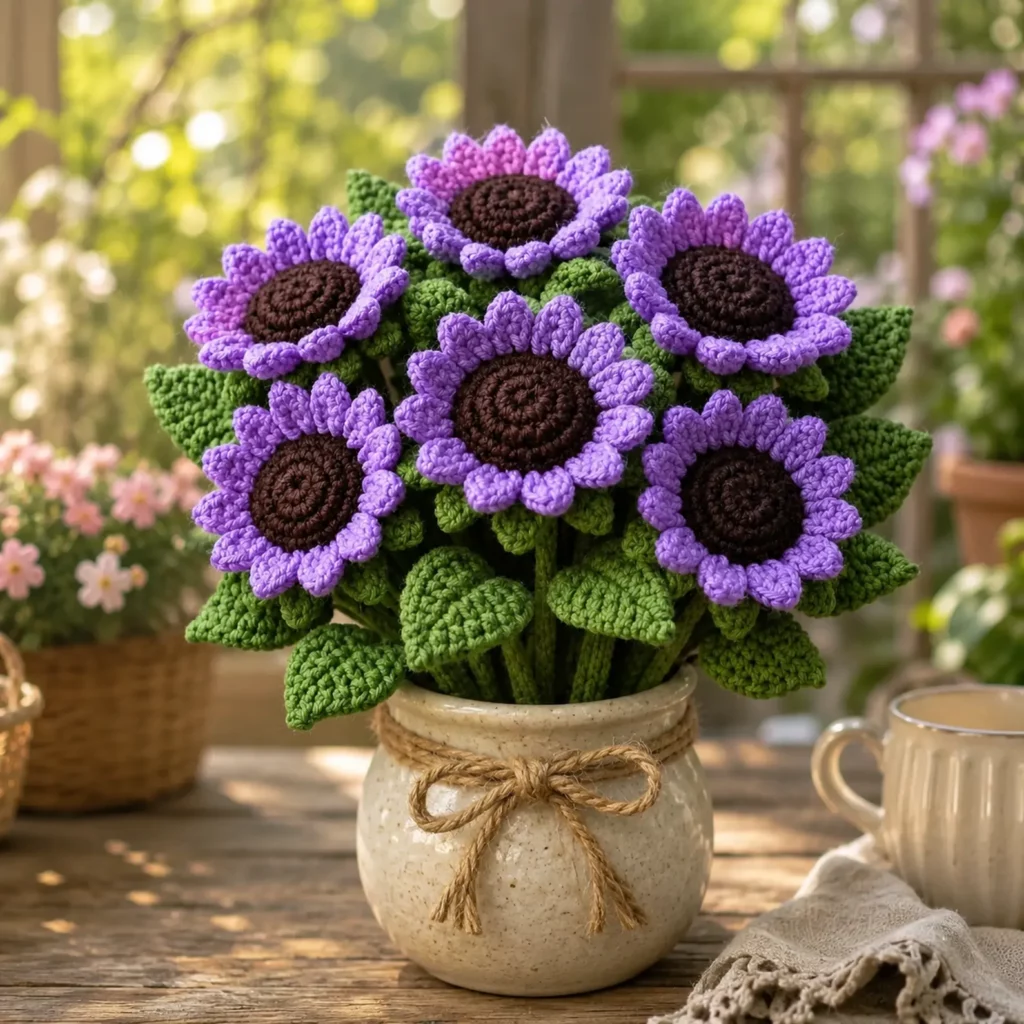
This sunflower bouquet is made from multiple crocheted sunflowers arranged together with green stems and textured leaves. Each flower has a dark brown center, bright yellow petals, and optional green calyx backing to give the head thickness and realism.
What you’ll make for each sunflower
- Center disc (brown): a dense round piece that forms the classic sunflower “seed” center
- Petals (yellow): a full ring of elongated petals that overlap slightly for a realistic look
- Backing/calyx (green, optional): a small green layer behind the petals to make the flower look finished from all angles
- Stem (green): a long tube wrapped around floral wire or pipe cleaner for stability
- Leaves (green): textured leaves attached along the stem to build a bouquet shape
Bouquet style
- Make 5–9 sunflowers for a full arrangement
- Vary stem lengths so the bouquet looks natural
- Add extra leaves between flowers to fill out the vase
This is a great DIY crochet project for home décor, weddings, Mother’s Day gifts, baby showers, and craft fairs.
Skill Level Explanation#
Skill Level: Beginner-Friendly to Confident Beginner
You’ll do great if you already know
- Magic ring
- Chain (ch)
- Single crochet (sc)
- Half double crochet (hdc) and double crochet (dc)
- Slip stitch (sl st)
- Basic seaming/assembly
Newer skills you’ll practice
- Consistent petal repeats
- Making a firm, flat flower center
- Attaching petals evenly
- Creating a sturdy stem with reinforcement
- Building a balanced bouquet arrangement
Materials Needed#
Yarn
Cotton yarn is ideal for flowers because it holds shape and looks crisp.
Recommended yarn weight
- DK (Category 3) for delicate flowers
- Worsted (Category 4) for fuller, faster flowers
Colors
- A: Brown (sunflower centers)
- B: Yellow (petals)
- C: Green (stems and leaves)
Yarn tips
- Cotton gives the cleanest petal definition
- Acrylic works too, but cotton usually holds the shape better
- Use a slightly darker yellow for extra realism (optional)
Hook
Use a hook that makes a firm fabric.
- DK: 3.0–3.5 mm
- Worsted: 3.5–4.5 mm
Stem support
Choose one
- Floral wire (18–22 gauge) for strong upright stems
- Pipe cleaners for beginner-friendly bendable stems
- Wooden skewers (wrap stem around them) for extra sturdy straight stems
Notions
- Stitch marker
- Yarn needle
- Scissors
- Optional: hot glue or fabric glue for quick securing
- Optional: floral tape for finishing stems
- Optional: stuffing (only if you want thicker flower heads)
Stitches & Techniques Explained#
Common Abbreviations
- MR = magic ring
- ch = chain
- sl st = slip stitch
- sc = single crochet
- hdc = half double crochet
- dc = double crochet
- tr = treble crochet
- inc = increase
- ( ) = repeat
- = stitch count
How to Make a Firm Sunflower Center
A sunflower center looks best when it is dense and slightly textured. You can do that by
- crocheting tight stitches with a smaller hook
- using back loop or front loop texture rounds
- optionally adding a puff stitch ring for a “seed” effect
Petal Shape Without Flopping
Petals hold their shape better when
- you use cotton yarn
- you keep the petal stitches tall in the middle and shorter at the edges
- you add a light slip stitch edging to stiffen
Stems That Stand Up
The bouquet looks best when stems are stable. The easiest formula is
- crochet a tight tube
- insert floral wire or pipe cleaner
- wrap with a few stitches or tape to secure
Step-by-Step Instructions#
Finished Size
Each sunflower head is about 2.5–3.5 inches wide (6.5–9 cm) with worsted yarn. You can scale smaller or larger by changing yarn weight and hook size.
Notes Before You Start
- For a bouquet, decide how many flowers you want first
- Make all centers first, then all petals, then stems and leaves
- This assembly line method makes the project much faster
Color Key
- A = Brown
- B = Yellow
- C = Green
Sunflower Center (Make 1 per flower, Color A)#
Round 1: 6 sc in MR [6]
Round 2: inc around [12]
Round 3: (sc, inc) around [18]
Round 4: (2 sc, inc) around [24]
Round 5: (3 sc, inc) around [30]
Round 6: sc around [30]
Optional seed texture round
Round 7: (sc in BLO around) [30]
This creates a subtle ridge and makes the center look more textured.
Fasten off leaving a long tail for sewing.
Center tip
If you want the center slightly domed, add a tiny pinch of stuffing behind it before attaching petals.
Petals (Make 12–18 per flower, Color B)#
You can attach petals directly to the center by working into the edge stitches, or make a petal ring and sew it on. The cleanest beginner method is to crochet petals around the center edge.
Attach Color B to any stitch on the edge of the center.
Petal repeat
(sl st in same stitch, ch 7, sc in 2nd ch, hdc in next, dc in next 3, hdc in next, sc in last, sl st back into the same center stitch)
sl st into next center stitch
Repeat around until you have a full ring of petals.
Petal count suggestion
- 12 petals = simpler, spaced look
- 16 petals = fuller classic sunflower
- 18 petals = very full, plush look
Fasten off and weave in ends.
Petal upgrade for extra fullness
Add a second layer of petals behind the first by attaching yarn to the back loops of the center stitches and repeating the petal instructions again. This makes the flower look much fuller without changing the center size.
Green Calyx Backing (Optional, Color C)#
This makes the flower look finished from behind and helps the head sit nicely on the stem.
Round 1: MR, 6 sc [6]
Round 2: inc around [12]
Round 3: (sc, inc) around [18]
Round 4: (2 sc, inc) around [24]
Round 5: sc around [24]
Fasten off with a long tail.
Leafy points (optional)
Attach yarn and work small points around
(ch 4, sl st back down the chain) repeat 6–8 times evenly
Sew calyx to the back of the flower head after stem is attached.
Stem (Make 1 per flower, Color C)#
Stem length options
- Short vase bouquet: 7–9 inches (18–23 cm)
- Medium bouquet: 9–12 inches (23–30 cm)
- Tall bouquet: 12–16 inches (30–41 cm)
Stem tube
Round 1: 6 sc in MR [6]
Rounds 2–? : sc around [6] until desired length
Insert support
- Slide floral wire or pipe cleaner inside as you crochet
- If using floral wire, fold the top end into a small loop so it won’t poke through the flower
Fasten off leaving a long tail for attaching to the flower.
Stem finish tip
If your stem looks too thin, start with 8 sc in MR and work [8] rounds instead.
Leaves (Make 2–4 per flower, Color C)#
Leaf pattern
Ch 10
Work into the chain: sc in 2nd ch, hdc, dc, dc, tr, dc, dc, hdc, sc
Fasten off with a long tail.
Optional leaf texture
Surface stitch a center vein line with sl st from leaf tip to base.
Leaf attachment
Sew leaves along the stem at different heights for a natural bouquet look.
Assembly#
Attach flower head to stem
- Sew the brown center base to the top of the stem
- Secure firmly with multiple passes of stitching
- If using wire, wrap yarn tail around the wire loop and sew through the center area for extra strength
- Position petals so they sit neatly around the center
Add calyx backing (optional)
- Place the green calyx behind the flower head
- Sew around edges
This hides the stem join and makes the flower look finished.
Attach leaves
- Sew 2–4 leaves to each stem
- Vary direction and height
- Add extra leaves to fill gaps in the bouquet
Build the bouquet
- Arrange stems in your hand first
- Stagger heights so flowers don’t sit at the same level
- Tie stems together with twine or floral tape
- Place into a jar or vase
Bouquet stability tip
If your vase is light, add stones or rice inside the vase to hold stems upright.
Common Mistakes and How to Avoid Them#
Petals curl or look floppy
- Use cotton yarn
- Keep tension consistent
- Add a slip stitch edging around petals
- Block petals lightly with steam
Center looks too small
- Add one more increase round before stopping
- Or add a second petal layer for fullness
Flower head spins on stem
- Secure with multiple passes of stitching
- Wrap yarn around stem support wire and stitch into center base
- Add calyx backing to lock it in place
Stems bend too easily
- Use thicker floral wire
- Double up pipe cleaners
- Use wooden skewers inside for straight stems
Bouquet looks flat
- Add more leaves
- Vary stem heights
- Make one or two flowers slightly larger by adding extra petals
Expert Tips for Better Results#
- Make all centers first, then all petals, then assemble. It’s faster and keeps the bouquet consistent.
- For a realistic sunflower, use two yellows: one bright and one slightly deeper golden tone for alternating petals.
- If you want extra “seed” texture, work a puff stitch round on the center instead of a plain sc round.
- A calyx backing is the secret to making crochet flowers look professional from every angle.
- Twist stems slightly after placing in the vase so petals face outward naturally.
Variations and Customization Ideas#
- Make mini sunflowers for a small jar bouquet using DK yarn and fewer petals
- Add a ribbon bow around the bouquet for gifting
- Create a mixed bouquet by adding daisies or lavender stems alongside sunflowers
- Use a gradient center (dark brown to lighter brown) for extra depth
- Make a sunflower keychain or brooch by skipping stem and adding a pin backing
Benefits of This Crochet Project#
- Never-wilt flowers that brighten any space
- Beginner-friendly stitches with high visual impact
- Great stash-buster for small yarn amounts
- Perfect handmade gift that feels thoughtful and lasting
- Easy to make in batches for craft fairs
- Customizable for any season, vase size, or décor style
Internal Linking Suggestions#
- How to Crochet a Magic Ring for Beginners
- Easy Crochet Leaf Pattern Tutorial
- How to Make Crochet Flowers Stand Up With Stems
- Best Cotton Yarn for Crochet Flowers
- Beginner Crochet Bouquet Patterns Collection
FAQ#
Is this crochet sunflower bouquet pattern beginner-friendly?
Yes. The stitches are simple, and the flower is built from repeatable parts. The key is consistent petal repeats and firm stem attachment.
What yarn is best for crochet flowers?
Cotton yarn is best because it holds shape and shows stitch definition clearly. Acrylic works too but may be softer and less crisp.
How do I make the stems stand up straight?
Use floral wire, double pipe cleaners, or a wooden skewer inside the crocheted stem tube. Adding weight in the vase also helps.
How many petals should I make?
16 petals gives a classic full sunflower look. 12 looks simpler, and 18 looks extra plush and full.
Can I make these flowers washable?
Yes if you use washable yarn and avoid wire. With wire, spot cleaning is best. Always air dry.
How do I keep the flower head from wobbling?
Sew the head to the stem very securely, wrap yarn around the wire loop if using wire, and add a green calyx backing to lock everything in place.
Conclusion#
A crochet sunflower bouquet is one of the happiest crochet pattern projects you can make. It’s bright, cheerful, and endlessly giftable, and it looks beautiful in a vase year-round without any maintenance. Once you learn the center-and-petal rhythm, you can build a full bouquet quickly by repeating the same steps and varying the stem heights.
If you tell me how tall you want your finished bouquet and what yarn weight you’re using, I can suggest the exact stem length range and the best petal count for the fullness you want.


