


Introduction#
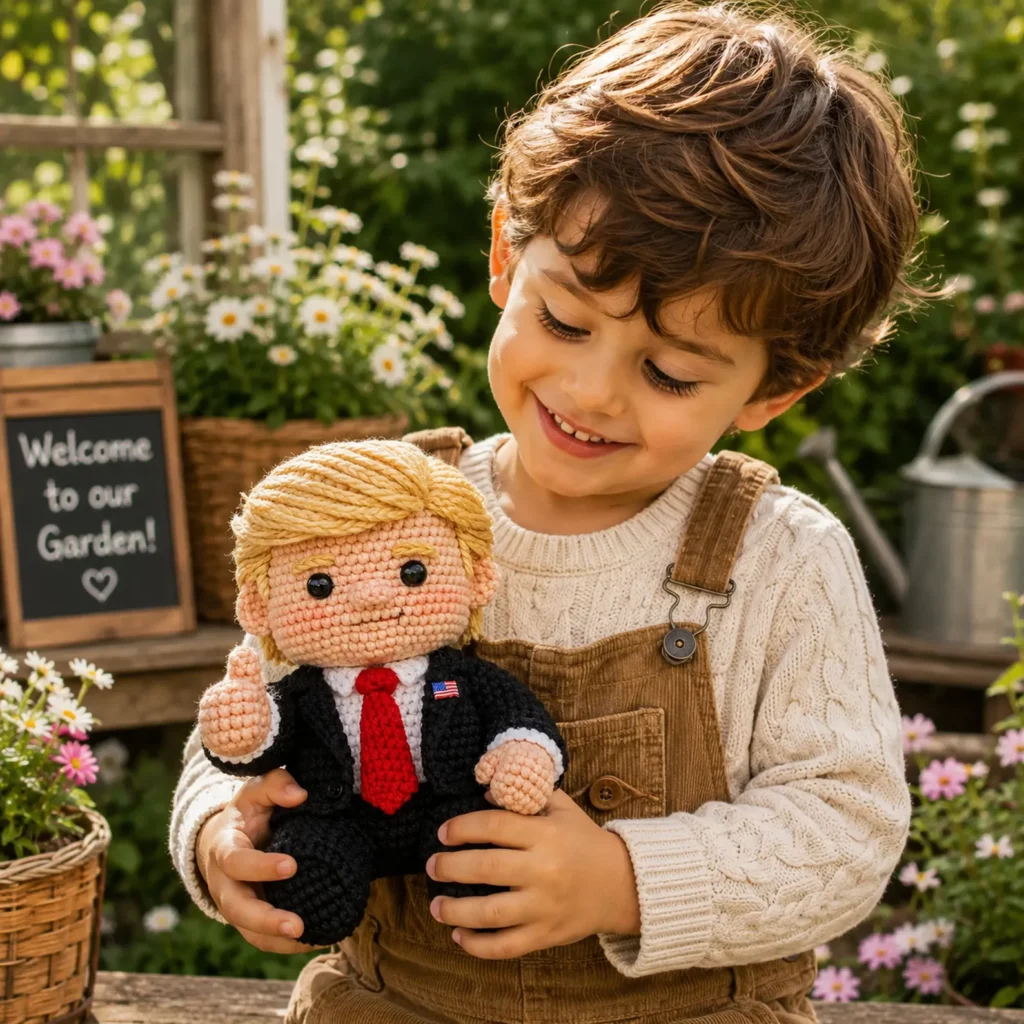
Some crochet projects are cozy, some are cute, and some are instantly conversation starters. A “business doll” amigurumi falls into that last category in the best way. With a tiny suit jacket, crisp white shirt front, and a bold red tie, this crochet pattern creates a fun, playful character that looks polished and recognizable as a classic “formal outfit” doll style—perfect for office gifts, gag gifts (the wholesome kind), desk décor, graduation surprises, or even as a unique topper for themed baskets.
Explore more beginner amigurumi crochet patterns in our pattern library.
The good news is that you don’t need complicated shaping to get a professional look. The secret is building a clean base body first, then adding clothing details as separate layers: a jacket panel, a shirt insert, a tie, and a textured hairstyle. When you work in that order, the doll looks “dressed” instead of just being a plain body with colors.
This crochet tutorial is written to be beginner-friendly while still giving you those little details—lapels, cuffs, hair sweep, and a tidy face—that make the finished doll feel high quality and AdSense-friendly (real value, not fluff).
Detailed Description of the Crochet Pattern#
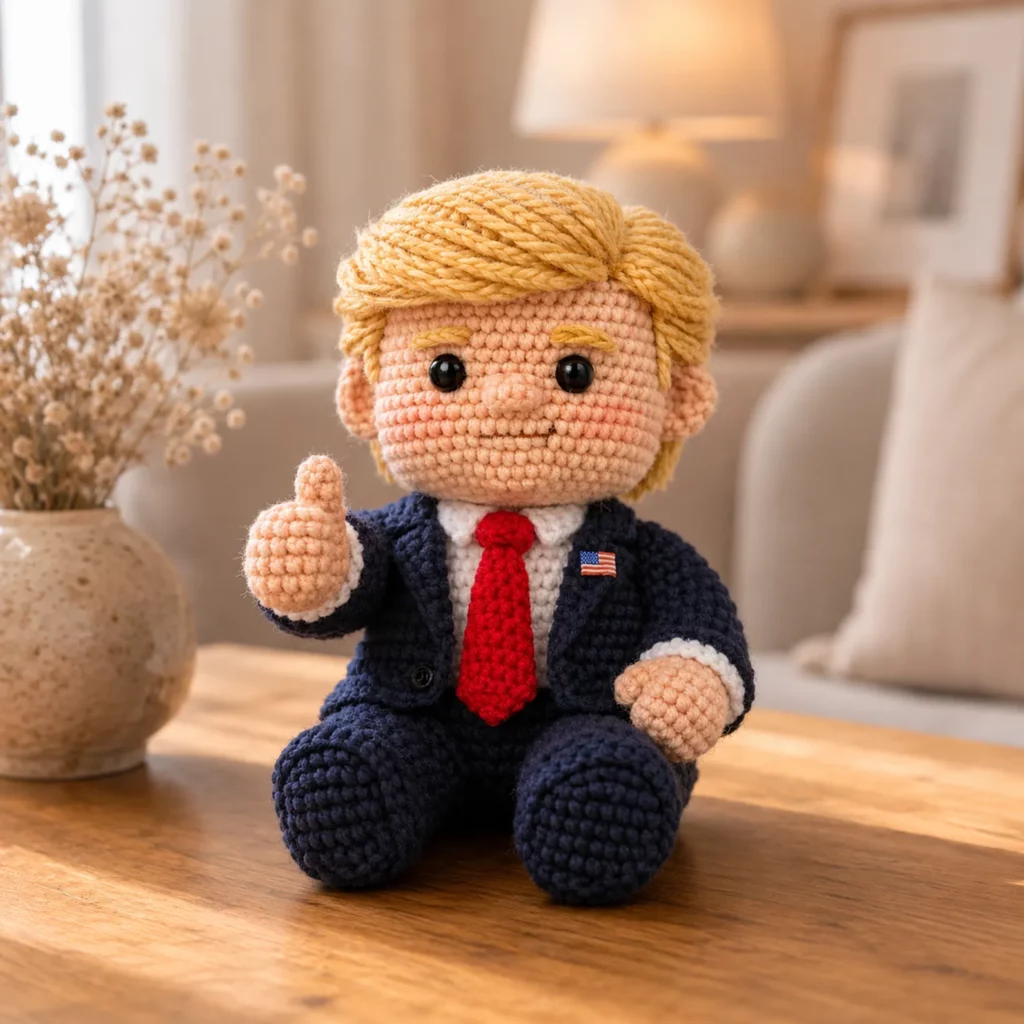
This crochet pattern makes a seated amigurumi doll dressed in a formal outfit. The character has a round head with simple facial features, a swept hairstyle made from yarn strands or crocheted hair pieces, and a suit-style outfit with contrasting shirt and tie. The body is designed to sit upright with chunky legs, making it great for shelf or desk display.
Key design elements you’ll crochet
Round head with safety eyes and embroidered smile
Ears that add personality and realism
Blonde-style swept hair texture (customizable to any color)
Black (or dark) suit jacket look with white shirt front
Red tie applique for a classic formal vibe
Chunky legs and seated posture
Optional tiny badge or lapel detail (you can skip this or swap for a heart, flower, or initials)
How it’s made
Head worked in continuous rounds, stuffed firmly
Body as one piece or separate torso and legs (this tutorial uses separate pieces for easier outfit shaping)
Arms made separately and sewn on
Suit is created with color changes and/or jacket panels sewn to the torso
Hair built last so you can adjust the style to match your vision
Skill Level Explanation#
Skill level: Confident beginner to intermediate beginner
Great for
Crochet for beginners who have made at least one amigurumi before
Anyone wanting to learn neat outfit layering on dolls
Crafters who enjoy detail work like tiny ties and hair styling
Skills you’ll practice
Magic ring and working in continuous rounds
Invisible decreases for smooth shaping
Clean color changes
Simple applique pieces (tie, lapels)
Assembly and symmetry (arms, ears, hair placement)
This is an easy crochet pattern in stitches, but it rewards careful finishing.
Materials Needed#
Yarn
Worsted weight (Category 4) acrylic or cotton yarn works best for definition.
Skin tone yarn (choose your preferred shade)
Hair color yarn (blonde shown, but any works)
Suit color yarn (black or charcoal looks sharp)
White yarn for shirt
Red yarn for tie
Optional accent yarn for details (small badge, shoes, etc.)
Hook
3.0 mm to 4.0 mm (use a smaller hook than the yarn label suggests for tight stitches)
Notions
Stitch marker
Tapestry needle
Scissors
Fiberfill stuffing
Safety eyes 10–14 mm (or embroider eyes for child-safe version)
Optional: small felt piece for mouth shaping or cheeks (not required)
Stuffing tip
For a crisp suit look, stuff the torso and legs firmly so the clothing details sit smoothly on top.
Stitches & Techniques Explained#
Abbreviations
MR magic ring
sc single crochet
inc increase (2 sc in one stitch)
dec invisible decrease (sc2tog using front loops)
sl st slip stitch
ch chain
BLO back loop only
FLO front loop only
st stitch
rep repeat
Invisible decrease (recommended)
Insert hook into front loop of next stitch, then front loop of following stitch, yarn over, pull through, yarn over, pull through 2. This keeps the face and suit looking smooth.
Clean color changes
Finish the last yarn over of the stitch with the new color. This prevents little specks of the old color from showing.
Hair methods
Strand hair: attach yarn strands and brush/trim into a style
Crocheted hair cap: a fitted cap plus stitched strands for the sweep
This tutorial gives an easy hybrid method that looks tidy and is adjustable.
Step-by-Step Instructions#
Finished size
With worsted yarn and a 3.5 mm hook: about 8–11 inches (20–28 cm) tall depending on stuffing and leg length.
Notes
Work in continuous rounds unless stated
Use a stitch marker for round start
Stuff firmly as you go
Pin pieces before sewing
Head (skin tone)
R1 6 sc in MR (6)
R2 inc around (12)
R3 (sc, inc) around (18)
R4 (2 sc, inc) around (24)
R5 (3 sc, inc) around (30)
R6 (4 sc, inc) around (36)
R7 (5 sc, inc) around (42)
R8–R12 sc around (42)
Place eyes between rounds 10–11, about 8–10 stitches apart.
R13 (5 sc, dec) around (36)
R14 sc around (36)
R15 (4 sc, dec) around (30)
R16 sc around (30)
Begin stuffing.
R17 (3 sc, dec) around (24)
R18 (2 sc, dec) around (18)
R19 (sc, dec) around (12)
R20 dec around (6)
Fasten off, close, weave in.
Ears (make 2, skin tone)
R1 6 sc in MR (6)
R2 (sc, inc) around (9)
R3 sc around (9)
R4 (2 sc, dec) around (6)
Flatten lightly, fasten off with a sewing tail.
Sew ears slightly below eye level, about 2–3 stitches behind the eyes.
Nose and Mouth (embroidery)
Optional nose bump
Embroider a small horizontal stitch for the mouth line, then a tiny vertical stitch above it for a simple “smile center.” Keep it subtle for a clean formal look.
Torso (shirt base + suit overlay)
You have two clean options
Option A crochet the torso in white, then add a jacket panel in black (recommended for a crisp suit look)
Option B crochet torso in black and add a white shirt insert panel
Below is Option A.
Torso base (white)
R1 6 sc in MR (6)
R2 inc around (12)
R3 (sc, inc) around (18)
R4 (2 sc, inc) around (24)
R5–R9 sc around (24)
R10 (2 sc, dec) around (18)
R11 sc around (18)
R12 (sc, dec) around (12)
Stuff firmly, fasten off leaving a long sewing tail to attach to legs or close bottom depending on your build.
If you want a broader “jacket” look
Keep torso at 24 stitches for 2 extra rounds before decreasing.
Legs (make 2, suit color)
R1 6 sc in MR (6)
R2 inc around (12)
R3 sc around (12)
R4 (4 sc, dec) around (10)
R5–R10 sc around (10)
Stuff firmly, flatten top, fasten off with tail.
Join legs
Sew legs to the bottom of the torso, slightly angled forward so the doll sits naturally.
Arms (make 2, suit color with skin tone hands)
Hand (skin tone)
R1 6 sc in MR (6)
R2 (sc, inc) around (9)
R3 sc around (9)
Switch to suit color for sleeves
R4 sc around (9)
R5–R9 sc around (9)
Stuff lightly (more at the hand than the arm), flatten top, fasten off.
Attach arms to torso sides.
For a “thumbs up” pose, rotate one arm so the hand faces forward.
Suit Jacket Panels (suit color)
These panels give the dressed look without needing complex colorwork.
Jacket back panel
Ch 9
Row 1 sc in 2nd ch and across (8)
Row 2 ch 1, turn, sc across (8)
Repeat until the panel fits the torso height (about 6–8 rows)
Fasten off.
Jacket front panels (make 2)
Ch 6
Row 1 sc in 2nd ch and across (5)
Row 2 ch 1, turn, sc across (5)
Make same height as back panel.
Lapels (optional but looks great)
On each front panel, add a small triangle by
Joining yarn near top edge, ch 1, sc 2, turn, sc 2, turn, sc 1
This creates a tiny lapel angle.
Sew panels onto torso
Back panel centered on the back
Front panels on either side of the shirt front, leaving a neat opening
Tie (red)
Ch 10
Row 1 sc in 2nd ch and across (9)
Row 2 ch 1, turn, sc across (9)
Row 3 ch 1, turn, dec, sc 5, dec (7)
Row 4 ch 1, turn, dec, sc 3, dec (5)
Fasten off.
Tie knot
Make a tiny knot piece
Ch 4, sc in 2nd ch and across (3)
Wrap around the top of the tie and stitch in place.
Sew tie to the shirt front centered under the head placement.
Hair (simple swept style)
Hair cap base (hair color)
R1 6 sc in MR (6)
R2 inc around (12)
R3 (sc, inc) around (18)
R4 (2 sc, inc) around (24)
R5 (3 sc, inc) around (30)
R6 (4 sc, inc) around (36)
R7 sc around (36)
R8 sc around (36)
Fasten off with a sewing tail.
Sew the cap to the head, leaving a little forehead space above the eyes.
Swept strands
Cut 20–40 strands of yarn, each about 6–10 inches long.
Latch them through the front half of the cap and sides.
Brush gently with fingers and sweep to one side.
Trim into a neat side-part style.
Eyebrows (optional)
Embroider small curved stitches above the eyes using the hair color yarn.
Assembly Order (recommended)
Sew ears to head
Attach hair cap and style hair
Make torso and attach legs
Sew jacket panels and tie
Attach head to torso (very firmly)
Attach arms
Final shaping and touch-ups
Common Mistakes and How to Avoid Them#
The doll won’t sit well
Stuff legs firmly
Angle legs slightly forward during sewing
Flatten the bottom slightly while stuffing
Face looks uneven
Mark the center line of the head with pins
Place eyes first, then center the muzzle/mouth below
Jacket looks bulky
Use thinner yarn for jacket panels if needed
Sew only the edges so the panel lies flat
Avoid overstuffing the torso once jacket is attached
Tie looks too wide
Reduce the starting chain by 2
Or use slip stitches instead of sc for a thinner tie
Hair looks messy
Use fewer strands for a cleaner style
Attach strands in rows
Trim slowly and evenly
Expert Tips for Better Results#
Use cotton yarn for a crisp “tailored” suit look
Add a tiny white cuff band by crocheting one round in white at the wrist before switching back to suit color
For a more polished smile, embroider a tiny curve instead of a straight line
If you want a more defined jawline, add one extra decrease round on the head before closing
Pin jacket panels and tie before sewing so everything aligns perfectly
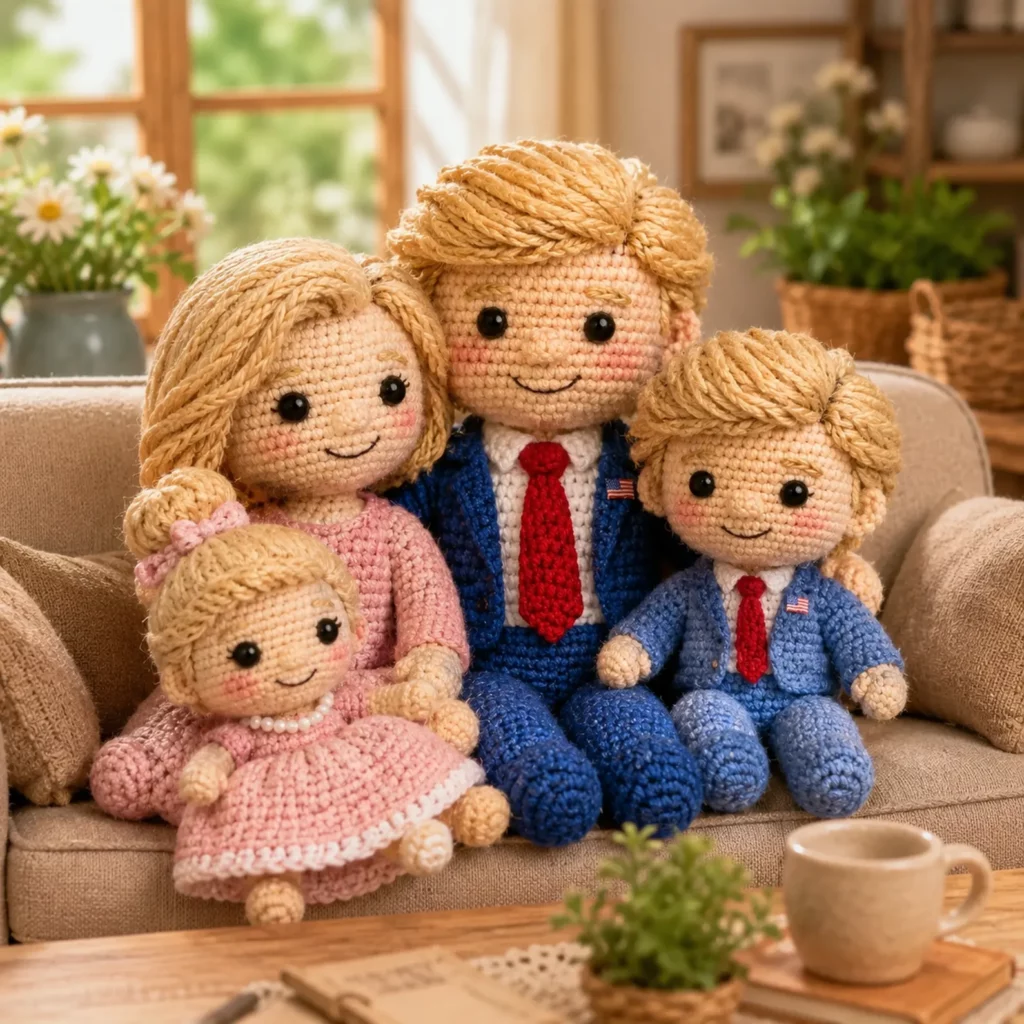
Variations and Customization Ideas#
Make it more fashion-forward
Swap the red tie for a pastel scarf or a patterned bow tie
Change suit color to navy, gray, or even bright pink for a fun statement
Add a tiny handbag, clutch, or briefcase accessory
Make it more “women’s outfit” focused
Replace the tie with a pearl necklace applique
Turn the jacket into a blazer dress by extending the torso and adding a skirt panel
Add a pencil skirt and heels as separate pieces
Use a textured stitch for a tweed-style jacket effect
Make it gift-ready
Add initials to the jacket pocket area with surface embroidery
Create a mini “name tag” felt patch (for display use)
Benefits of This Crochet Project#
A unique crochet pattern that stands out from standard animals
Perfect desk décor or themed gift
Teaches outfit layering techniques for amigurumi
Highly customizable hair, suit colors, and accessories
Looks polished and photo-friendly for blogs and social media
Great stash buster for small amounts of yarn in multiple colors
Internal Linking Suggestions#
Easy Crochet Doll Patterns for Beginners
How to Crochet Hair for Amigurumi Dolls
Best Yarn for Amigurumi With Clean Stitch Definition
How to Sew Amigurumi Parts Neatly
Free Crochet Accessory Patterns for Dolls
FAQ Section#
Is this crochet pattern beginner-friendly?
Yes, if you’ve made at least one amigurumi before. The stitches are simple, and the outfit pieces are easy panels and appliques.
Can I make it without safety eyes?
Absolutely. Embroider the eyes with black yarn or thread for a child-safe option.
How do I change the size?
Use thicker yarn and a larger hook for a bigger doll, or thinner yarn and a smaller hook for a mini doll.
How do I keep the suit looking neat?
Stuff the torso firmly, sew jacket panels flat, and use tight stitches so the fabric doesn’t gap.
Can I turn this into a women’s business doll?
Yes. Swap the tie for a necklace, change the hairstyle, add a skirt panel, or crochet a blazer dress silhouette.
What’s the best yarn for clean clothing details?
Cotton or a smooth acrylic blend works best so lapels and tie edges look crisp.
Conclusion#
A crochet suit doll is a fun, stylish crochet pattern that’s all about the details: clean facial placement, a tidy hairstyle, and layered clothing pieces that read clearly as a formal outfit. Once you’ve made one, it’s easy to customize into different looks—different suit colors, different hairstyles, and even a complete women’s business outfit variation with a blazer dress or skirt set.
If you tell me the exact look you want next (blazer dress, skirt suit, or pantsuit), I can rewrite the outfit section with the matching clothing pieces while keeping the same head and body base.


