


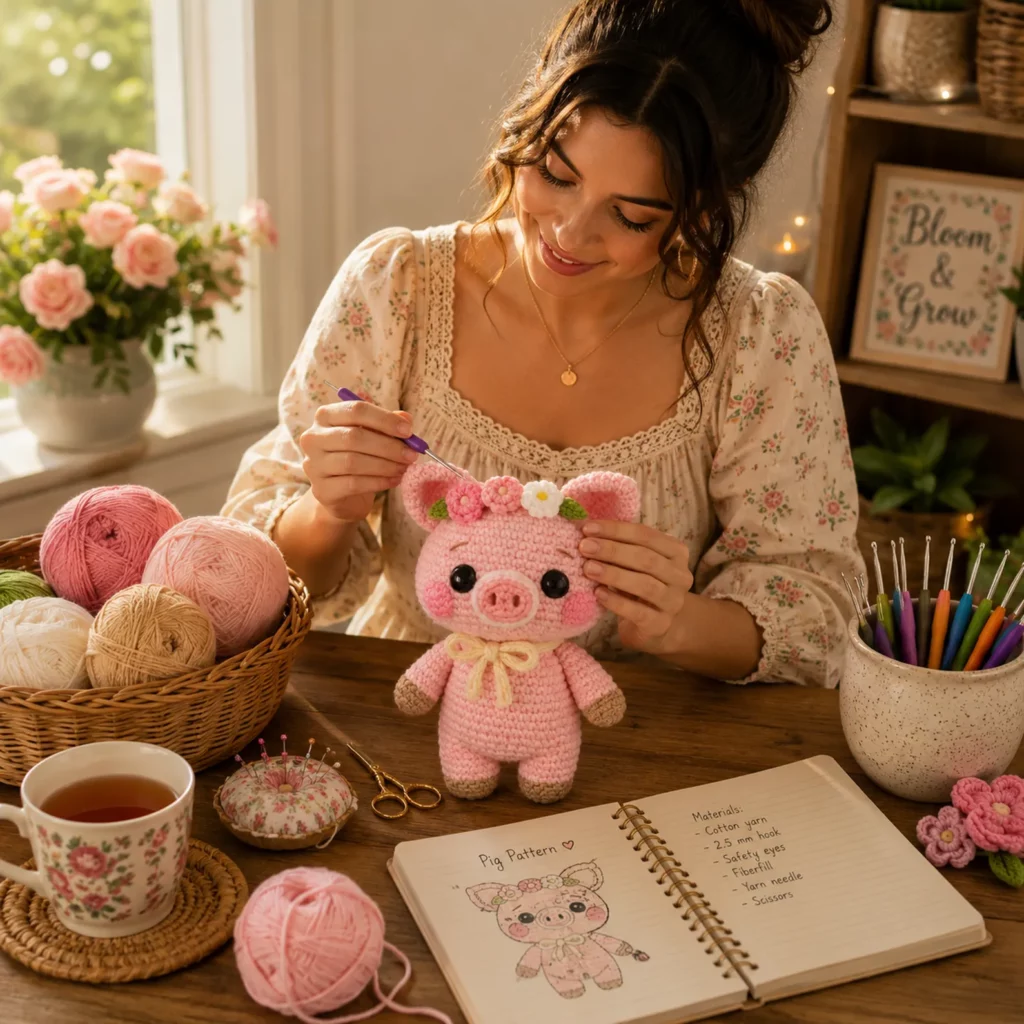
Introduction#
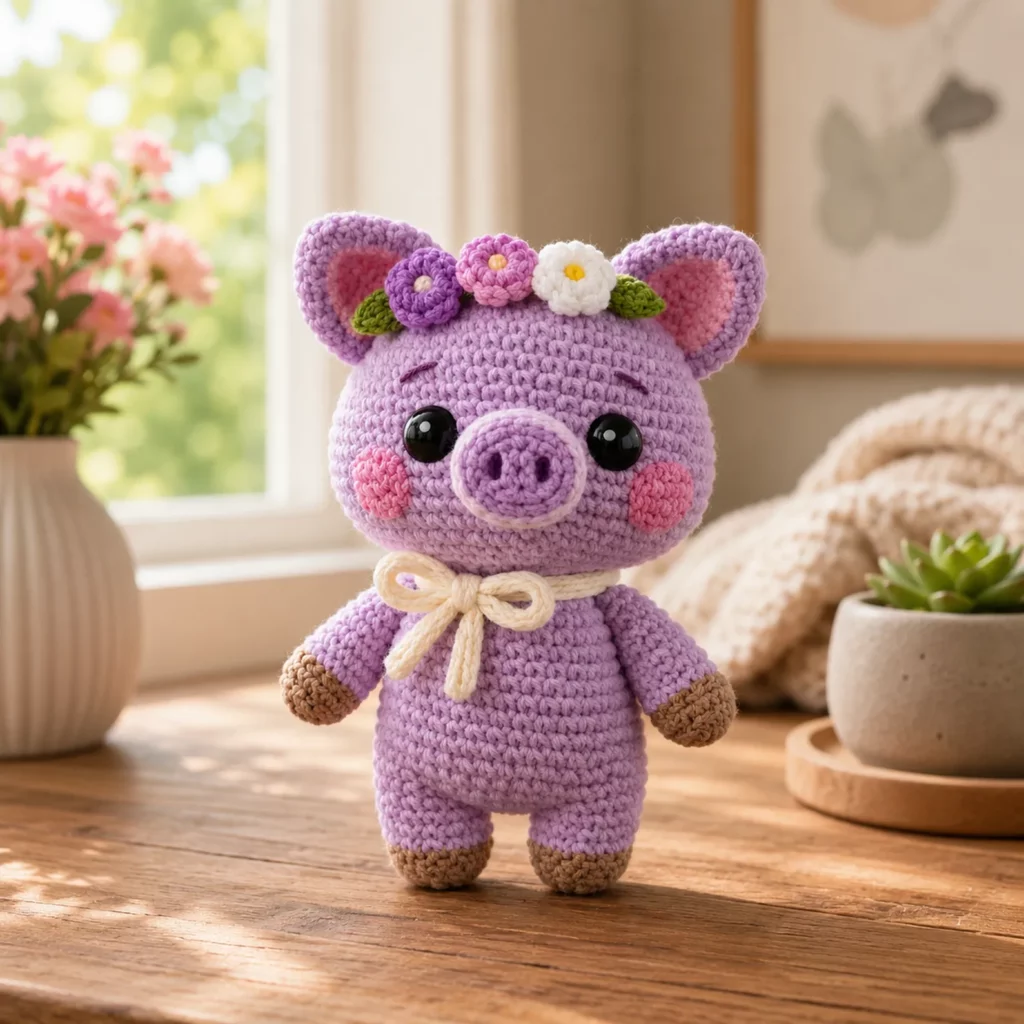
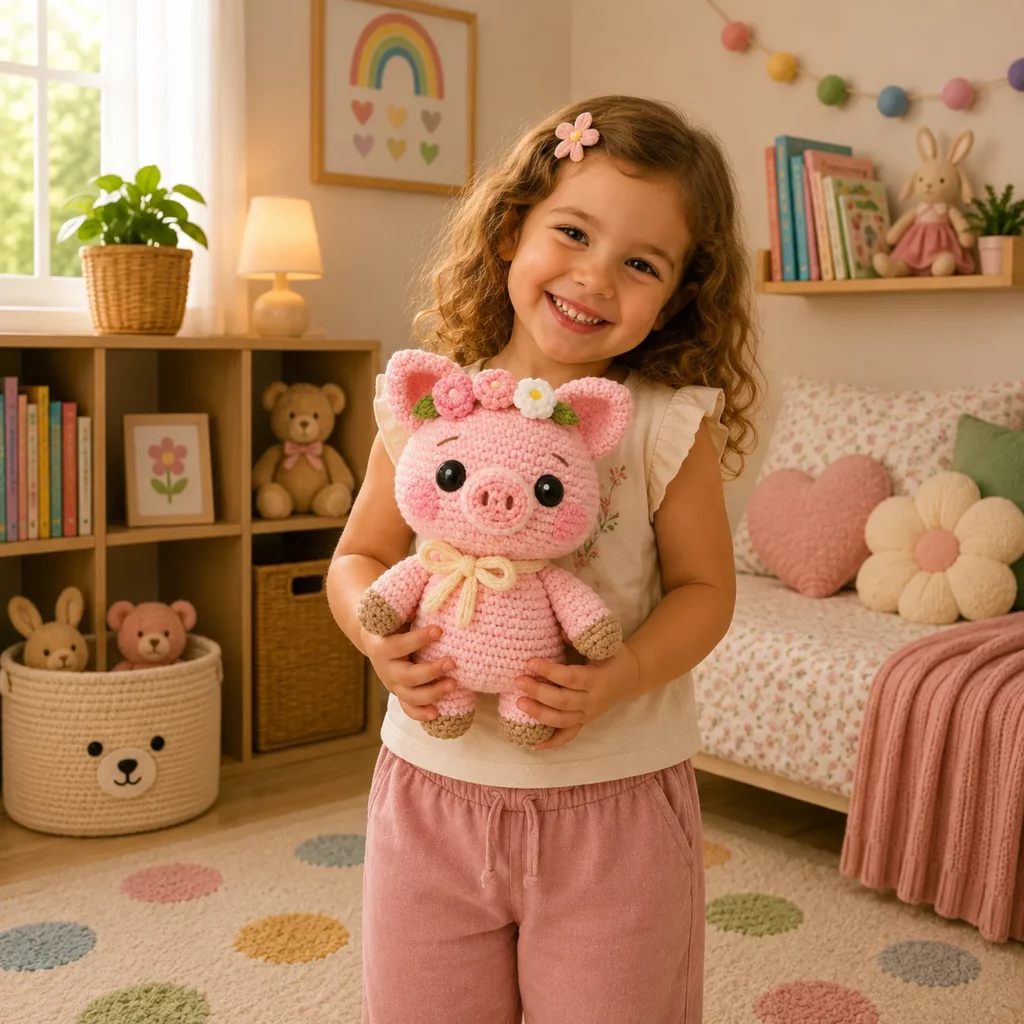
There’s something about a little crochet pig that instantly makes people smile. Maybe it’s the round snout, the soft cheeks, or the tiny hooves that make it look like it’s ready for a hug. This style of amigurumi is especially popular because it’s simple enough for confident beginners, but the finishing details—like a flower crown and a delicate bow—make it look like a boutique handmade plush.
Explore more beginner amigurumi crochet patterns in our pattern library.
This crochet pattern walks you through making a standing pig amigurumi with a rounded head, smooth body, sweet blush cheeks, and a floral crown. The design uses mostly single crochet, basic increases and decreases, and easy sewing. The flower crown is made from small crocheted blossoms and leaves, so you can customize it endlessly: pastel, bright, seasonal, or even a holiday-themed version.
If your goal is a high-value DIY crochet project that looks adorable in photos and feels gift-ready, this is the one.
Detailed Description of the Crochet Pattern#
This crochet pattern creates a small standing pig with these defining features:
- Round head with a raised snout and embroidered nostrils
- Large eyes for a cute, baby-like expression
- Soft cheeks (embroidered or lightly tinted)
- Simple upright body with a slightly wider base for stability
- Short arms and legs with contrasting hoof tips
- Optional neck bow for extra charm
- Floral crown made from mini flowers and tiny leaves attached across the top of the head
The overall silhouette is compact and balanced. The head is slightly larger than the body (classic amigurumi proportions), which makes the pig look extra sweet. The body is shaped to stand without needing a base, especially when the feet are placed evenly and the stuffing is firm.
Skill Level Explanation#
This is a confident beginner to intermediate crochet pattern.
You’ll be comfortable if you can
- Crochet single crochet in continuous rounds
- Increase and decrease neatly
- Count stitches and use a stitch marker
- Sew amigurumi parts securely
- Add simple embroidery details (nostrils, eyebrows, blush)
You’ll learn or practice
- Making a clean raised snout without lumps
- Positioning legs so the plush stands evenly
- Building small flowers and leaves for a crown
- Creating a polished “gift-ready” finish with small details
If you’ve made one or two amigurumi toys before, this pig will feel very doable.
Materials Needed#
Yarn
Smooth yarn gives the cleanest stitch definition and makes the flower crown look crisp.
Recommended yarn weight
- DK weight for a smaller, detailed pig
- Worsted weight for a slightly larger plush
Suggested colors
- Main body: light pink
- Snout and inner ears: slightly darker pink (optional)
- Hooves: tan or light brown
- Flower crown: pinks, white, and a little yellow for centers
- Leaves: green (one or two shades looks extra pretty)
- Bow: cream or pale yellow
Yarn tips
- Cotton yarn gives the sharpest stitches and great structure
- Acrylic is softer and washes well, great for gifts
- Avoid fuzzy yarn because it hides the facial details
Hook
Use a smaller hook than the yarn label suggests for tight amigurumi fabric.
- DK yarn: 2.75 mm to 3.25 mm
- Worsted yarn: 3.25 mm to 4.0 mm
Notions
- Stitch marker
- Tapestry needle
- Scissors
- Fiberfill stuffing
- Safety eyes (8 mm to 12 mm depending on size) or embroidery floss
- Embroidery thread for nostrils and eyebrows (brown or darker pink)
- Optional blush for cheeks (display only)
- Optional floral wire for crown shaping (display only)
Safety note
For a baby-safe version, embroider eyes instead of using safety eyes, and skip any wire.
Stitches & Techniques Explained#
US terms are used.
Abbreviations
- MR magic ring
- ch chain
- sl st slip stitch
- sc single crochet
- inc increase (2 sc in one stitch)
- dec decrease (sc 2 stitches together)
- st stitch
Invisible decrease
For a smoother finish, use invisible decreases by picking up the front loops of the next two stitches and single crocheting them together.
Clean color changes
Change color on the last yarn-over of the final stitch in the old color. Pull the new color snugly to reduce gaps.
Firm stuffing for standing
A standing amigurumi needs a firm lower body and firmly stuffed legs. Stuff in small amounts and shape often with your hands.
Step-by-Step Instructions#
Work in continuous rounds unless stated. Use a stitch marker to mark the first stitch of each round.
Finished size
Size varies depending on yarn and hook. With worsted yarn, the finished pig is typically hand-sized.
Head
Use pink.
Round 1
- 6 sc in MR (6)
Round 2
- inc around (12)
Round 3
- (sc, inc) around (18)
Round 4
- (2 sc, inc) around (24)
Round 5
- (3 sc, inc) around (30)
Round 6
- (4 sc, inc) around (36)
Rounds 7 to 11
- sc around (36)
Eye placement
- Place safety eyes between rounds 9 and 10
- Space them about 7 to 9 stitches apart for a cute expression
Begin shaping down
Round 12
- (4 sc, dec) around (30)
Round 13
- sc around (30)
Round 14
- (3 sc, dec) around (24)
Round 15
- sc around (24)
Stuff head firmly now, shaping it round.
Round 16
- (2 sc, dec) around (18)
Round 17
- (sc, dec) around (12)
Round 18
- dec around (6)
Fasten off, close, and weave in end.
Snout
Use pink or a slightly darker pink.
Round 1
- 6 sc in MR (6)
Round 2
- inc around (12)
Round 3
- (sc, inc) around (18)
Rounds 4 to 5
- sc around (18)
Round 6
- (sc, dec) around (12)
Round 7
- sc around (12)
Stuff lightly so it stays rounded without bulging.
Fasten off leaving a long tail for sewing.
Nostrils
- Embroider two vertical oval nostrils near the center of the snout
- Add a tiny smile line underneath if you want extra personality
Sew the snout to the lower front of the head, centered under the eyes.
Ears
Make two.
Outer ear (pink)
Round 1
- 6 sc in MR (6)
Round 2
- (sc, inc) around (9)
Round 3
- (2 sc, inc) around (12)
Round 4
- sc around (12)
Fasten off with a tail.
Inner ear (optional, darker pink)
Round 1
- 6 sc in MR (6)
Round 2
- (sc, inc) around (9)
Fasten off with a tail.
Sew inner ear onto outer ear, then pinch the base slightly and sew ears to the top sides of the head. Angle them outward slightly.
Body
Use pink.
Round 1
- 6 sc in MR (6)
Round 2
- inc around (12)
Round 3
- (sc, inc) around (18)
Round 4
- (2 sc, inc) around (24)
Round 5
- (3 sc, inc) around (30)
Round 6
- (4 sc, inc) around (36)
Rounds 7 to 10
- sc around (36)
Belly shaping
Round 11
- (5 sc, inc) around (42)
Rounds 12 to 15
- sc around (42)
Begin taper
Round 16
- (5 sc, dec) around (36)
Round 17
- sc around (36)
Round 18
- (4 sc, dec) around (30)
Round 19
- sc around (30)
Stuff firmly now, especially the bottom half. Flatten the base slightly as you go so it stands.
Round 20
- (3 sc, dec) around (24)
Round 21
- (2 sc, dec) around (18)
Round 22
- (sc, dec) around (12)
Round 23
- dec around (6)
Fasten off and close.
Arms
Make two. Start with hoof color if you want little cuffs, then switch to pink.
Hoof tip (tan)
Round 1
- 6 sc in MR (6)
Round 2
- sc around (6)
Switch to pink
Rounds 3 to 7
- sc around (6)
Stuff lightly. Flatten slightly and fasten off leaving a tail.
Sew arms to the upper sides of the body.
Legs
Make two for a standing pig, or four for a fuller look. This style typically uses two visible legs that read as “standing,” with the body providing stability.
Hoof (tan)
Round 1
- 6 sc in MR (6)
Round 2
- inc around (12)
Round 3
- sc around (12)
Switch to pink
Rounds 4 to 9
- sc around (12)
Stuff firmly and flatten the bottom slightly.
Fasten off leaving a long tail.
Sew legs evenly under the body. Test on a flat surface before final stitches. If it tips forward, move legs slightly forward. If it tips back, move legs slightly back.
Tail
Use pink.
Option one simple curl tail
- Ch 18
- Work 2 sc in each chain across to create a curl
Fasten off and sew to the back of the body.
Option two tube tail
- 4 sc in MR (4)
- sc around for 16 to 22 rounds
Fasten off and sew.
Neck bow (optional)
Use cream or pale yellow.
Bow strip
- Ch 18, sc in second ch from hook and across (17)
- Work 4 rows sc across
Fasten off.
Pinch center, wrap with yarn several times, and stitch to secure. Sew bow to the front of the neck area.
Flower Crown#
This is what makes the pig extra special. Keep it lightweight and secure.
Mini flowers
Make two or three small flowers in pink shades and one in white.
Simple five-petal flower
- MR
- (ch 2, sl st) repeated 5 times into the ring
Tighten ring and fasten off with a tail.
If you want thicker petals
- MR
- (ch 2, hdc, ch 2, sl st) repeated 5 times into the ring
Add tiny yellow centers with a few stitches.
Leaves
Make two to four small leaves in green.
Leaf worked around a chain
- Ch 7
- sc in second ch, hdc, dc, dc, hdc, sc
- In last ch, 3 sc, then mirror stitches down the other side
Fasten off with tail.
Crown base
You can sew flowers directly to the head, or make a small band.
Simple headband
- Ch enough to fit around the head (test around the forehead area)
- Work sc across for 2 rows
Fasten off and sew band ends together.
Sew flowers and leaves onto the band, then stitch the band onto the head at a few points so it stays secure.
Common Mistakes and How to Avoid Them#
Pig won’t stand evenly
- Stuff legs and lower body more firmly
- Flatten the base as you stuff
- Adjust leg placement before final sewing
Snout looks lumpy
- Stuff lightly and shape with fingers before sewing
- Sew evenly and add a tiny bit of stuffing right before closing the last stitches
Eyes look uneven
- Count stitches between eye placement points
- Use pins to mark positions before inserting
Flower crown feels messy
- Limit flower count so it doesn’t overwhelm the face
- Use matching tones and keep the largest flower near the center
- Sew each flower firmly at the center only, so petals stay dimensional
Expert Tips for Better Results#
- Use invisible decreases for the smoothest finish
- Add small eyebrow stitches above each eye for extra expression
- For blush cheeks, embroider pink circles or use a tiny amount of blush (display only)
- Pin everything before sewing and take a quick photo to check symmetry
- Weave ends inside the body and head to keep the finish clean
- If you want a sturdier plush, add a small weighted pouch in the body base (display only)
Variations and Customization Ideas#
- Make a “farm pig” version without the crown and add a tiny bandana
- Make a “birthday pig” with a small party hat instead of flowers
- Create seasonal crowns: spring pastels, autumn oranges, winter whites
- Add a tiny heart patch on the belly for a gift theme
- Make a mini keychain pig by using sport yarn and embroidered eyes
- Change hoof color to dark gray for a different style
Benefits of This Crochet Project#
- A high-cuteness crochet pattern that looks gift-ready
- Great scrap buster for small flower colors
- Builds confidence with shaping, sewing, and finishing
- Perfect for nurseries, birthdays, and handmade keepsakes
- Easy to customize in color palette and accessories
- Uses mostly basic stitches, making it relaxing and repeatable
Internal Linking Suggestions#
- How to Crochet a Magic Ring for Amigurumi
- Invisible Decrease Tutorial for Smooth Amigurumi
- Crochet Flower Appliqué Patterns for Beginners
- How to Sew Amigurumi Parts Neatly
- Best Yarn for Amigurumi With Tight Stitches
- Easy Crochet Animal Patterns Collection
- DIY Crochet Bow and Ribbon Tutorial
FAQ Section#
Can beginners make this crochet pattern
Yes. The stitches are basic and the shapes are straightforward. The main skill is careful assembly, which is great practice.
Can I make this without safety eyes
Absolutely. Embroider eyes with black thread for a baby-safe version.
How do I keep the flower crown in place
Sew it down at multiple points or attach flowers to a small headband and stitch the band to the head. This prevents shifting.
What yarn is best for a crochet pig
Smooth cotton or acrylic works best. Cotton gives crisp stitches, while acrylic tends to be softer and more cuddly.
How do I make the pig bigger or smaller
Change yarn weight and hook size. Thicker yarn makes a bigger pig, thinner yarn makes a smaller pig. Keep stitches tight so stuffing doesn’t show.
How do I make the pig stand better
Stuff the base firmly, flatten it slightly, and position legs evenly. If needed for display, add a small weight pouch inside the body base.
Conclusion#
This pig amigurumi crochet pattern is sweet, simple, and full of charm—especially with the floral crown and little bow detail. The construction is beginner-friendly, but the finished look feels special enough for a keepsake gift. With tight stitches, firm stuffing, and careful assembly, you’ll end up with a plush that looks polished and adorable from every angle.
If you want, tell me whether you’re using DK or worsted yarn, and I can suggest the best eye size and an easy flower count plan so your crown looks perfectly balanced.


