


Introduction#
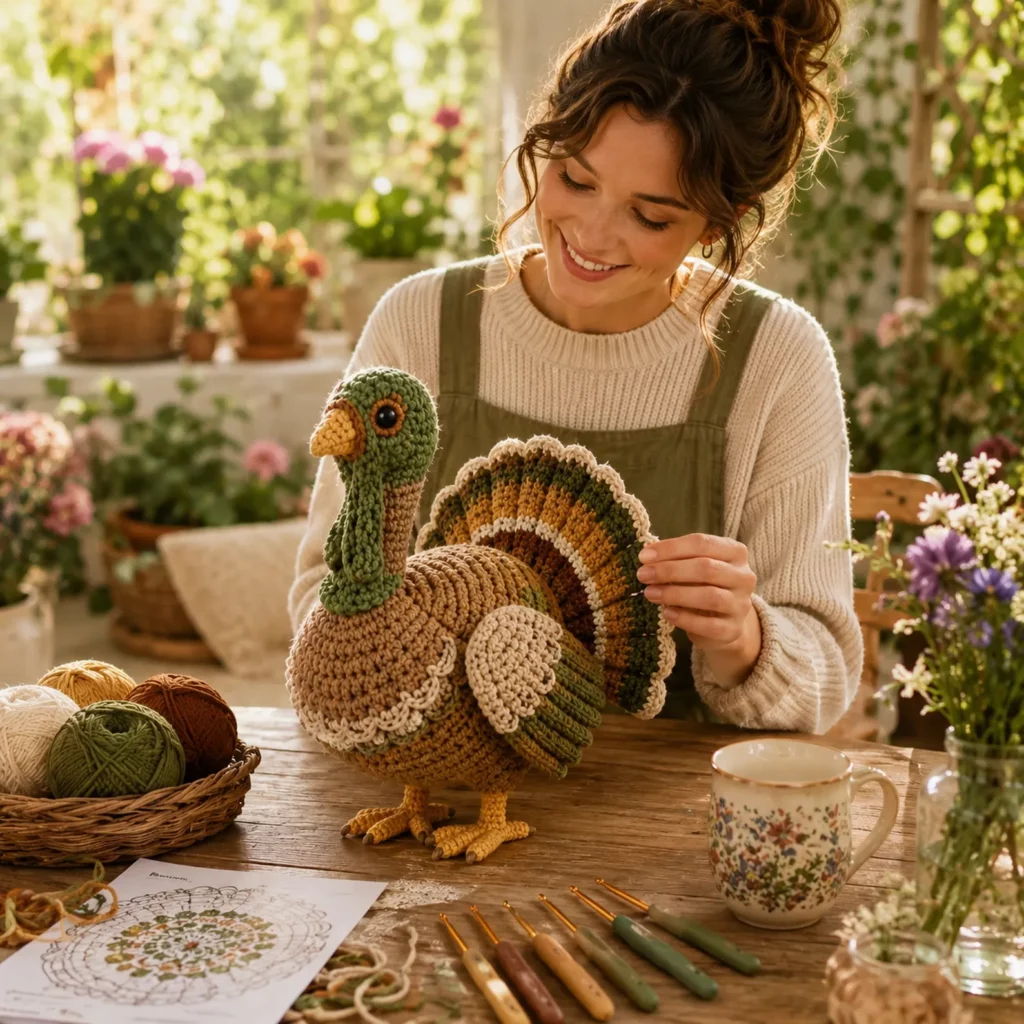
If you love seasonal makes that look impressive but are still totally doable at home, an amigurumi turkey is one of the most satisfying crochet projects you can pick up. It’s the kind of piece that instantly adds warmth to your décor, makes a memorable handmade gift, and gives you lots of room to personalize with colors, facial expressions, and fluffy tail details.
Explore more beginner amigurumi crochet patterns in our pattern library.
In this crochet tutorial, you’ll learn how to create a plump, standing turkey with a rounded body, sculpted wings, sturdy legs and feet, and a dramatic fanned tail. The construction is classic amigurumi: you’ll crochet in the round, shape with increases and decreases, stuff firmly, and then assemble the character details. By the end, you’ll have a finished piece that’s structured enough to stand and cute enough to display all season long.
Detailed Description of the Crochet Pattern#
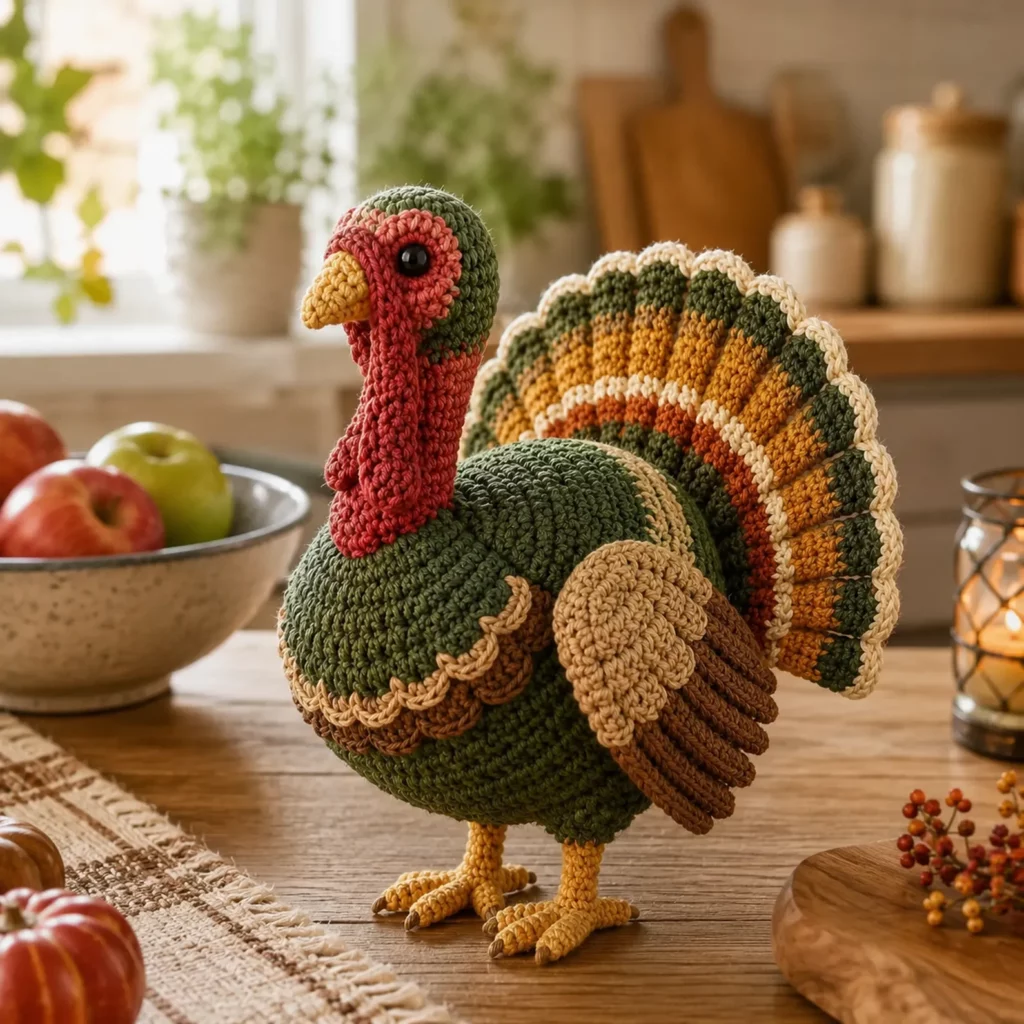
This crochet pattern creates a rounded, plush turkey with a slightly oversized body and a smaller head that blends smoothly into the body shape. The texture is tight and uniform (typical single crochet amigurumi fabric), which helps the toy hold its shape and keeps stuffing from peeking through.
Key design features
A plump, rounded body with subtle striping or shading (optional) for a rich “roasted” look
A red wattle that hangs from the beak area for classic turkey character
A small triangular beak in a warm golden tone
A large fan tail made from separate feather segments, with a light edge to define the feather tips
Chunky wings with stitched “feather” lines for extra detail
Sturdy legs and feet designed to help the turkey stand (with optional weighting)
How it’s made
The body and head can be made as one continuous piece (recommended for stability), or as two pieces sewn together if you prefer. The tail, wings, beak, and wattle are crocheted separately and sewn on. The feet are crocheted separately and attached at the base.
Skill Level Explanation#
This is an easy-to-intermediate crochet pattern. You do not need advanced shaping skills, but you should be comfortable with the basics of amigurumi.
Great for
Confident beginners who have made 1–2 small amigurumi projects
Crocheters who can maintain even tension in single crochet
Anyone wanting a “wow” seasonal project without complicated stitch patterns
You’ll practice
Working in continuous rounds
Basic increases and invisible decreases
Simple color changes (optional)
Sewing on parts neatly
Shaping with stuffing and placement
Materials Needed#
Yarn
Worsted weight (Category 4) acrylic or cotton for a defined stitch look, or velvet/chenille for extra plush (note: chenille is harder to frog)
Suggested colors
Dark brown and medium brown for body shading
Cream or off-white for tail edging
Red for wattle
Golden yellow or mustard for beak and feet
Hook
3.0 mm to 3.5 mm for worsted weight (choose a smaller hook than the yarn label suggests to keep stitches tight)
If using chenille, you may need 4.0–5.0 mm, but keep fabric firm
Notions
Safety eyes (10–14 mm) or black yarn to embroider eyes
Polyester fiberfill stuffing
Yarn needle for sewing
Stitch marker
Scissors
Optional: small amount of poly pellets or bean bag filling for weighting the base (place inside a secure pouch)
Helpful add-ons
A piece of felt (for beak support or foot pads)
Craft wire (only for display items, not for children) to pose tail slightly
Stitches & Techniques Explained#
Single crochet (sc)
The main stitch for amigurumi. Creates a dense fabric that holds stuffing.
Increase (inc)
Work 2 sc into the same stitch. Increases create the round shape.
Invisible decrease (dec)
Decrease by picking up the front loops of the next 2 stitches and working 1 sc through them. This keeps shaping smooth.
Working in continuous rounds
You don’t join rounds with a slip stitch. Use a stitch marker to track the first stitch of each round.
Color change (optional)
To create body shading, switch colors at the last yarn over of the final stitch before the new color section.
Basic embroidery
Used for stitched feather lines on wings or optional eyelids/eyebrows for expression.
Step-by-Step Instructions#
Notes before you start
Work in continuous rounds unless stated otherwise.
Stuff firmly as you go, especially the body and feet.
Numbers in parentheses are stitch counts at the end of the round.
If you want a standing turkey, plan for slightly heavier stuffing at the bottom and consider a small weight pouch in the belly.
Abbreviations
MR = magic ring
sc = single crochet
inc = 2 sc in same stitch
dec = invisible decrease
sl st = slip stitch
ch = chain
BLO = back loop only
FLO = front loop only
( ) = stitch count
Part 1: Body and Head (one piece)
Use dark brown for the base, switching to medium brown for a subtle stripe if desired.
R1: MR, 6 sc (6)
R2: inc around (12)
R3: (sc, inc) around (18)
R4: (2 sc, inc) around (24)
R5: (3 sc, inc) around (30)
R6: (4 sc, inc) around (36)
R7: (5 sc, inc) around (42)
R8: (6 sc, inc) around (48)
R9: (7 sc, inc) around (54)
R10–R16: sc around (54)
Optional shading
Work 2–3 rounds in a slightly lighter brown for a “band,” then return to the darker brown. Keep changes subtle for a realistic look.
R17: (7 sc, dec) around (48)
R18: (6 sc, dec) around (42)
R19: (5 sc, dec) around (36)
R20: (4 sc, dec) around (30)
Begin stuffing the body firmly. If adding weight, place a small pouch of pellets centered at the bottom now.
R21: sc around (30)
R22: (4 sc, inc) around (36)
R23: (5 sc, inc) around (42)
R24: sc around (42)
This creates a slight “shoulder” before the neck.
R25: (5 sc, dec) around (36)
R26: (4 sc, dec) around (30)
R27: (3 sc, dec) around (24)
R28: sc around (24)
Place eyes
Insert safety eyes between rounds 27–28, about 6–7 stitches apart. Adjust spacing to your preferred expression. If embroidering eyes, do it later after shaping.
R29: (2 sc, dec) around (18)
R30: sc around (18)
R31: (2 sc, inc) around (24)
R32: (3 sc, inc) around (30)
R33–R36: sc around (30)
Stuff the head firmly, shaping it round. Add extra stuffing under the face so the beak area looks full.
R37: (3 sc, dec) around (24)
R38: (2 sc, dec) around (18)
R39: (sc, dec) around (12)
R40: dec around (6)
Fasten off and close.
Part 2: Beak (golden yellow)
R1: MR, 4 sc (4)
R2: (sc, inc) around (6)
R3: sc around (6)
R4: (sc, dec) around (4)
Fasten off, leave a tail for sewing. Lightly stuff or leave flat for a neat triangle. Sew centered between the eyes, slightly below.
Part 3: Wattle (red)
Ch 6
In second ch from hook: sl st, sc, hdc, dc, dc in last ch
Fasten off, leave a tail for sewing. Stitch it beside the beak so it drapes naturally.
Part 4: Wings (make 2, medium brown)
R1: MR, 6 sc (6)
R2: inc around (12)
R3: (sc, inc) around (18)
R4–R6: sc around (18)
R7: (sc, dec) around (12)
R8–R10: sc around (12)
Lightly stuff the lower half so wings stay puffy but not stiff.
R11: (dec) around (6)
Flatten and sc across to close (3 sc). Fasten off, leave tail for sewing.
Optional wing feather detail
Use a slightly lighter brown yarn to stitch 2–3 curved lines on each wing.
Part 5: Tail Feathers (make 7–9, mixed browns + cream edge)
You can make a bold fan with more feathers or a simple fan with fewer.
Feather base (brown)
Ch 8
Row 1: sc in 2nd ch from hook and across (7) ch 1, turn
Row 2: inc, sc 5, inc (9) ch 1, turn
Row 3: sc across (9) ch 1, turn
Row 4: inc, sc 7, inc (11) ch 1, turn
Row 5: sc across (11)
Round the tip
Work 3 sc in last stitch, then continue down the other side evenly with sc, ending with 3 sc in the first stitch. This rounds the feather.
Cream edge
Join cream yarn and sc evenly around the feather edge for a clean, high-contrast outline. Fasten off.
Assemble tail
Arrange feathers in a fan (largest in the center if you made different sizes). Sew the bases together in an overlapping row. Then sew the full fan to the back of the turkey body, centered and slightly above the widest part so it “pops” behind the body.
Part 6: Legs and Feet (make 2, golden yellow)
For a standing toy, feet placement and firmness matter.
Foot (worked flat-oval style)
Ch 6
Round 1: sc in 2nd ch from hook, sc 3, 3 sc in last ch, sc 3 on underside, 2 sc in last (12)
Round 2: inc, sc 3, inc 3, sc 3, inc 2 (18)
Round 3: sc around (18)
Round 4: sc around (18)
Fasten off if you want separate legs, or continue to leg.
Leg tube
Round 5: BLO sc around (18)
Rounds 6–9: sc around (18)
Round 10: (sc, dec) around (12)
Stuff the foot firmly (and add a tiny weight pouch if desired).
Rounds 11–14: sc around (12)
Fasten off, leave a long tail for sewing.
Part 7: Assembly and Shaping
- Pin the tail fan to the back first. Once it’s centered, sew it securely along the feather base line.
- Attach wings on the sides, slightly below the head area. Angle them forward for a “cuddly” posture.
- Sew legs to the base. Place them slightly forward, not directly under the tail, so the turkey doesn’t tip backward.
- Final face details: tighten the wattle stitch so it hangs neatly; add a small stitch line for a smile if you want extra expression.
Standing tip
If your turkey leans back, move the feet forward by 2–3 stitches’ worth and add more stuffing (or weight) at the belly base.
Common Mistakes and How to Avoid Them#
Loose stitches that show stuffing
Use a smaller hook and keep tension snug. Amigurumi should feel firm.
Lopsided body
Count stitches every round. A single missed increase early can throw off the whole shape.
Tail droops or flops
Sew the tail base with multiple passes and attach it higher on the back. You can also add a hidden felt support strip inside the feather bases.
Turkey won’t stand
Feet too far back is the #1 issue. Reposition them forward and add base weight.
Eyes look uneven
Pin or mark the placement before inserting safety eyes. Count the stitches between the eyes and from the top of the head.
Expert Tips for Better Results#
Use a “stuffing ladder”
Add small amounts of stuffing often, shaping with your fingers, instead of stuffing only at the end.
Define color changes cleanly
When switching yarn colors, change on the last yarn-over of the final stitch before the new color.
Make the tail dramatic
Alternate feather colors (dark, medium, tan) and keep a consistent cream border for a polished look.
Secure attachments for durability
Use long yarn tails and sew through multiple stitches on both pieces. Knot and hide tails inside the body.
Add subtle contouring
A gentle indentation stitch around the eye area can create a sweeter, more expressive face.
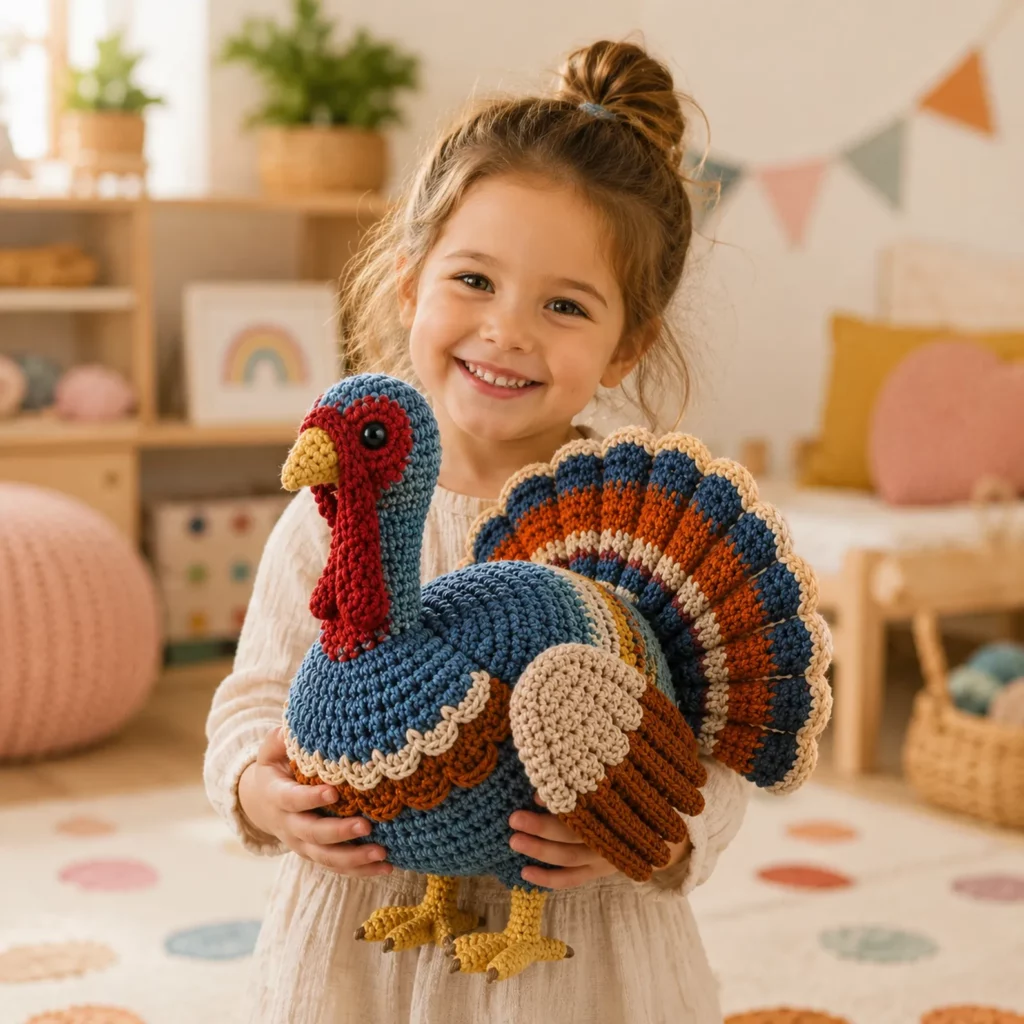
Variations and Customization Ideas#
Mini turkey
Use DK yarn and a 2.5–3.0 mm hook to create a palm-sized version.
Plush nursery turkey
Use chenille yarn, embroider eyes, and skip hard accessories for baby-safe gifting.
Different tail styles
Short fan: 5 wide feathers
Full fan: 9–11 feathers
Layered fan: sew a second row of smaller feathers on top for a dramatic “show” tail
Seasonal themes
Classic fall: browns + cream edge
Whimsical: teal, rust, mustard, and ivory
Farmhouse neutral: taupe body, oatmeal tail, beige beak
Add accessories
Tiny pilgrim hat (black with gold buckle)
A scarf in rust or cream
A small leaf applique on the belly
Benefits of This Crochet Project#
It’s a showpiece that’s still approachable
You get to practice core amigurumi skills in a satisfying way
It’s an excellent stash-buster for warm neutral yarns
It makes a thoughtful handmade gift or seasonal decoration
The tail and face details teach you how small changes create big personality
Internal Linking Suggestions#
You may also like
Beginner Amigurumi Basics: How to Crochet in the Round and Use a Magic Ring
How to Attach Safety Eyes Safely (and Baby-Friendly Alternatives)
Best Yarn for Amigurumi: Cotton vs Acrylic vs Chenille
Simple Crochet Pumpkin Pattern for Fall Decor
Crochet Animal Collection: Easy Farm and Woodland Friends
FAQ Section#
What size will the finished turkey be?
With worsted yarn and a 3.25 mm hook, expect about 7–10 inches tall depending on stuffing and tail size.
Is this a crochet pattern suitable for beginners?
Yes if you already know single crochet, increasing, and decreasing. If it’s your first amigurumi, take it slow and use stitch markers.
Can I make this as a free crochet pattern without safety eyes?
Absolutely. Embroider eyes with black yarn or use felt eyes for a softer look.
How do I make the turkey stand up better?
Place feet slightly forward, stuff the belly firmly, and add a small weight pouch at the base if needed.
What yarn works best for a neat, defined look?
Cotton or smooth acrylic in worsted weight gives crisp stitches and clean edges, especially for the tail.
Can I wash the finished amigurumi turkey?
If you use machine-washable yarn, gentle hand wash and air dry is safest. Avoid soaking if you used glued felt details.
How do I keep the tail feathers evenly spaced?
Lay them in a fan shape, pin in place, then sew the bases together before attaching to the body. Consistent overlap is the trick.
Conclusion#
This crochet pattern is a fun, cozy way to create a turkey that feels both classic and handmade-modern: rounded, sturdy, and full of personality. Once you’ve made one, you’ll probably want to try a second version with different tail colors or a new expression, because it’s the kind of project that gets better every time you repeat it.
If you make your own turkey, try experimenting with the feather count and foot placement first, then add your favorite finishing details. That’s where the magic of DIY crochet really shines.


