


Introduction#
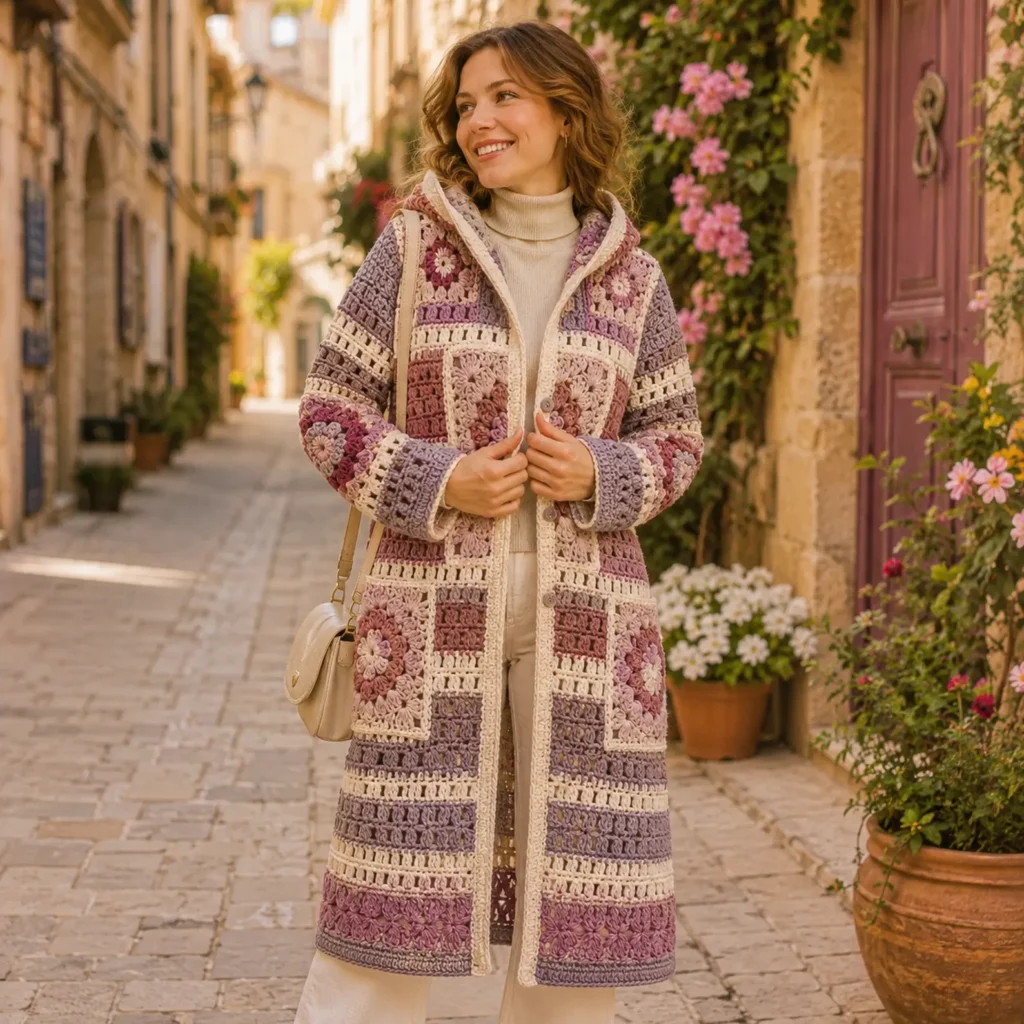
There’s something magical about a handmade hooded coat that looks like it belongs in an art gallery but still feels wearable for real life. This summer crochet pattern is exactly that: a long, cozy-yet-breezy patchwork coat built from bold floral squares, earthy stripes, and a beautifully shaped hood. It’s the kind of piece you throw on over a tank top at sunset, take to the beach on a windy evening, or wear to the farmers market when you want your outfit to do the talking.
Explore more beginner cardigans crochet patterns in our pattern library.
If you’ve ever wanted to make a statement garment but felt intimidated by “sweater math,” this is a fantastic way in. Patchwork construction lets you build the coat like a puzzle. You crochet a set of squares, add connecting strips, join panels, and then finish with sleeves, a hood, and edging. The final result is a standout DIY crochet project that looks complex, but is actually very manageable when you break it into steps.
In this crochet tutorial, I’ll walk you through a clear, beginner-friendly plan to create the same style: a long hooded coat with floral granny-style motifs, striped texture bands, roomy sleeves, big pockets, and clean edging. You’ll learn how to keep your sizing consistent, how to join panels neatly, and how to make your coat look polished enough for photos, gifts, or even selling finished pieces.
Detailed Description of the Crochet Pattern#
This crochet pattern creates a long hooded patchwork coat with a relaxed fit. The design is built around large statement squares featuring raised floral textures (a layered, petal-like motif) placed at key points: center back and front, pockets, and sleeves. Between the squares, the coat uses striped and textured rows in coordinating neutrals and warm tones to tie everything together.
Key features of the finished coat
A long length that hits around mid-thigh to knee depending on your height and sizing
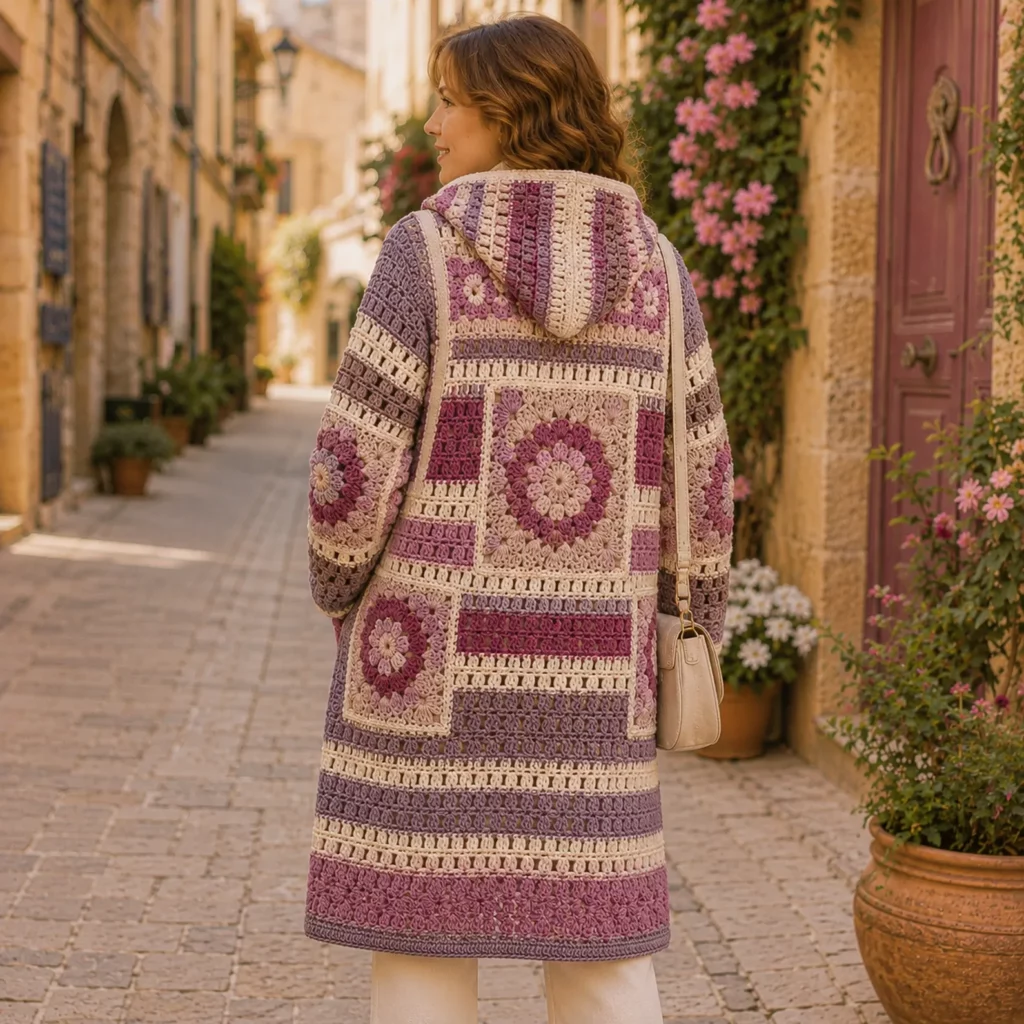
A roomy hood with striping that matches the body
Patchwork placement that creates a “blanket coat” look without being heavy
Wide sleeves with an easy drop-shoulder feel
Large square pockets that echo the main floral motif
A clean front opening with optional buttons and a sturdy edging
The color palette is a gorgeous mix of neutrals (cream, sand, taupe) with richer accents (cinnamon, rust, cocoa, dusty rose). You can absolutely customize this. The real star is the structure: squares plus striping plus good finishing.
Skill Level Explanation#
This is an intermediate crochet pattern, but adventurous beginners can absolutely attempt it with patience.
You’ll feel confident if you can already
Crochet granny squares or motifs (even basic ones)
Maintain consistent tension
Count rows and stitches reliably
Join pieces with a tidy seam
Do simple shaping for sleeves and hood
What makes it “intermediate”
Multiple stitch patterns and texture changes
Panel construction and garment assembly
Keeping all squares the same size for a professional finish
Finishing work (edging, button bands, shaping hood)
If you’re a beginner, the best approach is to crochet one square and one striped panel first as a “sample.” Once you’re happy with your fabric and size, the rest becomes repetition.
Materials Needed#
Yarn
A worsted/aran weight yarn (#4) gives structure and warmth without being too heavy
For a summer-friendly version, choose cotton, cotton-blend, or a lighter acrylic with good drape
Pick 4–6 colors:
Main neutral (cream or beige)
Secondary neutral (tan or oatmeal)
Dark neutral (cocoa or deep brown)
Accent 1 (rust/cinnamon)
Accent 2 (dusty rose/mauve)
Optional accent 3 (soft peach or warm blush)
How much yarn you need (approximate)
Small: 1200–1500 g total
Medium: 1400–1700 g total
Large: 1600–2000 g total
Extra-Large: 1900–2300 g total
This varies a lot depending on yarn fiber and how long you make the coat.
Hook
5.0 mm (H/8) is a common choice for worsted
If you crochet tightly, consider 5.5 mm for better drape
Use a smaller hook (4.5 mm) for edging if you want crisp finishing
Tools and notions
Stitch markers
Tape measure
Yarn needle for seaming
Scissors
Blocking supplies (blocking mat or towel, pins)
Buttons (optional, 2–4 medium buttons)
Toggle buttons also look amazing for a rustic vibe
Stitches & Techniques Explained#
Abbreviations (US terms)
ch chain
sl st slip stitch
sc single crochet
hdc half double crochet
dc double crochet
tr treble crochet
sp space
st stitch
BLO back loop only
FLO front loop only
Techniques used in this easy crochet pattern style coat
Motif-based construction: crochet squares separately, then join
Textured floral motif: often built with puff stitches, popcorns, or petal clusters
Striping and texture rows: alternating dc and chain spaces, or dc with BLO rows for ribbing
Seaming and joining: mattress stitch, whip stitch, or slip-stitch join
Edging: rounds of sc and/or hdc to stabilize and polish edges
Hood shaping: either increase slightly at the back seam or work a rectangle and seam the top
Beginner-friendly tip
Even if the floral motif feels advanced, you can substitute a simpler granny square and still get a beautiful coat. The construction method stays the same.
Step-by-Step Instructions#
Pattern notes
This is written as a “recipe-style” free crochet pattern so you can size it to your body and yarn choice. The goal is a relaxed, open-front hooded coat with patchwork squares and striped panels. You’ll work in three stages: make squares, build panels, assemble coat, then finish hood and edging.
Step 1: Choose your size and target measurements
Before crocheting, decide how you want it to fit. A coat like this looks best with positive ease (extra room).
Suggested finished measurements
Bust circumference: body measurement + 6 to 10 inches
Length: mid-thigh to knee (28–40 inches depending on preference)
Sleeve: slightly roomy, with cuffs optional
Write down
Your bust measurement
Desired coat length
Desired sleeve length
Step 2: Crochet and block your floral square motif
This coat uses large floral squares as feature panels (you’ll place them on the back, on the fronts, on sleeves, and on pockets). The exact flower stitch can vary, but the structure is usually the same: center flower, then square it off with rounds.
General floral square structure (adjustable)
Round 1: center ring, build base stitches (dc or puff stitches)
Round 2: petal round (clusters/puffs/popcorns)
Round 3: petal layering or spacer round
Round 4–6: square-up rounds using dc and corner spaces (dc, ch 2, dc in corners)
Target size
Aim for a square around 10–12 inches for a dramatic coat look.
If yours comes out smaller, add extra squaring rounds in a neutral color.
Blocking is not optional here
Block every square to the exact same measurement. This is the biggest secret to a coat that looks clean and expensive instead of bumpy and uneven.
Step 3: Decide how many squares you need
A common layout for this style
Back panel: 1 large floral square centered (or 2 stacked if you want more motif)
Each front panel: 1 floral square (or none if you prefer stripes), plus pocket squares
Sleeves: 1 floral square on each sleeve (optional but very pretty)
Pockets: 2 floral squares
Simple square count plan
Back: 1
Front left: 1
Front right: 1
Sleeves: 2
Pockets: 2
Total: 6 squares
If you want a more patchwork-heavy coat, make 8–12 squares and use them for extra body length or a more “blanket coat” look.
Step 4: Crochet the striped panels
The striped sections are what make the coat long and wearable. They also connect the squares and add the modern boho feel.
Easy striped panel stitch (great drape)
Row 1: dc across
Row 2: ch 3, turn, dc across
Repeat, changing colors every 2–4 rows
Textured stripe option (adds detail)
Alternate
2 rows dc
1 row hdc BLO (gives a subtle rib ridge)
1 row dc
This makes gorgeous texture without complicated stitches.
How wide should the striped panels be?
For the back: wide enough to match your back width from underarm to underarm
For each front: about half of the back width, plus overlap for the opening edges
Practical approach
Build your back panel by placing the square in the middle and crocheting striped sections above and below it until you reach your desired coat length. Then add striped side sections to reach your width.
Step 5: Build the back panel
Lay your blocked square flat. Decide where it sits on your back: usually around shoulder blade height or centered.
Option A: Square centered, stripes above and below
Crochet a top stripe section: a rectangle the same width as the square
Join it to the top of the square
Crochet a bottom stripe section: same width as square, longer to reach coat length
Join it to the bottom of the square
Add side stripe panels to widen the back to your desired back width
Option B: Full width back with square inserted
Crochet a full-width rectangle for the back
Then attach a centered square panel over it like an applique look
This is easier but slightly heavier
Step 6: Build the front panels
Front panels are usually long rectangles with a square feature and stripes.
For each front panel
Decide if the floral square sits on the chest area or lower front
Add stripes above and below to match the back length
Keep the inner front edge straight (this becomes your opening edge)
Make sure both fronts are identical in length
Tip for a clean opening edge
Work the inner edge with sc or hdc border as you go, especially if your stripe stitch creates gaps.
Step 7: Join shoulders and sides
Join the back and front panels at the shoulders first.
Shoulder join
Align the top edges
Join for 6–8 inches on each side (leave a neck opening in the middle)
Use mattress stitch for a nearly invisible seam, or slip stitch for a decorative ridge
Side join
Fold the piece so front and back align
Seam the sides from underarm down to hem
Leave an armhole opening (typically 8–10 inches depending on size)
Step 8: Make sleeves
This coat has roomy sleeves. You can do them two ways.
Method A: Sleeve made from a square + stripes
Use 1 floral square per sleeve as the “upper arm feature”
Add striped bands above and below if you want longer sleeves
Fold into a tube and seam the long edge
Attach to armhole
Method B: Sleeve worked directly from armhole (easy and adjustable)
Join yarn around the armhole
Work in rounds of dc or hdc
Decrease slightly toward the wrist if you want shape
Finish with a cuff (hdc BLO for ribbing)
Sleeve tip
Try the coat on before finishing sleeves. The best sleeve length is the one that fits your lifestyle, especially for a summer coat where you might prefer a slightly shorter sleeve.
Step 9: Create oversized pockets
The pockets in this style are statement pockets, often built from floral squares.
Pocket plan
Use 2 floral squares as pocket fronts
Add a fabric backing (optional) or crochet a back panel in sc for sturdiness
Attach pockets to the lower front panels, matching placement on both sides
Leave the top edge open and reinforce it with a few extra rows of sc
Practical pocket sizing
A 10–12 inch square makes a generous pocket that actually holds things.
Step 10: Add the hood
The hood is built to match the coat’s stripe vibe.
Simple hood method (rectangle + seam)
Measure your neckline opening from left front to right front across the back neck
Crochet a rectangle that width and about 12–16 inches tall
Fold the rectangle in half and seam the top edge to form the hood shape
Attach the bottom edge to the neckline evenly
Hood shaping upgrade (optional)
To avoid a pointy hood
Add a few decreases at the top seam area
Or seam with a curved line instead of straight
Step 11: Edging and finishing
Edging is what turns patchwork into a polished garment.
Suggested edging plan
Round 1: sc evenly around entire front opening, hood edge, and hem
Round 2: hdc or dc for height and softness
Round 3 (optional): crab stitch for a neat finished edge
Add extra sc rows along the front opening if you plan to sew buttons
Button band option
If you want buttons like the sample style
Work a thicker band in rows of hdc BLO along the front edge
Add buttonholes by chaining and skipping stitches on one side
Weave in ends carefully
With colorwork, you’ll have lots of ends. Weave them in the direction of the stitch rows to hide them.
Common Mistakes and How to Avoid Them#
Squares don’t match in size
Block every square and measure them. If one is smaller, add another squaring round instead of forcing it during seaming.
Coat feels stiff instead of drapey
Use a slightly larger hook or a yarn with better drape (cotton blend). Also avoid overly tight tension on dc rows.
Front edges ripple
Count stitches along edges and place sc evenly. If you add too many sc, it will wave. If you add too few, it will pull.
Sleeves twist after seaming
Make sure your stripe rows line up before stitching the sleeve tube. Pin first, then seam.
Hood looks too pointy
Use the rectangle method but round out the top seam with a gentle curve, or add a small decrease section.
Pockets sag
Reinforce the pocket top edge with extra sc rows and sew the pocket corners down firmly.
Expert Tips for Better Results#
Choose a “hero neutral” and let accents support it. A coat looks expensive when the neutrals are consistent and the accent colors repeat intentionally.
Use the same joining method throughout. Mixing joins can look messy. Mattress stitch is clean; slip stitch join is decorative. Pick one style.
Add structure with an edging hook change. Use a smaller hook for edging so the coat holds shape at openings and hem.
Try it on at every major step. Patchwork garments are forgiving, but small adjustments early save hours later.
For a summer-friendly finish, skip heavy cuffs and instead do a lighter sc edge at wrists and hem.
Variations and Customization Ideas#
Short version: make it hip-length for a cute cropped jacket
Sleeveless version: skip sleeves and turn it into a hooded vest
No hood: replace hood with a shawl collar for a classic cardigan vibe
Brighter palette: swap earth tones for summer brights like coral, aqua, lemon, and cream
Add fringe: a fringe hem looks amazing with boho patchwork
Belted style: add belt loops and a tie belt for shaping
Lining option: line the coat lightly if you want extra warmth and less stretching
Benefits of This Crochet Project#
It’s a wearable crochet pattern that looks high-end and unique
Patchwork construction makes sizing more flexible than a traditional sweater
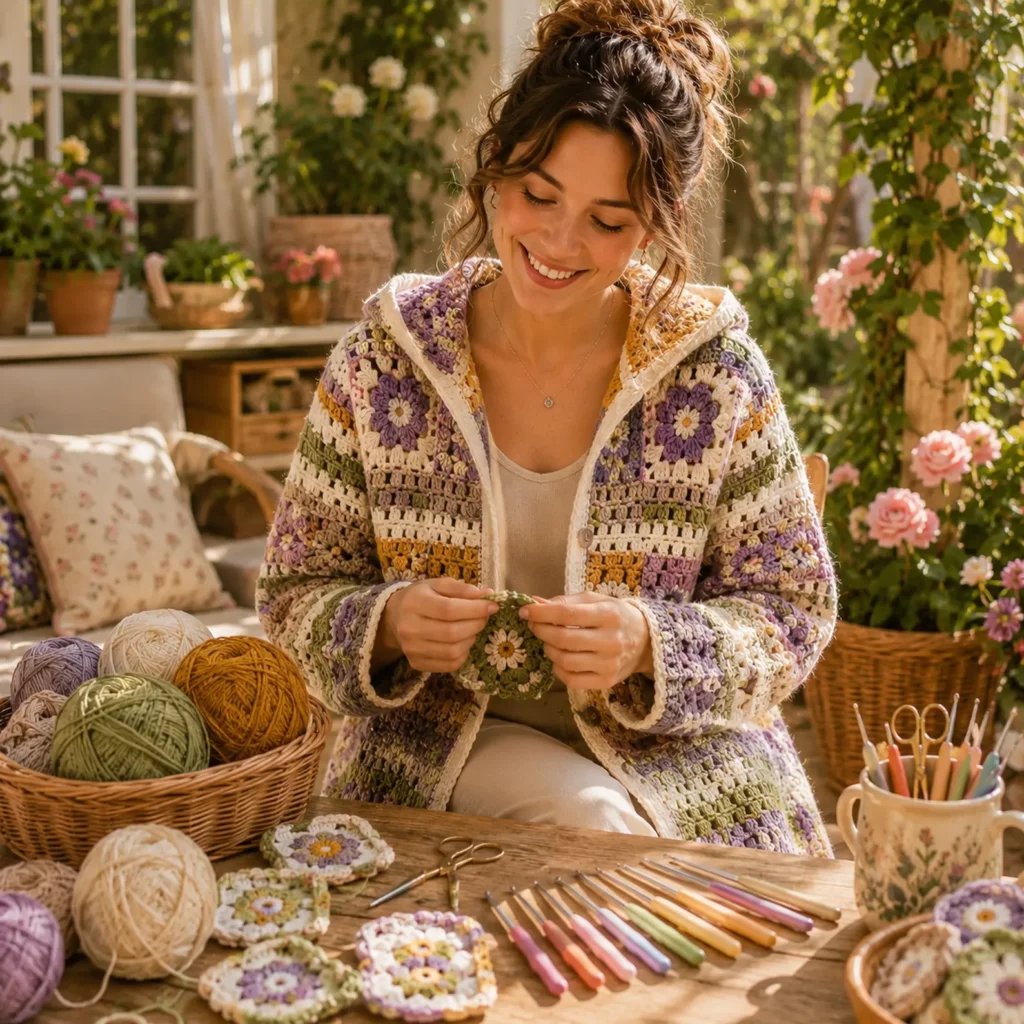
Perfect stash-buster: you can use multiple colors and small leftover yarn amounts
You’ll learn garment assembly skills you can reuse in other wearables
It’s an attention-grabbing piece that photographs beautifully for social media or product listings
Great layering piece for summer evenings, travel, and festivals
Internal Linking Suggestions#
You may also like
Free Crochet Pattern: Classic Granny Square Cardigan Construction Guide
Easy Crochet Tutorial: How to Block Granny Squares Perfectly
DIY Crochet: Best Joining Methods for Patchwork Garments
Crochet for Beginners: How to Count Rows and Keep Straight Edges
Free Crochet Pattern: Hooded Crochet Vest for Layering
How to Add Pockets to Crochet Cardigans Without Sagging
FAQ Section#
Is this crochet pattern suitable for beginners?
It can be, if you’re comfortable making consistent squares and you’re willing to go step by step. The construction is very logical, but the finishing and assembly take patience.
What yarn is best for a summer version of this coat?
Cotton, cotton blends, and lightweight acrylics work best. If you want a true summer feel, choose breathable yarn and keep the fabric slightly open by using dc rows and not crocheting too tightly.
Do I have to use the floral motif squares?
No. You can replace them with classic granny squares, solid squares, or even textured squares. The coat will still look beautiful, just with a different personality.
How do I resize the coat without complicated math?
Make a square and measure it. Then decide how many squares and striped panels you need to reach your target width and length. Adjust by adding stripe rows or extra squares instead of recalculating everything.
How do I keep the coat from stretching too much?
Use a yarn with good bounce (cotton blend helps), block gently, and add a firm edging. Reinforce shoulders with a tighter seam and consider adding a slip-stitch reinforcement row along the neckline.
Can I add buttons like the sample?
Yes. Add a thicker front edging band, then create buttonholes on one side by chaining and skipping stitches. Sew buttons onto the opposite side, evenly spaced.
How long does this project take?
It depends on your speed, but most crocheters complete a coat like this over several days to a couple of weeks. The squares go quickly; assembly and weaving ends take the most time.
Conclusion#
This hooded patchwork coat is a showpiece crochet pattern that’s surprisingly achievable when you approach it like building blocks. Start with one floral square, block it perfectly, and let that square set the scale for everything else. Then build your striped panels, join your garment like a puzzle, and finish with a hood and clean edging to pull the whole look together.
The best part is how customizable it is. You can keep it neutral and elegant, go bold and colorful, make it lighter for summer layering, or add extra warmth for cooler months. Once you’ve made one, you’ll understand the construction so well that designing your own color layout becomes the fun part.
If you want, tell me your bust measurement and the length you want (hip, mid-thigh, or knee), and I’ll map out a square-and-panel layout (how many squares, how wide to make stripes, and where to place pockets) so your finished coat fits exactly the way you imagine.


