


Introduction#
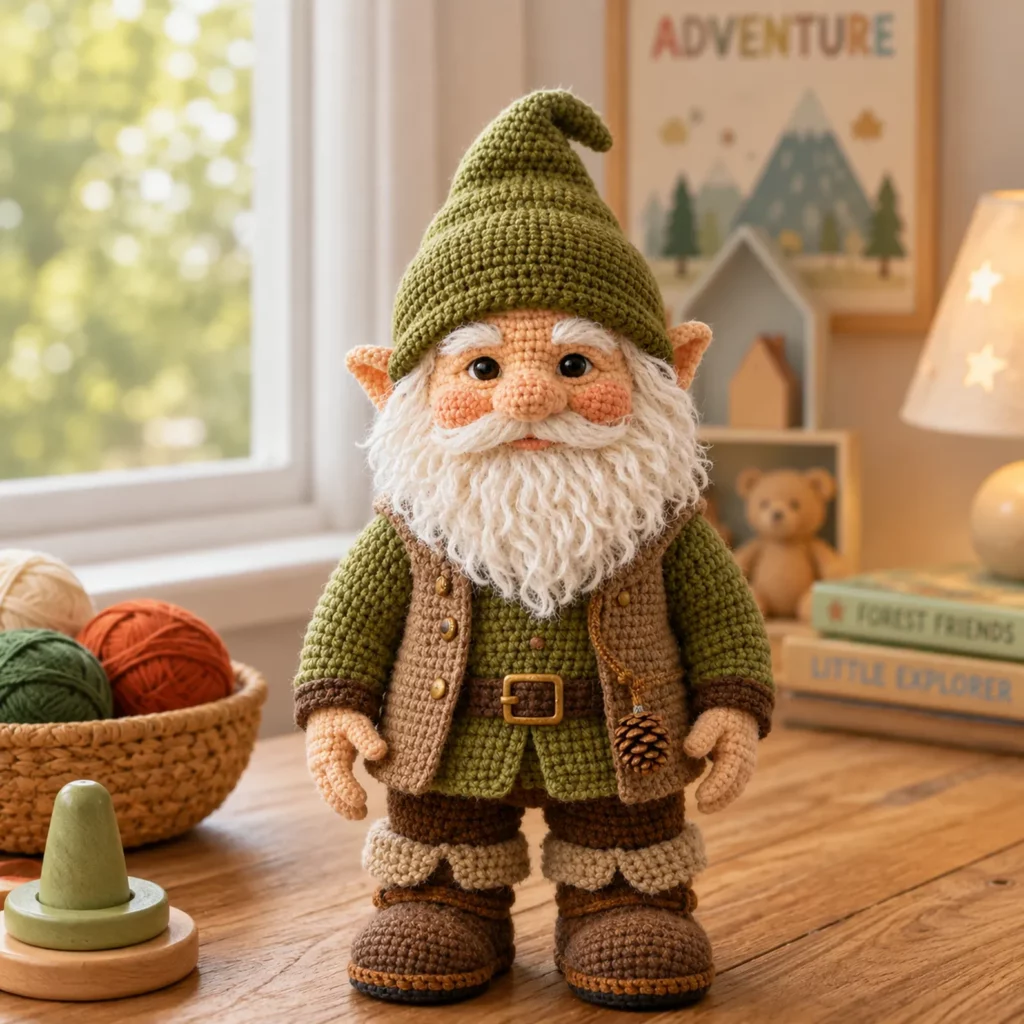
If you want a crochet project that feels like a true keepsake, a large gnome doll is one of the most rewarding makes you can choose. It’s cozy, character-filled, and instantly becomes a statement piece in your home. A big gnome (around 50 cm tall) has that “wow” factor: the hat slouches just right, the beard looks fluffy and full, and the outfit details (vest, belt, boots) make it feel like a collectible rather than a simple plush.
Explore more advanced amigurumi crochet patterns in our pattern library.
This crochet pattern is written as a full crochet tutorial so you can build the gnome step by step without guessing. You’ll learn how to shape a sturdy body that stands, how to create a friendly face with a rounded nose and soft cheeks, how to add a realistic beard texture, and how to assemble clothing details cleanly. You can keep it classic woodland colors, switch to holiday shades, or make a custom gnome to match your décor.
This is a “big make,” but the stitches are simple. The magic is in the shaping and finishing.
Detailed Description of the Crochet Pattern#
This crochet pattern creates a tall standing gnome doll with a soft body, long pointed hat, big nose, pointed ears, and a full textured beard. The outfit is layered: a shirt/tunic base, a vest, a belt, pants, and oversized boots. The overall style is realistic-cute: friendly eyes, rosy cheeks, and chunky proportions.
What you’ll make
Head and body base (one piece or two-piece join, depending on preference)
Nose (separate piece sewn on for dimension)
Ears (two small triangles/ovals sewn to the head sides)
Beard (loop yarn or brushed yarn style for fullness)
Hat (tall, slightly floppy, fitted at the brim)
Arms and hands (posed slightly forward)
Legs and boots (sturdy base for standing)
Vest (brown)
Belt (with buckle detail)
Optional accessories (tiny pouch, buttons, pinecone charm)
Why it stands well
A 50 cm doll needs stability. The best way is a weighted base plus firm stuffing and large flat boots. This pattern includes a simple “weight pouch” method you can add inside the body so the gnome stands securely.
Skill Level Explanation#
Skill Level: Intermediate Beginner to Intermediate
Beginner-friendly parts
Most pieces are single crochet with simple increases and decreases
Clothes are mostly rectangles and simple shaping
Skills you’ll practice
Consistent tension for large amigurumi
Invisible decreases for a smooth face
Adding weight for stability
Hair/beard techniques (loop stitch or brushed yarn)
Clean assembly and symmetrical placement
If you’ve made at least one amigurumi before, this is a great next step into “heirloom-size” crochet.
Materials Needed#
Yarn
For a 50 cm gnome, you want sturdy, smooth yarn with good stitch definition.
Recommended yarn weight
Worsted (Category 4) for a detailed gnome (more time, crisp details)
Bulky (Category 5) for a faster large gnome (still detailed)
Suggested colors (classic woodland gnome)
Skin tone (face, hands, ears)
White or off-white (beard, eyebrows)
Red (hat)
Green (shirt/tunic)
Brown (vest, pants, boots, belt)
Optional tan (boot cuffs)
Yarn tips
Cotton blend gives structure and neat stitches
Acrylic is softer and easier to find in many colors
For beard, choose a yarn that can be brushed or a fluffy yarn for realism
Hook
Use a hook smaller than the yarn label suggests to avoid gaps.
Worsted: 3.0–4.0 mm
Bulky: 4.0–5.5 mm
Notions
Stitch marker
Tapestry needle
Scissors
Fiberfill stuffing
Safety eyes (12–18 mm depending on scale) or embroidered eyes
Optional blush or pastel chalk for cheeks
Optional poly pellets or small stones for weight (inside a fabric pouch)
Optional wire for poseable arms (not recommended for children)
Safety note
If this is for a child under 3, embroider the eyes and avoid wire.
Stitches & Techniques Explained#
Abbreviations
MR = magic ring
sc = single crochet
inc = increase (2 sc in one stitch)
dec = decrease (invisible decrease recommended)
sl st = slip stitch
ch = chain
hdc = half double crochet
dc = double crochet
BLO = back loop only
FLO = front loop only
( ) repeat
[ ] stitch count
Invisible decrease
Insert hook into front loop of next stitch, then front loop of following stitch, yarn over, pull through, yarn over, pull through two.
Beard methods
Option A: Loop stitch beard (built-in texture)
You crochet loops while working rows, then trim to shape.
Option B: Brushed yarn beard (soft and fluffy)
Crochet a beard base, then brush yarn with a pet slicker brush to make it fluffy.
Option C: Attached strand beard (fullest look)
Latch-hook style strands through a beard base for a realistic effect.
For a 50 cm gnome, Option C or B looks the most realistic.
Standing stability
For big dolls, add weight. Easy method
Fill a small fabric pouch with poly pellets or rice
Place it in the body base
Stuff firmly around it
This keeps the gnome from tipping forward due to the big head and hat.
Step-by-Step Instructions#
Sizing note
This pattern is written in a scalable way. If you use bulky yarn, your gnome will reach about 50 cm with fewer rounds. If using worsted, you may add a few rounds to the body and hat to reach full height.
Head (Skin tone)
Round 1: 6 sc in MR [6]
Round 2: inc around [12]
Round 3: (sc, inc) around [18]
Round 4: (2 sc, inc) around [24]
Round 5: (3 sc, inc) around [30]
Round 6: (4 sc, inc) around [36]
Round 7: (5 sc, inc) around [42]
Round 8: (6 sc, inc) around [48]
Round 9: (7 sc, inc) around [54]
Rounds 10–16: sc around [54]
Eye placement
Place eyes between Rounds 13–14, about 10–12 stitches apart for a friendly look. For a sweeter face, place them slightly lower.
Shape toward neck
Round 17: (7 sc, dec) around [48]
Round 18: sc around [48]
Round 19: (6 sc, dec) around [42]
Round 20: sc around [42]
Round 21: (5 sc, dec) around [36]
Round 22: sc around [36]
Stuff head firmly.
Body (continue in same color or switch to shirt color)
If you want a seamless doll, continue from the head into the body. If you want easier assembly, make body separately and sew.
Switch to shirt/tunic color (optional)
Round 23: (5 sc, inc) around [42]
Round 24: (6 sc, inc) around [48]
Round 25: (7 sc, inc) around [54]
Rounds 26–34: sc around [54]
Make belly wider for stability
Round 35: (8 sc, inc) around [60]
Rounds 36–42: sc around [60]
Start stuffing body. Add weight pouch now at the bottom, then continue stuffing around it.
Shape toward hips
Round 43: (8 sc, dec) around [54]
Round 44: sc around [54]
Round 45: (7 sc, dec) around [48]
Round 46: sc around [48]
Round 47: (6 sc, dec) around [42]
Round 48: sc around [42]
Close bottom
Round 49: (5 sc, dec) around [36]
Round 50: (4 sc, dec) around [30]
Round 51: (3 sc, dec) around [24]
Round 52: (2 sc, dec) around [18]
Round 53: (sc, dec) around [12]
Round 54: dec around [6]
Fasten off and close.
Nose (Skin tone)
Round 1: 6 sc in MR [6]
Round 2: inc around [12]
Round 3: (sc, inc) around [18]
Rounds 4–6: sc around [18]
Round 7: (sc, dec) around [12]
Stuff lightly.
Round 8: sc around [12]
Fasten off leaving a long tail.
Sew nose centered below eyes. For a classic gnome look, place it slightly low so the beard tucks under it.
Ears (Make 2, Skin tone)
Round 1: 6 sc in MR [6]
Round 2: (sc, inc) around [9]
Round 3: sc around [9]
Round 4: (2 sc, inc) around [12]
Round 5: sc around [12]
Flatten slightly and sew to sides of head aligned with eyes.
Beard Base (White or off-white)
Make a curved beard “bib” shape, then add texture.
Ch 26
Row 1: sc in 2nd ch from hook and across (25), ch 1, turn
Row 2: sc2tog, sc 21, sc2tog (23), ch 1, turn
Row 3: sc across (23), ch 1, turn
Row 4: sc2tog, sc 19, sc2tog (21), ch 1, turn
Row 5: sc across (21), ch 1, turn
Row 6: sc2tog, sc 17, sc2tog (19), ch 1, turn
Row 7: sc across (19)
Edge with sc evenly around the beard base.
Add beard texture (choose one)
Brushed yarn method
Use a pet slicker brush on the beard base yarn to fluff it gently, especially along the lower edge. Do not brush too aggressively near seams.
Attached strand method
Cut 6–8 inch strands. Attach through stitches along rows, then trim into a rounded beard shape.
Sew beard under the nose and around the cheeks.
Eyebrows (White)
Make 2 small strands bundles or crochet small arcs.
Simple arc
Ch 6, sc in 2nd ch and across (5)
Sew above eyes at a slight angle.
Hat (Red)
Round 1: 6 sc in MR [6]
Round 2: inc around [12]
Round 3: (sc, inc) around [18]
Round 4: (2 sc, inc) around [24]
Round 5: (3 sc, inc) around [30]
Round 6: (4 sc, inc) around [36]
Round 7: (5 sc, inc) around [42]
Round 8: (6 sc, inc) around [48]
Round 9: (7 sc, inc) around [54]
Round 10: (8 sc, inc) around [60]
Rounds 11–20: sc around [60]
Taper to a point
Round 21: (8 sc, dec) around [54]
Rounds 22–25: sc around [54]
Round 26: (7 sc, dec) around [48]
Rounds 27–30: sc around [48]
Round 31: (6 sc, dec) around [42]
Rounds 32–35: sc around [42]
Round 36: (5 sc, dec) around [36]
Rounds 37–42: sc around [36]
Round 43: (4 sc, dec) around [30]
Rounds 44–48: sc around [30]
Round 49: (3 sc, dec) around [24]
Rounds 50–54: sc around [24]
Round 55: (2 sc, dec) around [18]
Rounds 56–60: sc around [18]
Round 61: (sc, dec) around [12]
Rounds 62–66: sc around [12]
Round 67: dec around [6]
Fasten off.
Tip for the floppy hat look
Lightly stuff only the brim area or leave it unstuffed. Shape the top by bending and tacking with a few stitches so it droops.
Arms and Hands (Make 2)
Arms (shirt color)
Round 1: 6 sc in MR [6]
Round 2: (sc, inc) around [9]
Rounds 3–18: sc around [9]
Switch to skin tone for hands
Rounds 19–26: sc around [9]
Stuff lightly. Flatten top and sew to body sides.
Hands shaping tip
If you want a cupped hand, add one round of (sc, inc) to widen slightly, then return to straight rounds.
Legs and Boots (Make 2)
Boot (brown)
Round 1: 6 sc in MR [6]
Round 2: inc around [12]
Round 3: (sc, inc) around [18]
Round 4: (2 sc, inc) around [24]
Rounds 5–7: sc around [24]
Round 8: sc in BLO around [24] (turns up)
Rounds 9–14: sc around [24]
Leg (pants color)
Round 15: (2 sc, dec) around [18]
Rounds 16–24: sc around [18]
Stuff firmly. Flatten top and sew to body bottom.
Boot cuff (optional, tan)
Attach yarn around boot top and work sc around, then one round of hdc to create a cuff.
Vest (Brown)
This is a simple open-front vest.
Ch to match chest width (measure around body front)
Row 1: sc across, ch 1, turn
Rows 2–? : sc across until vest reaches desired length
Leave arm openings by skipping stitches at the sides or sewing after fitting.
Fasten off and sew onto body. Add tiny buttons if desired.
Belt (Brown + buckle detail)
Ch long enough to wrap around waist
Work 2–3 rows of sc for belt width
Buckle: embroider rectangle or sew a small buckle accessory
Sew belt around waist.
Common Mistakes and How to Avoid Them#
The doll won’t stand
Add weight pouch inside body base
Stuff boots firmly and flatten soles slightly
Position legs evenly and pin before sewing
Face looks off-center
Mark center line with stitch markers before sewing nose and beard
Pin everything first, then sew
Beard looks messy
Trim slowly in small snips
If brushing, brush gently and evenly
Secure the beard base firmly before adding strands
Hat slides up
Add a tighter brim by working one round of sc BLO at the hat opening
Sew a few hidden tacking stitches under the brim
Clothes look bulky
Use the same yarn but a slightly smaller hook for clothing pieces
Keep seams flat and weave in ends carefully
Expert Tips for Better Results#
Use cotton blend for crisp clothing edges and cleaner stitch definition
Weave ends as you go, especially on clothing, to keep the inside tidy
For realistic cheeks, apply blush lightly with a cotton swab
Add a few hidden stitches from hat to head so it stays in the perfect position
If the beard is very full, sew it in layers: top edge first, then sides, then lower edge
Variations and Customization Ideas#
Holiday gnome: swap hat to green, add a tiny scarf, add mitten hands
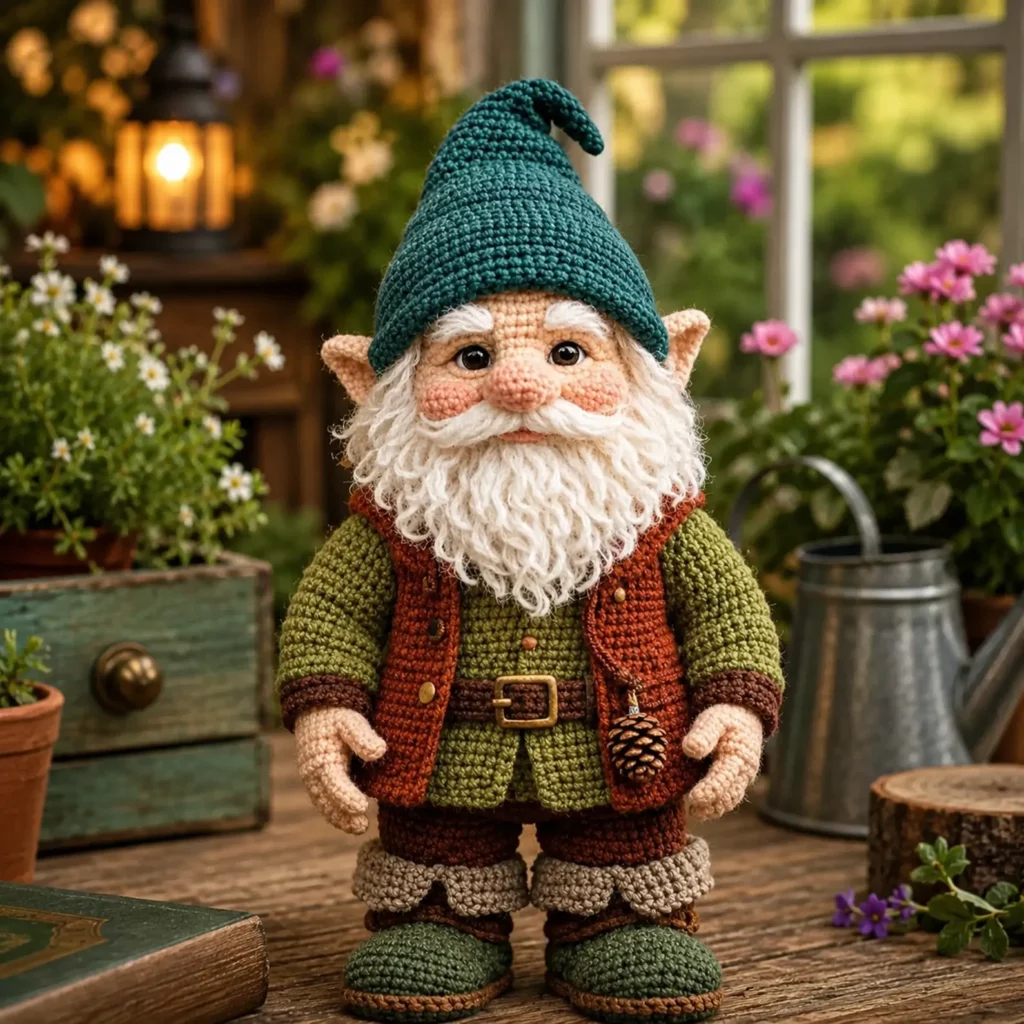
Woodland gnome: add a little pouch, mushroom accessory, or tiny pinecone charm
Viking gnome: add braids and a smaller cap instead of tall hat
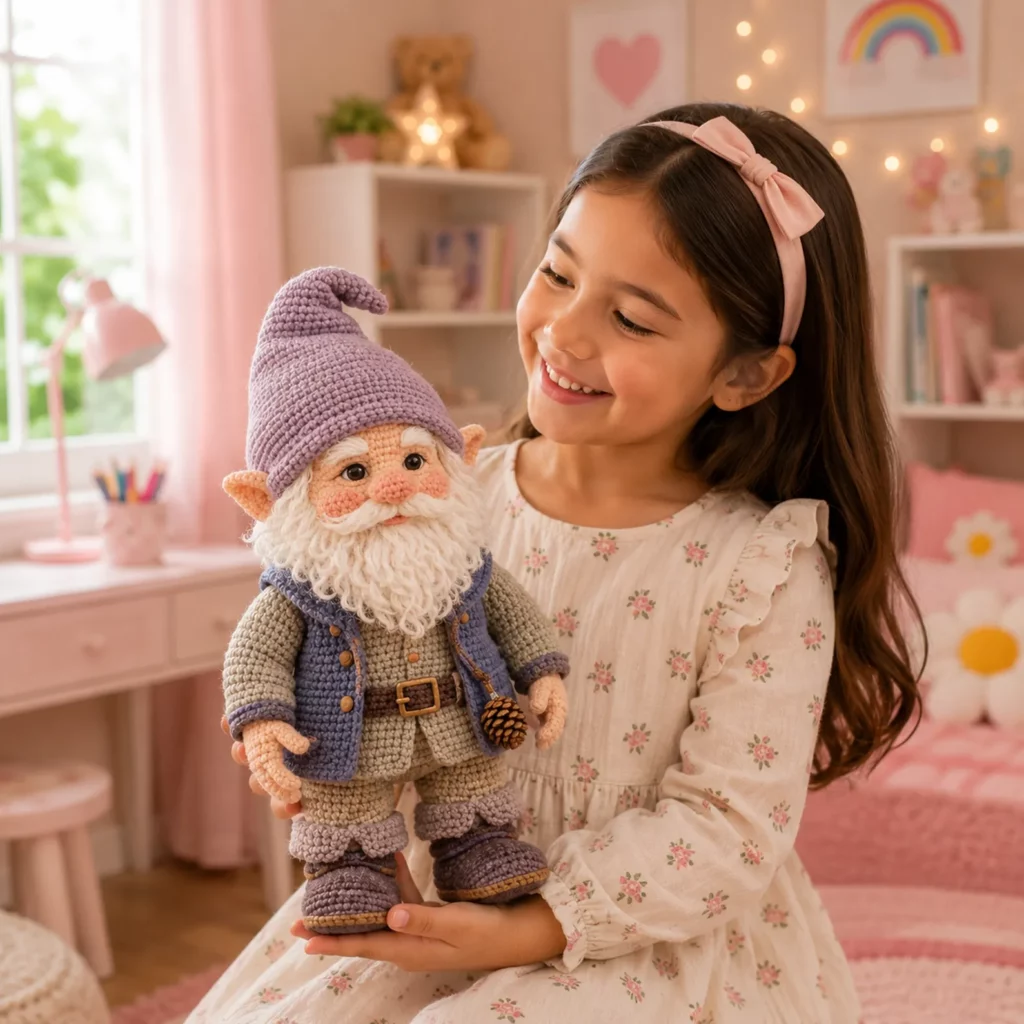
Girl gnome: add a longer dress and softer blush, add eyelashes embroidery
Mini version: use DK yarn and stop body rounds earlier to make a smaller gnome
Benefits of This Crochet Project#
A true statement décor piece that feels like a collectible
Great for gifting because it looks premium and handmade
Teaches big amigurumi structure, stability, and finishing
Customizable colors and outfit details
Perfect seasonal décor for winter, holidays, or year-round woodland themes
Internal Linking Suggestions#
How to Make Amigurumi Stand Without Tipping
Invisible Decrease Tutorial for Smooth Crochet Faces
Best Yarn for Large Amigurumi Dolls
How to Make Crochet Hair and Beards
Beginner Guide to Sewing Amigurumi Parts Symmetrically
FAQ Section#
How do I make the gnome exactly 50 cm tall?
Use bulky yarn for faster height, or add extra rounds to the body and hat if using worsted yarn. The hat height and boot height also affect total height, so those are easy places to adjust.
What is the best yarn for a large crochet doll?
Cotton blends or sturdy acrylics are great. Cotton gives crisp details, acrylic is soft and plush. For a standing doll, avoid very stretchy yarns.
How do I keep the gnome standing?
Add a weight pouch in the body base, stuff firmly, and sew legs and boots so the soles sit flat. Weight plus flat boots is the most reliable combo.
Can I make the beard without brushing?
Yes. You can attach yarn strands to the beard base and trim them into shape. This gives a full beard without needing a brush.
Is this safe for kids?
If it’s for young children, embroider the eyes, avoid wire, and sew all accessories very securely. Large dolls are often best as décor or supervised toys.
How do I make the hat more floppy?
Use less stuffing in the hat, make the top longer, and tack the tip down with a few hidden stitches so it droops naturally.
Conclusion#
A large crochet gnome doll is one of the most satisfying crochet pattern projects you can make because it turns simple stitches into a character-filled keepsake. With a sturdy standing body, a full beard, a classic hat, and outfit details like a vest and belt, your finished gnome will look polished and display-worthy.
If you tell me what yarn weight you’re using (worsted or bulky) and your hook size, I can adjust the round counts so the finished height lands closer to 50 cm with the proportions you want.


