


Introduction#
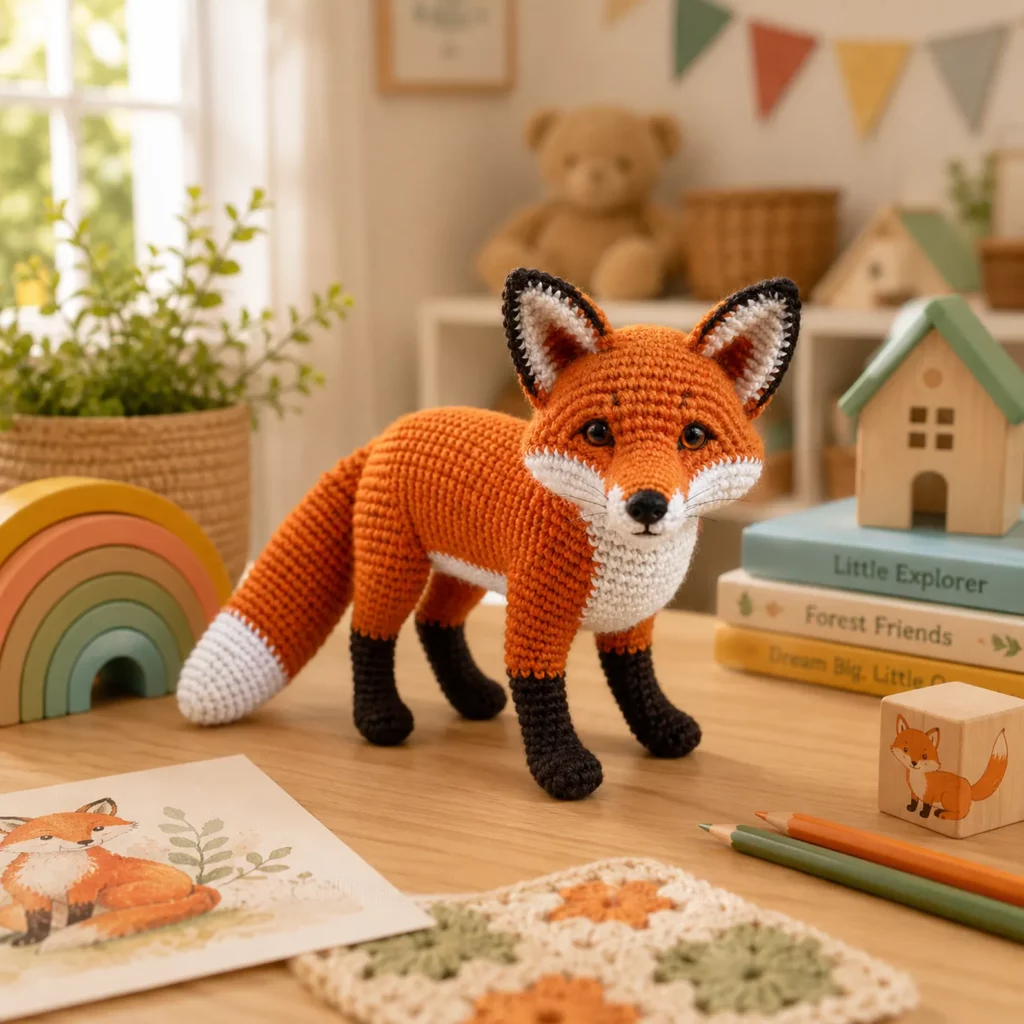
A fox amigurumi is one of those crochet projects that looks instantly impressive, even though it’s built from simple stitches. The secret is in the shape and the color placement: a sleek body, a gently pointed snout, crisp white chest and muzzle markings, dark “sock” legs, and a big fluffy tail with a white tip.
Explore more beginner amigurumi crochet patterns in our pattern library.
This crochet pattern walks you through how to make a realistic-cute standing fox that has a more lifelike silhouette than a round plush, but still feels soft, sweet, and giftable. If you love woodland animals, this is a perfect DIY crochet make for nurseries, seasonal décor, handmade gifts, or adding to your amigurumi collection.
In this crochet tutorial, you’ll learn how to create clean color changes, shape a stable body that stands on four legs, and assemble details like the muzzle and ears so your fox looks polished from every angle.
Detailed Description of the Crochet Pattern#
This fox is designed with a natural posture: the body is long and slightly arched, the legs are slim but sturdy, and the head has a defined snout. The ears are tall and triangular with contrasting inner ear color and a darker edge. The muzzle and chest are white, creating that classic fox face marking. The legs are dark at the bottom like little socks, and the tail is large and tapered with a bright white tip.
Key features you’ll be making
- Smooth single crochet fabric for a clean “fur” look
- Shaped head with a softly pointed snout
- White cheek/muzzle section for the fox’s signature face
- Tall ears with inner color detail and a dark rim
- Long body that looks realistic without being too complicated
- Four legs that support standing (the main challenge is balance)
- Tail with a bold white tip for that unmistakable fox finish
- Optional whiskers for extra realism
This crochet pattern is built in separate pieces so you can control the shaping and color placement more easily.
Skill Level Explanation#
This is a confident beginner to intermediate crochet pattern.
You’ll be comfortable if you can
- Crochet single crochet in continuous rounds
- Increase and decrease evenly
- Do basic color changes
- Sew parts together neatly
You’ll practice or learn
- Clean color-blocking for the muzzle and chest
- Shaping the body for a realistic stance
- Positioning legs so the fox stands without wobbling
- Making crisp ear edges and symmetry in assembly
If you’ve made amigurumi animals before, this is a very doable next step that feels more “designer” than a simple round plush.
Materials Needed#
Yarn
Smooth yarn gives the best stitch definition, especially for face shaping and color changes.
Recommended yarn weight
- DK weight for a refined, detailed fox
- Worsted weight for a larger plush fox
Suggested colors
- Orange/rust for the main body
- White/cream for muzzle, cheeks, chest, and tail tip
- Dark brown or black for legs and ear edging
- Small amount of pink or light brown if you want inner ear shading (optional)
Yarn tips
- Cotton yarn gives crisp stitches and a very polished finish
- Acrylic yarn makes a softer plush and is great for toys
- Avoid fuzzy yarn for this project because it blurs the face markings
- Use the same yarn brand/weight for all colors so pieces match in size
Hook
Use a smaller hook than the yarn label suggests for tight amigurumi fabric.
- DK yarn: 2.75 mm to 3.25 mm
- Worsted yarn: 3.25 mm to 4.0 mm
Notions
- Stitch marker
- Tapestry needle
- Scissors
- Fiberfill stuffing
- Safety eyes (10 to 14 mm depending on size) or embroidery floss for eyes
- Black embroidery thread for nose and mouth details
- Optional: fishing line or strong thread for whiskers
- Optional: small weights or pellets in a fabric pouch for stability (display only)
Safety note
If making for young children, embroider eyes and skip whiskers, weights, and any small detachable parts.
Stitches & Techniques Explained#
Abbreviations in US terms
- MR magic ring
- ch chain
- sl st slip stitch
- sc single crochet
- inc increase (2 sc in same stitch)
- dec decrease (sc two stitches together)
- st stitch
- FLO front loop only
- BLO back loop only
Invisible decrease
For smooth shaping (especially on the snout), use invisible decreases by picking up the front loops of the next two stitches and single crocheting them together.
Clean color change
Change color on the last yarn-over of the final stitch in the old color. Pull the new color snugly to avoid gaps.
Stuffing and shaping
This fox looks best with firm stuffing in the head, neck, and legs. Shape as you stuff by pressing the snout outward and smoothing the sides of the head with your fingers.
Step-by-Step Instructions#
This free crochet pattern is written as a crochet tutorial. Work in continuous rounds unless stated. Use a stitch marker.
Finished size
- DK yarn: about 18 to 26 cm long
- Worsted yarn: about 26 to 35 cm long
Notes
- Pin all parts before sewing
- Test standing balance before final stitching of legs
- Stuff firmly but do not overstretch stitches
Head
Start with orange.
Round 1
- 6 sc in MR (6)
Round 2
- inc around (12)
Round 3
- (sc, inc) around (18)
Round 4
- (2 sc, inc) around (24)
Round 5
- (3 sc, inc) around (30)
Round 6
- (4 sc, inc) around (36)
Rounds 7 to 10
- sc around (36)
Eye placement
- Place eyes between rounds 8 and 9
- Space them about 9 stitches apart for a natural look
Begin shaping the snout area
Round 11
- (4 sc, dec) around (30)
Round 12
- sc around (30)
Round 13
- (3 sc, dec) around (24)
Round 14
- sc around (24)
Round 15
- (2 sc, dec) around (18)
Stuff the head firmly now, shaping the front slightly.
Round 16
- (sc, dec) around (12)
Round 17
- dec around (6)
Fasten off and close. Weave in end.
Muzzle and cheeks (white)
This piece creates the fox’s white face marking.
Round 1
- 6 sc in MR (6)
Round 2
- inc around (12)
Round 3
- (sc, inc) around (18)
Round 4
- (2 sc, inc) around (24)
Rounds 5 to 6
- sc around (24)
Stuff lightly so it stays rounded.
Fasten off with a long tail.
Sew muzzle to head
- Center it under the eyes
- The top edge should sit just below eye level
- Sew with small stitches and add a tiny bit more stuffing right before closing
Nose and mouth
- Embroider a small black triangle nose on the muzzle tip
- Add a short vertical line and a gentle split mouth line
Ears (make two)
Ears are made with an outer orange ear and an inner white detail, then edged in dark yarn.
Outer ear (orange)
Round 1
- 6 sc in MR (6)
Round 2
- (sc, inc) around (9)
Round 3
- sc around (9)
Round 4
- (2 sc, inc) around (12)
Round 5
- sc around (12)
Round 6
- (3 sc, inc) around (15)
Round 7
- sc around (15)
Flatten the ear and close with sc across the top. Fasten off with a tail.
Inner ear (white, optional)
- Make a small triangle by crocheting rows
- Ch 6, sc across (5)
- Next row sc2tog, sc, sc2tog (3)
- Next row sc2tog (1)
Fasten off and sew inside the ear.
Dark ear edging (black or dark brown)
- With dark yarn, single crochet evenly around the ear edge for a crisp outline
Fasten off.
Sew ears to head
- Place ears high on the head
- Angle slightly outward
- Pin first and mirror placement for symmetry
Body (orange)
The body is a long oval cylinder.
Round 1
- 6 sc in MR (6)
Round 2
- inc around (12)
Round 3
- (sc, inc) around (18)
Round 4
- (2 sc, inc) around (24)
Round 5
- (3 sc, inc) around (30)
Round 6
- (4 sc, inc) around (36)
Rounds 7 to 16
- sc around (36)
Optional white chest panel
For a clean chest marking, sew on a white chest patch rather than doing complex colorwork.
Chest patch (white)
- Ch 10, sc in second ch and across (9)
- Work 6 to 10 rows sc across until it fits the chest area
Fasten off and sew to the front underside.
Taper toward the back
Round 17
- (4 sc, dec) around (30)
Rounds 18 to 20
- sc around (30)
Round 21
- (3 sc, dec) around (24)
Rounds 22 to 23
- sc around (24)
Stuff firmly, especially the belly.
Close
Round 24
- (2 sc, dec) around (18)
Round 25
- (sc, dec) around (12)
Round 26
- dec around (6)
Fasten off and close.
Legs (make four)
Start with dark yarn for socks, then change to orange.
Foot (dark)
Round 1
- 6 sc in MR (6)
Round 2
- inc around (12)
Round 3
- sc around (12)
Change to dark again for one more round if you want thicker socks
Round 4
- sc around (12)
Change to orange
Rounds 5 to 14
- sc around (12)
Stuff firmly. Keep legs straight and evenly sized.
Fasten off leaving a long tail for sewing.
Leg placement
- Front legs sit under the chest area
- Back legs sit slightly back under the body
- Angle legs outward a little so the fox stands stable
Pin all legs and test on a flat surface before sewing permanently.
Tail (orange with white tip)
The tail is long and slightly curved, with a big white tip.
Start with white.
Round 1
- 6 sc in MR (6)
Round 2
- inc around (12)
Round 3
- (sc, inc) around (18)
Rounds 4 to 6
- sc around (18)
Change to orange
Rounds 7 to 18
- sc around (18)
Begin taper
Round 19
- (4 sc, dec) around (15)
Rounds 20 to 22
- sc around (15)
Round 23
- (3 sc, dec) around (12)
Rounds 24 to 26
- sc around (12)
Round 27
- (2 sc, dec) around (9)
Rounds 28 to 30
- sc around (9)
Stuff as you go. Keep it firm but not stiff.
Fasten off leaving a long tail.
Attach tail
Sew to the back end of the body, slightly angled so it curves gently.
Assembly#
Sew head to body
- Place head at the front of the body
- Angle slightly downward for a natural fox posture
- Sew firmly with multiple passes so it doesn’t wobble
Attach legs
- Pin all four legs first
- Test standing position
- Adjust until the fox stands evenly
- Sew each leg securely, adding extra stitches inside the join for strength
Attach tail
- Sew tail to the back, slightly upward and outward
- If you want it to look extra fluffy, shape it with your hands after stuffing
Final details
- Embroider nose and mouth if not already done
- Add whiskers with fishing line or thread (optional, display only)
- Add a tiny stitch line above each eye for a “soft eyelid” look (optional)
Common Mistakes and How to Avoid Them#
Fox won’t stand
- Stuff legs and body more firmly
- Reposition legs wider and slightly outward
- Flatten feet gently before sewing
- Add a small weight pouch inside the belly for display-only pieces
Muzzle looks crooked
- Pin the muzzle and check symmetry from front and side before sewing
- Count stitches from each eye to the muzzle edges
Color changes look jagged
- Change color on the last yarn-over
- Pull new color snugly
- Weave ends neatly and avoid bulky knots
Ears look uneven
- Count rounds carefully
- Pin both ears before sewing
- Check height and angle before stitching
Tail droops
- Stuff a bit more firmly near the base
- Sew the base tightly
- Add a few anchor stitches from tail to body to hold a gentle curve
Expert Tips for Better Results#
- Use invisible decreases for a smooth snout and head shape
- Insert eyes before fully stuffing the head
- Sew legs in pairs (front pair, back pair) to keep alignment easier
- Shape the fox’s posture by slightly compressing the belly while sewing legs
- If you want a more realistic face, add subtle white stitches at the eyebrow area
- Steam-block the ears lightly so they hold their shape (do not overstretch)
- Weave ends as you go to keep finishing easy
Variations and Customization Ideas#
- Make a baby fox by shortening the legs and tail and using bigger eyes
- Add a scarf for a winter woodland fox
- Create an arctic fox version using white and pale gray with a fluffy tail
- Make a mini keychain fox using sport yarn and embroidered eyes
- Add a sitting option by shortening legs and widening the body base
- Add a plush belly by using slightly looser stuffing and a softer yarn
- Turn it into a family set with different yarn weights for different sizes
Benefits of This Crochet Project#
- A beautiful crochet pattern that looks realistic and high-end
- Great practice for clean shaping and color placement
- Uses small amounts of multiple colors, perfect for scrap yarn
- Makes a timeless handmade gift for kids and adults
- A satisfying project that teaches assembly and symmetry skills
- Looks great as décor for nurseries, shelves, and seasonal displays
Internal Linking Suggestions#
- How to Crochet Invisible Decrease for Amigurumi
- Best Yarn for Amigurumi With Tight Stitches
- How to Place Safety Eyes Symmetrically
- How to Sew Amigurumi Parts Neatly
- Clean Color Change Tutorial for Crochet
- How to Make Amigurumi Stand Upright
- Free Crochet Woodland Animal Patterns Collection
FAQ#
Is this crochet pattern good for beginners
Yes if you’ve made basic amigurumi before. The stitches are simple, but the shaping and assembly benefit from patience and careful pinning.
Can I make this fox baby-safe
Yes. Embroider eyes instead of using safety eyes, skip whiskers, and sew all pieces very securely.
How do I make the white face markings cleaner
Sew-on patches are the easiest way to get crisp lines without complicated colorwork. Use the same yarn weight and sew with small stitches.
How do I keep the fox from tipping forward
Place back legs slightly farther back, stuff the belly firmly, and avoid overstuffing the snout. A small weight pouch helps for display-only pieces.
What yarn works best for a realistic fox
Smooth cotton or smooth acrylic works best. Cotton gives the crispest stitch definition and makes the fox look very polished.
How do I resize the fox
Use thicker yarn and a larger hook for a bigger fox, or thinner yarn and a smaller hook for a smaller fox. Keep stitches tight so stuffing doesn’t show.
Conclusion#
This fox amigurumi crochet pattern is the perfect blend of realistic shape and adorable charm. With crisp white markings, tall ears, dark little socks, and a fluffy white-tipped tail, it captures everything we love about woodland foxes—without requiring complicated stitches. The key to a professional-looking result is tight tension, firm stuffing, and careful assembly with plenty of pinning before you sew.
If you tell me your yarn weight and the length you want your finished fox to be, I can suggest quick adjustments to the body and tail rounds so your proportions come out exactly right.


