


Introduction#
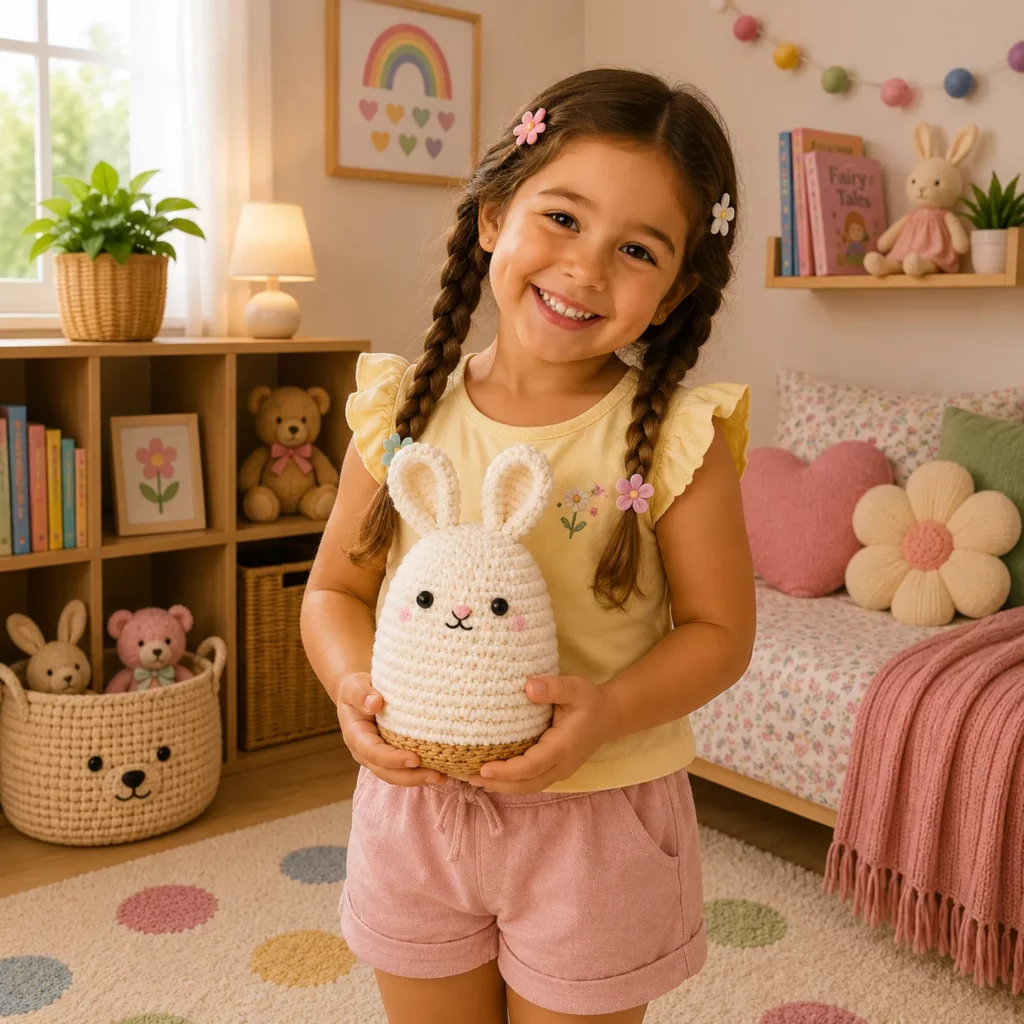
If you’re looking for a crochet project that feels calm, cute, and totally giftable, a bunny amigurumi is hard to beat. Bunnies are a classic in handmade toys because they’re instantly recognizable, easy to personalize, and perfect for all seasons—spring baskets, baby showers, birthdays, nursery décor, or a comforting desk buddy.
Explore more beginner amigurumi crochet patterns in our pattern library.
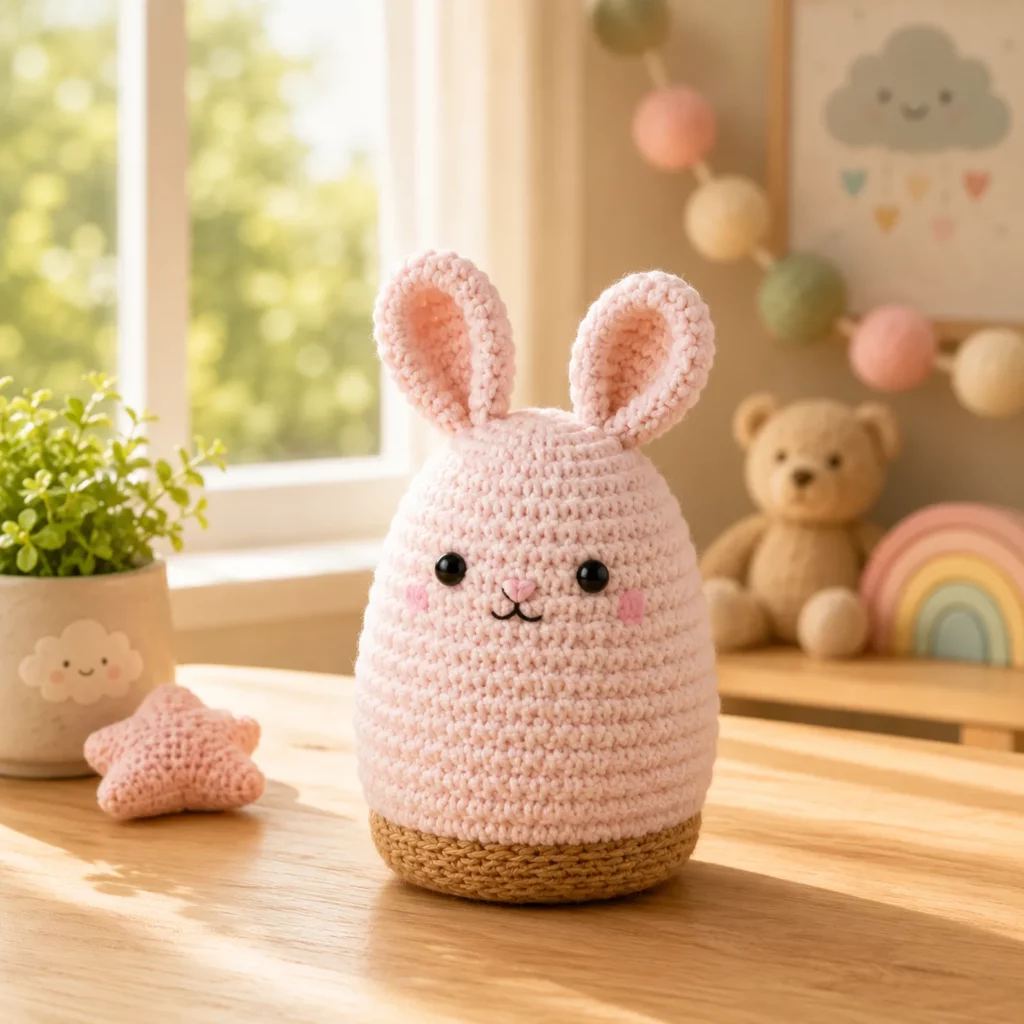
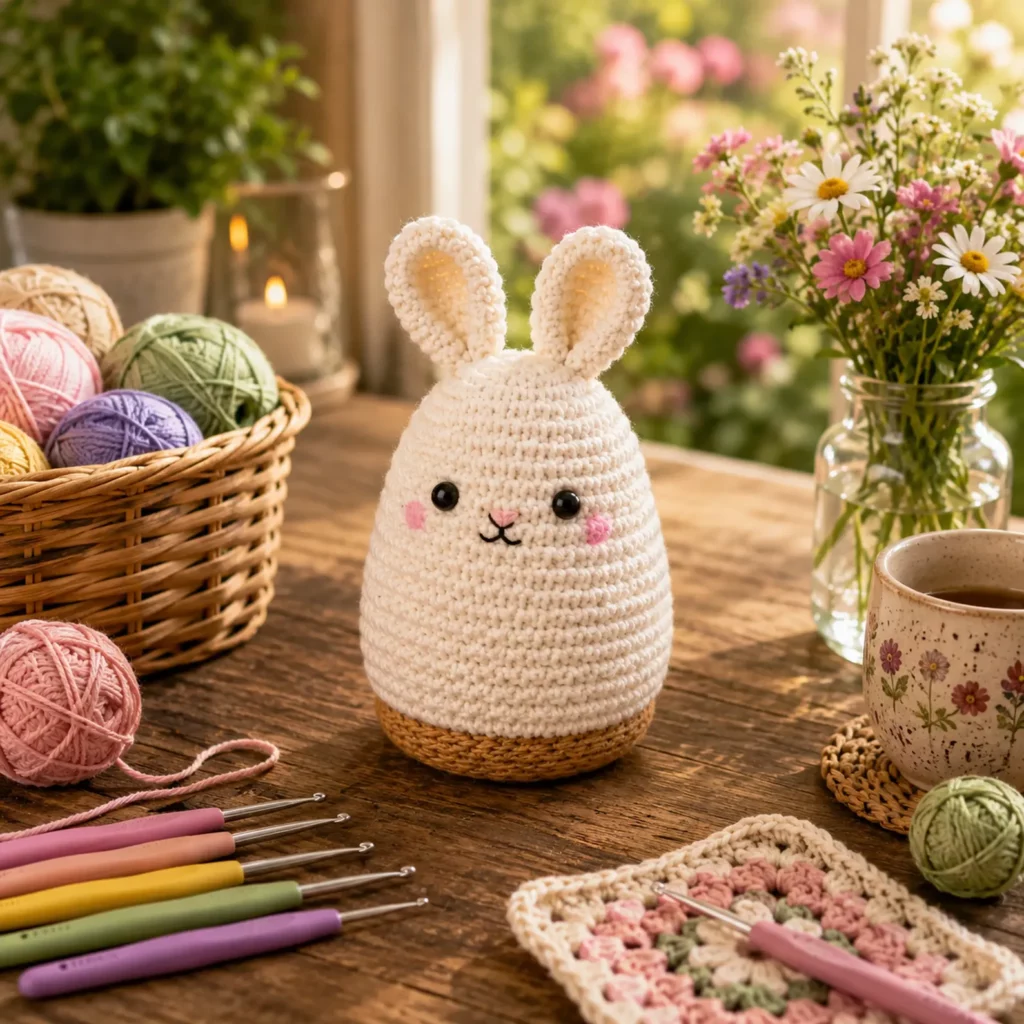
This crochet pattern creates a plump, egg-shaped bunny with long upright ears, a tiny embroidered face, and a simple two-tone base that makes it look extra finished. The body shape is smooth and beginner-friendly, and you can make it even easier by using one color if you prefer. The best part is that this style looks adorable even when you keep the details minimal. A neat stitch fabric, carefully placed eyes, and a sweet little mouth are enough to bring it to life.
Below you’ll find a complete crochet tutorial-style guide: materials, stitch explanations, step-by-step instructions, tips for getting a smooth finish, and lots of customization ideas so you can make a whole bunny family.
Detailed Description of the Crochet Pattern#
This crochet pattern is built around a simple, modern amigurumi silhouette:
- A rounded “egg” body that combines the head and torso into one piece
- Two tall ears with a slight curve and a soft inner ear look
- Small, simple facial features: eyes, nose, and a tiny smile
- Optional rosy cheeks for extra cuteness
- A contrasting lower band that looks like a little “base” or “basket” effect
This kind of crochet bunny works beautifully for beginners because there are fewer parts to sew compared to traditional dolls or animals. Instead of making a separate head, body, arms, and legs, you focus on one main shape and two ears. That means fewer seams and a smoother, cleaner look overall.
The finished bunny can be used as a plush toy, nursery decoration, shelf accent, or even a soft pincushion-style décor piece (depending on your yarn and stuffing).
Skill Level Explanation#
This is an easy crochet pattern for beginners and confident beginners.
You’ll be comfortable if you can
- Crochet single crochet in continuous rounds
- Make increases and decreases
- Use a stitch marker to track rounds
- Sew on ears neatly
- Embroider small facial details
You’ll practice
- Creating smooth shaping with invisible decreases
- Getting a clean, even stitch fabric that hides stuffing
- Placing facial features symmetrically
- Building structure through stuffing and shaping
If this is your first amigurumi, it’s a great place to start because the construction is simple and forgiving.
Materials Needed#
Yarn
Pick a yarn that gives you a smooth finish and feels soft in your hands.
Recommended yarn types
- Cotton yarn for crisp stitches and a polished look
- Acrylic yarn for a softer, cuddly feel
- Cotton blends for both structure and softness
Yarn weight options
- DK weight for a smaller, refined bunny
- Worsted weight for a medium bunny with a cozy feel
- Plush/chenille yarn for a super squishy bunny (count carefully)
Color suggestions
- Main bunny: white or cream
- Base band: tan, caramel, or light brown
- Embroidery: black or dark brown for mouth, pink for cheeks, pale pink for nose
Hook
Use a smaller hook than the yarn label suggests so the fabric is tight and stuffing doesn’t show.
Typical hook sizes
- DK: 2.75 mm to 3.25 mm
- Worsted: 3.25 mm to 4.0 mm
- Plush yarn: 5.0 mm to 7.0 mm depending on thickness
Notions
- Stitch marker
- Tapestry needle
- Scissors
- Fiberfill stuffing
- Safety eyes (6 mm to 12 mm depending on size) or embroidery floss
- Optional blush for cheeks (display only)
Baby-safe note
If this bunny is for a baby or toddler, embroider the eyes and skip any plastic parts.
Stitches & Techniques Explained#
US terms
Abbreviations
- MR magic ring
- sc single crochet
- inc increase (2 sc in one stitch)
- dec decrease (sc 2 stitches together)
- sl st slip stitch
- ch chain
- st stitch
- BLO back loop only
Invisible decrease
For a smooth finish, use invisible decreases by picking up the front loops of the next two stitches and single crocheting them together. This reduces the “bumpy” look that standard decreases can create.
Clean color change
To switch colors neatly, change on the last yarn-over of the final stitch in the old color. Pull the new color snug so the change line looks crisp.
How to avoid a wobbly shape
A smooth bunny comes from firm stuffing and shaping as you go. Stuff in small amounts, press the stuffing into the curves with your fingers, and rotate the piece while you work.
Step-by-Step Instructions#
This crochet pattern is written as an easy crochet tutorial. Work in continuous rounds unless stated. Use a stitch marker to mark the first stitch of each round.
Bunny body
Use main color.
Round 1
6 sc in MR (6)
Round 2
inc around (12)
Round 3
(sc, inc) around (18)
Round 4
(2 sc, inc) around (24)
Round 5
(3 sc, inc) around (30)
Round 6
(4 sc, inc) around (36)
Round 7
(5 sc, inc) around (42)
Rounds 8 to 14
sc around (42)
This section creates the rounded upper body.
Optional face placement guide
If using safety eyes, place them around the middle of this section so the face sits slightly above the widest part of the body. A common placement is between two middle rounds with about 6 to 8 stitches between eyes. Adjust for the expression you want.
Begin tapering slightly
Round 15
(5 sc, dec) around (36)
Round 16
sc around (36)
Round 17
(4 sc, dec) around (30)
Round 18
sc around (30)
Add stuffing now
Stuff firmly, shaping into a smooth egg. Keep the top slightly rounder than the bottom.
Switch to base color (optional band)
If you want the contrasting base, change to tan here. If not, continue with main color.
Rounds 19 to 22
sc around (30)
Begin closing
Round 23
(3 sc, dec) around (24)
Round 24
(2 sc, dec) around (18)
Round 25
(sc, dec) around (12)
Add a final bit of stuffing and flatten the base slightly so it sits.
Round 26
dec around (6)
Fasten off and close. Weave in the end.
Bunny ears
Make two in main color.
Ear outer
Round 1
6 sc in MR (6)
Round 2
(sc, inc) around (9)
Round 3
(2 sc, inc) around (12)
Round 4
(3 sc, inc) around (15)
Rounds 5 to 10
sc around (15)
Round 11
(3 sc, dec) around (12)
Round 12
sc around (12)
Round 13
(2 sc, dec) around (9)
Round 14
sc around (9)
Flatten the ear gently. Do not stuff. Fasten off leaving a long tail.
Optional inner ear detail
If you want a soft inner ear look, crochet a smaller inner ear piece in pale pink and sew it onto the front of the ear before attaching to the body.
A simple inner ear can be made as a small oval: start with 6 sc in MR, then one increase round to 9 or 12 stitches, and a couple of plain rounds.
Attach ears
Pin the ears at the top of the body. Place them evenly spaced so they look symmetrical from the front. Sew securely with small stitches.
Face details
Eyes
- Safety eyes give a glossy, classic amigurumi look
- Embroidered eyes are best for baby-safe bunnies
Nose and mouth
Embroider a tiny triangle nose in light pink, then add a simple “Y” shape for the mouth: one short line down and two small curves.
Cheeks
You can add blush cheeks with a little pink yarn stitching or a tiny amount of blush powder (display only). Keep cheeks small so the face stays clean and modern.
Common Mistakes and How to Avoid Them#
Bunny looks lumpy
- Stuff in small amounts and shape often
- Use a slightly smaller hook for tighter stitches
- Avoid overstuffing right before closing (that stretches stitches)
Bunny won’t stand upright
- Flatten the base while stuffing
- Add a little more stuffing to the lower half
- Make sure your closing rounds are centered and tight
Ears look uneven
- Count rounds carefully for both ears
- Pin ears before sewing
- Measure from the center of the face area to each ear placement
Eyes look crooked
- Use pins to mark eye placement first
- Count stitches between eyes
- Check from multiple angles before securing safety eyes
Color change line looks messy
- Change color on the last yarn-over
- Tug the new color slightly to tighten the first stitch
- Weave ends in carefully so the join stays clean
Expert Tips for Better Results#
- Use invisible decreases on all shaping rounds for a smoother finish
- Lightly pull the fabric into shape after stuffing to smooth bumps
- If the bunny feels too soft and slumps, add more stuffing to the base
- For a super clean look, embroider the nose and mouth with thin embroidery floss rather than yarn
- If you want the ears to stand more firmly, sew a small pinch at the base of each ear before attaching
Variations and Customization Ideas#
This is where the fun really starts. The same crochet pattern can create many different bunnies.
Color variations
- Classic white bunny with tan base
- Pastel bunny in baby pink, lavender, or mint
- Speckled yarn bunny for a modern handmade look
- Two-tone bunny with contrasting ears
Accessory ideas
- Tiny bow tie or scarf
- Mini flower crown
- Little carrot applique
- Sleepy face with embroidered closed eyes
- Add a small pom-pom tail on the back
Size variations
- Use thinner yarn and a smaller hook for a mini bunny
- Use chunky yarn for a big plush bunny
- Keep the same stitch counts and let yarn weight change the size naturally
Seasonal themes
- Spring bunny with floral details
- Holiday bunny with a tiny hat or scarf
- Halloween bunny in black and orange
- Winter bunny with a little sweater band
Benefits of This Crochet Project#
- A fast and satisfying crochet pattern with a high-cuteness result
- Minimal sewing compared to many amigurumi designs
- Great for crochet for beginners because the shapes are simple
- Easy to customize into many different styles
- Perfect for gifts, nursery décor, and handmade markets
- Works well with scrap yarn for small details
Internal Linking Suggestions#
You may also like
- Free crochet pattern for a mini carrot applique
- Easy crochet pattern for a teddy bear amigurumi
- Crochet tutorial for invisible decrease
- Crochet for beginners guide to stuffing and shaping amigurumi
- DIY crochet nursery décor ideas
- Free crochet pattern for tiny bows and flowers
FAQ Section#
Is this crochet pattern good for beginners
Yes. The bunny uses basic stitches and simple shaping. The main focus is neat stuffing and careful ear placement.
Can I make this bunny baby-safe
Yes. Use embroidered eyes and securely stitched facial details. Avoid plastic safety eyes and any removable accessories.
What yarn is best for an amigurumi bunny
Cotton or smooth acrylic yarn works best. Cotton gives crisp stitches and structure, while acrylic can be softer and cuddly.
How do I make the ears stand up more
Don’t over-flatten them. Add a small pinch at the base when sewing, and sew them firmly with multiple stitches. A slightly tighter stitch fabric also helps.
How do I resize the bunny
Change yarn weight and hook size. Thicker yarn makes a larger bunny, thinner yarn makes a smaller one. Keep stitches tight for a clean finish.
Do I have to add the contrasting base
No. The base band is optional. It simply adds a polished “finished” look and helps the bunny feel grounded visually.
Conclusion#
This bunny amigurumi crochet pattern is simple, sweet, and endlessly customizable. The rounded body makes it beginner-friendly, while the long ears and tiny face details give it instant charm. Whether you keep it classic in white and tan or make a colorful bunny collection, you’ll end up with a plush that feels handmade in the best way—soft, thoughtful, and gift-ready.
If you want, tell me the yarn weight you’re using and the approximate height you’d like, and I can suggest the best eye size and how many rounds to add or remove so your bunny comes out exactly the size you want.


