


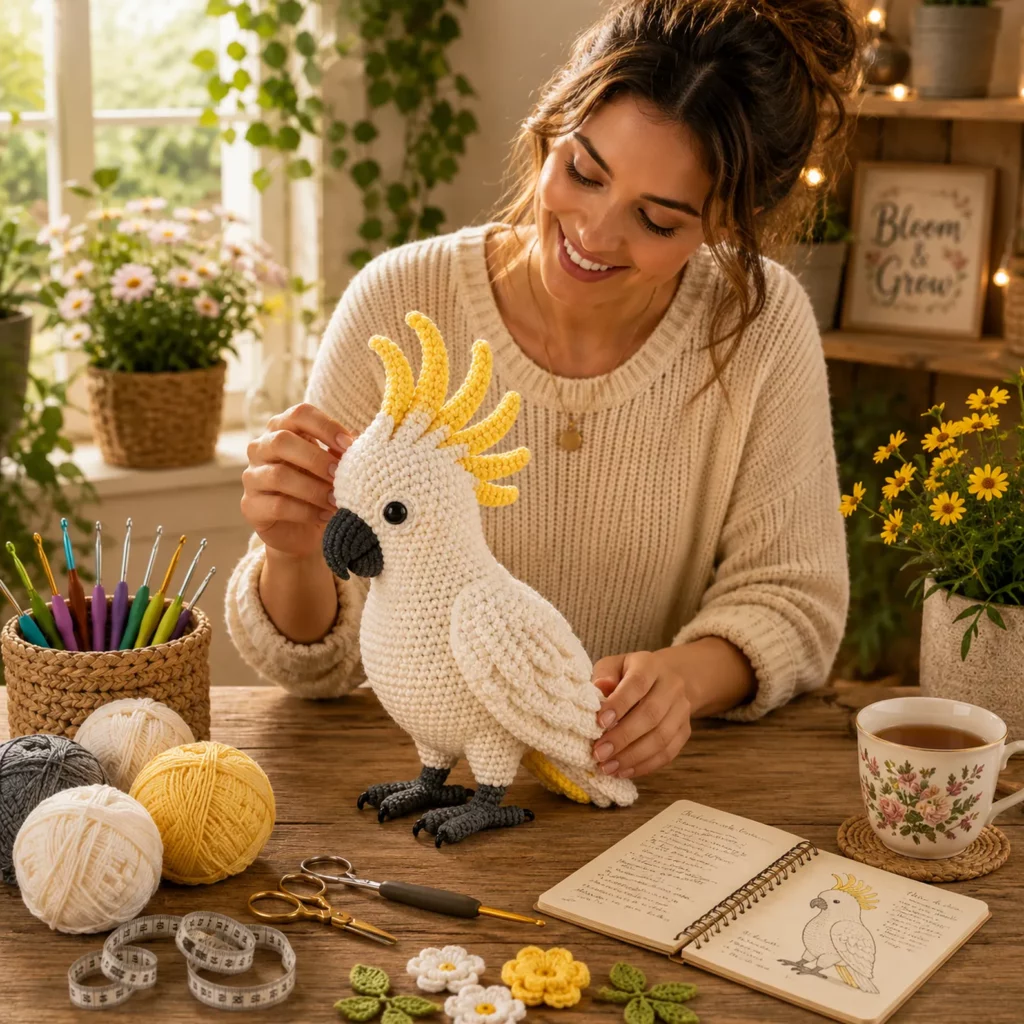
Introduction#
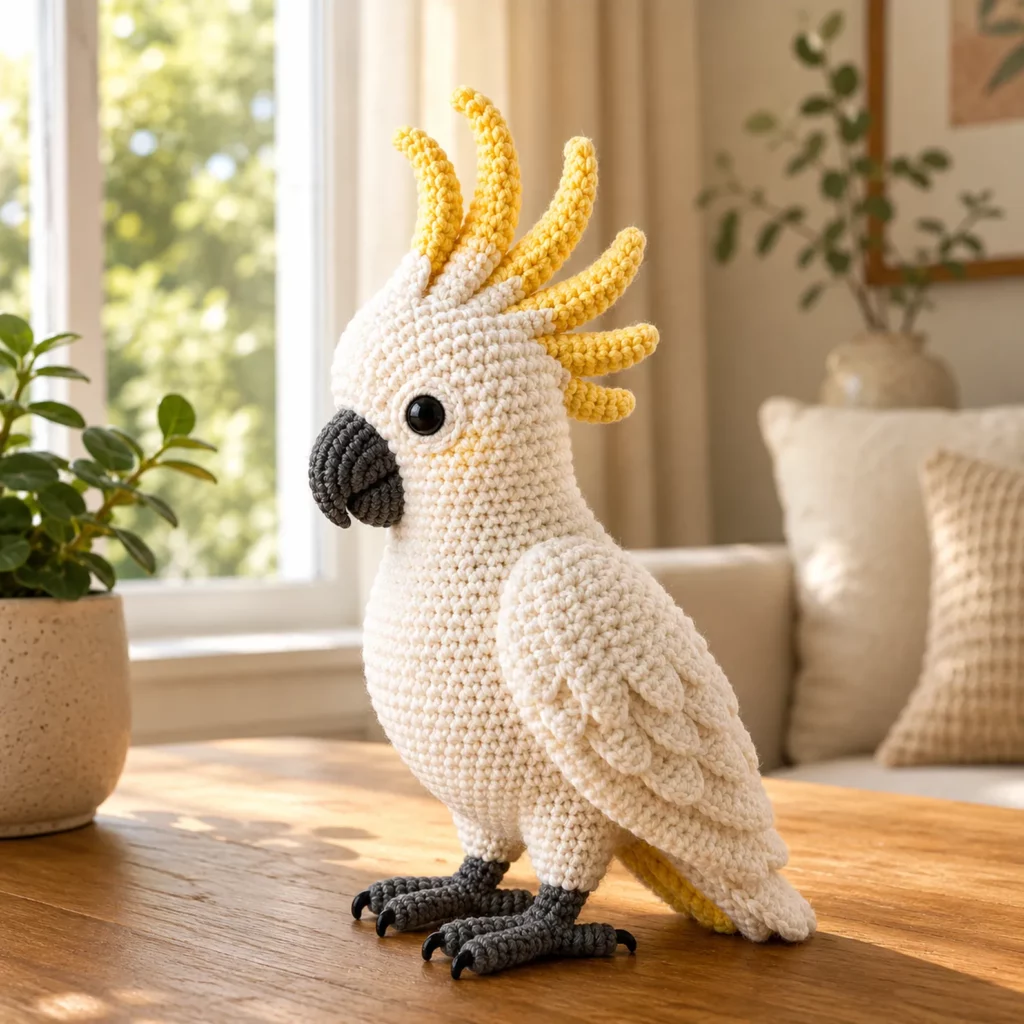
If you want an amigurumi project that feels elegant, bright, and instantly recognizable, a cockatoo is the perfect crochet pattern to try. The clean white body makes it look polished and modern, while the bold yellow crest adds that signature “wow” factor. This style of bird also looks amazing as décor because it stands upright and has beautiful shape from every angle.
Explore more beginner amigurumi crochet patterns in our pattern library.
This crochet tutorial will guide you through making a standing cockatoo amigurumi with a smooth body, a curved beak, layered wings, and strong bird feet. The crest is made from individual crocheted spikes so it can fan out like a real cockatoo. Even though it looks detailed, it’s built from beginner-friendly shapes—mostly single crochet with careful assembly.
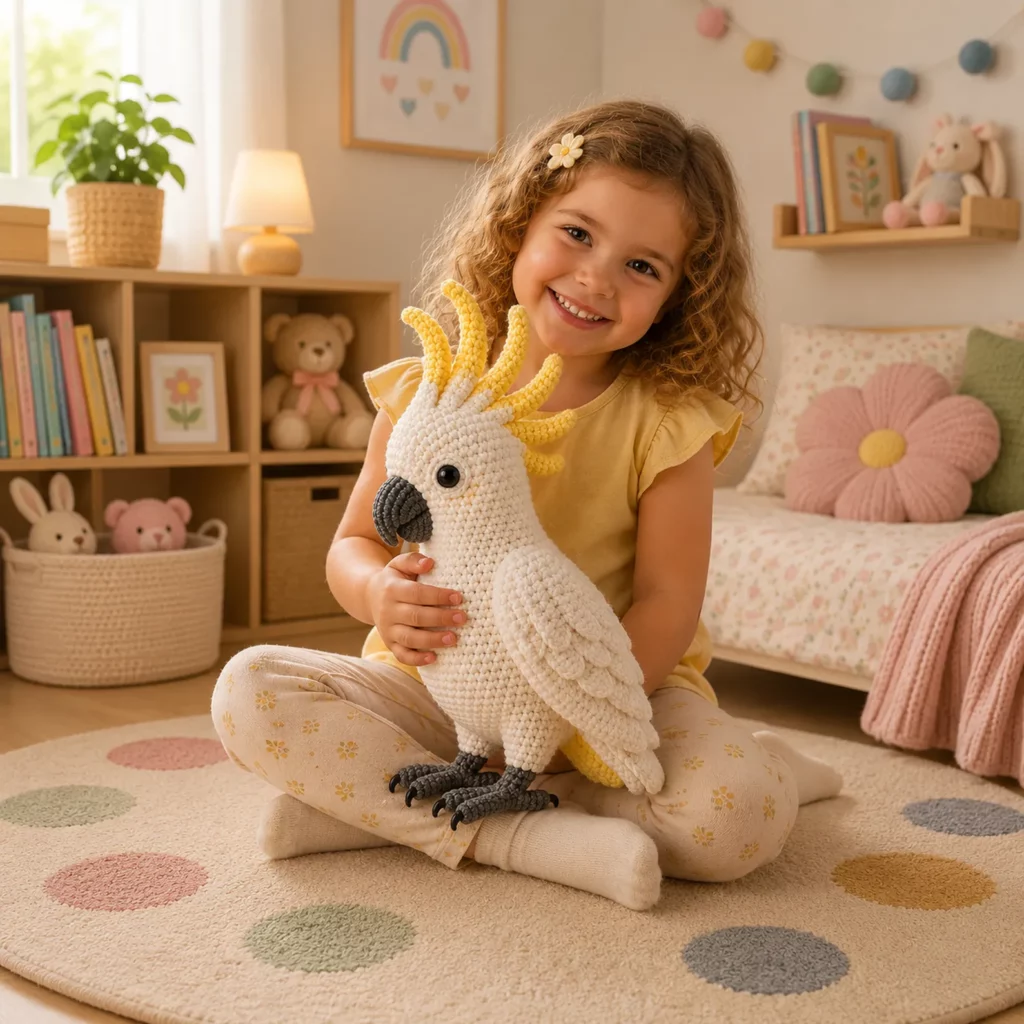
By the end, you’ll have a display-worthy DIY crochet bird that makes a gorgeous gift for bird lovers and a stunning addition to any amigurumi collection.
Detailed Description of the Crochet Pattern#
This cockatoo has a realistic upright posture with classic amigurumi softness. The body is round and slightly pear-shaped, giving a stable base. The head flows into the body, creating a smooth silhouette. The beak is chunky and curved, made in two parts to look dimensional. The wings are layered: a main wing piece plus additional feather layers stitched on top to create a sculpted “feathered” look without complicated stitch patterns.
Key parts you will crochet
- Smooth white head and body in tight single crochet
- Large gray curved beak for a strong cockatoo profile
- Yellow crest feathers made as separate spikes and attached in a fan
- Layered wings with feather-like sections
- Long tail piece tucked behind the body
- Sturdy gray legs and claw feet for standing stability
- Optional subtle eye detail ring if you want extra definition
The overall finish is clean and minimalist, which is why this crochet pattern looks so high-end when your stitches are even.
Skill Level Explanation#
This is a confident beginner to intermediate crochet pattern.
You’ll be comfortable if you know
- Single crochet in continuous rounds
- Increasing and decreasing
- Basic stuffing and shaping
- Sewing parts together neatly
You’ll practice
- Making a 3D beak from layered pieces
- Creating and attaching a multi-piece crest
- Layering wing “feathers” so they look dimensional
- Positioning feet for balance so the bird stands upright
If you’ve made an amigurumi bird or animal before, you can absolutely do this cockatoo.
Materials Needed#
Yarn
Smooth yarn is essential for a clean white bird body.
Recommended yarn weight
- DK weight for a refined, detailed cockatoo
- Worsted weight for a larger plush cockatoo
Suggested colors
- White or cream for the body, wings, and tail
- Yellow for crest feathers and optional under-tail accent
- Medium gray for beak and legs/feet
- Black for embroidery details if needed
Yarn tips
- Cotton yarn gives crisp stitch definition and a polished finish
- Acrylic works too and feels softer, but keep tension tight
- Avoid fuzzy yarn because it hides the clean shape and makes the white look less crisp
Hook
Use a smaller hook than the yarn label suggests for tight amigurumi fabric.
- DK yarn: 2.75 mm to 3.25 mm
- Worsted yarn: 3.25 mm to 4.0 mm
Notions
- Stitch marker
- Tapestry needle
- Scissors
- Fiberfill stuffing
- Safety eyes (8 to 12 mm) or embroidery floss for eyes
- Optional: small weights or pellets pouch in the base (display only)
- Optional: thin craft wire for crest pose (display only)
Safety note
For baby-safe toys, embroider eyes and skip weights or wire.
Stitches & Techniques Explained#
Abbreviations in US terms
- MR magic ring
- ch chain
- sl st slip stitch
- sc single crochet
- inc increase
- dec decrease
- st stitch
- BLO back loop only
Invisible decrease
Pick up the front loops of the next two stitches and sc them together. This gives a smoother finish on the head and body.
Layered wing technique
Instead of crocheting complex feather stitches, you crochet simple wing shapes and sew smaller “feather” layers on top. This creates texture with minimal effort.
Crest feather technique
The crest is made from multiple narrow spikes. Each spike is a slim tube or a flat strip that curves slightly when stuffed or stitched. Sewing them close together creates that iconic cockatoo fan.
Standing stability
A standing amigurumi bird needs
- Firm stuffing in the body base
- Feet placed slightly forward
- A tail that lightly touches the surface for extra support
For display, a small weight pouch helps a lot.
Step-by-Step Instructions#
Work in continuous rounds unless stated. Use a stitch marker.
Finished size
- DK yarn: about 20 to 30 cm tall
- Worsted yarn: about 28 to 40 cm tall
Notes
- Insert eyes before you fully stuff the head
- Stuff firmly for a smooth finish
- Pin all parts before sewing
Head and body (one piece)
Start at the top of the head with white.
Round 1
- 6 sc in MR (6)
Round 2
- inc around (12)
Round 3
- (sc, inc) around (18)
Round 4
- (2 sc, inc) around (24)
Round 5
- (3 sc, inc) around (30)
Round 6
- (4 sc, inc) around (36)
Rounds 7 to 11
- sc around (36)
Eye placement
- Place eyes between rounds 9 and 10
- Space them about 7 to 9 stitches apart
Begin body shaping
Round 12
- (5 sc, inc) around (42)
Rounds 13 to 20
- sc around (42)
Add belly depth
Round 21
- (6 sc, inc) around (48)
Rounds 22 to 28
- sc around (48)
Begin tapering toward the bottom
Round 29
- (6 sc, dec) around (42)
Round 30
- sc around (42)
Round 31
- (5 sc, dec) around (36)
Round 32
- sc around (36)
Start stuffing firmly
Stuff head and upper body first, then add extra firmness to the base.
Round 33
- (4 sc, dec) around (30)
Round 34
- sc around (30)
Round 35
- (3 sc, dec) around (24)
Round 36
- sc around (24)
Round 37
- (2 sc, dec) around (18)
Round 38
- (sc, dec) around (12)
Round 39
- dec around (6)
Fasten off and close. Flatten base gently.
Beak (two-piece for dimension)
Use gray.
Upper beak
Row 1
- Ch 8, sc in second ch and across (7)
Row 2
- Ch 1, turn, sc across (7)
Row 3
- Ch 1, turn, sc2tog, sc 3, sc2tog (5)
Row 4
- Ch 1, turn, sc across (5)
Row 5
- Ch 1, turn, sc2tog, sc, sc2tog (3)
Row 6
- Ch 1, turn, sc across (3)
Fasten off.
Lower beak
Row 1
- Ch 6, sc in second ch and across (5)
Row 2
- Ch 1, turn, sc across (5)
Row 3
- Ch 1, turn, sc2tog, sc, sc2tog (3)
Row 4
- Ch 1, turn, sc across (3)
Fasten off.
Assemble beak
- Place lower beak under upper beak
- Whip stitch around edges, lightly stuffing the base for firmness
- Sew beak to face centered below eyes
- Angle slightly downward for a natural cockatoo look
Wings (make two)
Use white. Wings are layered to look feathered.
Base wing
Round 1
- 6 sc in MR (6)
Round 2
- (sc, inc) around (9)
Round 3
- (2 sc, inc) around (12)
Round 4
- (3 sc, inc) around (15)
Rounds 5 to 8
- sc around (15)
Round 9
- (3 sc, dec) around (12)
Round 10
- sc around (12)
Flatten and close
Do not stuff. Fold flat and sc across top. Fasten off with sewing tail.
Feather layer strip (make four)
With white
- Ch 10
- Work a tapered strip: sl st, sc, hdc, dc, dc, hdc, sc, sl st along the chain
Fasten off.
Sew two feather strips on each wing, overlapping slightly. This creates the layered feather look.
Attach wings
- Sew wings to the sides of the body
- Position slightly back and angled downward
- Make sure both wings are the same height and angle
Tail
Use white with optional yellow under-tail highlight.
Tail piece
Row 1
- Ch 16, sc in second ch and across (15)
Rows 2 to 6
- Ch 1, turn, sc across (15)
To taper
Row 7
- Ch 1, sc2tog, sc 11, sc2tog (13)
Row 8
- Ch 1, sc across (13)
Row 9
- Ch 1, sc2tog, sc 9, sc2tog (11)
Row 10
- Ch 1, sc across (11)
Fasten off leaving a tail.
Optional yellow underside
- Make the same tail piece smaller (fewer rows) in yellow
- Sew behind so a hint of yellow peeks out like a feather underside
Attach tail
Sew to the lower back. Let it lightly touch the surface for extra standing support.
Crest feathers
Use yellow. Make multiple spikes and sew them in a fan.
Crest spike (make 6 to 9)
Round 1
- 6 sc in MR (6)
Rounds 2 to 10
- sc around (6)
Do not overstuff. Light stuffing or no stuffing keeps them neat.
Fasten off with a long tail.
Attach crest
- Sew spikes starting at the crown of the head
- Arrange in a fan shape, tallest in the center
- Add extra stitches at the base so they stand nicely
Display-only option
If you want the crest to stand tall, stitch each spike with a hidden supporting strand of yarn, or add a thin wire inside.
Feet and legs (make two)
Use gray.
Leg tube
Round 1
- 6 sc in MR (6)
Round 2
- (sc, inc) around (9)
Rounds 3 to 10
- sc around (9)
Stuff firmly and leave top open for sewing.
Toes
Make three front toes and one back toe per foot.
Front toe (make six)
- Ch 7, sc in second ch and across (6)
Fasten off.
Back toe (make two)
- Ch 5, sc in second ch and across (4)
Fasten off.
Assemble foot
- Sew three front toes together at the base
- Sew one back toe behind
- Sew the finished foot to the bottom of each leg tube
Attach legs
- Sew legs to the underside front of the body
- Place slightly forward for balance
- Pin first and test standing before final stitches
Common Mistakes and How to Avoid Them#
Cockatoo falls backward or forward
- Stuff the base more firmly
- Move feet slightly forward
- Let the tail touch the surface as a support point
- Add a small weight pouch inside for display-only pieces
Crest feathers flop
- Use tighter stitches or a smaller hook for crest spikes
- Sew bases very securely
- Add more spikes for fullness and support
Beak looks flat
- Lightly stuff the beak base
- Use two layers and sew tightly around edges
- Anchor the beak deeply into the face with strong stitches
Wings look uneven
- Pin both wings before sewing
- Measure placement from the base of the body
- Sew one wing, then mirror the placement for the second
Expert Tips for Better Results#
- Use invisible decreases for a smooth, professional finish
- Insert eyes before stuffing the head fully
- Shape the head by gently pressing the face forward while stuffing
- Steam-block feather strips lightly so they lay flat before sewing
- Weave ends as you go, especially for crest pieces
- Add a tiny white highlight stitch on the eye for extra life
- If your white yarn shows dirt easily, choose a washable yarn blend for a long-lasting plush
Variations and Customization Ideas#
- Make a smaller cockatiel-style bird by shortening the crest and tail
- Add a pink cheek patch using a tiny embroidered circle
- Create a rainbow crest for a fantasy bird version
- Add a perched branch base so it displays without balancing
- Make it baby-safe by embroidering eyes and skipping any hard parts
- Add a little scarf or bow for a gift-ready look
- Turn it into a keychain by making a mini version with sport yarn
Benefits of This Crochet Project#
- A standout crochet pattern that looks elegant and collectible
- Simple stitches with high-impact finishing details
- Great practice for shaping, assembly, and symmetry
- Perfect décor piece for plant shelves, nurseries, and desks
- Highly customizable in crest size, pose, and expression
- Uses mostly one main color, so it feels calm and satisfying to crochet
Internal Linking Suggestions#
- How to Crochet Invisible Decrease for Amigurumi
- Clean Color Change Tutorial for Crochet
- How to Sew Amigurumi Parts Neatly
- Best Yarn for Amigurumi With Tight Stitches
- Crochet Bird Feet and Perch Posing Tips
- Free Crochet Bird Patterns Collection
- How to Crochet Layered Wings for Amigurumi
FAQ#
Is this crochet pattern beginner-friendly
Yes if you’re comfortable with single crochet, increases, decreases, and basic sewing. The main detail work is attaching crest pieces and layering wings.
Can I make this without safety eyes
Absolutely. Embroider eyes with black thread for a baby-safe version.
How many crest feathers should I make
A full crest usually looks best with 6 to 9 spikes. Use fewer for a simpler look or more for a dramatic fan.
How do I keep the cockatoo standing upright
Stuff the base very firmly, position feet slightly forward, and let the tail touch the surface. For display pieces, a small weight pouch helps.
What yarn is best for a clean white bird
Smooth cotton or washable acrylic works best. Cotton gives crisp stitches, while acrylic can be softer and plushier.
How do I resize the cockatoo
Use thicker yarn and a larger hook for a bigger bird, or thinner yarn and a smaller hook for a mini version. Keep tension tight so stuffing doesn’t show.
Conclusion#
This cockatoo amigurumi crochet pattern is the perfect mix of clean design and dramatic detail. The smooth white body keeps it elegant, the curved gray beak gives it character, and the yellow crest makes it instantly recognizable. With layered wings and sturdy feet, the finished bird looks like a collectible plush you’d find in a boutique—but you made it by hand.
If you tell me your yarn weight and the height you want for your cockatoo, I can suggest the best eye size and an easy crest-feather count so your proportions look perfectly balanced.


