


Introduction#
If you’ve ever wanted to crochet something that gets an instant “Aww!”—this is it. A chubby penguin plush is one of those perfect crochet projects: fast enough to finish in a weekend, simple enough for newer makers, and cute enough to gift (or keep on your desk forever).
Explore more beginner amigurumi crochet patterns in our pattern library.
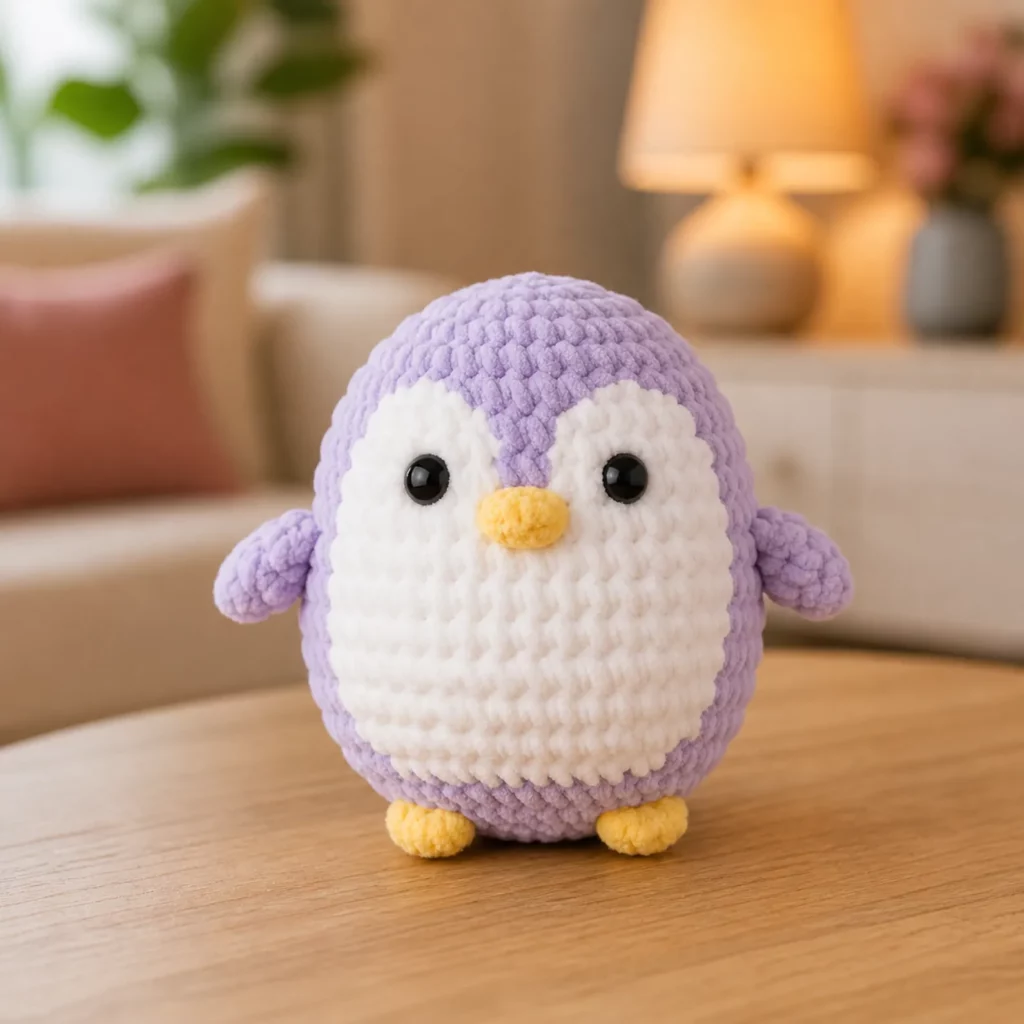
This crochet pattern is designed for that soft, squishy “plushie” look: a round body, a clean white belly, tiny wings, and little feet that help it sit upright. The shaping is classic amigurumi (increase, even rounds, decrease), and the details are intentionally simple so you can focus on neat stitches and a polished finish.
Whether you’re looking for a free crochet pattern to practice color changes, or you want an easy crochet pattern that uses plush yarn for maximum cuddle factor, this penguin is a joy from start to finish.
Detailed Description of the Crochet Pattern#
This penguin amigurumi has a smooth oval/round body with a contrasting belly panel, plus a small beak, two wings, and two feet. The overall silhouette is a “round plush” style (often called a chubby or squish amigurumi).
What makes this design work (and look professional)
- Plush yarn-friendly shaping: The body is mostly continuous rounds with gentle decreases, so the shape stays smooth.
- Clean belly contrast: The white belly is made as a separate oval panel and sewn on, which gives you a crisp edge (instead of messy color-change jogs).
- Simple limbs: Wings and feet are small, fast pieces that add personality without complicated construction.
- Sitting stability: The flatter base and added stuffing technique help the penguin sit nicely.
Finished size (approx.)
- With super bulky plush yarn: 7–10 inches tall depending on your tension and hook size.
- With worsted yarn: 5–7 inches (firmer, smaller plush).
This is a great “one skein + a little contrast” style DIY crochet project.
Skill Level Explanation#
This is an easy-to-intermediate amigurumi project.
Perfect for beginners who can:
- crochet single crochet in the round
- increase and decrease
- count stitches (or use stitch markers)
- sew simple pieces onto a body
Slightly more advanced (still doable):
- sewing on an oval belly panel neatly
- placing safety eyes evenly
- working with plush/chenille yarn (harder to see stitches)
If you’re brand new, you can still make this—just go slowly, use a stitch marker, and count each round. This is a very friendly crochet for beginners plush.
Materials Needed#
Yarn
Recommended (for the cuddly plush look):
- Super bulky plush/chenille yarn in:
- Main color (light blue, teal, gray, or classic penguin black)
- Belly color (white or cream)
- Accent color (yellow for beak/feet)
Alternative (for a smaller, firmer penguin):
- Worsted weight yarn in the same colors
Yardage estimate (plush yarn):
- Main color: ~150–250 yards (varies by brand and size)
- Belly: ~50–100 yards
- Accent: small amount (scraps are fine)
Hook
Choose a hook that makes tight stitches (no stuffing peeking through):
- Plush yarn: 4.5–6.0 mm (many makers like 5.0 mm)
- Worsted yarn: 2.75–3.5 mm
Tip: If you see gaps, go down a hook size.
Notions
- Stitch marker (must-have for amigurumi)
- Yarn needle (for sewing pieces)
- Scissors
- Polyester fiberfill stuffing
Safety & embellishments
- Safety eyes (10–16 mm for plush size; 8–12 mm for worsted size)
- Optional: embroidery thread for a tiny smile or blush
Important: If gifting to children under 3, skip safety eyes and embroider eyes instead.
Stitches & Techniques Explained#
Abbreviations (US terms)
- MR = magic ring
- sc = single crochet
- inc = increase (2 sc in one stitch)
- dec = invisible decrease (recommended)
- sl st = slip stitch
- ch = chain
- st(s) = stitch(es)
- Rnd = round
Magic Ring (MR)
The magic ring creates a tight center so stuffing won’t poke out. With plush yarn, it can feel slippery—pull the tail firmly and tie a small knot after the first round for extra security.
Invisible Decrease (dec)
This is the neatest decrease for amigurumi.
How to do it:
- Insert hook into front loop only of next stitch
- Insert hook into front loop only of following stitch
- Yarn over, pull through both front loops
- Yarn over, pull through remaining loops
Working with plush yarn (quick beginner tips)
Plush yarn hides stitches, so use these tricks:
- Count by feeling the “V” shapes with your fingers.
- Place a stitch marker in the first stitch of each round.
- Keep tension steady (not too tight, not too loose).
Clean color contrast for the belly
Instead of changing colors mid-body (which can look bumpy), we crochet a separate belly panel and sew it on. This gives you a crisp outline and a more polished plush.
Step-by-Step Instructions#
Pattern notes
- Worked in continuous rounds (do not join unless instructed)
- Use a stitch marker to mark the first stitch of each round
- Stuff as you go for the smoothest shape
Part 1: Body (Main Color)
Rnd 1: MR, 6 sc (6)
Rnd 2: inc around (12)
Rnd 3: (sc, inc) around (18)
Rnd 4: (2 sc, inc) around (24)
Rnd 5: (3 sc, inc) around (30)
Rnd 6: (4 sc, inc) around (36)
Rnd 7: (5 sc, inc) around (42)
Rnd 8: (6 sc, inc) around (48)
Now we build height:
Rnd 9–16: sc around (48) for 8 rounds
(Adjust height here: fewer rounds = shorter, more rounds = taller.)
Start shaping the top:
Rnd 17: (6 sc, dec) around (42)
Rnd 18: (5 sc, dec) around (36)
Rnd 19: (4 sc, dec) around (30)
Rnd 20: (3 sc, dec) around (24)
Rnd 21: (2 sc, dec) around (18)
Rnd 22: (sc, dec) around (12)
Stuff the body firmly now.
- Add extra stuffing to the lower half to help it sit upright.
- Keep the top slightly softer so it stays round, not pointy.
Rnd 23: dec around (6)
Fasten off, weave tail through remaining stitches and pull tight to close.
Part 2: Belly Panel (Belly Color)
This is an oval panel you’ll sew onto the front.
Ch 7
Rnd 1: Starting in 2nd ch from hook: 5 sc, 3 sc in last ch. Working on other side of chain: 4 sc, 2 sc in last ch (at the start). (14)
Rnd 2: inc, 4 sc, inc x3, 4 sc, inc x2 (20)
Rnd 3: sc, inc, 4 sc, (sc, inc) x3, 4 sc, (sc, inc) x2 (26)
Rnd 4: 2 sc, inc, 4 sc, (2 sc, inc) x3, 4 sc, (2 sc, inc) x2 (32)
Rnd 5: sc around (32)
Fasten off leaving a long tail for sewing.
Placement tip: Center the belly panel on the front of the body so it sits slightly lower than the eyes (you want a big “tummy” look). Pin in place with stitch markers before sewing.
Part 3: Wings (Make 2, Main Color)
Wings are simple little ovals.
Rnd 1: MR, 6 sc (6)
Rnd 2: inc around (12)
Rnd 3: sc around (12)
Rnd 4: (4 sc, dec) twice (10)
Rnd 5: sc around (10)
Flatten the wing (do not stuff) and sc through both layers across the top to close (about 5 sc).
Fasten off leaving a tail for sewing.
Part 4: Feet (Make 2, Accent Color)
These are small rounded nubs that help the penguin sit.
Rnd 1: MR, 6 sc (6)
Rnd 2: inc around (12)
Rnd 3: sc around (12)
Rnd 4: (2 sc, dec) around (9)
Rnd 5: sc around (9)
Lightly stuff each foot (just a pinch), then flatten and close with sc across the top (about 4–5 sc).
Fasten off leaving a tail for sewing.
Part 5: Beak (Accent Color)
A small oval beak gives a cute plush look.
Rnd 1: MR, 6 sc (6)
Rnd 2: (sc, inc) around (9)
Rnd 3: sc around (9)
Lightly stuff (or leave unstuffed for a flatter beak), then fasten off leaving a tail for sewing.
Part 6: Face Placement (Eyes + Beak)
Safety eyes placement (suggested):
- Place eyes between Rnd 12 and Rnd 14 of the body
- Space them about 7–10 stitches apart (depending on size)
Before snapping backs on:
- Insert both eyes
- Step back and check symmetry
- Then secure firmly
Sew the beak centered between the eyes, slightly lower.
Part 7: Assembly (The order matters)
For the cleanest look, assemble like this:
- Sew belly panel onto the front first
- Use small whip stitches around the edge
- Keep stitches even so the outline looks smooth
- Attach wings to the sides
- Place them roughly level with the upper third of the belly panel
- Angle slightly downward for a “huggy” look
- Attach feet near the bottom front
- Put them low enough that the penguin can “sit”
- If it tips backward, move feet slightly forward
Weave in all ends securely.
Common Mistakes and How to Avoid Them#
- Stuffing shows through stitches:
Use a smaller hook, tighten tension, or switch to invisible decreases. Plush yarn also helps hide gaps. - Penguin looks lopsided:
Count rounds carefully and keep your stitch marker in the first stitch of each round. Plush yarn can trick your eyes—count by touch. - Eyes aren’t even:
Insert both eyes before locking them. Measure stitch distance from the centerline of the belly for symmetry. - Belly panel looks crooked:
Pin it in place first with 4 stitch markers (top, bottom, left, right), then sew between markers. - Body becomes pointy at the top:
Add stuffing earlier (before the last few decrease rounds) and stop stuffing near the top so you can shape it smoothly. - Penguin won’t sit upright:
Add extra stuffing at the bottom and/or sew the feet slightly more forward.
Expert Tips for Better Results#
- Use “weighted stuffing” for stability: Add a small pouch of poly pellets or a few clean coins wrapped in fabric at the bottom before stuffing (optional but great for sitters).
- Shape as you stuff: Every few handfuls, pause and massage the body into a smooth round.
- Secure plush yarn ends well: Plush fibers can shed—leave longer tails and weave through multiple stitches in different directions.
- Pin everything first: Especially the belly and feet. Tiny placement changes make a big difference in personality.
- Add optional blush: A tiny touch of pink embroidery or fabric blush under the eyes makes it extra cute.
- Make it gift-ready: Add a lining felt circle inside the base (optional) to stabilize and keep pellets contained.
Variations and Customization Ideas#
- Classic penguin colors: Black body, white belly, orange beak/feet.
- Baby penguin look: Gray body with cream belly.
- Mini keychain version: Use worsted yarn and a smaller hook; add a keyring loop at the top.
- Sleepy penguin: Replace safety eyes with embroidered closed eyes and add a tiny smile.
- Winter penguin: Crochet a tiny scarf or beanie in scrap yarn.
- Different wing styles: Make wings longer by adding 1–2 extra rounds before closing.
Benefits of This Crochet Project#
- A satisfying, quick amigurumi make with a big “wow” factor
- Great for practicing shaping (inc/dec) and neat assembly
- Plush yarn makes it extra cuddly and forgiving
- Easy to personalize with colors and facial expression
- A strong gift option for birthdays, baby showers, and holidays
- A fun, modern crochet tutorial project that photographs beautifully
Internal Linking Suggestions#
You may also like…
- Free Crochet Pattern: Beginner Amigurumi Ball (Perfect Practice Project)
- Crochet Tutorial: Invisible Decrease for Amigurumi
- Crochet for Beginners: How to Crochet with Plush/Chenille Yarn
- DIY Crochet: How to Embroider Eyes for Baby-Safe Plushies
- Free Crochet Pattern: Mini Crochet Scarf for Stuffed Animals
- Amigurumi Finishing Guide: Neat Sewing and Seamless Assembly
FAQ Section#
What yarn is best for a plush amigurumi crochet pattern?
Super bulky plush/chenille yarn is ideal for a soft, squishy finish. It also hides minor imperfections, which is great for beginners.
Is this an easy crochet pattern for beginners?
Yes. The shaping is classic amigurumi (increase, even rounds, decrease), and the details are simple. The only challenge is seeing stitches in plush yarn—using a stitch marker helps a lot.
How do I make the penguin bigger or smaller?
To make it bigger, use thicker yarn and a larger hook, or add one more increase round (up to 54–60 stitches) plus a few extra even rounds. To make it smaller, use worsted yarn and a smaller hook, and reduce the number of increase rounds.
Can I crochet the belly as a color change instead of sewing a panel?
You can, but plush yarn color changes often look bumpy and can jog. Sewing a separate belly panel gives a cleaner, more polished look—especially for a “boutique” plush finish.
Where should I place the safety eyes?
A good starting point is between rounds 12–14, spaced about 7–10 stitches apart (depending on size). Always test placement before locking the backs.
How do I make it safe for babies?
Skip safety eyes and embroider the eyes with black yarn or thread. Also avoid small removable pieces and secure all ends extremely well.
Conclusion#
A chubby penguin plush is one of those “forever cute” projects—simple shaping, high payoff, and endlessly customizable. This free crochet pattern gives you a clean, professional method (separate belly panel, tidy limbs, and strong structure) while keeping the steps beginner-friendly and fun.
If you tell me what yarn you’re using (plush/chenille brand and weight) and your target size (mini, medium, or jumbo), I can adjust the stitch counts and round numbers so your crochet pattern comes out perfectly proportioned.


