


Introduction#
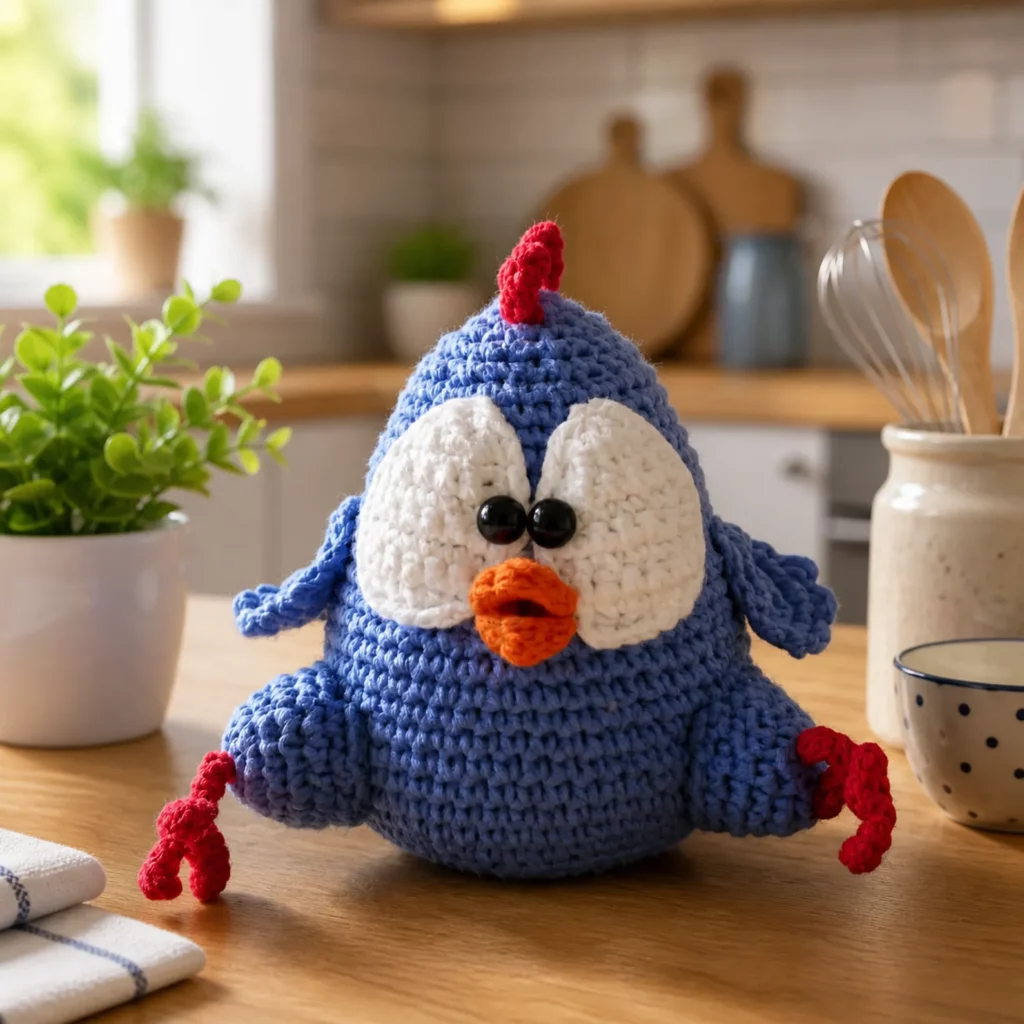
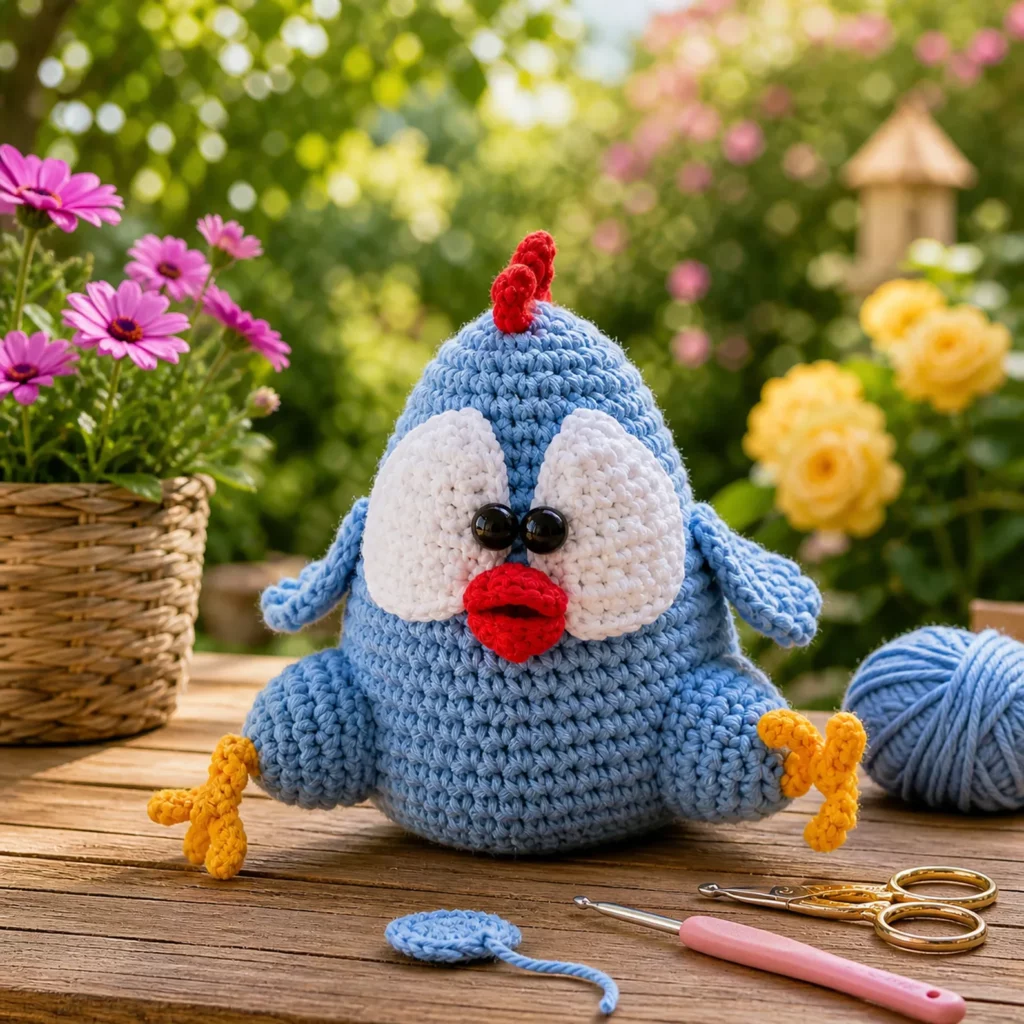
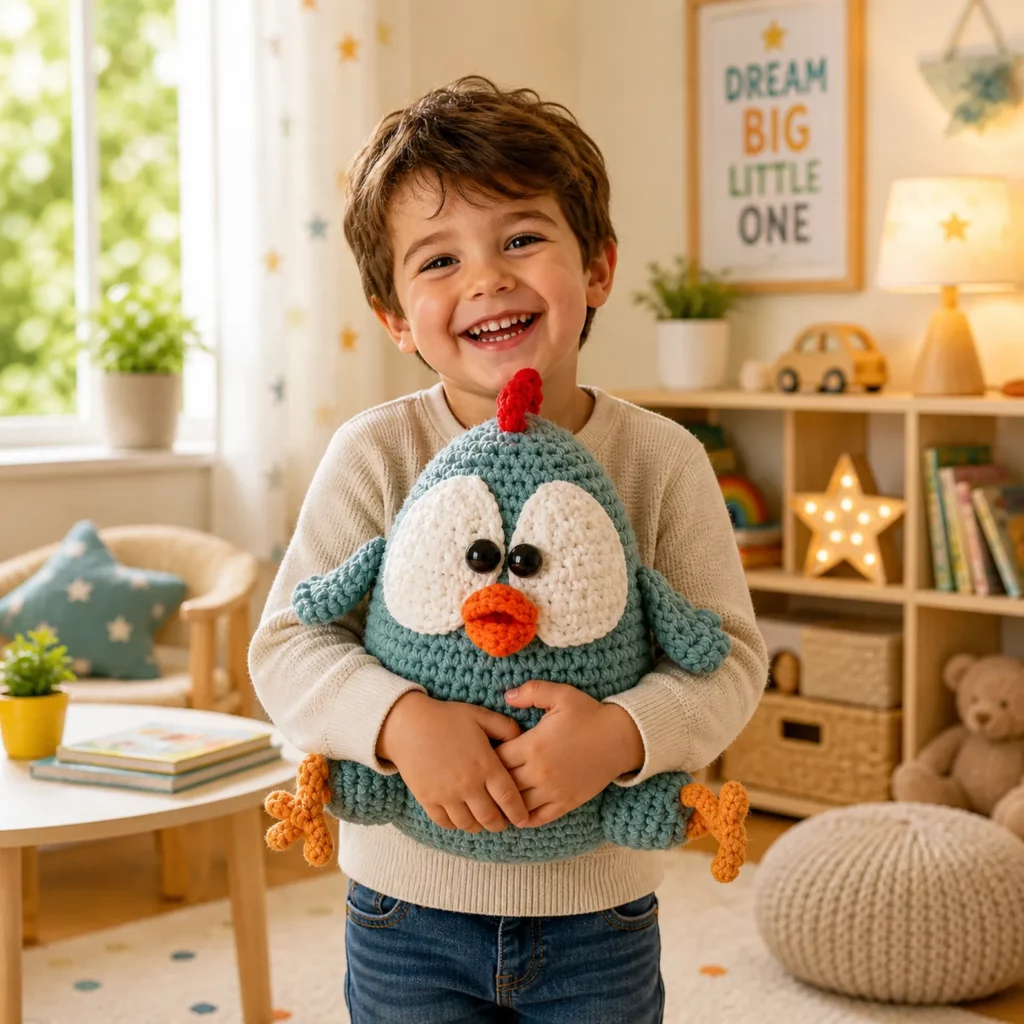
If you love amigurumi that makes people laugh the moment they see it, this chubby chicken is about to become your new favorite project. It has that perfect “round and grumpy-cute” personality: an extra plump body, oversized white eye patches, a bold red beak, and tiny wings that look like it’s ready to waddle into your kitchen and demand snacks.
Explore more beginner amigurumi crochet patterns in our pattern library.
What makes this crochet pattern such a winner is that the shaping is simple—mostly increases, straight rounds, and decreases—yet the finished toy looks detailed because the face pieces (eyes, beak, comb) do all the storytelling. It’s also very customizable: change colors for a chick, a rooster, or even a “cartoon chicken nugget” vibe, and you can scale it up or down by changing yarn weight.
Below you’ll find a complete, beginner-friendly free crochet pattern and a clear crochet tutorial style walkthrough, including how to keep the body stable, how to place the eyes for maximum expression, and how to attach the wings so they look symmetrical.
Detailed Description of the Crochet Pattern#
This chicken amigurumi is built around a big round body with a slightly flatter base so it sits upright. The “character” comes from bold facial features:
- Body: chubby egg shape, widest at the bottom, narrowing slightly at the top
- Wings: short, rounded “winglets” sewn to the sides
- Feet (optional): little red “toes” or flat feet to help it stand
- Eye patches: large white ovals/circles that frame the eyes
- Eyes: safety eyes placed close together for a comical, intense look
- Beak: a small stuffed beak (or layered beak) in red/orange
- Comb: simple red shape on top (small cone or scalloped ridge)
The stitch texture is typically single crochet, which gives a sturdy plush fabric that hides stuffing and holds its shape.
Skill Level Explanation#
This is an easy-to-intermediate crochet project.
Beginner-friendly parts:
- Working in the round
- Single crochet, increases, invisible decreases
- Simple sewn-on pieces (wings, patches)
Intermediate touches (still very doable):
- Clean assembly and symmetry (pinning helps)
- Layered face parts (eye patches + beak + comb)
If you’ve made even one basic amigurumi ball before, you’re ready for this easy crochet pattern.
Materials Needed#
Yarn
You can use worsted yarn for a medium plush or chunky yarn for a larger “pillow” style chicken.
Recommended yarn options:
- Worsted weight (#4) for a classic amigurumi size
- Chunky/bulky (#5) for a bigger plush
- Chenille/plush yarn if you want it extra squishy (use tighter stitches)
Suggested colors:
- Main body: yellow (classic chick) or white (classic chicken)
- Eye patches: white
- Beak/comb/feet: red or orange-red
- Optional: blush pink for cheeks
Yardage estimate (worsted):
- Main body: 150–250 yards (depends on size)
- Accent colors: small scraps
Hook
For tight amigurumi fabric:
- Worsted: 3.0–3.5 mm
- Bulky: 4.0–5.5 mm depending on yarn
- Chenille: 4.5–6.0 mm but keep stitches tight
Notions
- Fiberfill stuffing
- Stitch marker
- Yarn needle
- Scissors
- Safety eyes: 10–14 mm depending on size
- Black embroidery floss (optional for eyebrow lines or lashes)
Stitches & Techniques Explained#
Abbreviations (US terms)
- MR = magic ring
- sc = single crochet
- inc = increase (2 sc in same stitch)
- dec = invisible decrease (sc2tog through front loops)
- sl st = slip stitch
- ch = chain
- BLO = back loop only
Invisible decrease (recommended)
Invisible decreases keep your shaping smooth—especially important on round bodies where bumps are noticeable.
Clean color changes (for details)
This pattern uses separate pieces for most color work, so you don’t need complex color changes. If you do change colors mid-round, switch colors on the last yarn-over of the stitch.
Stuffing and shaping tip
A chubby body looks best when:
- Base is stuffed firmly (for stability)
- Upper body is stuffed medium-firm (for softness)
- You shape with your hands as you go
Step-by-Step Instructions#
Notes:
- Work in continuous rounds unless stated
- Use a stitch marker in the first stitch of each round
- Stitch counts are in brackets
Body (main color)
R1: MR 6 sc [6]
R2: inc x6 [12]
R3: (sc, inc) x6 [18]
R4: (2 sc, inc) x6 [24]
R5: (3 sc, inc) x6 [30]
R6: (4 sc, inc) x6 [36]
R7: (5 sc, inc) x6 [42]
R8: (6 sc, inc) x6 [48]
R9: (7 sc, inc) x6 [54]
R10–R16: sc around [54]
Start shaping slightly narrower at top:
R17: (7 sc, dec) x6 [48]
R18: sc around [48]
R19: (6 sc, dec) x6 [42]
R20: sc around [42]
Begin stuffing firmly, especially the bottom.
R21: (5 sc, dec) x6 [36]
R22: (4 sc, dec) x6 [30]
R23: (3 sc, dec) x6 [24]
R24: (2 sc, dec) x6 [18]
R25: (sc, dec) x6 [12]
Finish stuffing.
R26: dec x6 [6]
Fasten off, close, weave in.
Tip for a flatter base:
If you want it to sit extra well, after stuffing, gently press the bottom flat and add a few hidden stitches across the base (inside) to slightly “square” the bottom.
Wings (make 2, main color)
R1: MR 6 sc [6]
R2: (sc, inc) x3 [9]
R3: sc around [9]
R4: (2 sc, inc) x3 [12]
R5–R6: sc around [12]
Lightly stuff or leave unstuffed for a flatter wing.
Flatten opening and sc across to close (or sew closed). Leave a tail for sewing.
Attach wings to the sides of the body around the midline. Pin first so they match.
Eye Patches (make 2, white)
You can make these round or slightly oval. Round is easiest.
R1: MR 6 sc [6]
R2: inc x6 [12]
R3: (sc, inc) x6 [18]
R4: (2 sc, inc) x6 [24]
Fasten off with a long tail.
Optional oval version (more “cartoony”):
- Ch 7
- Work around the chain oval-style: 5 sc, 3 sc in last ch, 4 sc back, 2 sc in first ch (increase as needed to get the shape you like), then add 1–2 more rounds.
Eyes (safety eyes)
For the funniest “chicken stare,” place the eyes close together.
Suggested placement:
- Put both eye patches on the face first.
- Insert safety eyes through the patches, then through the body.
- Space the eyes about 3–6 stitches apart depending on size.
If you’re making a baby-safe version:
- Embroider eyes with black yarn, or use felt circles stitched on securely.
Beak (red/orange-red)
This beak is a small, lightly stuffed shape.
R1: MR 4 sc [4]
R2: (sc, inc) x2 [6]
R3: sc around [6]
R4: (sc, dec) x2 [4]
R5: sc around [4]
Fasten off, lightly stuff. Sew centered under the eyes.
Optional “two-part beak” (more realistic):
Make two small half-ovals and stitch together at the center so it looks like an upper and lower beak.
Comb (red)
Simple comb option (mini cone):
R1: MR 4 sc [4]
R2: (sc, inc) x2 [6]
R3: sc around [6]
R4: (2 sc, inc) x2 [8]
R5: sc around [8]
Fasten off, lightly stuff, sew to the top center.
Scalloped comb option (cute ridge):
- Ch 7
- In 2nd ch from hook: sl st, then (sc, hdc, dc, hdc, sc) across to create bumps
- Sew along the top of the head
Feet (optional, red)
If you want little toes, keep them small so they don’t distract from the face.
Simple feet (make 2):
R1: MR 6 sc [6]
R2: sc around [6]
R3: sc around [6]
Fasten off, lightly stuff, sew to the lower front.
Alternative: crocheted “toes”
- Make 3 tiny tubes (MR 4 sc, sc around for 2–3 rounds) and sew together like a claw shape.
Assembly Order (recommended)
- Sew eye patches to the face (or pin them)
- Insert safety eyes through patches and secure inside
- Sew beak centered between and slightly below eyes
- Sew comb on top
- Attach wings symmetrically
- Add optional feet
- Final shaping: adjust stuffing and massage into the roundest shape
Optional details:
- Add blush cheeks with pink yarn or soft pastel makeup (if it’s for display only).
Common Mistakes and How to Avoid Them#
- The chicken won’t sit upright: Stuff the base more firmly and flatten the bottom slightly while sewing closed. Adding small feet can also help stability.
- Eyes look uneven: Pin both eye patches first. Count stitches from the center line so both sides match.
- Safety eyes shift or feel loose: Use tight stitches and confirm washers are fully snapped.
- Beak looks crooked: Sew it in place with a few temporary stitches first, then secure once centered.
- Body looks lumpy: Stuff in small tufts and smooth with your hands frequently.
Expert Tips for Better Results#
- For a “super round” body, go one hook size smaller than the yarn label suggests.
- Want the funniest expression? Put the eyes slightly lower and closer together, then angle the beak just a touch downward.
- If your yarn is fluffy and hides stitches, place stitch markers every 10 stitches to keep counting easy.
- For a cleaner look, sew patches using the same color as the patch (white thread on white patch).
- If you’re gifting to children under 3, skip safety eyes and embroider everything.
Variations and Customization Ideas#
- Classic white chicken: white body, red comb, orange beak, yellow feet
- Tiny chick: make the pattern in DK yarn, embroider sleepy eyes, add a tiny wing blush
- Rooster vibe: bigger comb, add a small wattle under the beak
- Pastel kawaii chicken: mint body, pink beak, lavender cheeks
- Keychain mini: scale down with thin yarn and add a top loop
- Kitchen décor set: crochet a few chickens in different stripe “sweaters” for fun counter décor
Benefits of This Crochet Project#
- Fast, satisfying amigurumi with lots of personality
- Great stash buster (small amounts of accent yarn go a long way)
- Beginner-friendly shaping with high-impact details
- Perfect gift for kids, friends, or quirky home décor lovers
- A strong evergreen blog topic: “crochet pattern,” “free crochet pattern,” “crochet tutorial,” and “crochet for beginners” fit naturally
Internal Linking Suggestions#
You may also like…
- Magic Ring Crochet Tutorial for Beginners
- Invisible Decrease Crochet Tutorial
- How to Place Safety Eyes in Amigurumi
- Easy Amigurumi Animal Patterns (owl, frog, bunny)
- How to Sew Crochet Pieces Neatly (no messy seams)
FAQ Section#
Is this chicken an easy crochet pattern for beginners?
Yes. The body is a simple amigurumi shape and the details are separate pieces. The main “skill” is careful placement of the eyes and beak.
What yarn makes amigurumi look neat and smooth?
Worsted weight acrylic or cotton blends are great. Cotton gives the cleanest stitch definition; acrylic is softer.
Can I make this as a baby-safe toy?
Yes—embroider the eyes and beak instead of using safety eyes, and stitch all parts very securely.
How do I keep the chicken from tipping over?
Stuff the bottom firmly and flatten the base slightly. You can also add small feet or a few plastic pellets inside a sealed pouch for weight (display items only).
How do I change the size?
Use thicker yarn and a larger hook to make it bigger, or thinner yarn and a smaller hook to make it smaller—keep stitch counts the same.
What if my eye patches don’t fit the face well?
Add or remove one increase round. Patches should sit comfortably without wrinkling; blocking them lightly can help.
Conclusion#
This chubby chicken amigurumi is the kind of crochet pattern that brings instant joy—big eyes, bold beak, tiny wings, and that perfectly round body that begs to be squished. It’s simple enough for beginners, customizable for every color palette, and funny-cute in a way that makes it a guaranteed crowd-pleaser.
If you tell me what yarn weight you’re using (worsted, bulky, or chenille) and what size safety eyes you have, I can recommend the best eye patch round count and exact eye placement for the cutest expression.


