


Introduction#
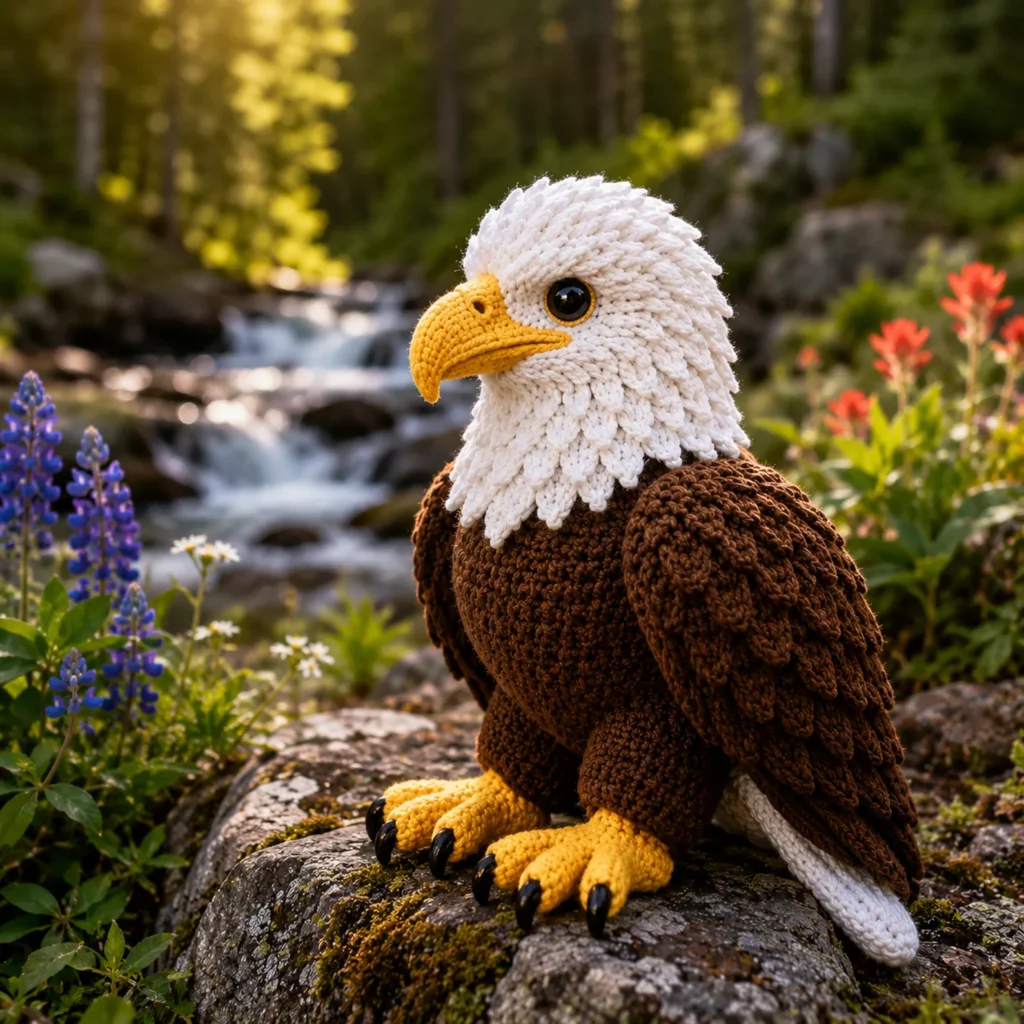
If you want an amigurumi project that feels bold, detailed, and genuinely impressive when it’s finished, a bald eagle is an unforgettable make. The silhouette is iconic: a bright white head, a strong golden beak, deep brown body and wings, and those fierce talons that make it look powerful even as a plush. It’s the perfect mix of “cute enough to hug” and “realistic enough to display.”
Explore more beginner amigurumi crochet patterns in our pattern library.
This crochet pattern is written as a full crochet tutorial with a focus on structure and texture. You’ll build a sturdy body, shape a large head with a smooth face, add feather texture around the neck, create layered wing feathers, and finish with a curved beak and talons. None of the stitches are overly complicated, but the details are placed intentionally so the final plush looks polished and lifelike.
Detailed Description of the Crochet Pattern#
This bald eagle amigurumi is designed as a perched plush with a rounded, slightly forward-leaning posture. It has a big head with a defined brow line, a curved beak, textured feather “ruff” around the neck, layered wing feathers, and oversized feet with black claws.
What you’ll make
- Head (white): smooth shaping with a slightly oval profile
- Feather ruff (white): layered “scales” or feather stitches around the neck for texture
- Body (brown): plump and sturdy, built to support the wings
- Wings (brown): thick wings with layered feather edging for a realistic look
- Tail (white or light gray): flat wedge tail that extends behind
- Beak (gold): curved beak piece sewn to the face with a defined ridge
- Feet and talons (gold + black): big feet with separate claw tips for that eagle power look
How it’s constructed
- Crochet head and body as separate pieces for better shaping
- Add feather texture as an overlay layer so the head stays smooth and clean
- Crochet wings in rows with a feather edging so they look layered
- Assemble everything with careful pinning so the eagle sits balanced and “strong”
Skill Level Explanation#
Skill Level: Intermediate Beginner to Intermediate
You’ll do great if you already know
- Magic ring
- Single crochet increases and decreases
- Working in continuous rounds
- Sewing amigurumi parts neatly
- Reading repeats and keeping stitch counts consistent
Newer skills you’ll practice
- Feather texture techniques (scale stitch or layered loops)
- Shaping a beak that looks curved rather than flat
- Attaching wings so they sit naturally on the body
- Building talons that look defined but still sturdy
If you’ve made a basic amigurumi animal, this is a great next step into more “realistic” detailing.
Materials Needed#
Yarn
Use smooth yarn for clean stitch definition, especially on the face and feathers.
Suggested yarn weight
- Worsted (Category 4) for a medium plush
- DK (Category 3) for a smaller eagle with finer details
Colors
- A: White (head, neck feathers, tail)
- B: Brown (body, wings)
- C: Gold/yellow (beak and feet)
- D: Black (claw tips, optional eye detailing)
- Optional: Light gray (tail shading)
Yarn tip
Cotton makes feather texture extra crisp. Acrylic makes the plush softer. Either works, but cotton gives the most “defined” feather look.
Hook
Use a smaller hook than the label suggests for tight amigurumi fabric.
- Worsted: 3.0–4.0 mm
- DK: 2.75–3.25 mm
Notions
- Stitch marker
- Yarn needle
- Scissors
- Fiberfill stuffing
- Safety eyes (10–14 mm) or embroidered eyes
- Optional: a small amount of felt (for eye backing or beak ridge support)
- Optional: pipe cleaner/wire for poseable wings (not recommended for kids)
Safety Note
If making for children under 3, embroider eyes and skip any internal wire.
Stitches & Techniques Explained#
Common Abbreviations
- MR = magic ring
- sc = single crochet
- inc = increase
- dec = decrease (invisible decrease recommended)
- sl st = slip stitch
- ch = chain
- hdc = half double crochet
- dc = double crochet
- ( ) = repeat
- = stitch count
Invisible Decrease
Pick up the front loops of the next two stitches and single crochet them together. This keeps the body smooth and professional.
Feather Texture Option A: Scale Stitch (Best Look)
Scale stitch is made by working multiple dc stitches around the post of a stitch to create a “feather scale.”
Simple scale concept
- Work a set of dc around a stitch post
- Skip/anchor stitches between scales
- The scales overlap and create a feathered surface
Feather Texture Option B: Loop Feather Edge (Easier)
If scale stitch feels too advanced, you can create feather texture by adding a scalloped edging with (sl st, ch 2, 3 dc in one space) repeats. It still reads like feathers and is beginner-friendly.
This pattern includes the easier method in the main instructions and offers the scale stitch upgrade as an optional variation.

Step-by-Step Instructions#
Finished Size
With worsted yarn and a 3.5 mm hook, expect about 8–11 inches (20–28 cm) tall depending on stuffing and wing size.
Notes Before You Start
- Work in continuous rounds unless stated
- Use stitch markers
- Stuff firmly, especially the body base
- Pin everything before sewing for symmetry
Color Key
- A = White
- B = Brown
- C = Gold
- D = Black
Head (Color A)#
Round 1: 6 sc in MR [6]
Round 2: inc around [12]
Round 3: (sc, inc) around [18]
Round 4: (2 sc, inc) around [24]
Round 5: (3 sc, inc) around [30]
Round 6: (4 sc, inc) around [36]
Rounds 7–10: sc around [36]
Eye placement
- Place eyes between Rounds 8–9
- Space 7–9 stitches apart depending on the look you want
- Slightly forward placement gives a strong eagle expression
Round 11: (4 sc, dec) around [30]
Round 12: (3 sc, dec) around [24]
Round 13: (2 sc, dec) around [18]
Stuff firmly and shape the head.
Round 14: (sc, dec) around [12]
Round 15: dec around [6]
Fasten off and close.
Beak (Color C)#
The beak is made as a curved cone and then lightly shaped during sewing.
Round 1: 4 sc in MR [4]
Round 2: (sc, inc) around [6]
Round 3: sc around [6]
Round 4: (2 sc, inc) around [8]
Round 5: sc around [8]
Round 6: (3 sc, inc) around [10]
Round 7: sc around [10]
Fasten off with a long tail.
Beak shaping tip
Flatten the base slightly and stitch the top edge tighter than the bottom edge so it naturally curves downward like a hooked beak.
Optional beak ridge
Surface stitch a short line from the top center of the beak back toward the face using Color C. This gives a more realistic “beak plate” look.
Feather Ruff (Neck Feathers, Color A)#
This is a separate collar piece that sits around the neck.
Ch 26, join to form a ring (adjust chain count to fit your head base snugly)
Round 1: sc around, join
Round 2: (sl st in next st, skip 1, 3 dc in next st, skip 1) repeat around to create scalloped feathers
Round 3: sc around to stabilize
Fasten off with a long tail.
Sew the feather ruff around the lower part of the head so it overlaps slightly onto the body. This gives that layered feather look without making the whole head textured.
Body (Color B)#
Round 1: 6 sc in MR [6]
Round 2: inc around [12]
Round 3: (sc, inc) around [18]
Round 4: (2 sc, inc) around [24]
Round 5: (3 sc, inc) around [30]
Round 6: (4 sc, inc) around [36]
Round 7: (5 sc, inc) around [42]
Rounds 8–13: sc around [42]
Shape the body slightly wider at the base for stability.
Round 14: (5 sc, dec) around [36]
Round 15: sc around [36]
Round 16: (4 sc, dec) around [30]
Round 17: sc around [30]
Stuff firmly, especially the base. Add optional weight pouch now if desired.
Round 18: (3 sc, dec) around [24]
Round 19: (2 sc, dec) around [18]
Round 20: (sc, dec) around [12]
Round 21: dec around [6]
Fasten off and close.
Wings (Make 2, Color B)#
Wings are worked in rows to create a long shape, then feathered along the outer edge.
Ch 18
Row 1: sc in 2nd ch from hook and across (17), ch 1, turn
Row 2: sc across (17), ch 1, turn
Row 3: sc2tog, sc 13, sc2tog (15), ch 1, turn
Row 4: sc across (15), ch 1, turn
Row 5: sc2tog, sc 11, sc2tog (13), ch 1, turn
Row 6: sc across (13), ch 1, turn
Row 7: sc2tog, sc 9, sc2tog (11), ch 1, turn
Row 8: sc across (11), ch 1, turn
Row 9: sc2tog, sc 7, sc2tog (9), ch 1, turn
Row 10: sc across (9)
Fasten off.
Feather edging
Attach yarn along the longer outer edge.
Work (sl st, skip 1, 3 dc in next stitch, skip 1) repeat along the edge.
This creates layered feather scallops.
Optional extra feather layer
Add a second feather row closer to the tip only for more texture.
Tail (Color A or light gray)#
Ch 12
Row 1: sc in 2nd ch and across (11), ch 1, turn
Row 2: sc across (11), ch 1, turn
Row 3: sc2tog, sc 7, sc2tog (9), ch 1, turn
Row 4: sc across (9), ch 1, turn
Row 5: sc2tog, sc 5, sc2tog (7), ch 1, turn
Row 6: sc across (7)
Fasten off.
Optional tail feather edge
Add a light scallop edging like the wings for a more feathered look.
Feet and Talons (Make 2, Color C with D claws)#
Foot base
Ch 6
Round 1: sc in 2nd ch, sc in next 3, 3 sc in last ch, sc back along underside, 2 sc in last stitch [14]
Round 2: sc around [14]
Round 3: (sc, inc) around [21]
Fasten off with a long tail.
Claws (Make 6–8 small, Color D)
For each claw
- Ch 4
- Sl st back down the chain
Fasten off.
Sew 3–4 claws to the front of each foot. For a stronger look, make the middle claw slightly longer.
Assembly#
Attach beak
- Center on the face slightly below eye line
- Sew top edge tighter so it curves downward
Attach feather ruff
- Sew around the base of the head
- Let it overlap the body slightly for a layered look
Attach head to body
- Position head slightly forward for a “perched” pose
- Sew securely all around
- Add extra stitches at the back of the neck for strength
Attach wings
- Place wings on the sides, angled slightly downward
- Stitch firmly along the top edge and leave feather edge free
- For a folded-wing look, angle wings downward and back
Attach tail
- Sew to back lower body, centered
- Angle slightly downward
Attach feet
- Sew feet under the front of the body so the eagle balances
- If it tips forward, move feet slightly forward or add more weight to base
- For a perched look, sew feet closer together and slightly forward
Final shaping
- Press the belly and base to flatten slightly
- Adjust stuffing to keep the chest rounded
- Check symmetry from front and side before weaving in final ends
Common Mistakes and How to Avoid Them#
Head looks wobbly
- Sew with smaller stitches and go around twice
- Add extra stuffing at the neck area
- Use anchor stitches from head into upper back
Feather ruff curls or flips
- Add a stabilizing sc round before sewing
- Sew it down at multiple points, not just the top edge
Beak looks flat
- Stitch the top edge tighter than the bottom edge
- Add a small ridge line with surface crochet
- Slightly stuff the beak base if needed
Wings droop too much
- Use tighter stitches or a smaller hook for wings
- Sew more of the wing edge to the body
- Add a hidden tack stitch from wing tip to back for lift
Feet don’t support the plush
- Stuff the body base firmly
- Add a small weight pouch
- Reposition feet slightly forward
Expert Tips for Better Results#
- Use invisible decreases everywhere for a smooth, professional finish
- Pin the face patch or mark center points before attaching beak so it stays straight
- If you want extra realism, add a tiny eyebrow ridge by stitching a short brown line above the eye
- Add subtle wing depth by using two shades of brown for feather edging
- Block wings lightly (just flatten) before sewing so scallops look crisp
Variations and Customization Ideas#
- Make a smaller desk eagle with DK yarn and a 2.75 mm hook
- Add a branch perch base (crochet a small log cylinder in brown) so it looks like it’s perched
- Change expression by adjusting eye placement
- Add more feather texture by using the scale stitch option on wings
- Create a keychain version by making a simplified body and smaller wings
Benefits of This Crochet Project#
- A striking display plush with a realistic silhouette
- Builds amigurumi skills in shaping, texture, and assembly
- Great practice for feather techniques without complicated patterns
- Makes a meaningful gift for nature lovers
- Customizable size and realism level
- A crochet pattern that feels like a true “heirloom make”
Internal Linking Suggestions#
- Invisible Decrease Tutorial for Smooth Amigurumi
- How to Sew Amigurumi Parts Neatly
- Crochet Feather Stitch Guide (Scallop and Scale Options)
- Best Yarn for Amigurumi: Cotton vs Acrylic
- How to Add Weight to Amigurumi for Standing Plushies
- Easy Crochet Bird Patterns Collection
FAQ#
Is this bald eagle crochet pattern beginner-friendly?
It’s best for confident beginners. The stitches are basic, but the feather details and assembly require patience and careful placement.
What yarn works best for a realistic eagle?
Cotton gives the cleanest feather texture and stitch definition. Acrylic works too and feels softer, but cotton looks sharper.
How do I make the beak look curved?
Sew the top edge tighter than the bottom edge and add a ridge line. This naturally forces the beak into a hooked shape.
Can I make it baby-safe?
Yes, with embroidered eyes and no internal wire. Stitch all parts very securely and avoid small detachable claws if needed.
How do I keep the wings looking feathered?
Use the scalloped feather edging and lightly flatten the wings before sewing. You can also add a second feather row for more depth.
How do I make the eagle stand or perch?
Stuff the base firmly and position the feet slightly forward. Adding a small weight pouch inside helps a lot, especially with larger heads.
Conclusion#
A bald eagle amigurumi is one of those crochet pattern projects that feels truly special when you finish it. The shape is bold, the details are satisfying, and the feather textures make it look far more realistic than a simple plush. Take your time with placement, reinforce the beak and wings, and don’t skip the final shaping—you’ll end up with a striking handmade eagle that looks display-worthy.
If you tell me your yarn weight and hook size, I can recommend the best safety-eye size and adjust the stitch counts so your eagle comes out exactly the size you want.


