


Introduction#
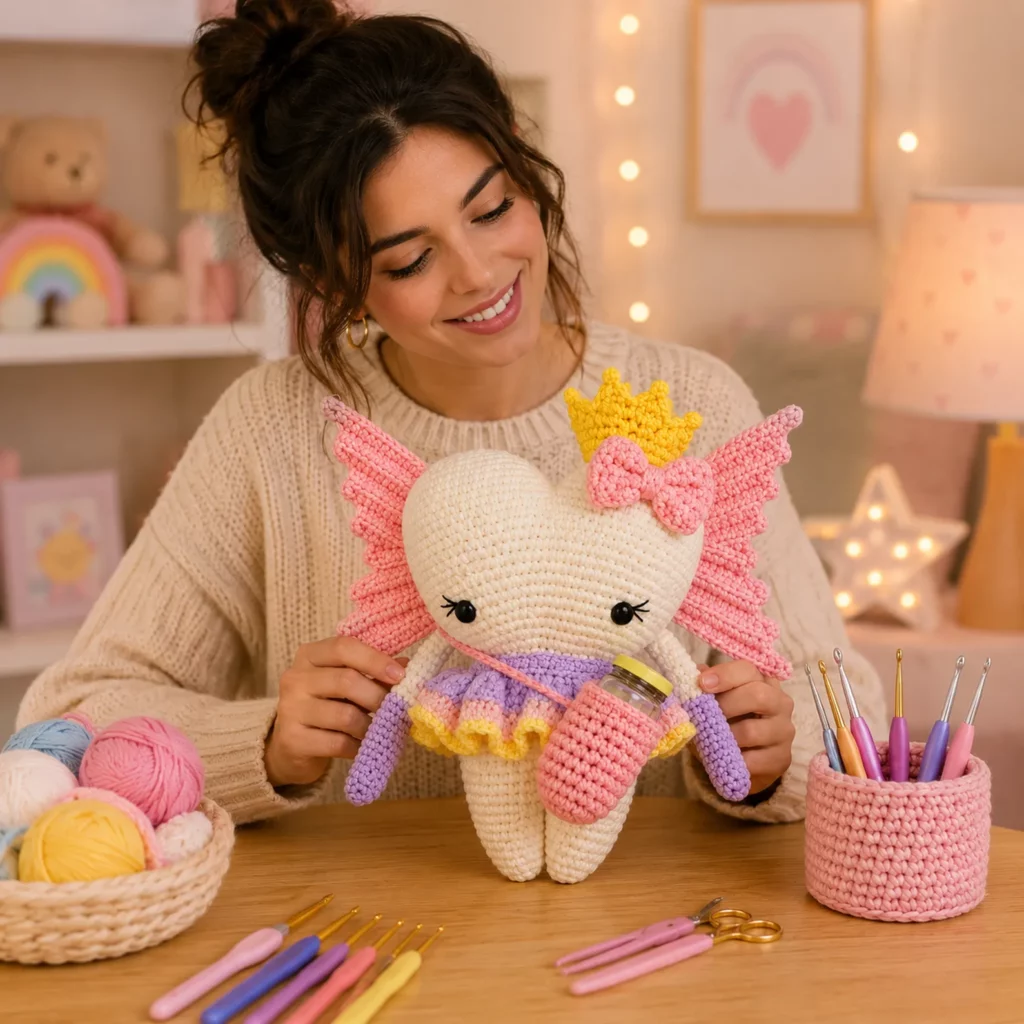
If you love amigurumi that feels extra special—something that looks like it belongs in a nursery, a gift box, or a “keepsake” shelf—this angel heart doll is going to be your new favorite crochet pattern. It’s soft, sweet, and full of personality, with a heart-shaped head, big fluttery wings, a tiny crown, and a bow that makes it look instantly “handmade luxury.” The little pouch accessory is the cutest finishing touch and can be used as a pretend bottle holder, tiny treat bag, or even a mini storage pocket for a note.
Explore more beginner amigurumi crochet patterns in our pattern library.
What I love most about this project is that it’s built from simple shapes you already know: rounds of single crochet, easy increases and decreases, and a few flat pieces (wings, crown, bow). It looks detailed because the design layers well, not because the stitches are complicated. That makes it perfect if you want a free crochet pattern that feels impressive but stays beginner-friendly.
This tutorial walks you through the full build: shaping the heart head cleanly, creating structured wings that hold their form, making a ruffled collar, adding sweet facial details, and assembling everything so it looks balanced and polished. You’ll also get customization ideas (colors, wing styles, accessories) so you can make a whole collection.

Detailed Description of the Crochet Pattern#
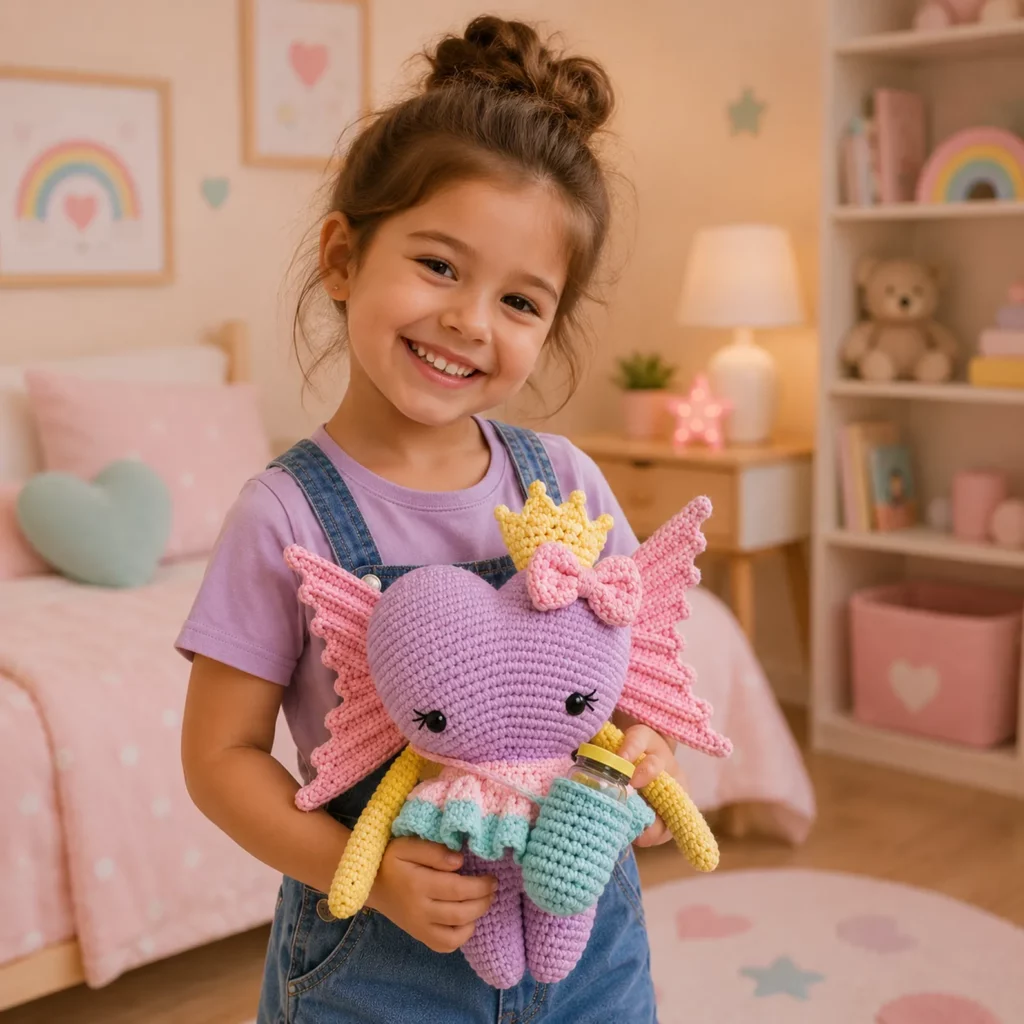
This crochet pattern creates a standing angel doll with a heart-shaped head and a soft, rounded body. The head is worked as a heart silhouette (two rounded lobes at the top that taper slightly toward a point). The wings are made as two matching panels with ribbed texture for a feather-like effect. A small crown sits on top and a bow decorates one side for a princess vibe. The outfit includes a ruffled collar/shoulder layer that adds volume and frames the head beautifully, plus simple arms that can be posed inward as if hugging the pouch accessory.
The overall look is clean and modern: minimal facial embroidery (cute eyelashes), pastel-friendly color blocking, and accessories that make it feel like a “character” rather than a plain doll. The pouch can be sewn onto a strap so it rests across the body like a mini bag, which is a fun way to add storytelling to the finished amigurumi.
The build is sturdy enough for display and gifting. If you use a tight stitch and the right yarn, it will keep its shape well. With baby-safe embroidery instead of safety eyes and secure stitching, it can also be adapted for little hands (always follow safe-toy guidelines and avoid hard parts for babies).
Skill Level Explanation#
This is an easy-to-intermediate crochet pattern.
Beginner-friendly skills used
Single crochet in the round
Basic increases and invisible decreases
Working with stitch markers and counting rounds
Simple sewing and assembly
Basic embroidery for facial features
Skills that feel a bit more advanced (but very learnable)
Shaping the heart head cleanly and symmetrically
Keeping wings flat and even
Layering decorative pieces (crown, bow, ruffle) so they sit neatly
Balancing proportions during assembly
If you’re comfortable making a simple amigurumi ball, you can absolutely make this doll. The key is taking your time on the shaping and assembly steps.
Materials Needed#
Yarn
For the cleanest, most defined stitches, use a smooth yarn with good stitch definition. Worsted weight (#4) works well for a medium-size doll. DK (#3) makes a smaller, finer version. A plush yarn can also work, but details like the crown and wings are harder to define, so I recommend smooth yarn for your first try.
Suggested color palette (adapt as you like)
Main body/head: cream or white
Wings and bow: pastel pink or blush
Crown: yellow or gold
Arms/legs accents: lavender or pastel purple
Outfit ruffle: pastel rainbow or two-toned (optional)
Pouch: dusty pink
Hook
2.75–3.5 mm for worsted yarn (use smaller for tighter fabric)
2.25–3.0 mm for DK yarn
Notions
Stitch marker
Yarn needle
Scissors
Fiberfill stuffing
Optional: safety eyes (embroidered eyes recommended for baby-safe)
Optional: blush (display-only)
Helpful extras
A small amount of craft wire is not recommended for kids’ toys, but for display pieces you can use it inside wings (only if you’re experienced and it will not be handled). Most crocheters will get a great result without wire by using tighter stitches and light blocking.
Stitches & Techniques Explained#
Abbreviations (US terms)
MR = magic ring
ch = chain
sl st = slip stitch
sc = single crochet
inc = increase (2 sc in one stitch)
dec = invisible decrease (sc2tog using front loops)
BLO = back loop only
FLO = front loop only
st(s) = stitches
Invisible decrease
This keeps your shaping smooth, especially on the head and body. Insert hook through the front loop of the next stitch and the front loop of the stitch after, yarn over, pull through, yarn over, pull through both loops.
Heart shaping trick
A heart head is easiest when you think of it as: two rounded “bumps” at the top that merge into one piece, then you shape downward with gradual decreases. Stitch counts matter here, so markers and symmetry checks are your best friend.
Ruffles
Ruffles are just planned extra fabric. You create them by increasing frequently in one round (for example, 2 stitches in one stitch repeatedly) or by using taller stitches for more flare.
Surface embroidery
Simple eyelashes or a small smile can be done with black embroidery floss or thin yarn. Keep stitches short and consistent for a clean expression.
Step-by-Step Instructions#
Pattern notes
Work in continuous rounds unless stated. Use a stitch marker in the first stitch of each round. Stuff firmly but slowly—tiny pinches of stuffing create smoother shapes than big clumps. The counts below create a medium doll; you can scale by using thicker yarn or adding a round in key areas.
Part 1: Heart Head (main color)
Make two top lobes (make 2)
Rnd 1: MR, 6 sc (6)
Rnd 2: inc around (12)
Rnd 3: (sc, inc) around (18)
Rnd 4: sc around (18)
Fasten off first lobe. Do not fasten off second lobe.
Join lobes
With second lobe on hook, ch 3, join to first lobe with sc, sc around first lobe (18), sc in each of the 3 chains, sc around second lobe (18), sc in other side of chains (3). You now have one joined heart top.
Shaping rounds
Rnd 1 after join: sc around (42)
Rnd 2: sc around (42)
Rnd 3: (5 sc, dec) around (36)
Rnd 4: sc around (36)
Rnd 5: (4 sc, dec) around (30)
Rnd 6: sc around (30)
Begin stuffing the top well, shaping the heart curves with your hands.
Create the heart point
Rnd 7: (3 sc, dec) around (24)
Rnd 8: sc around (24)
Rnd 9: (2 sc, dec) around (18)
Rnd 10: sc around (18)
Rnd 11: (sc, dec) around (12)
Stuff more firmly, especially near the lower front to create a gentle point.
Rnd 12: dec around (6)
Fasten off, close, weave in.
Face details
Place eyes low on the heart head so it looks cuddly. Embroider simple lashes on each side for a sweet look. Optional: add a tiny curved smile slightly off-center for charm.
Part 2: Body (main color)
Rnd 1: MR, 6 sc (6)
Rnd 2: inc around (12)
Rnd 3: (sc, inc) around (18)
Rnd 4: (2 sc, inc) around (24)
Rnd 5: (3 sc, inc) around (30)
Rnd 6–10: sc around (30) for 5 rounds
Rnd 11: (3 sc, dec) around (24)
Rnd 12–14: sc around (24) for 3 rounds
Stuff firmly.
Rnd 15: (2 sc, dec) around (18)
Rnd 16: sc around (18)
Rnd 17: (sc, dec) around (12)
Rnd 18: dec around (6)
Fasten off, close, leave tail for sewing to head if you prefer to sew later, or sew head to body now.
Part 3: Arms (make 2, accent color or main color)
Rnd 1: MR, 6 sc (6)
Rnd 2: sc around (6)
Rnd 3: (sc, inc) around (9)
Rnd 4–10: sc around (9) for 7 rounds
Lightly stuff only the lower half. Flatten top and close. Leave tail for sewing.
Part 4: Legs or Lower Body Point (main color)
This doll has a soft tapered lower body look. If you want “feet,” make two small feet and attach. If you want the elegant tapered shape, skip separate legs and simply shape the body slightly longer before closing.
Optional feet (make 2)
Rnd 1: MR, 6 sc
Rnd 2: inc around (12)
Rnd 3: sc around (12)
Rnd 4: (2 sc, dec) around (9)
Stuff lightly, close, sew to base.
Part 5: Ruffled Collar/Skirt Layer (pastel mix or contrast color)
Join yarn around the upper body near the neck seam (or crochet separately as a ring and sew on).
Ruffle round
Work (inc) in every stitch around for a full ruffle, or use (inc, sc) repeated for a softer ruffle.
If your neck area has 24 stitches, a full ruffle becomes 48 stitches, giving that fluffy collar look.
Finish with one round of sc to stabilize the edge.
Part 6: Wings (make 2, pastel pink)
Wings look best slightly firm. Use a smaller hook if needed.
Wing base
Ch 21
Row 1: sc in 2nd ch from hook and across (20), turn
Row 2: ch 1, sc across (20), turn
Row 3: ch 1, BLO sc across (20), turn
Repeat Row 3 for 6–10 rows total to create ribbing.
Shape the wing edge
On one long side, work a scalloped edge: (sl st, sc, hdc, dc, hdc, sc) into the next stitch, then sl st into next stitch. Repeat to create soft “feather” bumps.
Fasten off, weave in ends.
Attach wings
Sew wings to the back of the body just below the head so they frame the heart shape. Angle them slightly upward for a “flying” look.
Part 7: Crown (yellow)
A small crown can be a simple band with points.
Crown band
Ch 18, join to form a ring (fit to head size)
Round: sc around (18)
Points
Work (sl st, ch 3, sl st) repeated evenly around to create little crown tips.
Fasten off and sew to the top of the head.
Part 8: Bow (pastel pink)
Bow piece
Ch 10
Row 1: sc across (9), turn
Rows 2–5: ch 1, sc across (9), turn
Fasten off.
Pinch center and wrap
Wrap yarn around the center several times to form the bow shape. Sew onto the head near the crown.
Part 9: Pouch Accessory (dusty pink)
This can hold a tiny note, pretend bottle, or small charm.
Pouch body
MR, 6 sc
Rnd 2: inc around (12)
Rnd 3: (sc, inc) around (18)
Rnd 4: sc around (18)
Rnd 5: sc around (18)
Rnd 6: sc around (18)
Fasten off.
Strap
Ch long enough to go across the body like a crossbody bag.
Sl st back down the chain for strength.
Attach to pouch sides and tack stitch strap to the doll so it stays in place.
Assembly order (recommended)
Sew head to body first
Attach arms next
Add ruffle collar
Attach wings
Sew on crown and bow
Add pouch last
Do final face embroidery at the very end so you can “aim” the expression after everything is positioned
Common Mistakes and How to Avoid Them#
Heart head looks uneven
The top lobes may not be identical, or the join chains may be uneven. Make sure both lobes have the same stitch count and same number of rounds. When joining, keep chain count consistent and place the join at the same point on each lobe.
Stuffing shows through stitches
Use a smaller hook or tighter tension, especially for the head. Smooth yarn makes holes more visible, so stitch density matters.
Wings curl or twist
This happens when tension varies. Block wings lightly (pin flat and mist with water for cotton) or add one stabilizing border round of sc around the wing edges.
Ruffle is too floppy
Use fewer increases (inc, sc) instead of increasing in every stitch. You can also use a smaller hook for the ruffle round.
Crown won’t sit flat
Make sure the crown ring matches the head circumference. If it flares, reduce stitches. If it pinches, add stitches or loosen tension.
Accessories look crooked
Pin everything before sewing. One extra minute of pinning saves a lot of rework.
Expert Tips for Better Results#
Use embroidery floss for eyelashes. It’s cleaner and thinner than yarn, so your face details look crisp.
Stuff in tiny pieces and shape often. A heart head looks best when you pause and sculpt it gently as you stuff.
Use stitch markers for symmetry. Mark the center front of the head and body so you place features evenly.
Reinforce wings and strap seams. These are “grab points,” especially if the doll will be handled.
Add a simple lining to the pouch if you want it functional. A tiny felt insert inside the pouch helps it hold shape and keeps small items from poking through stitches.
Variations and Customization Ideas#
Make it a tooth fairy doll by turning the pouch into a tiny pocket designed to hold a baby tooth container.
Change the theme colors for holidays: white and gold for winter, pastel rainbow for spring, red and pink for Valentine’s.
Swap the crown for a flower headband. Crochet small flowers and stitch around the top of the head.
Use different wing styles: angel wings (rounded), butterfly wings (two-lobed), or smaller “flutter” wings for a simpler look.
Add a star wand accessory with a small star appliqué on a crochet stick.
Make a mini version by using DK yarn and a 2.25–2.75 mm hook and reducing one increase round in the head.
Benefits of This Crochet Project#
It’s a high-impact crochet pattern that looks gift-worthy
Great for practicing shaping and clean assembly
Perfect stash-buster for pastel yarn leftovers
Accessories make it feel like a complete character
Ideal for nursery décor, baby shower gifts, and keepsakes
Easy to customize into many themes (fairy, angel, princess, tooth fairy)
Internal Linking Suggestions#
You may also like these related posts
How to Crochet Amigurumi Wings That Don’t Curl
Beginner Crochet Tutorial: Invisible Decreases for Smooth Shaping
Free Crochet Pattern: Simple Amigurumi Doll Base You Can Customize
How to Embroider Cute Eyes and Eyelashes on Amigurumi
DIY Crochet: Making Mini Bags and Pouches for Dolls
How to Keep Amigurumi Heads Smooth While Stuffing
FAQ Section#
Is this an easy crochet pattern for beginners?
Yes, especially if you already know single crochet and basic increases/decreases. The shaping is still simple, but the project includes multiple add-ons (wings, crown, bow), so it feels like a “next step” beginner project.
What yarn is best for a doll like this?
Smooth worsted cotton or a cotton blend gives the cleanest stitch definition and holds shape well. Acrylic works too, but cotton tends to look more polished for amigurumi details.
Can I make it baby-safe?
You can make it safer by embroidering eyes instead of using safety eyes and avoiding hard accessories. Sew all parts very securely. For babies, keep it as decor unless you’re confident it meets safe-toy standards.
How do I make the heart shape more defined?
Stuff firmly at the top lobes and shape the lower front into a gentle point. You can also add a small line of surface crochet or embroidery down the center dip for extra definition.
Why do my wings look floppy?
Try a smaller hook, tighter stitches, and a border round to stabilize. Light blocking helps a lot, especially with cotton yarn.
Can I resize this crochet pattern?
Yes. Use thicker yarn and a larger hook for a bigger doll, or DK yarn and a smaller hook for a smaller doll. Keep stitch counts the same and let yarn choice scale the size naturally.
Conclusion#
This angel heart doll crochet pattern is one of those projects that feels truly special when finished. The heart-shaped head gives it a unique silhouette, the wings and crown add instant “storybook” charm, and the little pouch accessory makes it feel like a character with a purpose. It’s a wonderful gift, a sweet décor piece, and a satisfying make that teaches you shaping and assembly skills you’ll use in future amigurumi.
If you tell me your yarn weight (worsted, DK, or plush) and the approximate height you want (small shelf doll or larger cuddle size), I can suggest the best hook size and which rounds to add or remove so the heart head and wings stay perfectly proportioned.


