


Introduction#
If you love the “squishy plushie” look—big head, tiny snout details, and that irresistibly fluffy fringe—this crochet pattern is going to be your new favorite make. Plush animals are the kind of project that looks impressive on a shelf, but when broken down into simple shapes, they’re surprisingly approachable.
Explore more beginner amigurumi crochet patterns in our pattern library.
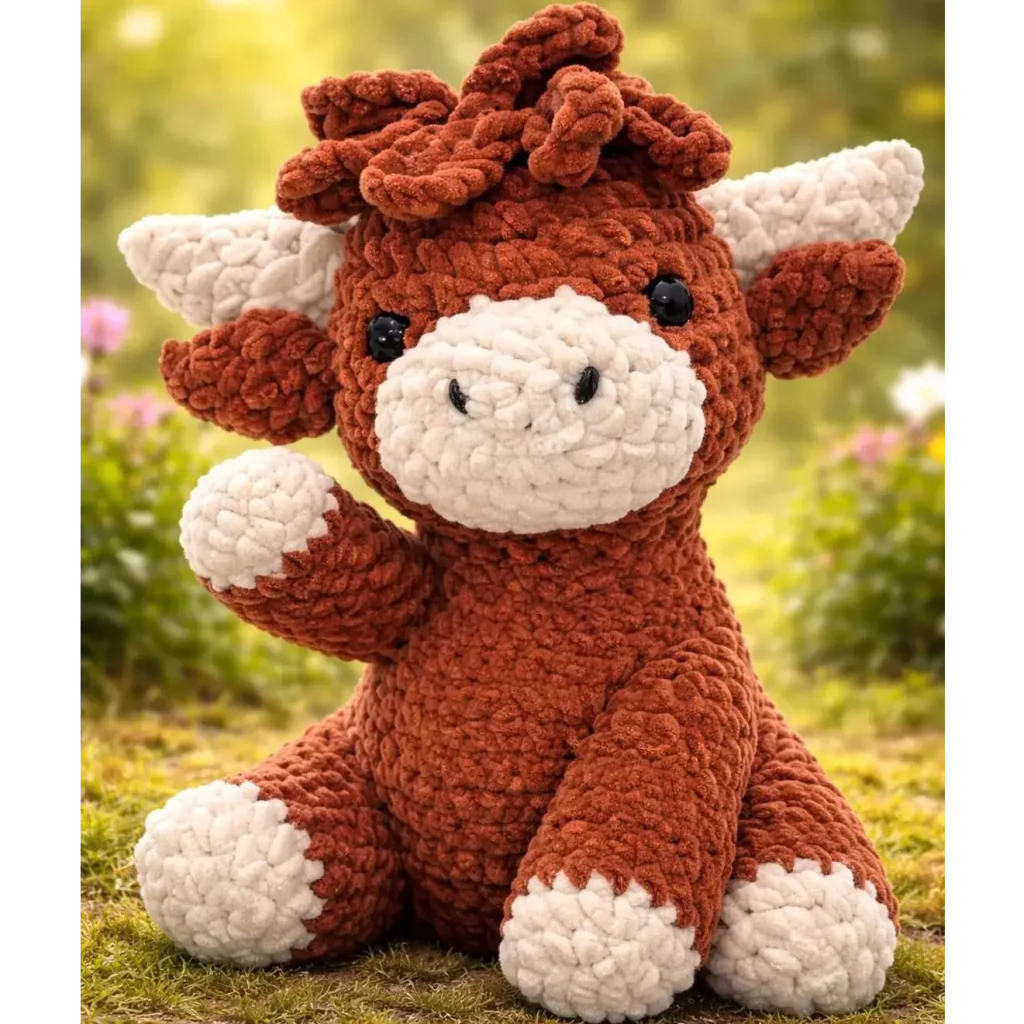
This DIY crochet project walks you through creating a plush Highland cow amigurumi: rounded head, sweet muzzle, soft horns, chunky legs, and a bouncy forelock (the fluffy “bangs” on top). You’ll get a complete, beginner-friendly crochet tutorial style set of instructions, plus finishing tips so your cow looks neat, sturdy, and huggable.
Detailed Description of the Crochet Pattern#
This crochet pattern creates a plush cow stuffed toy with these defining features:
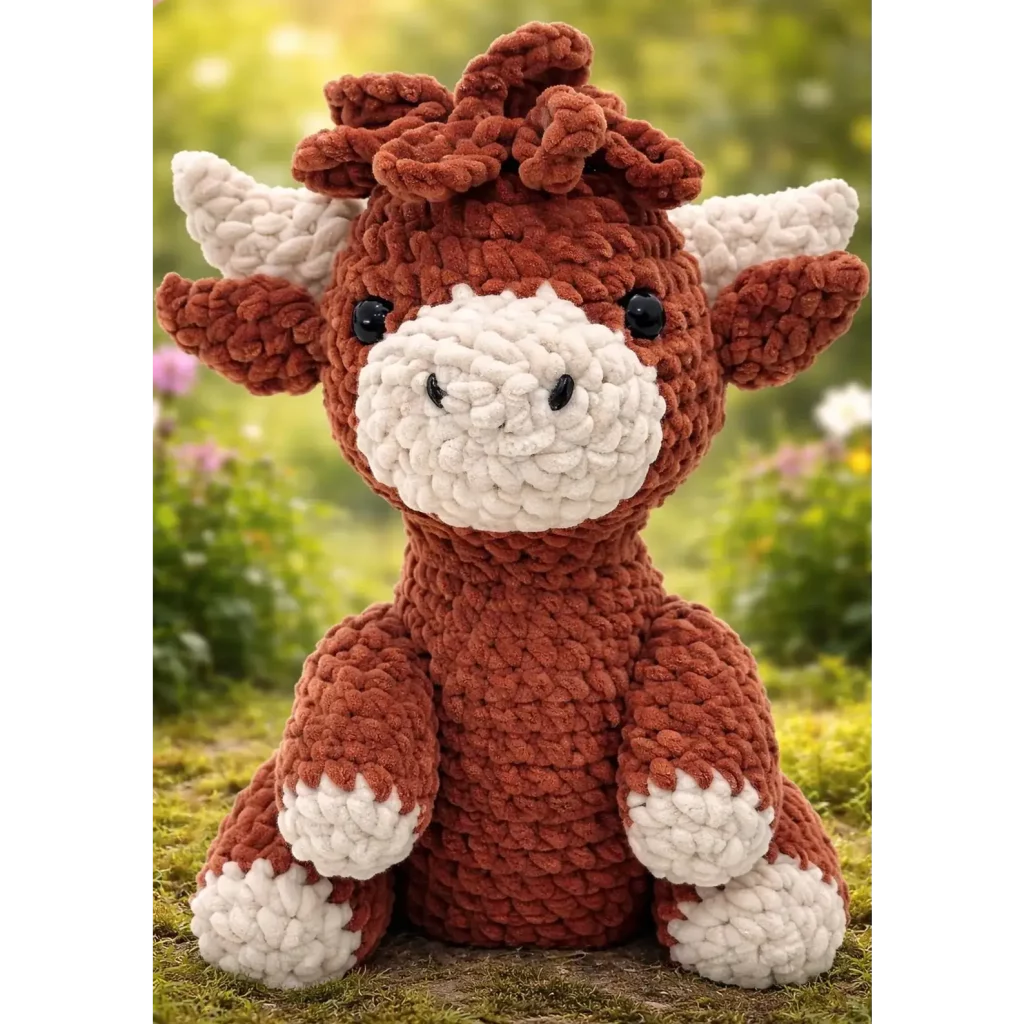
- Oversized head + rounded body for that cuddly “kawaii plush” silhouette
- Contrasting muzzle (light color) worked as a separate piece and sewn on
- Small embroidered nostrils for a clean, minimal face
- Safety eyes placed wide for a sweet expression
- Side ears and curved horns attached near the top of the head
- Tufted forelock made with looped strands (easy “fringe” technique)
- Thick legs and arms with contrast hooves
Construction is classic amigurumi: mostly single crochet in continuous rounds, with increases/decreases shaping the curves. Using super bulky plush yarn makes it work up fast and gives that velvety texture.
Skill Level Explanation#
Skill level: Confident Beginner / Easy Intermediate
You can absolutely make this as a newer crocheter if you’re comfortable with:
- Crocheting in the round (magic ring or alternative start)
- Single crochet, increases, decreases
- Simple sewing/assembly (whip stitch)
- Counting stitches (plush yarn hides stitches—tips below!)
Best for:
- Crochet for beginners who have made 1–2 amigurumi projects
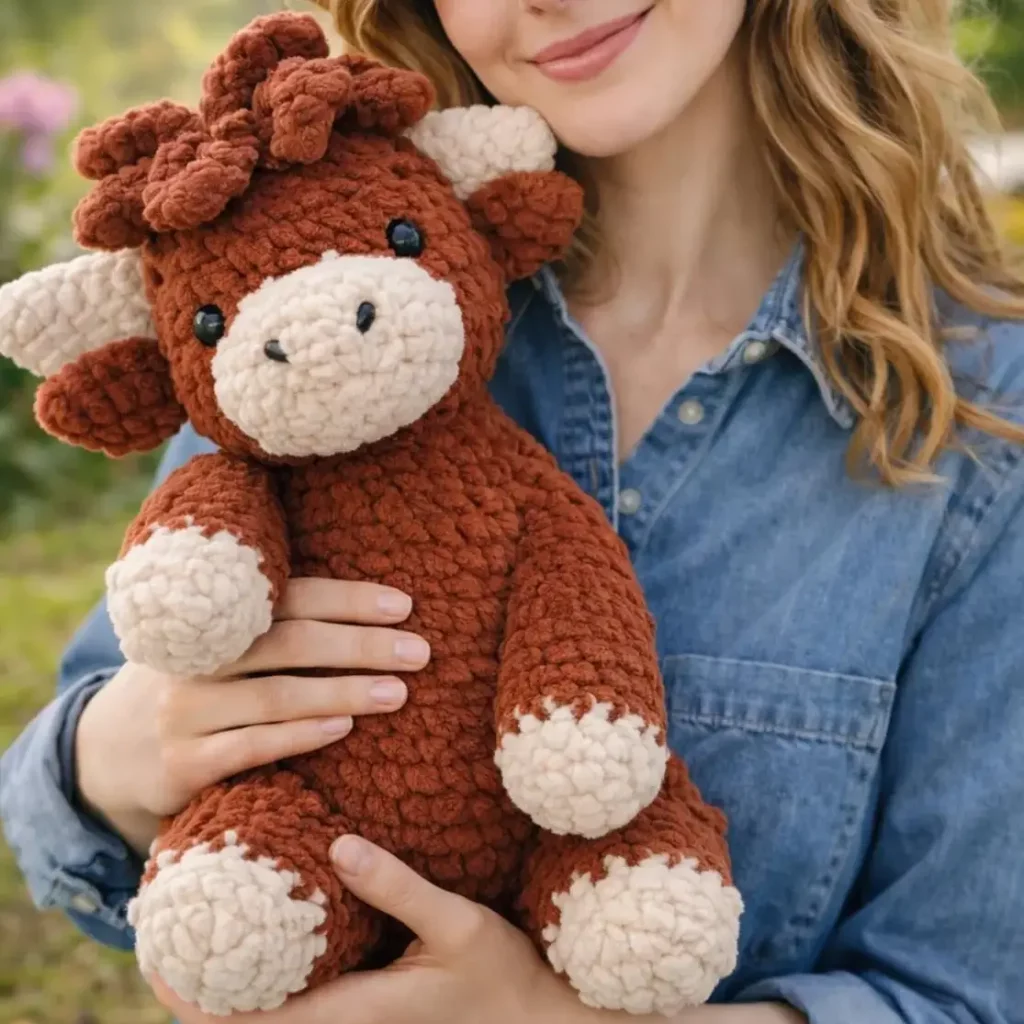
- Anyone who wants a fast, giftable plushie
- Crafters who love soft chenille/blanket yarn plush makes
Materials Needed#
Yarn
To match the plush look, choose a super bulky (#6) chenille/blanket yarn in:
- Main color (MC): medium brown (or any cow color)
- Contrast (CC): cream/ivory for muzzle + hooves
- Optional: small amount of darker brown/black for nostrils (embroidery)
Yarn tip: Plush yarn varies in thickness. If yours is extra chunky, size up the hook slightly and keep tension relaxed to avoid stiffness.
Hook
- 6.0–7.0 mm crochet hook (use what gives you a tight fabric with your yarn)
Notions
- 2 safety eyes: 14–18 mm (depending on finished size)
- Fiberfill stuffing
- Yarn needle (large eye)
- Stitch markers (must-have for plush yarn!)
- Scissors
- Optional: pins for positioning pieces
Approximate Size
With #6 plush yarn and a 6.5 mm hook, expect about 10–14 inches (25–35 cm) tall seated, depending on tension.
Stitches & Techniques Explained#
Abbreviations (US terms)
- MR = magic ring
- ch = chain
- sc = single crochet
- inc = increase (2 sc in same stitch)
- dec = decrease (single crochet 2 together; use invisible decrease if possible)
- sl st = slip stitch
- BLO/FLO = back/front loop only
- ( ) = repeat instructions
- [ ] = stitch count at end of round
Key Techniques (quick tutorial notes)
1) Continuous rounds:
Don’t join each round—use a stitch marker to track the first stitch.
2) Invisible decrease (recommended):
Insert hook into front loops of next 2 stitches, yarn over, pull through, yarn over, pull through 2.
3) Clean color changes:
On the last yarn-over of the final stitch in the old color, pull through the new color.
4) Plush yarn stitch-finding tip:
Feel for the “V” with your fingers and count by touch. Mark every 10 stitches if needed.
Step-by-Step Instructions (Free Crochet Pattern)#
Notes: Work in continuous rounds unless stated. Stuff as you go. Keep stitches tight enough that stuffing won’t show.
A) Head (MC)
R1: MR, 6 sc [6]
R2: inc x6 [12]
R3: (sc, inc) x6 [18]
R4: (2 sc, inc) x6 [24]
R5: (3 sc, inc) x6 [30]
R6: (4 sc, inc) x6 [36]
R7: (5 sc, inc) x6 [42]
R8: (6 sc, inc) x6 [48]
R9–R14: sc around [48]
Place safety eyes between R11–R12, about 10–12 stitches apart (adjust for your preferred expression).
R15: (6 sc, dec) x6 [42]
R16: (5 sc, dec) x6 [36]
R17: (4 sc, dec) x6 [30]
Begin stuffing firmly.
R18: (3 sc, dec) x6 [24]
R19: (2 sc, dec) x6 [18]
R20: (sc, dec) x6 [12]
R21: dec x6 [6]
Fasten off, weave in.
B) Muzzle (CC)
This is a puffy oval you’ll sew onto the face.
R1: MR, 6 sc [6]
R2: inc x6 [12]
R3: (sc, inc) x6 [18]
R4: (2 sc, inc) x6 [24]
R5: sc around [24]
R6: (2 sc, dec) x6 [18]
Lightly stuff.
Fasten off leaving a long tail for sewing.
Nostrils: With black/brown yarn, embroider two small vertical ovals near the lower center of the muzzle (keep it subtle).
Sew muzzle centered under the eyes. Pin first, then stitch around the edge.
C) Body (MC)
R1: MR, 6 sc [6]
R2: inc x6 [12]
R3: (sc, inc) x6 [18]
R4: (2 sc, inc) x6 [24]
R5: (3 sc, inc) x6 [30]
R6: (4 sc, inc) x6 [36]
R7–R12: sc around [36]
R13: (4 sc, dec) x6 [30]
R14: sc around [30]
R15: (3 sc, dec) x6 [24]
Stuff firmly, especially the bottom for stability.
R16: (2 sc, dec) x6 [18]
R17: (sc, dec) x6 [12]
Fasten off leaving a long tail for attaching head.
D) Arms (make 2)
Start with CC (hoof), switch to MC.
R1 (CC): MR, 6 sc [6]
R2: inc x6 [12]
R3: sc around [12]
Change to MC.
R4–R8: sc around [12]
Lightly stuff the hoof, then stuff the arm softly (so it stays squishy).
Flatten top and close with 6 sc across. Leave tail for sewing.
E) Legs (make 2)
Chunky legs help it sit nicely.
R1 (CC): MR, 6 sc [6]
R2: inc x6 [12]
R3: (sc, inc) x6 [18]
R4: sc around [18]
Change to MC.
R5–R10: sc around [18]
Stuff firmly.
Fasten off leaving a tail. (Do not flatten too much—rounded legs look cuter.)
Optional toe detail: With CC, add a couple of small surface stitches on the hoof.
F) Ears (make 2, MC)
R1: MR, 6 sc [6]
R2: (sc, inc) x3 [9]
R3: sc around [9]
Flatten and close with 4–5 sc across. Leave tail for sewing.
G) Horns (make 2, CC)
Horns are short, curved tubes.
R1: MR, 5 sc [5]
R2: sc around [5]
R3: (sc, inc) x2, sc [7]
R4–R6: sc around [7]
Lightly stuff (optional) or leave unstuffed for softer horns.
Fasten off with tail for sewing.
H) Forelock / Fluffy Bangs (MC)
This is what makes it “Highland”! You can do this two ways.
Option 1: Simple loop fringe (recommended)
Cut 10–18 strands of MC yarn, each about 6–8 inches long.
Use a hook to pull a loop through stitches on the crown/top-front of the head. Pull tails through the loop to knot. Repeat in a cluster.
Trim into a rounded “tuft.”
Option 2: Crochet curly bangs (more structured)
Ch 16. In 2nd ch from hook, 2 sc in each ch across (it will coil). Fasten off. Make 4–6 curls and sew to the top-front of the head.
I) Assembly
- Attach head to body:
Center head on body opening. Sew securely with a strong whip stitch. Add extra stitches around the “neck” area for durability. - Attach legs:
Sew legs low on the body front/sides so the plush sits. Pin first. For a seated pose, position them slightly forward. - Attach arms:
Sew arms to the upper sides of the body, slightly angled inward. - Attach muzzle (if not already):
Double-check it’s centered and secure. - Attach ears and horns:
- Place horns on top sides of head (symmetrical).
- Place ears slightly below/behind horns.
Common Mistakes and How to Avoid Them#
- Losing stitch count with plush yarn: Use a stitch marker every round and count by touch. Mark every 10 stitches.
- Overstuffing the head: Plush yarn hides shaping, but too much stuffing can stretch gaps. Stuff firmly, not hard.
- Wobbly head: Use tighter stitches when attaching head, and consider adding a small “stuffing collar” at the neck.
- Eyes placed too high/close: Pin or “test place” with stitch markers before locking safety eyes.
- Horns/ears uneven: Always pin both sides first, step back, then sew.
Expert Tips for Better Results#
- Use invisible decreases for a smoother finish on plush yarn.
- Brush the muzzle lightly (with clean fingers, not a pet brush) to fluff fibers after sewing.
- Stability hack: Add a small pouch of poly pellets (inside fabric) at the bottom of the body for a sit-friendly plush.
- Neat muzzle edge: Sew through the outer loops of the muzzle and the head stitches for a clean seam.
- Sculpting optional: A tiny stitch from muzzle to head (one or two strategic tacks) can give a gentle “snout” shape.
Variations and Customization Ideas#
- Mini version: Use worsted weight yarn (#4) and a 3.0–3.5 mm hook for a pocket-sized cow.
- Color swaps:
- Black + cream (classic)
- White + tan (sweet “calf” look)
- Pink + cream (cute fantasy plush)
- Add spots: Crochet small circles/ovals and sew to body for a spotted cow.
- Scarf or bandana: A tiny triangle bandana instantly makes it gift-ready.
- Different horns: Make longer horns by adding 2–4 extra rounds and slightly increasing near the base.
Benefits of This Crochet Project#
- Fast finish: Super bulky yarn makes it a satisfying weekend project.
- Beginner-friendly shapes: Mostly simple spheres and tubes.
- Great for gifts: Baby showers (with embroidered eyes), birthdays, holiday baskets.
- Stash-buster: Perfect for using leftover plush yarn in coordinating colors.
- Stress-relieving: Repetitive single crochet rounds are calming and easy to pick up again.
Internal Linking Suggestions#
If you’re building a crochet blog, link this post to related content like:
- “How to Crochet in a Magic Ring (Beginner Tutorial)”
- “Invisible Decrease for Amigurumi (Step-by-Step)”
- “Best Plush Yarn for Amigurumi + Hook Size Guide”
- “How to Attach Safety Eyes Safely (and Alternatives for Kids)”
- “Beginner Amigurumi Patterns You Can Finish in a Weekend”
FAQ Section (Crochet for Beginners Search Queries)#
1) What is the best yarn for a plush cow amigurumi?
A super bulky chenille/blanket yarn gives the soft, squishy plush finish. Choose a yarn that feels dense and doesn’t shed excessively.
2) What hook size should I use with plush yarn?
Most #6 plush yarn works well with a 6.0–7.0 mm hook. Aim for a tight fabric so stuffing doesn’t show through.
3) Can I make this crochet pattern without safety eyes?
Yes. For child-friendly toys, embroider eyes with black yarn or use felt circles securely stitched on.
4) Why do my decreases look bumpy on plush yarn?
Standard decreases can create visible lumps. Switch to the invisible decrease technique and keep your tension consistent.
5) How do I keep the head from flopping over?
Stuff the neck area firmly, sew the head on with strong stitches, and add extra rounds of stitching around the join. For extra support, insert a small rolled piece of felt inside the neck.
6) How do I make the fluffy “hair” on top?
Use simple loop fringe: knot short strands into a cluster on the crown and trim to shape. It’s quick and creates a cute Highland cow look.
Conclusion#
This plush Highland cow crochet pattern is the kind of project that checks all the boxes: soft, fast, beginner-friendly, and ridiculously cute when finished. Once you’ve made one, you’ll probably want a whole “herd” in different colors—because the fringe, the horns, and that chunky muzzle are just too fun to customize.
If you make this DIY crochet plush, try one variation (spots, scarf, longer horns) and share your results. And if you’d like, tell me what yarn weight you’re using and your preferred size—I can help you adjust stitch counts to scale the pattern up or down.


